VisionTrack VTGo 112 User manual

USER MANUAL
VisionTrack Copyright © 2018 - All Rights Reserved
All manufacturers specifications are subject to change without notice. No liability will be
accepted by Visiontrack for any errors or omissions in this information.
VTGo 112
SMART DASH CAM
1280x720
RESOLUTION
HD
BUILT-IN
G-SHOCK SENSOR
ULTRA-WIDE
ANGLE LENS
1.5”
SCREEN
SIZE LOOP
RECORDING

1. Up button
2. Menu button
3. Down button
4. USB data interface
5. Lens
6. Speaker
7. OK mode
8. Mode/Lock
9. Power on/o
10. Screen
11. Micro SD slot
12. Bracket mount
13. Reset button
14. MIC
1.2 Features
1. Product Description
1.1 Overview
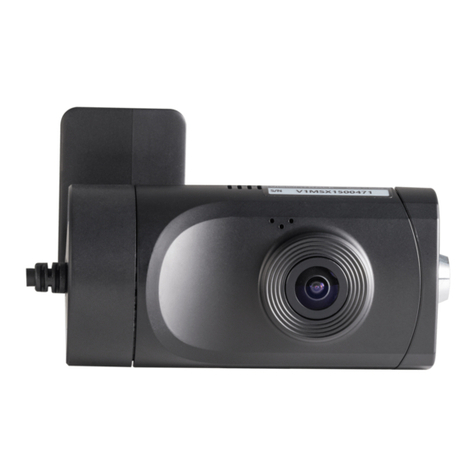
VTGo 112 is a new generation dash cam oering 720p video that can give you a
comprehensive view of any incident and can provide court admissible evidence,
protecting against exaggerated claims and crash-for-cash scams.
The inbuilt camera with a super-wide angle lens, G-sensor and removable SD card
can be used to report bad driver behaviour and protect against insurance fraud.
1.2.1 Function keys

1) UP button – Short press on this button in standby and recording status to
zoom out digitally. Choose up function in MENU.
2) MENU button – Short press on this button to show function setting menu.
3) DOWN button – Short press on this button in standby and recording
status to zoom in digitally. Choose down function in MENU.
4) USB data interface – Connect PC for Data transfer. Connect external
power to charge battery or provide power.
5) Camera – Wide-angle lens.
6) Speaker – Video playback, voice monitor, operating sound warning.
7) OK button – Conrmation button for video recording and taking photo.
In recording mode press this button to start video recording, press
again to stop. In photo mode, short press to take photo. In menu mode
press to conrm.
8) MODE – Short press on this button will shift among "photo mode, record
mode, playback mode”. Lock function: short press this key to force save
the current video when video is recording.
9) POWER ON/OFF – Power switch: continuous press for power on/o.
10) Screen – View window.
11) Micro SD slot – Slot for memory card.
12) Bracket mount – Install vehicle bracket hole.
13) Reset button – Use this to restart device.
14) MIC
1.2.2 Button and interface function description

• G-sensor Function – When gravitational acceleration reaches
6g (lg=9.80m/s), device will save present video as undeletable les.
Automatic power on/o function.
• Support recording – Start and shutdown synchronisation with
automatic saving of the video les after connecting to the car
power supply.
• Seamless loop recording
• LOCK – Short press “M” to force save the current video when
video recording.
• Power on/o – Long press on “power on/o” button to start,
Indicator light will turn on when power is on. Then long press again on
“power on/o” button to shutdown and the indicator light will go out.
Note: video will automatically power o after warning of low battery.
• REC mode – Short press on “M” button shift to REC mode, REC icon is
on the top left corner. Short press on ''OK'' mode to start recording,
ashing red dot on REC icon indicates recording.
• Photo mode – Short press on “M” button shifts to photo mode, photo
button is on the top left corner. Then short press on “OK” button to
complete photo.
• Video/photo playback – Short press on button, shift to playback
mode, playback icon is on the top left corner.
Short press on key can choose le up.
Short press on key can choose les down.
Short press on “OK” button to play the selected video les.
1.2.3 Special function description
1.2.4 REC/photo operation specifications

• Menu setting– Short press on “MENU” mode, enter video set status
and now the background colour is yellow in “video icon” column; then
press “M” button again to shift to set status, the “set icon” column
background is yellow.
In the setting items, press on keys to make shift up and down in
sub items, then press “OK” button to set sub items.
Short press on “MENU” or “MODE” button can exit the setting status.
• Time settings – Short press “MENU” button to enter “setting status”,
here short press on button to set menu. Use keys to choose
date time items, short press “OK” to enter, short press on “OK” button
will shift among y/m/d/h/m/s.
Adjust gure through buttons, then press button to conrm
modication.
• Lock – Short press "M" to force save the current video when video
recording.
Connect USB cable and press “power on” button, car DVR will automatically
show USB menu, two mode are available:
1: USB-Disk
In this mode we can access video les and photo les.
2: PC-Camera
In this mode USB video equipment is shown so you can take photo or make
video chat.
1.2.5 USB mode

• Battery indication image – here are three methods to charge, the red
indicator lights up when charging, the entire charging time is about 180
minutes and the red indicator light automatically goes o when
charging is completed.
1. Use power adapter to charge
2. Use PC-USB to charge
3. Use car power to charge
Note: Video instrument can only use 5V car power supply, or it
may cause damage to the device.
This product can only be used in 12V/14V
Note: When it appears that the device has crashed because of
improper operation, remove battery or press the ''reset” button
to restart.
1.2.6 Battery instruction
1.3 Product specifications
LCD Screen Size 1.5”TFT LCD
Optional Language English
Video Resolution 1280x720 @ 30fps
Video Format AVI
Loop Recording Seamless loop recording
Photo Format JPEG
Memory Cards Max 32GB Micro SD card (not included)
Microphone Supported
Current Frequency 50Hz/60Hz
USB Function USB-disk, PC-Camera
Power Interface DC-5V
Battery Built-in 200m Ali

2. Trouble Shooting
For problems in normal operating situations, please try these methods
below:
• Can't take photo and record – Check if the SD card has enough
space or is locked.
• Automatically stops when recording – Use the compatible
high-speed SD card with SDHC because of large HD video les.
(high-speed SD cards are C4 and C6).
• “File error” when replaying photo or video – Uncompleted les
because of SD card storage error, please use formatting function to
format your SD card.
• Unclear video – Check if there is any dirt or ngerprints and clean
the camera lens.
• Black image when recording sky or water scene – Scenes with big
contrasts will inuence the automatic exposure function of the
camera; you can adjust EV in the settings mode to correct it.
• Colour not perfect on a cloudy day and outdoor light – Set the
“white balance” function to automatic.

3. Notes
VisionTrack Copyright © 2018 - All Rights Reserved
All manufacturers specifications are subject to change without notice. No liability will be
accepted by Visiontrack for any errors or omissions in this information.
Table of contents
Other VisionTrack Dashcam manuals

