Phonocar VM494 User manual

03/2020
9.7”
FULL SCREEN
FULL HD 1080P
SPECCHIETTO RETROVISORE 9.7” DVR CON RETROCAMERA
REAR VIEW MIRROR 9.7” DVR WITH REAR CAMERA
RETROVISEUR DVR 9.7” AVEC CAMÉRA DE RECUL
RÜCKSPIEGEL 9,7» DVR MIT RÜCKFAHRKAMERA
ESPEJO RETROVISOR DVR DE 9.7”CON RETROCÁMARA
Manuale istruzioni
Instructions manual
Notice d’utilisations
Bedienungsanleitung
Manual de instrucciones
VM494
FR
DE
EN
IT
ES

2
IT
Specchietto retrovisore multifunzione con videocamera anteriore regolabile integrata e retrocamera con cavo per
l’installazione da 15 m, funzione DVR con cicli di registrazione da 1, 3 e 5 minuti e G-Sensor, schermo Full Screen da 9.7”
con Menù Touch. Si applica allo specchietto originale del veicolo per avere una serie di funzioni di supporto e sicurezza
durante la guida e le manovre:
1. DVR: una volta acceso inizia la registrazione anche a veicolo fermo. Registra in FULL HD sia con la videocamera ante-
riore che con la retrocamera.
2. La funzione G-SENSOR, una volta attivata, in caso di urti o collisioni salva il filmato dell’evento impedendone la sovra-
scrittura e rendendolo così disponibile in caso di controversie.
3. Visualizzazione Retrocamera Automatica: Dopo avere collegato il cavo reverse, all’inserimento della retromarcia si
attiva automaticamente la retrocamera mostrando sullo schermo le immagini.*
4. Autospegnimento: attivando questa funzione lo schermo si spegne automaticamente per consentire l’utilizzo “tradi-
zionale” dello specchietto mantenendo attiva la funzione DVR.
ITALIANO ...............................................PAG. 2
ENGLISH ................................................PAG. 8
FRANÇAIS .............................................PAG. 14
DEUTSCH ..............................................PAG. 20
ESPAÑOL ...............................................PAG. 26
Installare l’unità in modo che non limiti il campo di visibilità. Non tentere di riparera l’unità autonomamente il
montaggio o la riparazione devo essere eseguiti solo da personale esperto.
É possibile spostare la camera anteriore (integrata allo specchietto) verso l’esterno per una facile è corretta installazione.
VM494
Indice lingue
Contenuto della confezione
Precauzioni
Nota
• 1 Specchietto VM494
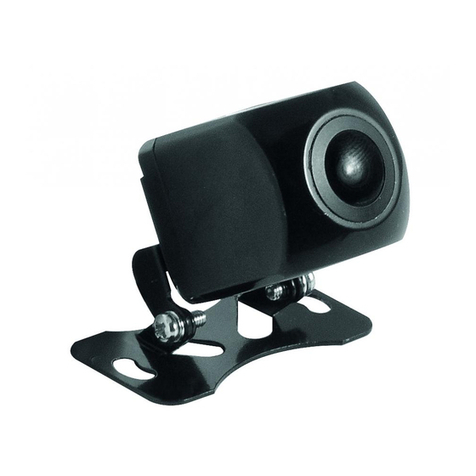
• 1 Retrocamera dedicata con cavo da 15 m
• 1 Cavo alimentazione 12 V
• 2 supporti in gomma per il fissaggio
• Manuale istruzioni
Caratteristiche tecniche
• Schermo 9.7” risoluzione 1280x480 pixel
• Videocamera anteriore regolabile in larghezza
• Angolo di visualizzazione 144°
anche in fase di registrazione
• Registrazione video in FullHD a 1080P
• Formato video: 1080P, MOV 30 FPS
• Ciclo di registrazione: 1/3/5 minuti
• Formato foto: JPG/TIFF/PNG
• Vetro Azzurrato anti-riflesso a schermo spento
• Retrocamera con attivazione automatica
della visualizzazione all’inserimento della retromarcia
• Dimensioni 7 x 25,5 cm

3
IT
RED POWER
CAVO OPZIONALE cod. Phonocar 05226
POWER
REVERSE-GEAR-LIGHTS
ATTENZIONE:
Retrocamera digitale dedicata inclusa nella confezione
non sostituiibile con altri modelli.
CAMERA
YELLOW
Battery
BLACK
Ground
+12V
+12V
+12V
RED
Ignition-Key
Connessioni

4
IT
1Accensione / Spegnimento + Premendo brevemente Standby
2Telecamera
3Ingresso MiniUSB per alimentazione
4Ingresso retrocamera
5Slot MicroSD DVR
6NON ABILITATO
7Reset
8Altoparlante
Funzioni
1
2
45 36
78

5
IT
Premere (1) per fermare o iniziare la registrazione.
Premere (2) per scattare una foto.
Premere (3) l’icona quando la registrazione è disattiva. Questa funzione esclude la registrazione dell’audio.
Se disattivata , in alto a destra comparirà l’icona di un microfono barrato.
Premere (4) per bloccare il file corrente, se bloccato , il file non verrà sovrascritto.
Se attivato il lucchetto comparirà in alto a destra l’icona relativa.
Premere (5) per entrare nel menù RIPRODUZIONE
10:07
15-01-2020
FILE170101-000127F.MOV
FILE159451-000052F.MOV
FILE169876-000096F.MOV
FILE17054-000101F.MOV
FILE170001-000136F.JPG
F
R
F
R
B
C
D
E
F
A
A VIDEO CAMERA FRONTALE: Premendo
F
si visualizza la lista dei video registrati dalla camera frontale.
B VIDEO CAMERA POSTERIORE: Premendo
R
si visualizza affianco la lista dei video registrati dalla camera
posteriore.
C FILE VIDEO CAMERA FRONTALE: Premendo
F
si visualizza affianco la lista dei video “Bloccati”
registrati dalla camera frontale.
D FILE VIDEO CAMERA POSTERIORE: Premendo
R
si visualizza affianco la lista dei video “Bloccati”
registrati dalla camera posteriore.
E GALLERIA FOTO: Premendo si può accedere ala visualizzazione delle foto scattate.
Verranno visualizzate sempre tramite un elenco.
FANTEPRIMA: Premendo sulla finestra di anteprima si passa al menu di riproduzione (vedi schema pag. 6)
Funzioni
2 3 4 51
2
3
4
5
1
Premendo la freccia in alto a sinistra si torna nel menù precedente.

6
IT
Funzioni menu riproduzione
Funzioni menu impostazioni
Premere per entrare nel menù impostazioni.
Visualizzare le funzioni con i tasti
10:07
15-01-2020
Movie Mode
Movie Clip Time
Night mode
Exposure
FHD
HD
2
3
4
1
1 MODALITÀ VIDEO: Seleziona la qualità del video,
FULLHD 1080p o HD 720p
2 TEMPO DI FILMATO: Seleziona la durata del loop di registra-
zione 1/3/5 minuti
3 MODALITÀ NOTTURNA: Attiva o disattiva la modalità di guida
notturna
4 REGOLAZIONE DELL’ESPOSIZIONE: Aumenta in percen-
tuale positiva o negativa l’esposizione della telecamera frontale
aumentando o diminuendo la luminosità percepita.
F
Premere
per bloccare
i video evitando
la sovrascrittura
Premere
per passare
al video o
immagine
precendente
Indietro
veloce
Riproduzione
Pausa
Avanti
veloce
Premere
per passare
al video o
immagine
successivo
Premere
per eliminare
il video o
l’immagine
Premendo la freccia in alto a sinistra si torna nel menù precedente.
1
2
1

7
IT
Funzioni menu impostazioni
Premere per entrare nel menù impostazioni.
Visualizzare le funzioni con i tasti
10:07
15-01-2020
Video Time Lapse
Timelpase Rec Time
Smart LCD Brightness
Protect level
OFF
1FPS
4FPS
6
8
5
7
5 VIDEO TIME LAPSE: Sono presenti le impostazioni ma non la
reale funzione. NON ABILITARE
6 TIMELAPSE REC TIME: Sono presenti le impostazioni ma non
la reale funzione. NON ABILITARE
7 SMART LCD BRIGHTNESS Attiva e disattiva la funzione Bright-
ness dello schermo. Aumenta la luminosità dello schermo, ma
non della telecamera.
8 PROTECT LEVEL: Seleziona la sensibilità di blocco del video
durante un incidente. La sensibilità può essere impostata in 3
valori, alta, media, bassa, oppure disattivata. Se attivata, all’urto,
la registrazione viene bloccata e non più soprascritta, verrà
salvata nella cartella apposita vedi pag. 5 menu 5 punti 3/4 (video
bloccati).
Premere per entrare nel menù impostazioni.
Visualizzare le funzioni con i tasti
10:07
15-01-2020
Parking Monitoring
LCD Power Safe
Language
Volume
OFF
ON
10
11
12
9
9 PARKING MONITORING: Attiva o disattiva la funzione
Parking Monitor.
Per utilizzare il Parking Monitor deve essere attiva anche la
funzione G-sensor (Impostabile nel punto 8 “PROTECT LEVEL” ).
Se le funzioni sono attive e l’alimentazione è fissa e non da accen-
disigari (cavo opzionale), il VM494 si risveglierà per 30 secondi in
presenza di un urto o vibrazione, bloccando il video che succes-
sivamente non verrà sovrascritto e sarà visualizzato nella cartella
dei video BLOCCATI (Pag 5, Punto 5, funzione C,D)
10 LCD POWER SAFE: Attivare questa funzione per spegnere lo
schermo automaticamente dopo 1 minuto/ 3 minuti,
la registrazione continuerà normalmente.
11 LANGUAGE: Selezionare la lingua
12 VOLUME: Premere per selezionare il volume del touch.
Premere per entrare nel menù impostazioni.
Visualizzare le funzioni con i tasti
10:07
15-01-2020
Flicker
Clock Sengs
Format SD-Card
Reset Setup
50 Hz
60 Hz
14
15
16
13
13 FREQUENZA: Imposta la frequenza in Hz dell’OCD
14 CLOCK SETTING: Premuto ti da la possibilità di settare data
e ora.
15 FORMAT SD-CARD: Premendo si può formattare l’SD-Card
16 RESET SETUP: Premendo si può resettare lo specchietto ai
dati di fabbrica., tutti i dati e le impostazioni verranno cancellati.
Premere per entrare nel menù impostazioni.
Visualizzare le funzioni con i tasti
10:07
15-01-2020
FW Version 966-20185423
17
17-FW VERSION: Versione del dispositivo.
La barra indica il livello di luminosità impostato. Tramite il touch
screen è possibile diminuire o aumentare il livello
Premendo la freccia in alto a sinistra si torna nel menù precedente.
2
1
1
1
1
8
EN
Multifunction rearview mirror with a built-in adjustable front camera and a rear camera equipped with câble for
15 m installation, DVR function with 1/3/5 minutes recording cycles, G-Sensor and 9.7” Full Screen with Touch Menu. It
fits on the original mirror of the vehicle, to provide a series of support and safety functions , when driving and parking:
1. DVR : Once turned on, the device starts recording even when the vehicle is stationary.
Recording in HD, both with front and rear camera.
2. G SENSOR Once activated and in case of collisions or impacts, it saves the footage of the event and preventing
overwriting and making it available in case of disputes.
3. Automatic Rear View: After connecting the reverse câble and when reverse gear is engaged, the rear camera is auto-
matically activated, displaying the images on the screen.
4. Auto power off: the screen automatically turns off after 1 minute of non-use to allow “traditional” use of the
mirror, while keeping the DVR function active.
Do not install the unit where it can limit the field of vision of the driver. Do not attempt to repair the unit yourself.
Assembly and repair must be performed by qualified technicians.
You can move the front camera (integrated in the mirror) outwards for an easy and correct installation.
VM494
Supplied
Warning
Note
• 1 VM494
• 1 dedicated rear camera with 15 m cable
• 1 power câble 12V
• 2 rubber fixing brackets
• 1 user manual
Technical features
• 9.7” screen resolution 1280x480 pixels
• Width-adjustable front camera
• Viewing angle 144° also while recording
• FullHD video recording at 1080P
• Video formats: 1080P, MOV 30 FPS
• Recording cycle: 1/3/5 minutes
• Picture format: PG/TIFF/PNG
• Blue anti-glare glass with the screen off
• Rear camera with automatic visualization
activation when reverse gear is engaged
• Dimensions 7 x 25,5 cm

9
EN
RED POWER
OPTIONAL Cable cod. Phonocar 05226
POWER
REVERSE-GEAR-LIGHTS
WARNING:
Dedicated digital rear camera supplied
NOT replaceable with any other model.
CAMERA
YELLOW
Battery
BLACK
Ground
+12V
+12V
+12V
RED
Ignition-Key
Connections

10
EN
1Power On / Off + Short press Standby
2Camera
3MiniUSB input for power supply
4Rear camera input
5MicroSD DVR Slot
6NOT ENABLED
7Reset
8Loudspeaker
Functions
1
2
45 36
78

11
EN
Press (1) to stop or start recording.
Press (2) to take a picture.
Press (3) the icon when recording is off. This function mutes the audio recording. If disabled, a crossed-out micro-
phone icon appears in the upper right corner.
Press (4) to lock the current file, if locked , the file will not be overwritten. If the lock is activated, a lock icon will
appear in the upper right corner.
Press (5) to enter the PLAYBACK menu
10:07
15-01-2020
FILE170101-000127F.MOV
FILE159451-000052F.MOV
FILE169876-000096F.MOV
FILE17054-000101F.MOV
FILE170001-000136F.JPG
F
R
F
R
B
C
D
E
F
A
A FRONT CAMERA VIDEOS: Pressing
F
the list of videos recorded by the front camera is displayed.
B REAR CAMERA VIDEOS: Pressing
F
the list of “Locked” videos recorded by the rear camera is displayed beside
C FRONT CAMERA VIDEO FILES: Pressing
F
the list of “Locked” videos recorded by the front camera is display-
ed beside.
D REAR CAMERA VIDEO FILES: Pressing
F
the list of “Locked” videos recorded by the rear camera is displayed
beside.
E PHOTO GALLERY: Pressing you can access the display of the taken photos. They will always be displayed in
a list.
F PREVIEW: Pressing on the preview window you can switch to the playback menu (see diagram on page 12).
Functions
2 3 4 51
2
3
4
5
1
Pressing the arrow at the top left will bring you back to the previous menu.

12
EN
Playback menu functions
Setup menu functions
Press to enter the settings menu.
Display the functions with the keys
10:07
15-01-2020
Movie Mode
Movie Clip Time
Night mode
Exposure
FHD
HD
2
3
4
1
1 VIDEO MODE: Selects the video quality,
FULLHD 1080p or HD 720p
2 FOOTAGE TIME: Selects the recording loop length (1/3/5
minutes)
3 NIGHT MODE: Activates or deactivates the night driving mode.
4 EXPOSURE ADJUSTMENT: Increase in positive or negative per-
centage the front camera exposure by increasing or decreasing
the perceived brightness.
F
Press to lock
videos avoiding
overwriting
Press to move
to the previous
video or picture Fast
rewind
Playback
Pause
Fast forward
Press to move
to the next
video or picture
Press to delete
the video
or picture
Pressing the arrow at the top left will bring you back to the previous menu.
1
2
1

13
EN
Setup menu functions
Press to enter the settings menu.
Display the functions with the keys
10:07
15-01-2020
Video Time Lapse
Timelpase Rec Time
Smart LCD Brightness
Protect level
OFF
1FPS
4FPS
6
8
5
7
5 VIDEO TIME LAPSE : settings are available, but not the real
function. DO NOT ENABLE.
6 TIMELAPSE TIME REC: Settings are available, but not
the real function. DO NOT ENABLE
7 SMART LCD BRIGHTNESS Activates and deactivates the
Brightness function of the screen. Increases the brightness of the
screen, but not the camera.
8 PROTECT LEVEL: Selects video lock sensitivity during an acci-
dent. The sensitivity can be set in 3
levels, high, medium, low, or off. If activated, on impact,
the recording is blocked and no longer overwritten. It will be
saved in the appropriate folder see page 5 menu 5 p. 3/4 ( blo-
cked videos).
Press to enter the settings menu.
Display the functions with the keys
10:07
15-01-2020
Parking Monitoring
LCD Power Safe
Language
Volume
OFF
ON
10
11
12
9
9 PARKING MONITORING: Activates or deactivates the Parking
Monitor.
To use the Parking Monitor, the G-sensor function must also be
active (see step 8 “PROTECT LEVEL” ). If the functions are enabled
and the power supply is fixed and not supplied by a cigarette
lighter (optional câble), the VM494 will wake up for 30 seconds if
a bump or vibration occur, blocking the video that subsequently
will not be overwritten and will be displayed in the LOCKED
videos folder (Page 5, Step 5, Function C,D)
10 LCD POWER SAFE:
Activate this function to turn the screen off automatically, after
1 minute/3 minutes, the recording will continue normally.
11 LANGUAGE: Select language
12 VOLUME: Press to select the touch volume.
Press to enter the settings menu.
Display the functions with the keys
10:07
15-01-2020
Flicker
Clock Sengs
Format SD-Card
Reset Setup
50 Hz
60 Hz
14
15
16
13
13 FREQUENCY: Sets the OCD frequency in Hz.
14 CLOCK SETTING: Press to set date and time.
15 FORMAT SD-CARD: Press to format the SD-Card.
16 RESET SETUP: By pressing you can reset the mirror to the
factory data, all data and settings will be deleted.
Press to enter the settings menu.
Display the functions with the keys
10:07
15-01-2020
FW Version 966-20185423
17
17-FW VERSION: Device version.
The bar shows the set brightness level. You can use the touch
screen to decrease or increase the brightness level.
Pressing the arrow at the top left will bring you back to the previous menu.
2
1
1
1
1

14
FR
Rétroviseur multifonction intégré d’une caméra avant réglable et une caméra de recul avec câble d’installation de 15 m.
La fonction DVR a les cycles d’enregistrement d’1,3 et 5 minutes et le G-Sensor; large écran de 9,7’’ et menu tactile.
Il s’installe sur le retroviseur original de la voiture et permet d’avoir une serie de fonctions de support et sécurité pen-
dant la conduite et les manoeuvres:
1. DVR: Dès qu’il est allumé, il commence immédiatement l’enregistrement, ceci même si le véhicule est à l’arret. L’enre-
gistrement est en Full HD soit avec la caméra avant que la caméra de recul.
2. La fonction G-Sensor: une fois qu’elle est activée, sauvegarde les films en cas de choc ou collision et évite la réécritu-
re, permettant ainsi à la vidéo de l’incident d’être disponible en cas de besoin.
3. Vision automatique de la caméra de recul: Après le branchement du câble reverse, les images de la caméra de recul
sont immédiatement visible sur l’écran dès l’insertion de la marche arrière.
4. Auto-extinction: l’activation de cette fonction permet à l’écran de s’éteindre automatiquement pour permettre
l’utilisation traditionnelle du rétroviseur, mais en maintenant active la fonction DVR.
Installer l’appareil de façon à ne pas réduire le champs de vision.
Ne pas essayer de réparer l’unité tout seul; l’installation ou la répration doit être fait par des professionnels.
La caméra avant (intégrée dans le rétroviseur) peut être déplacée vers l’extérieur pour faciliter l’installation.
VM494
Contenu de la boite
Recommandations
Note
• 1 Rétroviseur VM494
• 1 Caméra de recul spécifique avec câble de 15 m
• 1 faisceau d’alimentation 12 V
• 2 Supports en caoutchouc pour la fixation
• Notice d’utilisation
Caractéristiques techniques:
• Écran 9.7’’ résolution 1280x480 pixel
• Caméra avant réglable
• Angle de vision 144° même durant l’enregistrement
• Enregistrement vidéo en Full HD à 1080P
• Format vidéo: 1080P, MOV 30 FPS
• Cycle d’enregistrement: 1/3/5 minutes
• Format Photo: JPG/TIFF/PNG
• Verre bleu anti-reflet lorsque l’écran est éteint
• Vision automatique des images de la caméra de recul
à l’insertion de la marche arrière.
• Dimensions 7x25,5 cm

15
FR
RED POWER
Câble OPTIONNEL cod. Phonocar 05226
POWER
REVERSE-GEAR-LIGHTS
ATTENTION:
La caméra de recul numérique incluse dans la boite ne
peut pas être remplacée par d’autres modelles.
CAMERA
YELLOW
Battery
BLACK
Ground
+12V
+12V
+12V
RED
Ignition-Key
Connexions

16
FR
1Allumage / Extinction + Stand-by en faisant brièvement pression
2Caméra
3Entrée Mini USB pour l’alimentation
4Entrée caméra de recul
5Port Micro SD DVR
6NON ACTIVE
7Reset
8Haut-parleur
Fonctions
1
2
45 36
78

17
FR
Appuyer (1) pour interrompre ou commencer l’enregistrement.
Appuyer (2) pour faire une photo
Appuyer (3) l’icone lorsque l’enregistrement est désactivé. Cette fonction permet d’exclure l’enregistrement de
l’audio. Lorsqu’elle est désactivée, en haut à droite apparait l’icone de microphone barrée.
Appuyer (4) pour bloquer le fichier en cours, s’il est bloqué, le fichier ne sera pas réécrit.
Si le cadenas est activé, en haut à droite apparaitra l’icone correspondante
Appuyer (5) pour entrer dans le menu de reproduction
10:07
15-01-2020
FILE170101-000127F.MOV
FILE159451-000052F.MOV
FILE169876-000096F.MOV
FILE17054-000101F.MOV
FILE170001-000136F.JPG
F
R
F
R
B
C
D
E
F
A
A VIDÉO CAMÉRA AVANT: en appuyant
F
les vidéos enregistrées par la caméra avant sont visibles.
B VIDÉO CAMÉRA DE RECUL: en appuyant
F
les vidéos enregistrées par la caméra de recul sont visibles à coté.
C FICHIER VIDÉO CAMÉRA AVANT: en appuyant
F
les vidéos “bloquées” enregistrées par la caméra avant sont
visibles.
D FICHIER VIDÉO CAMÉRA DE RECUL: en appuyant
F
les vidéos “bloquées” enregistrées par la caméra de
recul sont visibles.
E GALLERIE PHOTO: en appuyant on accède aux photos faites. celles-ci sont visibles via une liste.
F AVANT PREMIÈRE: en appuyant sur la fenêtre avant première, on va dans le menu de reproduction
(Voir schéma Page 18).
Fonctions
2 3 4 51
2
3
4
5
1
En appuyant la flèche en haut à gauche on revient au menu précédent.

18
FR
Fonctions menu de reproduction
Fonctions menu de réglages
Appuyer pour entrer dans le menu des réglages.
Parcourir les fonctions avec les touches
10:07
15-01-2020
Movie Mode
Movie Clip Time
Night mode
Exposure
FHD
HD
2
3
4
1
1. MODALITÉ VIDÉO: Choisir la qualité de la vidéo: Full HD 1080p
ou 720p
2. DURÉE DES FILMS: choisir la durée de l’enregistrement en
loop 1/3/5 minutes
3. MODALITÉ NOCTURNE: Active ou désactive le mode de
conduite nocturne
4. RÉGLAGE DE L’EXPOSITION: augmente positivement ou
negativement l’exposition de la caméra avant. Ceci influence la
perception de la luminosité
F
Appuyer pour
bloquer la vidéo
et éviter la
réécriture
Appuyer
pour effacer
la vidéo ou
l’image
Revient
rapide
Reproduction
Pause
Avance
rapide
Appuyer pour
la vidéo ou
l’image suivante
Appuyer pour
effacer la vidéo
ou l’image
En appuyant la flèche en haut à gauche on revient au menu précédent.
1
2
1

19
FR
Fonctions menu de réglages
Appuyer pour entrer dans le menu des réglages.
Parcourir les fonctions avec les touches
10:07
15-01-2020
Video Time Lapse
Timelpase Rec Time
Smart LCD Brightness
Protect level
OFF
1FPS
4FPS
6
8
5
7
5. VIDÉO TIME LAPSE: Vous y trouvez les réglages mais pas la
fonction réelle. NE PAS L’ACTIVER
6. TIMELAPSE REC TIME: Vous y trouvez les réglages, mais pas la
fonction réelle. NE PAS L’ACTIVER
7. SMART LCD BRIGHTNESS: active et désactive la fonction
brightness de l’écran. Augmente la luminosité de l’écran, mais pas
celle de la caméra.
8. PROTECT LEVEL: Sélectionne la sensibilité pour le verrouillage
de la vidéo durant un accident. La sensibilité peut être réglée sur
3 valeurs: haute, moyenne, basse ou être désactivée. Lorsqu’elle
est activée, durant un choc, l’enregistrement est verrouillé et n’est
plus réécrite; elle est sauvegardé dans le fichier prévu. Voir page 5
menu 5 point 3/4 (vidéo verrouillée).
Appuyer pour entrer dans le menu des réglages.
Parcourir les fonctions avec les touches
10:07
15-01-2020
Parking Monitoring
LCD Power Safe
Language
Volume
OFF
ON
10
11
12
9
99. PARKING MONITORING: Active ou désactive la fonction
Parking Monitor. Pour l’utilisation de parking monitor, la fonction
G-Sensor doit être active (Réglable au point 8 “PROTECT LEVEL”).
Lorsque les fonctions sont actives et l’alimentation est fixe et non
pas par allume-cigare (câble en option), le VM494 sort de son état
de veil pendant 30 secondes en présence d’un choc ou vibration
et bloque la vidéo. Celle-ci par la suite ne pourra pas être réécrite
et sera visible dans le dossier des vidéos bloquées (Pag.5, point 5,
fonction C,D).
10 LCD POWER SAFE: Activez cette fonction pour éteindre
l’écran automatiquement après 1 minute / 3 minutes,
l’enregistrement se continuera normalement.
11 LANGUAGE: Choisissez votre langue
12 VOLUME: Appuyer pour sélectionner le volume du tactile.
Appuyer pour entrer dans le menu des réglages.
Parcourir les fonctions avec les touches
10:07
15-01-2020
Flicker
Clock Sengs
Format SD-Card
Reset Setup
50 Hz
60 Hz
14
15
16
13
13 FREQUENZA: Régler la fréquence en Hz de l’OCD
14 CLOCK SETTING: Régler la date et l’heure.
15 FORMAT SD-CARD: Vous pouvez formater la carte SD
16 RESET SETUP: En appuyant, on restaure les réglages d’origine
du rétroviseur. avec la réinitialisation, toutes les données et les
paramètres seront effacées.
Appuyer pour entrer dans le menu des réglages.
Parcourir les fonctions avec les touches
10:07
15-01-2020
FW Version 966-20185423
17
17-FW VERSION: Version de l’appareil.
La barre indique le niveau de luminosité défini. À l’aide de l’écran
tactile, il est possible de diminuer ou d’augmenter le
niveau.
En appuyant la flèche en haut à gauche on revient au menu précédent.
2
1
1
1
1

20
DE
20
Multifunktionaler Rückspiegel mit eingebauter verstellbarer Frontkamera und Rückfahrkamera mit 15 m Kabel für
Installation. Das Gerät verfügt außerdem über eine DVR-Funktion mit 1/3/5 Minuten Aufnahmezyklen,
G-Sensor und 9,7” Vollbildschirm mit Touch Menü.
Das Produkt auf dem Originalspiegel des Fahrzeugs installieren, um eine Reihe von Unterstützungs-und
Sicherheitsfunktionen beim Fahren und Parken nutzen zu können:
1. DVR Nach dem Einschalten beginnt die Aufzeichnung auch beim stehenden Fahrzeug. Es nimmt in HD auf (sowohl mit
der Front- als auch mit der Rückfahrkamera).
2. G-SENSOR Funktion: Sobald diese Funktion aktiviert wird, wird das Video im Falle eines Aufpralls gespeichert und das
Überschreiben wird verhindert.
3. Automatische Anzeige der Rückfahrkamera: Nach dem Anschluss des Reverse-Kabels und
beim Einlegen des Rückwärtsgangs schaltet sich die Rückfahrkamera automatisch ein und die Bilder werden auf dem
Bildschirm angezeigt.4. Automatische Abschaltung: Der Bildschirm schaltet sich nach 1 Minute Nichtbenutzung automa-
tisch aus, um eine “normale” Nutzung des Spiegels zu ermöglichen, während die DVR-Funktion aktiv bleibt.
Installieren Sie das Gerät nicht, wo das Sichtfeld des Fahrers eingeschränkt werden kann
• Versuchen Sie nicht, das Gerät selbst zu reparieren.
• Die Montage oder Reparatur sollte nur von Fachleuten durchgeführt werden.
Für eine einfache und korrekte Installation können Sie die Front-Kamera (im Spiegel integriert) nach außen verschieben.
VM494
Im Lieferumfang enthalten
Warnung
Hinweis
• 1 VM494-Rückspiegel
• 1 Rückfahrkamera mit 15 m Kabel
• 12 V Stromversorgungskabel
• 2 Gummi-Befestigungswinkel
• Bedienungsanleitung
Technische daten
• Kapazitiver 9,7“ Bildschirm
• Auflösung 1280 x 480 Pixel
• 144° Betrachtungswinkel auch während der
Aufzeichnung
• FullHD-Videoaufzeichnung bei 1080P
• Videoformat: 1080P, MOV 30 FPS
• Aufzeichnungszyklus: 1/3/5 Minuten
• Fotoformat: JPG/TIFF/PNG
• Blaues blendfreies Glas bei ausgeschaltetem
Bildschirm
• Rückfahrkamera mit automatischer Aktivierung der
Anzeige bei eingelegtem Rückwärtsgang
• Abmessung 7x25,5 cm
Table of contents
Languages:
Other Phonocar Dashcam manuals

Phonocar
Phonocar VM496 User manual

Phonocar
Phonocar VM270 User manual

Phonocar
Phonocar VM 285 User manual

Phonocar
Phonocar VM 283 User manual

Phonocar
Phonocar VM489 User manual

Phonocar
Phonocar VM262 User manual

Phonocar
Phonocar VM498 User manual

Phonocar
Phonocar VM284 User manual

Phonocar
Phonocar VM265 User manual

Phonocar
Phonocar VM 288 User manual