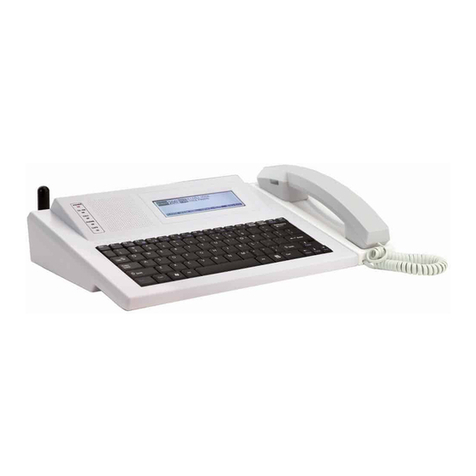
visiplex VS4820 Guide

Custom Audio Guide
Adding Custom Audio Files
To add custom files, you’ll need to add the file to the speakers/receivers themselves. After you’ve connected
to the VPS software and selected your device, you’ll see an icon at the top that says Alerts. This is where you’ll
upload the files. Once you have it open, simply add the files you want, and click program.
The audio files must be 8-bit Mono WAV files, with one of the following formats and sample rates:
•8.000 kHz, 8-bit, Mono
•11.025 kHz, 8-bit, Mono
•16.000 kHz, 8-bit, Mono
•22.050 kHz, 8-bit, Mono
•
We recommend using 16.000 or 22.050kHz for better audio quality with voice recordings.
For formatting the audio files, if you do not have access to other file conversion software, we recommend
using an online WAV converter like: https://audio.online-convert.com/convert-to-wav to convert the files to
the proper format.
The audio files will need to be uploaded to each of the speakers to work, and they will need to be uploaded
in the same order if you are using multiple audio files. Custom audio files start at #11. We strongly recommend
numbering the audio files so that you can keep track of them and ensure they’re uploaded in the right order
so the speakers are playing the same message when triggered. Save these in a folder on your PC, as you will
not be able to read files from the units after they are uploaded onto the speakers.
Click the Add button at the bottom, and locate the desired WAV files on your PC. After adding all the desired
audio files, click the program button.
If the files you’re attempting to load are too large, the software will give you an error message saying so. If
you’re using larger audio files, you’ll want to change the “Memory Alerts Configuration” you see at the top of
the screen. The default is 32 files approximately 16 seconds long each (at 8KHz). If you have longer audio files
or are using a higher rate like 16KHz, you may need to change the configuration. When doing this, it will erase
the current custom files you have loaded on the speaker, but will not affect the built-in audio files. After
selecting the desired configuration, click the update configuration button. Click the program button after you
have changed the memory configuration and selected the audio files.
Custom Audio Guide
Version 1.0
Visiplex, INC. 2021
1

Activating Custom Audio Files (VS4820)
To activate the audio files on the VS4820, you’ll create an event with the “TONE/VOICE/BELL ALERT” type. For
the tone, select #11 and up for the custom audio files you have loaded. The first custom file is 11, second is
12 and so on. (The default built in audio files are #1-8, and can be found on our site under Audio Samples.)
You can also load the files on the VS4820 and play as a live audio transmission with the wireless PA speaker
type. When programming the event, instead of choosing live as the mode, you’ll select PPM-xx, where the xx
is the number of the audio file. You can record and listen to your own messages on the VS4820 unit itself in
the setup menu.
Note that the unit will not send alarm messages while transmitting live audio, as the system prioritizes live
audio over message activation. For this reason, we recommend uploading the custom audio to the speakers
themselves, and just having the VS4820 send the command to activate them.
Activating Custom Audio Files (VS4810 & VS4500)
With the older VS4810 and VS4500 systems, you’ll need to send a command that tells the speakers what audio
file to play, and how to play it. The command will be sent to an ALPHANUMERIC or ALPHA PAGER type device
ID. (Usually #300 by default to activate all speakers). This is the Generate Message command, formatted as:
GMTTDVPR
•GM: Generate Message. Needs to be in front of the command, this tells units what type of command
it is.
•TT: This is the two-digit number of the audio file you wish to play. You can find the built-in audio files
on our website in Resources> Audio Samples> Built-In Audio Files. For example, if you want to play the
D2 tone, it would be “02”.
•D: Duration, 1-9. This makes the audio file play again with no delay, and can make certain tones sound
longer. We recommend just leaving this set to 1.
•V: Volume, 1-4. 1 is 25% volume, 2 = 50%, 3 = 75%, 4 = 100%.
•P: Pause, 1-9. How many seconds you would like to pause between repeating the message. 2 seconds
is the most common.
•R: Repeats, 1-9. How many times you want it to play the message. You can also use the letter A for 20
repeats, B = 60, C = 120, and D = 240.
So, for example, you can use GM021323. It will play audio file #02, (the two-beep tone) with 1 duration, 75%
volume. It will play it 3 times, with a 2 second pause between repeats.
Also, with the GM commands, there are two optional digits you can have on the end of that command making
it an 8-digit command. Those are used to play a tone before the audio file. For example, if you wanted to play
the “evacuation emergency” message, with a two-tone beep in front of the message you would add “21” to
the end of the command. The first digit, #2 is the number of the tone it plays, the second digit #1 is for how
many times to play the tone. So, the command would be GM04132321. This feature does not work on some
older units.
Custom Audio Guide
Version 1.0
Visiplex, INC. 2021
2

You can also load the files on the VS4810 and play them as a live audio transmission. The downside to this is
that once the message is started, you will not be able to stop it easily. You would program in a device ID with
the type “wireless speaker”, and use the DSC field (Device Special Command) to play an audio file stored on
the unit rather than have you speak the message. The unit will not send alarm messages during this, as the
system prioritizes live audio over message activation. It will keep playing the audio until finished. If you have
to stop it, you would need to turn the unit off. For these reasons we would recommend uploading the custom
audio to the speakers themselves, and just having the GM command activate them.
The format for the 4-digit DSC field is: TTRD
•TT: Two-digit track number. For the VS4810, 01 is the first file you load on it, since there are no built-
in audio files on this unit.
•R: Repeats, 1-9. How many times it will play the audio file.
•D: Delay, 1-9. How many seconds it will wait between plays.
For example, if you load 1 file on the VS4810, and you want it to play twice with a 3 second delay, the DSC
field would be 0123.
The DSC field is also how you would use the telephone line interface if you have it, to dial out to a number
and play a recorded message. Program a device ID you can trigger, leave the code field blank, then enter the
phone number you want it to call in the phone field (with a 1 in front, no dashes or anything). The type will
be phone, and you will use the DSC field to indicate the message to play. When the phone is answered, it will
play the recorded message over the phone line.
Custom Audio Guide
Version 1.0
Visiplex, INC. 2021
3
Other manuals for VS4820
3
This manual suits for next models
2
Table of contents
Other visiplex Accessories manuals


