Vitek VT-4119SR User manual

UZ
2
13
25
37
49
4119IM.indd 1 20.02.2008 15:15:56

Please, read and understand this manual carefully before the startup,
use and setup of the player. Keep the manual for future references.
This device contains a DVD player that uses a laser system.
Do not open the case in order to avoid exposure to laser radiation.
Invisible laser radiation is present when the case is open. DO NOT LOOK
AT THE LASER RAYS. Furthermore, use of the control system or making
adjustments or completing operations, other than those described in
these instructions, can lead to dangerous exposure to radiation.
We urge you to carefully study these operating instructions and save
them for future use. Contact a service center (if necessary) for service
and repairs.
CAUTION! DO NOT OPEN THE UPPER HOUSING OF THE DEVICE DUE
TO RISK OF ELECTRIC SHOCK. THERE ARE NO USER-SERVICEABLE
PARTS INSIDE. EMPLOY THE SERVICES OF QUALIFIED PERSONNEL.
IN ORDER TO AVOID ELECTRICAL SHOCK, THE WIDE PRONG OF THE
PLUG SHOULD BE FIRMLY AND COMPLETELY INSERTED INTO THE
OUTLET. WATER MUST NOT SPILL INTO THE DEVICE. DO NOT PLACE
CONTAINERS OF LIQUIDS, LIKE VASES, ONTO THE DEVICE.
This appliance is powered by AC mains: voltage 110-40V and frequency
50-60Hz. Ensure the mains voltage meets appliance’s operating voltage.
It is forbidden to immerse this appliance into water. Do not install
the appliance at the places with high humidity (in bath rooms, near
water basins, kitchen sins, washer machines, swimming pools, in wet
basements or cellars) in order to avoid fire and electric shock. Do not
allow drops and splashes falling on the appliance. Do not put any objects
filled with liquids (vases, for example) on the appliance. In order to avoid
condensation because of appliance transferring from warmer room to a
colder one and vice versa, do not switch the appliance on immediately,
but wail for about one hour.
Do not use extension cords not approved by the manufacturer, it may be
dangerous.
Do not allow sockets and extension cords become overloaded as doing
so may lead to fire or electric hock
Install the appliance thus to be able disconnecting power cord plug from
a wall outlet immediately in case of malfunction. Power cord should not
be tight near its exit out of the appliance. Power cord should be routed
so that it cannot become tangled. Do not put any objects on the power
cord.
Disconnect the appliance from a wall outlet to provide additional
protection during a lighting storm and when you are not going to use
the appliance for a long time. This measure is used to avoid appliance
failures because of lighting or mains voltage jumps.
Do not disconnect power cord when the power is on.
In order to disconnect power cord from a wall outlet hold the plug, not
pull the cord.
Do not open appliance housing on your own, doing so would cause
electric shock. Do not repair of modify the appliance. Any servicing
should be done by qualified professionals at service centers.
Special attention is required when the appliance is used by children of
invalids.
Keep at the places inaccessible by children.
Do no allow using this appliance as a toy.
Install the appliance at the places where sufficient ventilation is provided.
This appliance should not be installed inside any built-in furniture
(book shelves or built-in closets) where sufficient ventilation cannot be
provided.
Ensure the proper ventilation is provided in case of installing the
appliance on a bed, divan, sofa, carpet, or any other similar furniture.
Do not place the appliance near any heat sources, for example radiators,
electric heaters, ovens or any other heating appliances (including
amplifiers too). Do not install the appliance at the places where it would
be exposed to direct sun rays, excessive dust or mechanical impacts.
Do not put heavy articles on the appliance.
Do not place this appliance on a furniture with non-fixed wheels, on
unsteady bases, tripods, brackets, tables as the appliance would fall
down and cause children’s’ or adult’ injury, or appliance damage. Use
the bases, tripods, brackets, and tables delivered with the appliance or
recommended by the manufacturer. Follow manufacturer’s instructions
while installing the appliance on a base, use holders and fasteners
recommended by manufacturer only. Unit consisting of base and
appliance should be moved with special care. The appliance could
probably be thrown over in case of sudden stop, push or moving the
base on an uneven surface.
Do not allow foreign objects falling inside appliance housing through any
openings. This may cause ignition and electric shock. In case of such
an accident disconnect the appliance from wall outlet and consult a
qualified professional before any further usage.
In the situations described below it s necessary to unplug appliance and
apply to qualified professional for repair:
a) power cord or plug damage;
b) foreign object falling inside the appliance;
c) appliance was exposed to rain or the water was poured on the
appliance;
d) there are obvious changes in appliance operation;
e) appliance was fallen down or was damaged in any other way.
Unplug from a wall outlet before cleaning. Use soft damp cloth for
cleaning the appliance. It is forbidden using liquid or aerosol detergents.
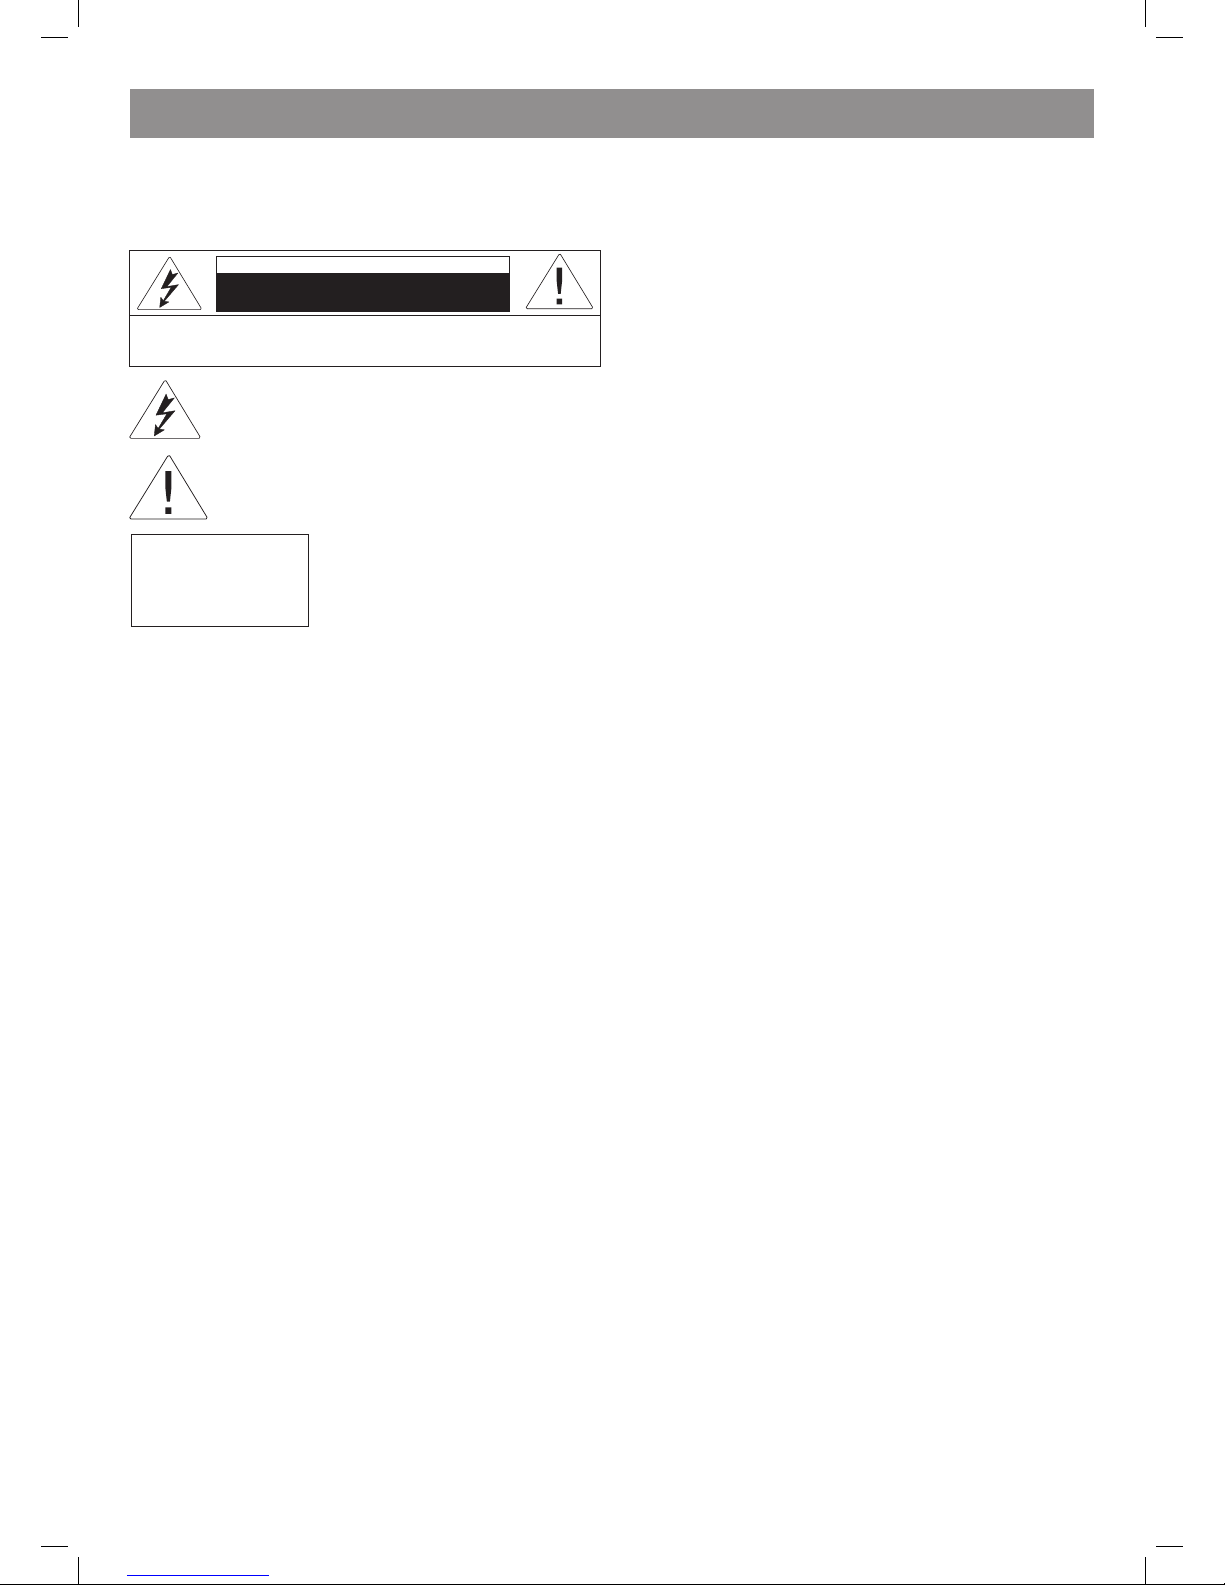
The lightning bolt in a triangle symbol indicates to the
user that there are dangerous voltages inside the device
that can result in electrical shock.
The exclamation point in a triangle symbol indicates to
the user important operating instructions and technical
service information in the accompanying literature.
Indicates a device using a laser. This symbol
must be located on the rear panel of a
device, indicating that the device contains a
Class 1 laser and that laser rays are in use.
The possibility of laser exposure does not
exist without opening the device.
WARNING: In order to reduce the risk of fire or electrical shock,
do not remove the device panels. Contact qualified personnel for
service and repairs.
4119IM.indd 2 20.02.2008 15:15:56

= Do not use cracked or deformed disks as doing so may cause
appliance damage.
= Hold the disc’s outer edges. Insert disk with label up. Do not touch
the disc surface. Dust, scratches or finger prints on disk’s operating
surface may cause t internal damage.
= Do not expose disks to direct sunlight, heat radiation from heat
sources, high temperature and humidity.
= Put disk into storage case after usage.
= At regular intervals wipe disk’s operating surface with soft damp
cloth, from center to outer edges. Do not use casual detergents.
Battery leakage would cause injuries or remote control damage. In order
to avoid battery damage, follow the next instructions:
- Install batteries in correct way, following polarity according to the
mark on the appliance.
- Do not mix batteries of different types and batteries with different
time of service.
- Extract batteries in case you are not going to use the appliance for a
long time.
- Replace the batteries in proper time.
• Use the box and pack articles received along with appliance to
prepare it for transportation.
• After long period of operation appliance housing becomes heated,
this is normal.
• Do not move the appliance while playing back a disk as doing so
would cause reading device or disk damage.
This product incorporates copyright protection technology that is
protected by method claims of certain U.S. patents and other intellectual
property rights owned by Macrovision Corporation and other rights
owners Use of this copyright protection technology must be authorized
by Macrovision Corporation, and is intended for home and other
limited viewing uses only unless otherwise authorized by Macrovision
Corporation. Reverse engineering or disassembly is prohibited.
Manufactured under license from Dolby Laboratories. Dolby and the
double-D symbol are trademarks of Dolby Laboratories. Confidential
Unpublished Works. Copy right 199-1997 Dolby Laboratories. All rights
reserved
СЕ: This appliance complies with Electromagnetic Compatibility
Directive and Low voltage appliance directive.
Vitek DVD player represents new generation of home appliances
providing high quality video and audio playback. This DVD player’s
characteristics surpass the capabilities of any other video player existed
before. This player is the best signal source for home theaters. The
maximal enjoyment is guarantied.
• Supported types of disks: DVD-R/-RW, DVD+R/+RW, CD-R/-RW
• Supported formats: DVD, MPEG4 (DivX), SVCD, VCD, CDDA, МРЗ,
WMA, Kodak Picture CD, JPEG
• Built-in decoders: Dolby Digital AC-/ Dolby Prologic II/ DTS digital
output
• Connecting jacks: composite (VIDEO), S-Video, component (Y Cb/
Pb Cr/Pr), coaxial (COAXIAL), optical (OPTICAL), 5.1/Stereo
(5.1 CH AUDIO OUT), SCART, HDMI
• USB slot
• Memory card slot: SD/MMC/MS Card
• Karaoke
• On-screen menu in Russian or English
This unit can play the following types of discs:
DVD Audio + Video
АС- Dolby Digital Audio
МРЗ Audio
Video-CD (VCD) Audio + Video
CDDA Audio
Kodak Picture CD Photo
MPEG4 Audio + Video
The next accessories are included into delivery set:
Operating Instructions
Remote control
Audio-video cable
batteries of ААА type, 1.5V
HDMI cable
DVD 5 (single sided, single layer)
DVD 9 (single sided, double layer)
DVD 10 (double sided, single layer)
DVD 18 (double sided, double layer)
VCD 1.0/1.1/.0
Picture CD
DVCD
CDDA
МРЗ
CD-R
CD-RW
Type DVD VCD SVCD CD
Recording
format
MPEG MPEGI MPEG II DIGIT
Disk capacity single
sided,
single
layer 4,7
Gb –
hours
double
sided,
single
layer 8,5
Gb - 4
hours
double
sided,
single
layer
9,4 Gb
- 4,5
hours
double
sided,
double
layer
17 Gb -
9 hours
650М 74
min
650M 45
min
650M 74
min
Dimensions, cm 1/8 1 1 1/8
Horizontal
resolution
> 500 lines >40 lines >50
lines
-
Subtitles Up to types - 8 -
Language Up to 8 4 -
Symbol
4119IM.indd 3 20.02.2008 15:15:57

4
DVD-disks by different manufacturers have different parameter marked
by the next symbols:
Regional code and video out system
Dolby digital surround
DTS recording system
Number of audio tracks
Number of subtitles
Picture format
View restriction
View angle
5.1 audio channel
Hidden subtitles
-channel stereo
Restriction
Usually video or music content of DVD disk is divided into several parts.
Each part is called as “title”.
Minimal fragment of video or music content of DVD disk inside the title
is called ‘chapter’. Usually one title includes one or several chapters
(fragments) numerated in order to facilitate search procedure. Some
discs can include no any chapters.
Part of video or audio content of SVCD, VCD or CD disk. All tracks are
numbered in order to facilitate search procedure.
VCD disks supporting playback control function and including dynamic
and static video content are divided into several parts called ‘scenes’.
Each scene is easy to be found by its number. One scene includes one
or several tracks.
When SVCD or VCD playback content menu of disk is displayed on
screen, that function is called ‘playback control function’ or PBC
function.
VCD disks not supporting
PBC function (version 1.1)
Video and music (audio) play back
SVCD/VCD disks supporting
PBC function (version .0)
VCD could use menu on-screen menu for
playback
Notice: If you record your disk using personal computer, even if the
format is matching there are cases when disk cannot be played back
because of incompatible disk burn software settings.
4119IM.indd 4 20.02.2008 15:15:58

5
1. STANDBY/ON button
. location of remote control signals’ photo detector
. disk tray
4. disk tray open/close OPEN/CLOSE
5. play/pause PLAY/PAUSE
6. playback stop STOP
10. LED display
8 . microphone jack
9. USB-device connection slot (USB Flash Drive)
10. SD/MS/MMC Card connection slot
1. Power
. HDMI slot
. Component video out jacks (Y Cb/Pb Cr/Pr)
4. Coaxial audio out jacks (Coaxial)
5. Composite video out jack (Video)
6. S-Video out jack
7. Optical audio out jack (OPTICAL)
8. 5.1СН audio out jacks
9. SCART jack
4119IM.indd 5 20.02.2008 15:15:58

6
1. disk tray open/close button OPEN/CLOSE
. video out mode switching button V. MODE
. OSD button (disk info)
4. POWER button
5. number buttons
6. color systems switching buttons PAL/NTSC
7. enter cancellation button CLEAR
8. program mode button PROG
9. navigation buttons ()
10. zoom button ZOOM
11. skipping to previous track button PREV
1. skipping to next track button NEXT
1. playback top button STOP
14. volume level control buttons VOLUME +/-
15. media type selection button DVD/USB/CARD
16. angle view on button ANGLE
17. sound off button MUTE
18. frame by frame playback button STEP
19. playback pause button PAUSE
0. rewind button F REV
1. forward wind button F FWD
. low motion button SLOW
. play/enter button
4. setup menu enter button SETUP
5. fragment repeat button A-B RPT
6. repeat mode selection button REPEAT
7. search menu enter button SEARCH
8. disc content menu (title menu) enter button TITLE/PBC
9. subtitle selection button SUBTITLE
0. language selection button AUDIO
1. menu enter button MENU
• Load batteries into the battery compartment of remote control.
• Remove the batteries if the unit will not be used for a prolonged
period of time.
• Replace batteries in proper time.
4119IM.indd 6 20.02.2008 15:15:59

7
Before connecting DVD player to any other equipment, ensure power supply of player and other equipment is disconnected.
Choose the most appropriate type from the following types of connections according to capabilities of your TV-system.
(1) Composite video output
In order to display standard quality images, connect composite video output jack (VIDEO) of your DVD player to adequate input of your TV-set or
monitor using one audio-video cable (A/V) with yellow ending pins included into delivery set.
() S-Video output
In order to display high quality images connect S-VIDEO jack of your DVD player to adequate input of your TV-set or monitor using one S-Video cable
(not included into delivery set).
() Component video output
For exact color rendering and high quality picture view connect component video signal jacks Y Cb/Pb Cr/Pr (red/blue/green) to input jacks of your
TV-set using adequate cable (not included into delivery set).
(4) SCART output
Use 1-pins cable SCART (not included into delivery set) to connect SCART jack of your DVD player to the adequate jack of your TV-set.
(5) HDMI output
Special HDMI cable (included into delivery set) is used to connect DVD player to HDMI jack of TV-set. This way you can get high quality picture.
• Parallel connection using several video outputs effects quality of image negatively.
• Only correct system connection and setting provides clear picture.
Choose the most appropriate type from the following types of connections according to capabilities of your TV-system.
(1) channel analog audio output
Use jacks FR and FL 5.1 CH of analog audio output (5.1 CH AUDIO OUT) to connect -channel analog audio output. Switch the mode of audio output
to -channel mode (see dynamics’ setup page).
() 5.1 СН analog audio output
Use pair of AV cables to connect 5.1-channel audio output (FL, FR, SL, SR, CENTER, SUB WOOFER) of DVD player to an adequate input (5.1) of an
amplifier/receiver.
() Coaxial digital audio output
Use special coaxial cable to connect COAXIAL jack of your DVD player to an adequate input of an amplifier.
(4) Optical digital audio output
Use special fiber optical cable to connect OPTICAL jack of your DVD player to an adequate input of an amplifier.
Setup parameters should meet the type of jack used to connect DVD player to external devices.
4119IM.indd 7 20.02.2008 15:15:59

8
1. Switch TV-set on and select the adequate type of input signal in TV-
set settings.
Press SETUP button to enter system setup menu. Press SETUP
button again to exit menu.
. Use navigation buttons () to select on of the next pages: main
setup page, audio setup page, video setup page, custom setup
page, password setup page.
. Press button () to enter selected page.
4. Use buttons () to select an item you want to change.
5. Press button or to enter sub-item to change a setting. Use
navigation buttons () to select required value or to confirm
selected value and return to list of settings.
some menu items corresponding to preset modes are
marked and cannot be selected.
Input settings are stored even after switching off power.
4:/PS: When DVD player is connected to normal TV-set, wide screen
picture is viewed on the whole screen, but its side parts are cut (4:).
4:/LB: When DVD player is connected to normal TV-set, wide screen
picture is viewed thus there are black regions in upper and down part of
the screen (4:).
Wide screen: use this item if home theater is connected to wide screen
TV-set (16:9).
Some DVD movie could be shot from different angles. Detailed
information concerning this subject you can get from annotation to your
DVD disk.
If this mode is on while playing back DVD disk shot from different angles
symbol of camera is displayed on the screen.
Selecting on-screen menu language.
This function is not working if there are no subtitles recorded on a disk. If
disk’s subtitle function if switched off, press SUBTITLE button on remote
control to switch it on. Default setting is ON.
If screensaver function is on, player is switched on, but disk is not
playing back for several minutes, a moving picture is appeared on the
screen, after 0 minutes player is switched to standby mode. You can
press button STANBY on remote control to exit standby mode.
If this function is on, layer remembers the time of disk’s taking out, the
next time you load the same disk, player will play it from the place of last
stop and extraction of the disk.
•
-
Left/Right: original sound in 5.1 CH format is transferred through left and
right channel only.
Stereo: original sound in 5.1 CH format is transferred in stereo mode.
D surround: effect of D surround sound is created using two channels
only.
5.1 CH: original sound in 5.1 CH format is transferred through 5
channels: front, central, rear speakers, subwoofer.
If your sound system includes front, central, rear speakers and
subwoofer, you can set menu items according to real configuration. This
function would not work if fading function is on (left/right, stereo, d
surround).
In 5.1CH audio mode select ON (switch test signal on), test signal will
be played through all six channel in sequence. Setting the system up
by test signal is to be done on condition there is no disk in the tray and
parameter FADE is set to “5.1СН” position.
Use this function to examine all audio channels if you are in doubt about
the quality of sound.
Dynamic range compression allows decreasing sudden volume jumps
caused by sound effects. You can switch compression on (ON) or off
(OFF) or select automatic mode (AUTO).
Post DRC is inactive? when downmix is set 5.1.
-
Switch off SPDIF: sound is supplied to appliance output in analog form
(5.1 CH AUDIO OUT).
SPDIF/RAW: digital output signal in original format as recorded on disk.
SPDIF/PCM: digital output signal in decoded РСМ format.
-
Select setting for audio format: 48 К, 96 К.
4119IM.indd 8 20.02.2008 15:16:03

9
•
-
Stereo: stereo phonic output signal.
Left mono: left channel output signal.
Right mono: right channel output signal.
Mixed mono: averaged left and right channel output signal.
This option allows decreasing volume down to very low level saving
the quality and all details of audio signal. This is very useful while
watching programs having high dynamic range in night time without any
disturbance to other family members, but with high quality of sound.
•
If you are not satisfied with the previous settings, you can set the
distances to acoustic systems according the real conditions. Pres
buttons () to choose a speaker and button () to set the distance.
•
-
There are seven equalizer modes. You can select any of them according
to your preferences and disk content.
-
On – corresponds to adequate frequency band amplification.
•
You can choose the next parameters of digital filter: OFF, 44.1 К, 88. К.
Default value if OFF.
•
CVBS: setting composite video signal.
YUV: choose this mode when connecting by component jacks Y Cb/Pb
Cr/Pr.
RGB: choose this mode when connecting by SCART jack.
You can switch on or off progressive scanning if the mode YUV is
selected.
•
You can set sharpness, brightness, contrast, gamma, hue, saturation,
brightness signal delay adjustment (luma delay) according to your
preferences.
•
You can set the next parameters: HDMI (on/off), RESOLUTION.
4119IM.indd 9 20.02.2008 15:16:08

10
This is page is available only when no disc in the tray.
•
Your player supports all TV systems. You can choose PAL, NTSC or AUTO
(multi system mode).
AUTO (multi system mode): TV system is switched automatically
according to disk color system.
NTSC: this system is employed in USA, Taiwan, Japan and etc.
PAL: this system is employed in China, Europe, Hong Kong and etc.
• (playback control)
You can switch on or off this function of playback control (РВС function).
• (choosing language), subtitle, disk menu
These parameters could be preset according to your preferences. If
preset parameters are supported by disk’s content, playback is going
on according to your settings. Otherwise disk’s default settings are
used. You can change playback settings by pressing buttons AUDIO and
SUBTITLE.
•
This function is intended for parental control of disk content during
playback and protects your children from watching the objectionable
scenes. Disk with lever higher then the level preset by this function will
not be played.
•
Return to factory settings.
•
When password mode is OFF, you can set parental control level (menu
Custom preference page -> Parental control).
In order to make change of parental control level impossible, switch on
password mode.
•
You can change password using this option. Select Password ->
Change. Input the old password in pop-up window (or default password
– 16900), then input new password and input new password again.
Press PLAY button to save new password.
• Press button STANDBY located on front panel of DVD player or
POWER button on remote control to switch on player’ power supply.
• Use POWER button located on remote control to switch to standby
mode.
• Press button OPEN/CLOSE located on front panel of DVD player
or button on remote control to open disk tray. Load a disk into
tray by its operating surface looking down (label up). Press button
OPEN/CLOSE once more to close the tray, player will start playback
automatically. (For МРЗ and JPEG disks function of automatic
playback is not applicable.)
• Use buttons VOLUME +/- to increase or decrease volume level.
• Press button MUTE to switch off the sound completely. Press button
MUTE or volume control buttons once more to switch on the sound.
• Press button located on remote control or on front panel of DVD
player to start playback. To stop playback press button PAUSE
located on remote control or on front panel of DVD player. To return
to normal playback mode press button .
• When playing back DVD, SVCD, VCD, CD disks press button STOP
once, player will remember the point of stop. Press button located
on remote control or on front panel of DVD player to continue. Press
STOP button second time to stop player completely.
◄◄►►
• Press button F.FWD for fast winding forward
• Press button F.REV for fast rewind
I/ I (skip to previous/next track)
• When playing back DVD disks press button PREV (I) located on
remote control or on front panel of DVD player to skip to previous
chapter.
• When playing back SVCD, VCD, CD disks press button PREV (I)
to skip to previous track.
• When playing back DVD disks press button NEXT (I) located
on remote control or on front panel of DVD player to skip to next
chapter.
• When playing back SVCD, VCD, CD disks press button NEXT (I)
to skip to next track.
• If disk includes two or more tracks, chapters or titles you can set
your own playback order using this button.
• Press button PROG to enter programming mode, program menu
appears on the screen. Press number buttons to set number of
track, chapter or title. To set number 10 and more use button
10+. For example, to input number 6 press the next sequence of
buttons: 10+, 10+, 6. If there are more then 10 entries, press NEXT
I to continue program table (maximal number of entries is 0).
Use cursor buttons () to move cursor. After the program is
completed select menu item “start” using cursor buttons and press
button to start playback of programmed sequence.
• Programming is not applicable for МРЗ, DiV X disks. Pres button
PROG once to open file list. You can select a file you need to play
using cursor buttons.
• When playing back DVD disks press button TITLE/PBC to display
main menu (in case of some disks – to go to disk menu).
• When playing back SVCD, VCD.0 disks press button TITLE/PBC to
display disk menu.
After disk have been loaded, if PBC function is ON player displays
menu automatically (see custom settings page in system setup
menu). In this mode you can choose track number by pressing the
adequate number button.
Press button TITLE/PBC, on TV screen will be displayed “РВС OFF”,
in this mode disk playback is started automatically.
VCD1.1, CDDA and МРЗ do not have РВС menu.
(menu)
• When playing back DVD disks press button MENU to open disk’s
menu.
(subtitles selection)
• When playing DVD disk with subtitles press button SUBTTITLE to
choose subtitle language.
(view angle)
• When playing DVD disk with more then one view angle press button
ANGLE to choose the angle you need.
4119IM.indd 10 20.02.2008 15:16:09

11
• To play DVD, SVCD, VCD disk content frame by frame press button
STEP. To return to normal playback mode press button located on
remote control or on front panel of DVD player.
• Press button REPEAT to play the track, chapter, title or the whole
disk again.
• When playing back DVD disks press and hold button REPEAT,
options of repeat of the chapter, title or all disk are suggested on the
screen.
• When playing back SVCD, VCD.CD disks options of repeat of track,
ll disk or cancel repeat are suggested on the screen.
• When playing back МРЗ disks options of repeat of track, all tracks in
folder or cancel repeat are suggested on the screen.
• When playing back DVD, SVCD, VCD.CD disks you can set A-B
fragment for repeat.
• Press button А-В RPT to set start point (А).
• Press button А-В RPT to set end point (В). Repeat of selected
fragments will be started.
• Press button А-В RPT third time to cancel repeat and to return to
normal playback.
• Pres button ZOOM to change the scale of picture. Use buttons
() to move picture across the screen in enlarged picture mode.
• When playing back DVD containing several audio support languages
press button AUDIO to select required language.
• In playback mode press button SEARCH once. Search menu will
be displayed on the screen. Press this button second time to close
menu. Use buttons () to select required option in search menu.
Press button to confirm.
• Press button OSD, disk data will be displayed on the screen.
• Press button SETUP, system setup menu will be displayed on the
screen.
• Press button V-MODE to select video output mode (CVBS, YUV,
P-SCAN, HDMI and RGB.
• When playing back VCD 1.1, CD disks use number buttons to
choose track and chapter after the disk have been loaded. Number
button are necessary when functions PROGRAM and MENU are
switched on.
• Use button 10+ and adequate number to select track with number
10 and higher.
• Press this button to select color system: PAL, AUTO NTSC.
• Press this button to cancel number input.
• Press button DVD/USB/CARD, menu will be displayed on the screen.
Use buttons () to choose data source - DVD disk, USB device
or SD/MS/MMC card. Press button for confirmation of your
choice.
Press SLOW button on remote control for playing back at lower speed.
Karaoke disk is DVD or VCD disk with prerecorded music and
subtitles showing user what and when he or she should start singing.
Microphone (not included into standard delivery set) is necessary for
singing.
• Plug microphone into mike jack located on the side panel of DVD
player.
• Insert karaoke disk into DVD player, playback is started
automatically.
• МРЗ is the third audio compression format of international standard
MPEG, which compresses sound in 1 times. Using MP format one
can record about 600 minutes of music on once CD, and the quality
of the sound is very close to audio CD’s quality.
• There are many formats for saving MP songs. Usually one MP
disk contains several folders, and every folder includes several files
(songs).
• For moving through list of folders and files use buttons (), use
buttons ()to open or close folder, press button to play back a
file.
• After loading picture CD, its file list appears on the screen. Use
buttons () and to view the files from the list. The picture selected
is shown on the full screen of your TV-set.
• To enter menu of picture preview press button STOP. Picture
previews will be shown on the screen. Use buttons () to select
the picture you need. Press button to show picture in full screen
mode.
• Also you can switch on slide show mode, enter menu of buttons’
description by selecting adequate item using buttons () and
. Use buttons Prev and Next to switch between picture preview
groups.
Buttons used while viewing the pictures:
ZOOM – switch on scale change mode.
F.FWD () F.REV () – changing scale of picture
() – moving enlarged picture
If function ZOOM is off, you can rotate a picture using buttons ().
This appliance supports the next types of memory cards:
MS cards: MEMORY STICK CARD
ММС cards: MULTI MEDIA CARD
SD cards: SD MEMORY CARD
1. Switch on appliance’s power.
. Insert a card into its slot (MS, SD, MMC).
. Press button DVD/USB/CARD, menu of media selection will appear on
the screen. Use buttons () and () to select the media you need.
• If disk and card or USB device are inserted into player
simultaneously, player starts playing disk by default. To switch to
another mode (USB/CARD) press button DVD/USB/CARD.
• When the playback is topped, you can remove card or USB device.
4119IM.indd 11 20.02.2008 15:16:09

1
No power Power cord is not connected to power source. Plug power cord in power source socket.
No picture Signal source in TV settings is selected in wring way. Select the setting according to type of player connection.
Setting does not correspond to type of current connection. Select the setting according to current type of player
connection.
Cable plug is inserted into input jack not tightly. Examine cable connection.
No sound Audio cable plug is inserted into input jack not tightly. Examine audio cable connection.
Devices are connected, but not switched on. Switch power of connected devices on.
Incorrect sound setup. Select adequate setup.
Sound distortion Volume is too high. Decrease volume
Unstable picture Wrong TV-set setting Adjust TV-set settings.
Cannot read disks Disk is not loaded Load disk
Disk is loaded with label down Examine position of disk in the tray (label should be up)
There is condensation inside player Leave DVD player without disk for one hour
Microphone is not
working
Microphone is switched off Connect a microphone and switch it on
Microphone volume is too low Adjust microphone volume level
Remote control is not
working
Remote control is not directed to player Direct remote control to player
Distance between remote control and layer is more then 8
meters
Make distance between remote control and layer shorter
Remote control batteries are dead Replace both batteries
Some system functions
are not working
Wrong sequence of buttons have been pressed Repeat operation once more according to recommendation
contained in this manual.
Power supply 110-40 V, 50/60 Hz
Color system NTSС / PAL
Data format Supported formats: DVD, DVCD, SVCD, VCD, CDDA, МРЗ, WMA, HDCD, JPEG, KODAK PICTURE CD
Digital video playback compressed by MPEG4 (DivX) algorithm
Media type DVD, DVD-R/-RW/+R/+RW, CD-R/-RW
Digital-to-analog converter 19 kHz / 4-bit
Video output 1Vp-p
S-Video output: Y: 1Vp-p (75 Ohm) С: Vp-p (75 Ohm)
Audio output .0 W 5.1 Channel, -channel mixed
Audio signal digital output Coaxial/optical
Jacks SCART, CVBS, S-VIDEO, Y Cb/Pb, Cr/Pr, HDMI
Band 0 Hz – 0 kHz
Noise level ~-70dB
Distortion <0,01%
Dynamic range ~7dB
Consumed power less then 15 W
Remote control
Transceiver Infrared radiation
Power source batteries of ААА type
The manufacturer reserves to itself the right to change the design and the technical characteristics of the unit without a prior notice.
. Recycling
“This product is marked by the symbol of the selective sorting, relating to the electrical and electronic component scrap. That means
that the product must be taken by a selective system of collection in accordance with European directive 00/96/CE in order to
be able either to be recycled or to be dismount in order to reduce any environmental impact. Attention! The electronic products
not having been the subject of a selective sorting are potentially dangerous for the environment and human health because of the
potential presence of dangerous substances.”
The manufacturer reserves the right to make changes to the characteristics of the device without prior notice.
Details regarding guarantee conditions can be obtained from the dealer from whom the appliance was purchased. The bill of sale or receipt must be
produced when making any claim under the terms of this guarantee.
This product conforms to the EMC-Requirements as laid down by the Council Directive
89/6/EEC and to the Low Voltage Regulation (/7 EEC)
4119IM.indd 12 20.02.2008 15:16:09

1
Уважаемый покупатель!
Перед подключением, использованием и настройкой устройства
внимательно прочитайте инструкцию. Необходимо соблюдать все
предупреждения и рекомендации по эксплуатации устройства,
приведенные в этом руководстве.
Сохраните руководство, используйте его в дальнейшем в качестве
справочного материала.
ВНИМАНИЕ!
Опасность удара
электрическим током!
НЕ ВСКРЫВАТЬ!
Предупреждение: во избежание возникновения пожара или
поражения электрическим током не подвергайте устройство
воздействию дождя или влаги.
Чтобы избежать удара электрическим током, не открывайте корпус
устройства самостоятельно.
Сервисное обслуживание должно осуществляться только
квалифицированными специалистами сервисных центров.
Значок молнии в равностороннем треугольнике
предупреждает пользователя о наличии опасного
напряжения внутри корпуса устройства, которое может
привести к поражению электрическим током.
Восклицательный знак в равностороннем треугольнике
указывает пользователю на наличие важных
рекомендаций по эксплуатации и настройке.
CLASS 1 LASER PRODUCT
Данный продукт классифицируется как ЛАЗЕРНОЕ УСТРОЙСТВО
КЛАССА 1. Соответствующая этикетка находится на задней
панели устройства и означает, что устройство использует
лазерные лучи. Возможность лазерного облучения отсутствует,
если прибор не вскрывать. ОБСЛУЖИВАНИЕ УСТРОЙСТВА
ДОЛЖНО ВЫПОЛНЯТЬСЯ ТОЛЬКО КВАЛИФИЦИРОВАННЫМИ
СПЕЦИАЛИСТАМИ СЕРВИСНОГО ЦЕНТРА.
Данное устройство работает от сети переменного тока с
напряжением 110-40 В и частотой 50-60 Гц. Проверьте,
соответствует ли напряжение в электросети рабочему напряжению
устройства.
Запрещается погружать прибор в воду. Во избежание
возникновения пожара или поражения электрическим током не
размещайте это устройство в условиях повышенной влажности
(около ванн, тазов с водой, кухонных раковин, стиральных
машин, рядом с плавательным бассейном, в сырых подвалах и
т.д.). Не допускайте попадания на устройство капель или брызг.
Запрещается ставить на устройство заполненные жидкостью
емкости (например, вазы). Во избежание образования конденсата
(когда вы переносите плеер из более теплого помещения в более
холодное и наоборот) не включайте прибор сразу, подождите
приблизительно 1 час.
Не используйте сетевые удлинители, которые не разрешены
изготовителем устройства, так как это может быть опасным.
Не допускайте перегрузки розеток или удлинителей, так как это
может привести к пожару или поражению электрическим током.
Установите это устройство таким образом, чтобы в случае
неисправности вилку сетевого провода можно было немедленно
вынуть из розетки. Сетевой провод не должен быть натянут там, где
он выходит из устройства; его необходимо прокладывать так, чтобы
он не запутывался, не устанавливайте на него какие-либо предметы
обстановки.
Для дополнительной защиты устройства во время грозы, а также
в тех случаях, когда вы не собираетесь использовать его в течение
длительного времени, отключите его от розетки электросети. Это
исключит выход устройства из строя из-за ударов молнии или
скачков напряжения в электросети.
Не отсоединяйте сетевой шнур при включенном питании.
Для отсоединения сетевого шнура беритесь непосредственно за
вилку, ни в коем случае не тяните за провод.
Во избежание удара электрическим током не открывайте корпус
устройства самостоятельно. Не ремонтируйте прибор и не
вносите в него изменения. Сервисное обслуживание должно
осуществляться только квалифицированными специалистами
сервисных центров.
Будьте особенно внимательны, если прибором пользуются дети или
люди с ограниченными возможностями.
Храните прибор в недоступных для детей местах.
Не разрешайте детям использовать прибор в качестве игрушки.
Устанавливайте устройство в местах с достаточной вентиляцией.
Это устройство не следует размещать во встроенной мебели (в
книжных полках или стенных шкафах), если в ней нельзя обеспечить
достаточной вентиляции.
При размещении устройства на кровати, диване, софе, ковре или
на других подобных предметах обстановки обеспечьте устройству
необходимую вентиляцию.
Не размещайте устройство вблизи источников тепла, например,
радиаторов, электрообогревателей, духовок, или рядом с другими
устройствами, являющимися источниками тепла (в том числе и
усилителей), а также в местах, подверженных воздействию прямых
солнечных лучей и чрезмерному запылению.
Не кладите на устройство тяжелые предметы.
Не размещайте это устройство на предметах мебели с
нефиксируемыми колесиками, на неустойчивых подставках,
треногах, кронштейнах, столах, так как изделие может упасть и
привести к травмам детей, взрослых, а также к неисправности
самого устройства. Используйте только те подставки, треноги,
кронштейны, столы, которые либо продаются вместе с
устройством, либо рекомендованы изготовителем устройства.
При установке устройства на подставке соблюдайте инструкции
изготовителя, применяйте только те крепежные изделия, которые
рекомендуются изготовителем. Подставку с установленным на
ней устройством следует перемещать с крайней осторожностью.
При резкой остановке, рывках или при перемещении подставки по
неровной поверхности весьма вероятно опрокидывание подставки
и падение устройства.
Не допускайте попадания каких-либо предметов через отверстия
в корпусе устройства, это может повлечь за собой возгорание
устройства и поражение электрическим током. Если это все-
таки произошло, отсоедините устройство от сети и обратитесь к
квалифицированным специалистам.
Если у вас возникли описанные ниже ситуации, необходимо
выключить устройство из розетки и обратиться к
квалифицированному специалисту для ремонта устройства:
a) Повреждение сетевого шнура или вилки.
b) В устройство попали какие-либо предметы.
c) Устройство попало под дождь или на него разлили воду.
d) Заметны явные изменения в работе устройства.
e) Устройство упало или было повреждено каким-либо другим
образом.
Перед чисткой выключите устройство из розетки. Для чистки
устройства пользуйтесь влажной мягкой тканью. Запрещается
использовать для этих целей жидкие или аэрозольные чистящие
средства.
4119IM.indd 13 20.02.2008 15:16:09

14
Не используйте треснутые или деформированные диски, это может
вызвать поломку устройства.
Берите диск только за края. Вставляйте диск надписью вверх. Не
прикасайтесь к рабочей поверхности диска. Пыль, царапины или
отпечатки пальцев на рабочей поверхности диска могут привести к
выходу его из строя.
Следите за тем, чтобы на диски не попадали прямые солнечные
лучи, чтобы они не находились рядом с источниками тепла и не
были подвержены воздействию высокой температуры и влажности.
После использования уберите диск в футляр на хранение.
Периодически протирайте рабочую поверхность диска мягкой
тканью от центра к краям. Не пользуйтесь обычными моющими
средствами.
Протечка батареек может стать причиной травм или повреждения
пульта дистанционного управления. Чтобы избежать этого, следуйте
приведенным ниже инструкциям:
- устанавливайте батарейки правильно, соблюдая полярность в
соответствии с обозначениями на устройстве;
- не используйте вместе разные батарейки (старые и новые, раз-
ных типов и т.п.);
- вынимайте батарейки, если устройство не будет использоваться
в течение длительного времени;
- своевременно меняйте батарейки.
• При транспортировке устройства используйте коробку и детали
упаковки, которые были получены вами при покупке устройства.
• Если плеер работал продолжительное время, то его корпус мо-
жет быть слегка нагретым - это нормальное явление.
• Не перемещайте данное устройство во время воспроизведения
диска. В противном случае может быть повреждено считываю-
щее устройство и диск.
В данном устройстве используется технология защиты
авторских прав, защищенная патентами США и другими
правами на интеллектуальную собственность, принадлежащими
компании Macrovision Corporation и другим правообладателям.
Использование технологии защиты авторских прав должно
быть разрешено компанией Macrovision Corporation, устройство
предназначено только для домашнего использования, если
обратное не разрешено компанией Macrovision Corporation.
Разборка изделия и копирование технологии запрещены.
Изготовлено по лицензии Dolby Laboratories. Название «Dolby» и
символ в виде двойной буквы «D» являются торговыми марками
компании Dolby Laboratories.
Примечание: данное устройство соответствует директиве по
электромагнитной совместимости и директиве для низковольтных
устройств.
DVD-плеер Vitek - это новое поколение домашних устройств,
обеспечивающих воспроизведение высококачественного
изображения и звука. Характеристики DVD-плеера значительно
превосходят характеристики любого существовавшего ранее
оборудования для воспроизведения видео. Он является наилучшим
источником сигнала для систем домашнего кинотеатра и обеспечит
вам максимальное удовольствие от просмотра.
• Воспроизводимые диски: DVD-R/-RW, DVD+R/+RW, CD-R/-RW.
• Поддерживаемые форматы: DVD, MPEG4 (DivX), SVCD, VCD,
CDDA, МРЗ, WMA, Kodak Picture CD, JPEG.
• Встроенные декодеры Dolby Digital AC-/Dolby Prologic II/выход
DTS digital.
• Разъёмы для подключения: композитный (VIDEO), S-Video, ком-
понентный (Y Cb/Pb Cr/Pr), коаксиальный (COAXIAL), оптический
(OPTICAL), 5.1/стерео (5.1 CH AUDIO OUT), SCART, HDMI.
• Разъем USB.
• Разъем карты памяти SD/MMC/MS Card.
• Караоке.
• Экранное меню на русском и английском языках.
Данный плеер может воспроизводить следующие типы дисков:
DVD Аудио + Видео
АС- Dolby Digital Аудио
МРЗ Аудио
Video-CD (VCD) Аудио + Видео
CDDA Аудио
Kodak Picture CD Фото
MPEG4 Аудио + Видео
В комплект поставки входят следующие принадлежности:
Инструкция по эксплуатации
Пульт дистанционного управления
Аудио/видеокабель
батарейки, ААА 1.5 V
HDMI кабель
DVD 5 (односторонний однослойный)
DVD 9 (односторонний двухслойный)
DVD 10 (двухсторонний однослойный)
DVD 18 (двухсторонний двухслойный)
VCD 1.0/1.1/.0
CD с изображениями
DVCD
CDDA
МРЗ
CD-R
CD-RW
4119IM.indd 14 20.02.2008 15:16:09

15
ТИП DVD VCD SVCD CD
ФОРМАТ ЗАПИСИ MPEG MPEGI MPEG II DIGIT
ОБЪЕМ ДИСКА Односторонний,
однослойный
4,7 Гб - часа.
Двухслойный,
односторонний 8,5
Гб - 4 часа
Двухсторонний,
однослойный
9,4 Гб - 4,5 часа.
Двухсторонний,
двухслойный
17 Гб - 9 часов
650М 74 мин. 650M 45 мин. 650M 74 мин.
РАЗМЕР, см 1/8 1 1 1/8
ГОРИЗОНТАЛЬНОЕ
РАЗРЕШЕНИЕ
>500 линий >40 линий >50 линий -
СУБТИТРЫ до видов - 8 -
ЯЗЫК до 8 4 -
ОБОЗНАЧЕНИЕ
DVD-диски разных производителей имеют разные параметры, которые обозначаются следующими символами:
Dolby digital surround digital surroundsurround
Обычно изображение или музыка, записанная на DVD-диске, делится на несколько частей, каждая из которых называется «заголовок».
Минимальный фрагмент изображения или музыки на DVD-диске в пределах заголовка; обычно один заголовок состоит из одного и
более эпизодов (фрагментов), которые для облегчения поиска пронумерованы. Но на некоторых дисках эпизоды (фрагменты) могут
отсутствовать.
Часть изображения или музыки на диске SVCD, VCD или CD. Для облегчения поиска все треки пронумерованы.
Диски VCD, поддерживающие функцию контроля воспроизведения и содержащие динамическое и статическое изображение, делятся на
части, называемые сценами. Каждая сцена может быть легко найдена по номеру и может быть отображена на экране. Одна сцена обычно
состоит из одного или нескольких треков.
Во время воспроизведения диска SVCD или VCD на экране может быть отображено меню содержимого диска, которое называется
функцией контроля воспроизведения или функцией РВС.
4119IM.indd 15 20.02.2008 15:16:10

16
Тип диска Функции
Диски VCD, не поддерживающие функцию РВС
(версия 1.1) Воспроизведение как музыки (звука), так и изображения
Диски SVCD/VCD, поддерживающие функцию РВС
(версия .0)
Для воспроизведения изображения с VCD может использоваться меню, которое
отображается на экране
Примечание: если вы записываете диск, используя ПК, то даже если формат диска совместим, бывают случаи, когда диск не
воспроизводится из-за настроек программного обеспечения, которое использовалось при записи диска.
1. кнопка STANDBY/ON
. местоположение фотоприемника сигналов от пульта дистанционного управления
. лоток для дисков
4. ( ) – кнопка открытия/закрытия лотка диска (OPEN/CLOSE)
5. () – кнопка воспроизведения/приостановки (PLAY/PAUSE)
6. () – кнопка остановки воспроизведения (STOP)
7. ЖК дисплей
8. разъем для подключения микрофона
9. разъем для подключения USB-носителя (USB Flash Drive)
10. разъем для подключения карты памяти SD/MS/MMC Card
1. питание
. разъем HDMI
. разъемы компонентного видеовыхода (Y Cb/Pb Cr/Pr)
4. разъем коаксиального аудиовыхода (Coaxial)
5. разъем композитного видеовыхода (Video)
6. разъем видеовыхода S-Video
7. разъем оптического аудиовыхода (OPTICAL)
8. разъемы аудиовыхода 5.1СН
9. разъем SCART
4119IM.indd 16 20.02.2008 15:16:10

17
1. кнопка открытия/закрытия лотка диска (OPEN/CLOSE)
. кнопка переключения режимов видеовыхода (V. MODE)
. кнопка OSD (информация о диске)
4. кнопка POWER
5. цифровые кнопки
6. кнопка переключения систем цветности (PAL/NTSC)
7. кнопка отмены ввода (CLEAR)
8. кнопка режима программирования (PROG)
9. кнопки навигации курсора()
10. кнопка изменения масштаба (ZOOM)
11. кнопка перехода к предыдущему треку (PREV)
1. кнопка перехода к следующему треку (NEXT)
1. кнопка остановки воспроизведения (STOP)
14. кнопки регулировки уровня громкости (VOLUME +/-)
15. кнопка переключения типа носителя (DVD/USB/CARD)
16. кнопка включения ракурсов (ANGLE)
17. кнопка выключения звука MUTE
18. кнопка покадрового воспроизведения (STEP)
19. кнопка приостановки воспроизведения (PAUSE)
0. кнопка перемотки назад (F REV)
1. кнопка перемотки вперед (F FWD)
. кнопка замедленного воспроизведения (SLOW)
. кнопка воспроизведения/ввода ()
4. кнопка входа в меню настроек (SETUP)
5. кнопка повтора фрагмента (A-B RPT)
6. кнопка выбора режимов повтора (REPEAT)
7. кнопка входа в меню «Поиск» (SEARCH)
8. кнопка входа в меню содержимого диска (TITLE/PBC)
9. кнопка выбора субтитров (SUBTITLE)
0. кнопка выбора языка звукового сопровождения (AUDIO)
1. кнопка входа в меню (MENU)
• Вставьте батарейки в соответствующий отсек пульта дистанци-
онного управления.
• Извлеките батарейки, если вы не будете использовать пульт
длительное время.
• Своевременно заменяйте батарейки.
Внимание! Перед началом подключения DVD-плеера к другому
оборудованию убедитесь, что электропитание DVD-плеера и
другого оборудования отключено.
4119IM.indd 17 20.02.2008 15:16:10

18
Выберите наиболее подходящий из перечисленных ниже типов подключений, исходя из возможностей вашего телевизора.
(1) Композитный видеосигнал
Для просмотра изображений стандартного качества соедините разъем выхода композитного видеосигнала (VIDEO) вашего DVD-плеера
с соответствующим входом телевизора или монитора, используя один провод аудио/видеокабеля (A/V) с желтыми штекерами на концах,
входящего в комплект поставки.
() Разъем S-Video
Для просмотра изображений улучшенного качества соедините разъем S-VIDEO вашего DVD-плеера с соответствующим входным
разъемом на телевизоре или мониторе посредством кабеля S-Video (в комплект поставки не входит).
() Компонентный видеовыход
Для точной цветопередачи изображений высокого качества подключите разъемы выхода компонентного видеосигналаY Cb/Pb Cr/Pr
(красный/синий/зеленый) к входным разъемам на телевизоре или мониторе, используя соответствующий кабель (в комплект поставки не
входит).
(4) Разъем SCART
Для подключения разъема SCART DVD-плеера к такому же разъему на телевизоре или мониторе используется 1-контактный кабель
SCART (в комплект поставки не входит).
(5) Разъем HDMI
Для подключения разъема HDMI DVD-плеера к разъему HDMI телевизора используется специальный провод HDMI. При этом вы получаете
изображение высокой четкости (входит в комплект поставки).
• Одновременное подключение нескольких видеовыходов может ухудшить качество изображения.
• Хорошее изображение можно получить только при правильном подключении и корректной настройке системы.
Выберите наиболее подходящий из перечисленных ниже типов подключений, исходя из возможностей вашего телевизора
(1) Двухканальный аналоговый выход
Для подключения двухканального аналогового выхода используйте разъемы FR и FL 5.1 СН аналогового аудиовыхода (5.1 CH AUDIO OUT),
при этом переключите режим аудиовыхода в -канальный режим (см. «Страница настройки динамиков»).
() 5.1 СН Аналоговый аудиовыход
Для подключения пятиканального аудиовыхода (FL, FR, SL, SR, CENTER, SUB WOOFER) DVD-плеера к соответствующему пятиканальному
входу (5.1) усилителя мощности/ресивера используйте пары AV-кабелей.
() Коаксиальный цифровой аудиовыход
Для подключения разъема COAXIAL вашего DVD-плеера к соответствующему разъему на усилителе мощности используется специальный
коаксиальный кабель.
(4) Оптический цифровой выход
Для подключения разъема OPTICAL вашего DVD-плеера к оптическому разъему на усилителе мощности используется специальный
волоконно-оптический кабель.
4119IM.indd 18 20.02.2008 15:16:10

19
Примечание: параметры настройки должны соответствовать
разъему, через который DVD-плеер подключается к внешним
устройствам.
1. Включите телевизор и установите в его настройках соответству-
ющий тип входного сигнала.
Для входа в меню настроек системы нажмите кнопку SETUP. Для
выхода из меню снова нажмите SETUP.
. При помощи кнопок навигации () выберите одну из следую-
щих страниц: страница основных настроек, страница установок
звука, страница настроек видео, страница индивидуальных на-
строек, установка пароля.
. Нажмите кнопку (), чтобы войти в выбранную страницу.
4. При помощи кнопок () выберите пункт, который вы хотите из-
менить.
5. Нажмите кнопку () или (), чтобы войти в подпункт изменения
настройки. При помощи кнопок навигации () выберите нужное
значение () или (), чтобы подтвердить введенное значение и
вернуться к списку настроек.
Внимание! Некоторые пункты меню, соответствующие
предустановленным режимам, отмечены серым и не могут быть
выбраны.
Введенные установки сохраняются и после выключения питания.
4:/PS: когда DVD-плеер подключен к обычному телевизору,
широкоэкранное изображение воспроизводится на всем экране, но
часть его обрезается (4:).
4:/LB: когда DVD-плеер подключен к обычному телевизору,
широкоэкранное изображение воспроизводится так, что сверху и
снизу появляются черные полосы (4:).
Широкоэкр.: используйте этот пункт, если домашний кинотеатр
подключен к широкоэкранному телевизору (16:9).
Некоторые фильмы на DVD-дисках могут быть записаны под
разными ракурсами. Более подробную информацию о такой
возможности можно почерпнуть из аннотации к вашему DVD-диску.
Если режим включен, при воспроизведении DVD-диска,
записанного под разными ракурсами, на экране отображается
символ камеры.
Выбор языка экранного меню.
Эта функция не работает, если диск не имеет субтитров. Если
функция субтитров выключена, нажмите кнопку SUBTITLE на пульте
дистанционного управления для включения функции. Установка по
умолчанию – «ВКЛ.».
Если функция «Экранная заставка» включена, плеер включен, но
диск не воспроизводится в течение нескольких минут, то на экране
появляется движущаяся заставка и через 0 минут плеер переходит
в режим ожидания. Вы можете нажать кнопку STANDBY на пульте
дистанционного управления для выхода из режима ожидания.
Если эта функция включена, плеер запоминает момент времени
извлечения диска, и при следующей загрузке того же диска
воспроизведение начнется с момента извлечения диска.
•
•
Лев/Прав: оригинальный звук формата 5.1 CH передается только по
левому и правому каналам.
Стерео: оригинальный звук формата 5.1 CH передается в режиме
стерео.
Объемн. звуч.:создается эффект объемного звучания по двум
каналом.
5.1 канал: передача оригинального звука в формате 5.1 CH.
•
Если ваша акустическая система включает фронтальные,
центральные, тыловые колонки, сабвуфер, то вы можете установить
пункты меню в соответствии с реальной конфигурацией. Функция
не работает, если включена функция микширования (Лев/Прав,
Стерео, Объемн. Звуч.).
В режиме 5.1-канального звучания выберите «Вкл.» (включить
тестовый сигнал). Тестовый сигнал будет последовательно
воспроизводиться во всех шести каналах. Настройка с помощью
тестового сигнала должна выполняться при отсутствии диска в
лотке, и когда параметр МИКШИРОВАНИЕ установлен в положение
«5.1СН».
Используйте эту функцию, чтобы проверить все каналы звучания,
если вас не устраивает качество звука.
Сжатие динамического диапазона позволяет уменьшить
резкие перепады громкости звуковых эффектов. Вы можете
включить (Вкл.), выключить (Выкл.) компрессию или установить
автоматический режим (Авто). Функция не работает, если включен
режим 5.1К.
•
4119IM.indd 19 20.02.2008 15:16:13

0
-
Выкл. SPDIF: звук подается на выход устройства только в
аналоговом виде (5.1 CH AUDIO OUT).
SPDIF/RAW: цифровой выходной сигнал в оригинальном формате,
записанном на диске. SPDIF/PCM: цифровой выходной сигнал в
декодированном РСМ-формате.
-
Выберите настройку для аудиоформата: 48 К, 96 К.
•
-
Стерео: стереофонический выходной сигнал.
Левый моно: выходной сигнал левого канала.
Правый моно: выходной сигнал правого канала.
Смешанный моно: усредненный выходной сигнал левого и правого
каналов.
При просмотре ночью программ с высоким динамическим
диапазоном звука выбор этого режима позволит вам уменьшить
звук до очень низкого уровня (чтобы не беспокоить других членов
семьи) и в то же время сохранить качество и детали звукового
сопровождения.
•
Если предыдущие установки вас не устраивают, вы можете
установить расстояние до акустических систем в соответствии с
реальными условиями. Нажмите кнопки ()для выбора колонок, и
()для установки расстояния.
•
-
Имеется семь режимов работы эквалайзера. Вы можете выбрать
любой в соответствии с вашими предпочтениями и содержанием
просматриваемого диска.
-
Вкл. - соответствует усилению соответствующего частотного
диапазона звука.
•
Вы можете выбрать следующие параметры цифрового фильтра:
ВЫКЛ., 44.1 К, 88. К. По умолчанию фильтр выключен.
•
CVBS: установка композитного видеосигнала.
YUV: выберите этот режим при подключении через разъем Y Cb/Pb
Cr/Pr к компонентному разъему.
RGB: выберите этот режим при подключении через разъем SCART.
• вы можете включить или выключить
прогрессивную развертку, если выбран режим YUV.
• вы можете установить резкость, яркость,
контрастность, гамму, оттенок, насыщение, подстройку задержки
сигнала яркости (задержка свечения) в соответствии с вашими
предпочтениями.
•
Вы можете установить следующие параметры: HDMI (вкл./выкл.),
Разрешение.
4119IM.indd 20 20.02.2008 15:16:16
Table of contents
Languages:
Other Vitek DVD Player manuals

Vitek
Vitek VT-4119 SR User manual

Vitek
Vitek VT-4076 SR User manual

Vitek
Vitek VT-4014 SR User manual

Vitek
Vitek VT-4008 User manual

Vitek
Vitek VT-4106 SR User manual

Vitek
Vitek VT-4008 User manual

Vitek
Vitek VT-4010 User manual

Vitek
Vitek 4015 User manual

Vitek
Vitek VT-4101 BK User manual

Vitek
Vitek VT-4110 B User manual