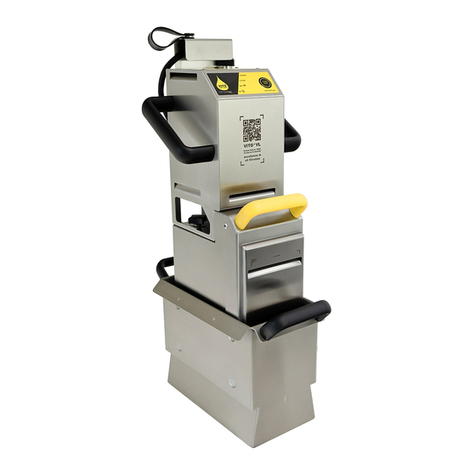
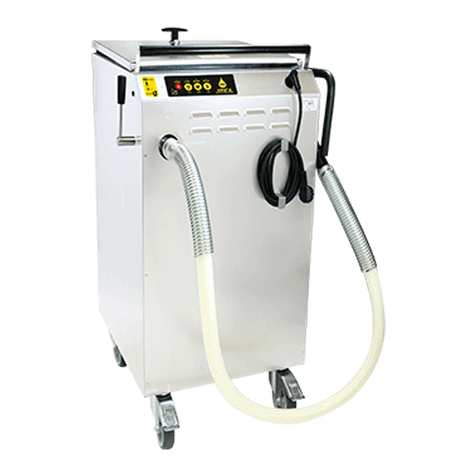
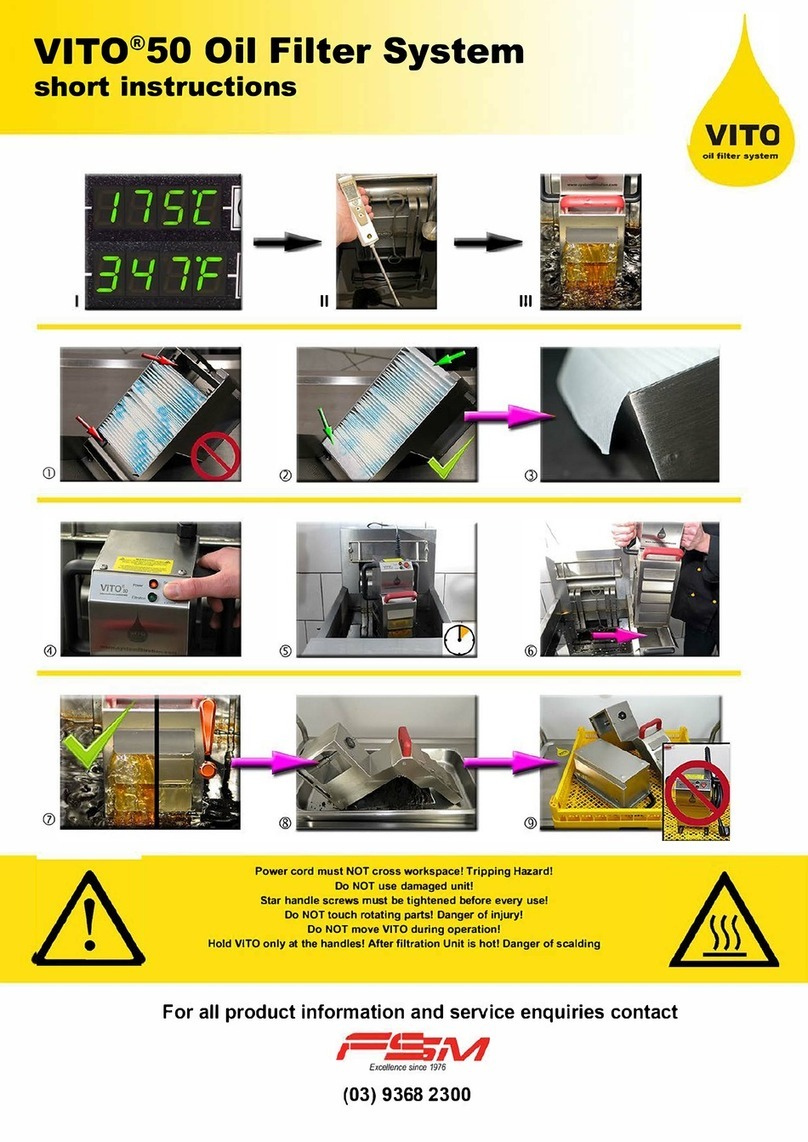
VITO 30 User manual

User Manual - Bedienungsanleitung
Manual de instrucciones - Manuale d‘instruzione
VITO 30 50 80
Manuel d‘utilisation


Contents
1. Product..........................................................................................................2
1.1 Product descripon.............................................................................................................2
1.2 Delivery contents ................................................................................................................2
2. Legal informaon...........................................................................................2
3. Preface ..........................................................................................................3
4. General notes ................................................................................................3
5. Safety informaon / symbol explanaon .......................................................3
6. VITO 30 / VITO 50 / VITO 80 usage.................................................................3
6.1 Designated use....................................................................................................................3
6.2 Non designated use ............................................................................................................3
7. Preparaon before use ..................................................................................4
7.1 Safety guidelines .................................................................................................................4
7.2 Storage of VITO ...................................................................................................................4
7.3 Filtraon duraon...............................................................................................................4
7.4 Checking the factory sengs..............................................................................................4
7.5 Programming the cycle me...............................................................................................4
7.6 Acvate / deacvate the beep and set sound level (VITO 80 only) ....................................4
8. Filtraon process...........................................................................................5
8.1 Requirements......................................................................................................................5
8.2 Operaon notes..................................................................................................................5
8.3 Starng the ltraon process .............................................................................................5
8.4 Finishing the ltraon process prematurely.......................................................................5
9. Safety funcons.............................................................................................5
9.1 Tilt and vibraon protecon (VITO 80 only)........................................................................5
9.2 Acousc signal (VITO 80 only).............................................................................................5
9.3 Temperature control ...........................................................................................................5
9.4 Memory ..............................................................................................................................6
10. Care and servicing........................................................................................6
10.1 Notes.................................................................................................................................6
10.2 Cleaning preparaon.........................................................................................................6
10.3 Manual cleaning................................................................................................................6
10.4 Machine cleaning..............................................................................................................6
11. Parcle lter change....................................................................................6
12. Accessories ..................................................................................................7
13. Waste disposal.............................................................................................8
13.1 Packaging disposal ............................................................................................................8
13.2 Filter disposal....................................................................................................................8
13.3 Device disposal .................................................................................................................8
13.4 WEEE (Waste Electrical and Electronic Equipment) Statement ........................................8
14. Storage recommendaons for parcle lters ...............................................8
15. Troubleshoong ..........................................................................................9
16. Technical data............................................................................................10
17. Declaraon of conformity ..........................................................................11
Page 1

1. Product
1.1 Product descripon 1.2 Delivery contents
1. Power indicator (red LED)
2. Filtraon indicator (green LED)
3. Push buon
4. Drip pan
5. Star handles (on both sides)
6. Control unit
7. Handles
8. Power cord
9. Pump-lter unit
10. Vent slots
11. Cable protecon
12. Control panel
• VITO oil lter system
• User manual
• Warranty card
• Quick guide
• Spare lters (11pcs.)
• Drip pan
13. Type label
2. Legal informaon
VITO AG
Eltastrasse 6
78532 Tulingen (Germany)
Phone: +49 (0) 7461 / 96289-0
Fax: +49 (0) 7461 / 96289-12
www.vito.ag
CEO:
Andreas Schmidt (MBA, Dipl.-Wirt.Ing)
Headqarter: Tulingen, Germany
Registry court: Stugart HRB 750227
In cooperaon with:
University Albstadt-Sigmaringen (Germany)
- Industrial engineering with business studies -
Jakobstrasse 1
72458 Albstadt (Germany)
Copyright © VITO AG
All rights reserved
This document is protected by copyright of VITO AG. Any repro-
ducon, in part or as a whole, without the wrien permission of
VITO AG is prohibited.
13
Control Panel - VITO
Pump-Filter unit - VITO 80
- Two inlay lters (removable)
2
1 3
VITO 30 VITO 50 VITO 80
11
10
7
6
10
5
9
4
12
7
8
9
5
6
4
8
11
12
13
8
11
12
10
7
6
10
5
9
4
13

3. Preface
Dear VITO customer,
thank you for choosing this product by VITO AG.
Please read the manual carefully to familiarize yourself with the handling of your VITO oil lter system to ensure
proper use. Your local dealer and the customer service are available to answer your quesons and provide sup-
port.
We are grateful for comments and suggesons concerning the VITO oil lter system and / or the manual. (Please
nd contact informaon contained in this manual.)
We hope that you enjoy your VITO oil lter system for a long me and increase the eciency in your estab-
lishment. With VITO you own a high-quality oil lter system from which you can expect a long life and ecient
support for your work.
4. General notes
These operaon instrucons contain important informaon about the handling of the VITO oil lter system. Read
this informaon carefully before using your VITO. Keep this manual available for more informaon.
VITO is an oil ltraon system, designed for the cleaning of frying oil / shortening. Frying will contaminate the
oil with burned parcles. With VITO, the oil can be cleaned directly in the fryer. Filtering with VITO prolongs the
lifeme of the oil. We recommend ltering with VITO once or twice a day.
The VITO parcle lter can be used several mes before changing. Once the oil stops owing through the front
vents, replace the lter. Used lters should be disposed according to local regulaons.
5. Safety informaon / symbol explanaon
Wrong treatment of the VITO can lead to dangers and injuries. The following should be observed. Possible dangers
are marked with these signs:
Warning
Danger of injury if this is not observed
Risk of electric shock
by incorrect use or case opening
Danger of slipping
if oil is spilled to the oor
Cauon
Important security p
Danger of burnings
for the user of VITO by incorrect
applicaon
Operaon instrucon
Informaon about the handling of
VITO oil lter system
6. VITO 30 / VITO 50 / VITO 80 usage
6.1 Designated use
• VITO is designed for use in commercial kitchens
• Follow the safety instrucons! Filtraon is only possible if the oil is liquid.
• VITO should only be used by suitably trained sta!
• VITO oil lter system is designed for intermient duty
6.2 Non designated use
The nonobservance of the contents described in the manual can lead to damage or malfuncon of VITO
• VITO is NOT approved for cleaning / ltering of liquids other than frying oil / shortening!
• Do NOT use or store VITO outside! It will be damaged by rain or humidity!
• VITO is NOT designed for connuous duty! Risk of overheang/re hazard!
• Do NOT cover vent slots (VITO 50 / VITO 80 ) (10)!
• Do NOT touch the power cord (8) with wet hands!
• Do NOT jam or bend the power cord (8)!
• The use of VITO is strictly prohibited for children!
• VITO must not be operated on a connecon other than protecon class I
No liability will be accepted for improper use!
Page 3

7. Preparaon before use
7.1 Safety guidelines
• Don’t plug the VITO machine when you get it immediately for the rst me wait unl VITO can acclimate
• BEFORE START WORKING WITH VITO YOU MUST TURN OFF THE FRYER.
• Clean VITO before using it the rst me. (See chapter 10 Care and servicing)
• Make sure that the local voltage is conform to the voltage on the type label (13)of VITO!
• DO NOT MOVE VITO WHILE FILTRATION IS IN PROGRESS!
• Do NOT get the power cord in contact with hot oil / shortening! (8)
• The maximum operang temperature is 175°C/350°F! (oil temperature)
• Do NOT run the pump-lter unit (9) outside the fryer!
• Pay aenon to heang elements, grids or thermal sensors in the fryer!
• To li or transport VITO only pick it up using the black handles (7)!
7.2 Storage of VITO
The handles of the drip pan (4) can be fastened oponally at the short or the long side.
• Place VITO always into the drip pan (4), aer use or for transport
• Store VITO only in the drip pan (4)
• Allowed ambient / storage temperature: +10 to +35°C (50° to 95°F)
7.3 Filtraon duraon
The factory sengs for one ltraon cycle of VITO is:
• VITO 30: 4,5 min, max. 3 cycles
• VITO 50: 4,5 min, max. 12 cycles
• VITO 80: 4,5 min, max. 12 cycles
Upon reaching the maximum number of cycles, VITO must cool down before used for the next ltraon.
Cool down phases
• up to 2 hours:
VITO 30
VITO 50 and VITO 80 (if power cord (8) is pulled out)
• approximately 15 min
VITO 50 and VITO 80 (if power cord (8) is plugged in)
If the temperature of VITO is too high, the overheat protecon will acvate.
(VITO 80 has addional acousc beep signal)
• Power Indicator (red LED) (1) “Power” is ashing.
• The ltraon process will stop.
7.4 Checking the factory sengs
Pressing the push buon (3) will be conrmed by one ash of the Power indicator (red LED) (1)
1. Press and hold the push buon (3)
2. Plug VITO in.
3. Hold the start/stop buon (3) for 5 seconds. (VITO 80 will beep)
4. Programmed cycle me is displayed by ashing of the indicators
5. The red LED (1) indicates 1 minute per ash
The green LED (2) indicates 30 seconds per ash
e.g. 4x red = 4 min
1x green = 30 seconds
= duraon of lter cycle: 4min 30sec.
7.5 Programming the cycle me
To re-program the cycle me, start with the steps in 7.4 checking the factory sengs, then:
1. Press push buon (3) instantly aer cycle length was displayed
2. Press push buon (3) to increase the cycle me by 30 sec. (Re-program starts at 0 sec!)
(e.g. press 3x for 1,5min etc.)
3. Once the designated cycle me is set, wait for the green LED (2) to ash once ( VITO 80 beeps).
4. Pull out the power cord (8).
The new cycle me is now saved.
7.6 Acvate/deacvate the beep and set sound level (VITO 80 only)
To set the sound level of the beep, start with the steps in 7.4 checking the factory sengs, then:

1. Aer the cycle me is displayed wait for the green LED (2) to ash (VITO 80 will beep addionally)
2. Set the beeper status using the push buon (3)
3. The indicators show the selected status:
Red LED (1) = beeper o
Green LED (2) = half volume
Red LED + green LED = full volume (1) + (2)
Pull out the power cord (8).
The new sengs are now saved.
8. Filtraon process
8.1 Requirements
VITO 30 / 50 / 80
• Insert parcle lter into the pump-lter unit (9) (See chapter 11 Parcle lter change.)
• Latch lter-lid
• Put control unit (6) on pump-lter unit (9)
• Tighten the star handles (5).
8.2 Operaon notes
• BEFORE START WORKING WITH VITO YOU MUST TURN OFF THE FRYER .
• Filtraon cycle can be stopped at any me by pressing push buon (3).
• Do NOT move VITO while ltraon is in progress!
• Only use VITO in a straight posion!
• The Power indicator (red LED) (1) and Filtraon indicator (green LED) (2) are lit during
ltraon process.
8.3 Starng the ltraon process
1. Turn o the fryer.
2. Take VITO out of the drip pan (4)
3. Make sure that the parcle lter is in the pump lter unit (9)
4. Put VITO into the fryer.
5. Ensure a secure standing (for holding brackets see chapter 12 Accessories)
6. Check the frying oil level
(The oil level must be between the MIN and MAX marking of the pump-lter unit (9)!)
7. Plug in VITO:
Power indicator (red LED) (1) is acve
Cooling fan is running (VITO50 / VITO 80)
8. Press push buon (3)
9. Filtraon indicator (green LED) (2) is lit during the ltraon.
8.4 Finish the process prematurely
1. Press push buon (3)
Filtraon indicator (green LED) (2) is o
2. Pull the power cord (8): VITO 30
Keep VITO 50 / VITO 80 plugged in!
3. Li VITO, let oil ow back in the fryer
4. Place VITO in the drip pan (4)
9. Safety funcons
9.1 Tilt and vibraon protecon (VITO 80 only)
If VITO 80 is lted more than 15°, topples over or vibrates too strong because of bad placement or
mechanical defect, the machine will switch o. Both indicators start ashing and a repeang beep will
be heard.
9.2 Acousc signal (VITO 80 only)
At the end of each cycle VITO 80 beeps for 5 seconds. VITO 80 will also beep if any error occurs.
9.3 Temperature control
If the temperature of the electrics is exceeded, VITO stops the ltraon.
The power indicator (red LED) (1) starts to ash and VITO 80 starts to beep connuous.
Page 5

VITO must be taken out of the fryer to conrm the error by pressing the push buon (3)
The power indicator (red LED) (1) will connue to ash unl VITO is cooled down.
Leave VITO 50 & VITO 80 plugged in. VITO is operaonal again aer approx. 15 min.
It takes up to 2.5 hours if VITO is unplugged.
If VITO takes too long to cool down aer a temperature based shutdown, the ambient temperature might
be too high or VITO was le in the fryer. VITO 80 will connue to beep every 40 seconds. Take VITO to a cool
place and plug it back in to allow the cooling fan to work.
Do NOT put VITO into a cold-storage room! Condensaon can destroy the electrics.
9.4 Memory
VITO records the operang mes and usage values. These values can be readout using the VITO Data Reader.
(see chapter 12 Accessories)
10. Care and servicing
10.1 Notes
• Clean pump-lter unit (9) at every parcle lter change
• Clean VITO only if cooled down
• Do NOT use abrasives
• Do NOT use wire brushes or similar tools
10.2 Cleaning preparaon
1. Make sure VITO is cooled down
2. Unfasten star handles (5) on both sides
3. Remove control unit (6) from pump-lter unit (9)
4. Open pump-lter unit (9)
5. Dispose parcle lter
6. Manual or machine cleaning
10.3 Manual cleaning
1. Clean control unit (6) only with damp cloth!
2. DON’T put VITO under running water! This can destroy the electrics!
3. If strong dirt then deep clean (boil-out) / Clean the pump-lter unit (9) with soap sud.
4. Dry VITO with a towel.
10.4 Machine cleaning
1. Clean control unit (6) only with a
damp cloth! Do NOT put the electrical
unit (6) into a dishwasher!
This will destroy the electrics
2. Put pump-lter unit (9) and the drip pan (4)
into the dishwasher. Start the cleaning program.
11. Parcle lter change
Change the parcle lter only if necessary. The me of change is based on usage of VITO and the
degree of polluon of the frying oil.
Pay aenon to the cleaning eciency and the spill of oil coming out of the pump-lter unit. (9)
Change the parcle lter only at a low ltraon performance.
Normal ow Low ow

12. Accessories
Addional accessories for your VITO are available:
Spare lters for VITO
bundle size: 1 box (100 or 50 pcs.)
lter area: VITO 30: 0.17 m² (1.82 ²) / VITO 50/80: 0.26 m² (2.77 ²)
material: rayon, cellulose
mesh size: nom. 20 µm / e. 5 μm
FDA conformity: yes
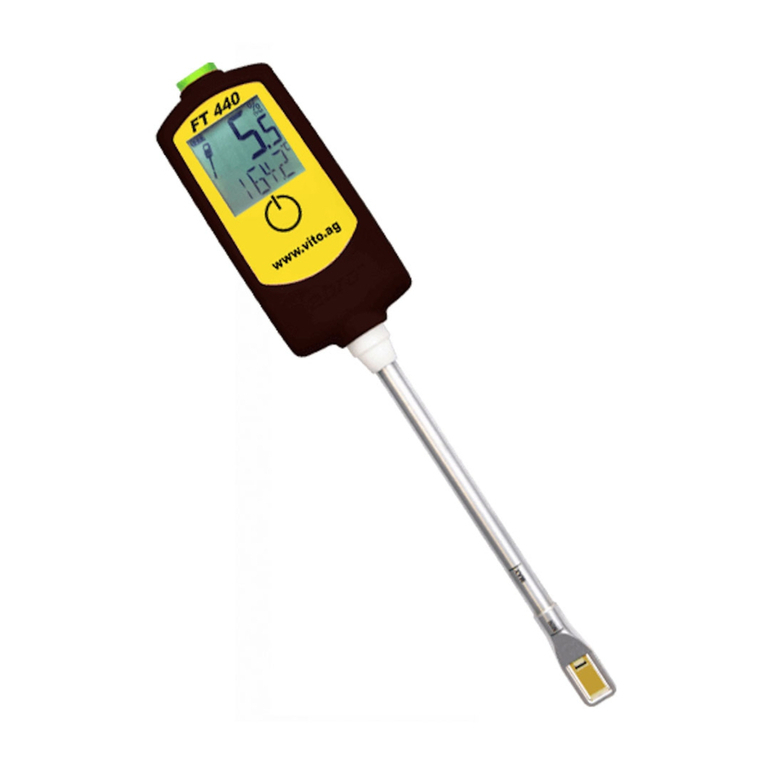
VITO oiltester
Checks TPM of your oil
Prevents changing oil too early
Ensures high quality
Quick temperature check
Holding Brackets
Keep VITO in secure standing
Customisable for any fryer
Reduce vibraon
Wall Bracket
Store VITO on the wall next to the fryer
Data Reader
Readout the usage informaon of VITO
Check the use of VITO according to HACCP
Need anything else?
Contact us for other soluons. Our customer support will gladly assist you with all quesons.
FT 440:
Checks TPM of your oil
Prevents changing oil too early
Ensures high quality
Quick temperature check
Clip-on frame:
To hang VITO in the fryer
Page 7
Do not leave gaps between
the lter and the edges of
the pump-lter unit (9)
Overlap the last fold on both
sides of the pump-lter unit
(9)

13. Waste disposal
13.1 Packaging disposal
• The packaging should be recycled
or
• Keep the packaging carefully
13.2 Filter disposal
• Used lters must be disposed in the country-specic way
13.3 Device disposal
If VITO reaches the end of life it must be disposed accordingly.
This disposal is handled by VITO AG as dened by law.
Send VITO to:
VITO AG
Eltastrasse 6
78532 Tulingen (Germany)
For further quesons please contact your local dealer or the VITO AG customer support
13.4 WEEE (Waste Electrical and Electronic Equipment) Statement
To protect the global environment and as an environmentalist, VITO AG must remind you that: Under the
European Union (“EU“) Direcve on Waste Electrical and Electronic Equipment, Direcve 2012/19/EU, which
takes eect on February 14 , 2014, products of “electrical and electronic equipment“ cannot be discarded as
municipal waste anymore and manufacturers of covered electronic equipment will be obligated to take back
such products at the end of their useful life. VITO AG will comply with the product take back requirements at
the end of life of VITO-branded products that are sold into the EU. You can return these products to local
collecon points.
14. Storage recommendaons for parcle lters
During storage do not expose the parcle lters to extreme temperature or humidity, for example near a heat source, air condi-
oning or direct sunlight. Heat and cold have a negave eect on the properes of the parcle lter, especially aer removing or
opening the bag packaging.
The parcle lter must not be exposed to frost, as this can cause damage to the microstructure of the lter, which impairs the func-
onality of the parcle lter.
• Store dry at 60-65% relave humidity
• Room temperature 24°C ± 5°C (78°F ± 40°F)
• Do NOT put weight on pallets
• Avoid sudden temperature changes
• Store in the cardboard packaging in sealed bag
• Maximum height of the lter stack 185cm (6 )
Under observance of the above condions, the storage period will be 3 years.

15. Troubleshoong
Malfuncon Possible cause Remedial acon
Power indicator (1) stays inacve • Power cord (8) not plugged in
• Power cord (8) / connector is
defecve
• Plug in VITO
• Please contact service
VITO makes loud noises at
ltraon
• Star handles (5) are too loose
• Rotor scratches on the fryer
• Rotor defecve
• Tighten star handles (5)
• Alter posion of VITO in the
fryer
• Please contact service
Power indicator (1) ashes and/or
acousc indicator is beeping (VITO
80 beeps addionally)
• overheang protecon is
acvated
• let the device cool down
Power indicator (1) and ltraon in-
dicator (2) ashing (VITO 80 beeps
addionally)
• VITO is lted more than 15°
• Strong vibraons
• Check posion of VITO
• Check posion of VITO
• defecve turning part
VITO cannot be started • Control unit (6) defecve • Please contact service
Line fuse / Ground fault circuit
interrupter (GFCI) blowout
• Net protecon or other electron-
ic components are blocking
• Rotor defecve
• Circuit overloaded
• Change power outlet, elec.
circuit
• Please contact service
• Change power outlet, elec.
circuit
Low ltraon performance • Parcle lter is full
• Pump pipe is blocked
• Motor is defecve
• Change lter
• Empty pump-lter unit (9)
• Deep clean (boil-out)
• Please contact service
Oil splashes at sides / on top • Parcle lter blocked
• Too much space between lter
lid and pump lter unit (9)
• Filter is inserted incorrectly
• Change lter / clean unit
• Adjust lter sealing sheet
• Insert lter correctly
LEDs ash 10 sec. aer plugging in • Push buon (3) is defecve
• Control unit (6) wet inside
• Please contact service
• Let it dry
Should other issues appear, get in contact with the customer support or your local dealer!
Contact details on page 2 chapter Legal informaon.
Page 9

16. Technical data
VITO 30 VITO 50 VITO 80
Nominal voltage according to
country, see type sign
220 to 240 VAC ±10%
50 to 60Hz
100 to 120 VAC ±10%
50 to 60Hz
220 to 240 VAC ±10%
50 to 60Hz
100 to 120 VAC ±10%
50 to 60Hz
220 to 240 VAC ±10%
50 to 60Hz
100 to 120 VAC ±10%
50 to 60Hz
Nominal current
under load
Approx 1,1 A at 230 V
Approx 2,2 A at 115 V
Approx 1,2 A at 230 V
Approx 2,4 A at 115 V
Approx 2,0 A at 230 V
Approx 4,0 A at 115 V
Max. power / Nominal Power 300 W / 253W 300 W / 276 W 500 W / 460 W
Noise level < 85db < 85db < 85db
User control push buon (3)
Temperatures in use Control unit (6) up to max. 75°C (167°F)
pump-lter unit (9) up to max. 200°C/392°F (short me)
pump-lter unit (9) up to max. 180°C/356°F (permanent)
(recommended frying temperature max. 175°C/347°F)
Storage temperatures 10°C/50°F to max. 30°C/86°F (At higher temperature less cycles)
Weight VITO : 6,3 kg (13,9 lbs) VITO : 7,7 kg (17 lbs) VITO : 9.3kg (20.3 lbs)
Acousc signal no no yes
Taking parcles 0.9kg / 2 lbs 1.3kg / 2,9lbs 2.5kg / 5.5lbs
Applicaon Ideal for 1-3 fryers up to
12l / 22lbs
Ideal for 1-4 fryers up to
20l / 37lbs
Ideal for all gas or
electrical fryers
Filter Folds: 30
Material: pulp, cellulose
FDA-CFR 21
Folds: 44
Material: pulp, cellulose
FDA-CFR 21
Folds: 44
Material: pulp, cellulose
FDA-CFR 21
Operaon Intermient operaon
Dimensions
227mm/8.9in
104mm/4.1in
176mm/6.9in
216mm/8.5in
304mm/12.0in
356mm/14.0in
345mm/13.6in
387mm/15.2in
320mm/12.6in
234mm/9.2in
191mm/7.5in
149mm/5.8in
275mm/10.8in
385mm/15.2in
398mm/15.7in
426mm/16.8in
280mm/11.0in
212mm/8.3in
487mm/19.2in
509mm/20.0in
550mm/21.7in
185mm/7.3in
233mm/9.2in
324mm/12.8in
112mm/4.4in
116mm/4.6in
155mm/6.1in
116mm/4.6in
155mm/6.1in
195mm/7.7in
210mm/8.3in
161mm/6.3in
116mm/4.6in
VITO 80VITO 50VITO 30

17. Declaraon of conformity
Issued by VITO AG | Eltastrasse 6 78532 Tulingen (Germany) | Phone:+49 (0) 7461 / 96289-0
Fax : +49 (0) 7461 / 96289-12 | Email: info@vito.ag - www.vito.ag
for the products VITO 30, VITO50, VITO80 EU Patent No. 1326692 U.S. Patent No. US7.052.605.B2
The professional oil and fat ltraon equipment is manufactured and tested according to the following
standards:
For the purposes of the EU direcves :
- 2006/42/EG Machinery Direcve
- 2014/30/EU Electromagnec Compability
- 2014/35/EU Low Voltage Direcve
- 2011/65/EU Restricon of use of certain hazardous substances in electrical and electronic equipment
- 2003/10/EC Minimum requirements to protect the safety and health of workers
- 2012/19 EU Waste Electrical and Electronic Equipment
The risks from physical eects (noise) ,The ltraon devices of the X-series meet the relevant
community harmonizaon legislaon of the european union.
- EN 61000-6-1: 2007 Immunity
- EN 61000-6-2: 2005 Immunity
- EN 61000-6-3: 2007 + A1: 2011 Emission
- EN 61000-6-4: 2007 + A1: 2011 Emission
- DIN 18876: 2018-06 Commercial kitchen equipment - Portable non-integrated oil / grease ltraon equipment - Requirements and tesng
with German, European and Internaonal (Non-European) standards
German Standard DIN EN European Standard EN Internaonal Standard IEC (IEC/CISPR)
DIN EN 61000-6-1:2007-10 based on EN 61000-6-1:2007 based on IEC 61000-6-1:2005
DIN EN 61000-6-2:2006-03 based on EN 61000-6-2:2005 based on IEC 61000-6-2:2005
DIN EN 61000-6-3:2011-09 based on EN 61000-6-3:2011-09 based on IEC 61000-6-3:2006 + A1:2010
DIN EN 61000-6-4:2011-09 based on EN 61000-6-4:2011-09 based on IEC 61000-6-4:2006 + A1:2010
DIN EN 61000-3-2:2010-03 based on EN 61000-3-2:2010-03 based on IEC 61000-3-2:2005 + A1:2008 + A2:2009
DIN EN 61000-3-3:2014-03 based on EN 61000-3-3:2014-03 based on IEC 61000-3-2:2005 + A1:2008 + A2:2009
DIN EN 60335-1:2014-11 based on EN 60335-1:2014-11 based on IEC 60335-1:2010
DIN EN 12100:2011-03 based on EN 12100:2011-03 based on ISO 12100:2011-03
DIN EN 60204-1/A1 based on EN 60204-1/A1 based on IEC 60204-1:2005+AMD1:2008 CSV
DIN EN 55014-1:2012-05 based on EN 55014-1:2012-05 based on CISPR 14-1:2005 + A1:2008 + Cor. :2009 +
A2:2011
DIN EN 55014-2:2016-01 based on EN 55014-2:2016-01 based on CISPR 14-2:2015
- - (EG) Nr. 2023/2006 - -
- - (EG) Nr. 1935/2004 - -
DIN EN 10088-1 - -- -
DIN 18876 A1 - -- -
DIN 18876 A2 - -- -
DIN 18876 A3 - -- -
DIN EN 50396 - -- -
DIN EN 61003-2 - -- -
DIN EN 61000-3-3 - -- -
DIN EN 10095 - -- -
DIN EN 10269 - -- -
DIN EN 10302 - --
89/109/EWG - -- -
EGV 1935/2004 - -- -
80/590/EWG - -- -
DIN EN 82079-1 - -- -
ProdSG - -- -
LFGB - -- -
DGUV-Regel 110-002 - -
Tulingen, 2018
Andreas Schmidt
CEO
VITO AG
Page 11


Inhalt
1. Produkt ...................................................................................................... 2
1.1 Produktbeschreibung .......................................................................................................... 2
1.2 Lieferumfang ....................................................................................................................... 2
2. Rechtliche Hinweise.................................................................................... 2
3. Vorwort...................................................................................................... 3
4. Allgemeine Hinweise .................................................................................. 3
5. Sicherheitshinweise / Symbolerklärung ...................................................... 3
6. VITO 30/VITO 50/VITO 80 Nutzung ............................................................. 3
6.1 Besmmungsgemäßer Gebrauch ........................................................................................ 3
6.2 Nicht besmmungsgemäßer Gebrauch............................................................................... 3
7. Vor Inbetriebnahme ................................................................................... 4
7.1 Sicherheitshinweise............................................................................................................. 4
7.2 Auewahrung von VITO ..................................................................................................... 4
7.3 Filtraonsdauer ................................................................................................................... 4
7.4 Überprüfung der Werkseinstellungen................................................................................. 4
7.5 Programmieren der Zykluszeit............................................................................................. 4
7.6 Akvieren/Deakvieren des akusschen Signals (nur VITO 80).......................................... 4
8. Filtraonsvorgang....................................................................................... 5
8.1 Voraussetzungen ................................................................................................................. 5
8.2 Hinweise zum Betrieb.......................................................................................................... 5
8.3 Filtraonsvorgang starten.................................................................................................... 5
8.4 Filtraon vorzeig abbrechen.............................................................................................. 5
9. Sicherheitsfunkonen................................................................................. 5
9.1 Umkipp- und Vibraonsschutz (nur VITO 80)...................................................................... 5
9.2 Akussches Signal (nur VITO 80) ......................................................................................... 5
9.3 Temperaturkontrolle............................................................................................................ 5
9.4 Speicherung......................................................................................................................... 6
10. Pege und Wartung.................................................................................. 6
10.1 Hinweise............................................................................................................................ 6
10.2 Reinigung vorbereiten....................................................................................................... 6
10.3 Manuelle Reinigung........................................................................................................... 6
10.4 Maschinelle Reinigung....................................................................................................... 6
11. Parkellterwechsel ................................................................................. 6
12. Accessoires ............................................................................................... 7
13. Entsorgung ............................................................................................... 8
13.1 Entsorgung der Verpackung .............................................................................................. 8
13.2 Entsorgung der Filter......................................................................................................... 8
13.3 Entsorgung der Altgeräte .................................................................................................. 8
13.4 WEEE (Waste Electrical and Electronic Equipment) Richtlinie........................................... 8
14. Lagerungsempfehlung für Parkellter ..................................................... 8
15. Fehlerbehebung........................................................................................ 9
16. Technische Daten.................................................................................... 10
17. Konformitätserklärung............................................................................ 11
Page 1

1. Produkt
1.1 Produktbeschreibung 1.2 Lieferumfang
1. Poweranzeige (rote LED)
2. Filteranzeige (grüne LED)
3. Start / Stop Taster
4. Auangwanne
5. Sterngri-
schrauben (auf beiden Seiten)
6. Steuerungseinheit
7. Haltegri
8. Netzkabel
9. Pump-Filtereinheit
10. Lüungsschlitze
11. Kabelschutz
12. Folientastatur
13. Typenschild
• VITO Frieröllter
• Benutzerhandbuch
• Garanekarte
• Kurzanleitung
• Ersatzlter (11 Stück)
• Auangwanne
VITO AG
Eltastrasse 6
78532 Tulingen (Deutschland)
Tel.: +49 (0) 7461 / 96289-0
Fax: +49 (0) 7461 / 96289-12
www.vito.ag
CEO:
Andreas Schmidt (MBA, Dipl.-Wirt.Ing)
Hauptsitz: Tulingen, Deutschland
Reg. Gericht: Stugart HRB-750227
In Kooperaon mit:
Hochschule Albstadt-Sigmaringen
- Wirtschasingenieurwesen -
Jakobstrasse 1
72458 Albstadt
Copyright © VITO AG
Alle Rechte vorbehalten
Dieses Dokument unterliegt dem Urheberrecht der Firma VITO
AG. Ohne vorherige schriliche Genehmigung der Firma VITO
AG darf das Dokument, oder Teile davon weder vervielfälgt,
noch in Widerspruch zu deren berechgten Interessen verwen-
det werden. Änderungen im Sinne des technischen Fortschris
sind vorbehalten.
Pump-Filtereinheit - VITO 80
Folientastatur - VITO
- Zwei Bypasslter (herausnehmbar)
2. Rechtliche Hinweise
13
11
10
7
6
10
5
9
4
12
7
8
9
5
6
4
8
11
12
13
8
11
12
10
7
6
10
5
9
4
13
VITO 30 VITO 50 VITO 80
2
1 3

3. Vorwort
Sehr geehrter VITO Kunde,
vielen Dank, dass Sie sich für ein Produkt aus dem Hause VITO AG entschieden haben.
Bie lesen Sie das Benutzerhandbuch aufmerksam durch, um einen sicheren Einsatz und ein opmales Filtraons-
ergebnis zu erreichen. Bei Fragen steht Ihnen Ihr Händler oder der Kundenservice gern zur Verfügung. Wir sind
dankbar für Anregungen und Vorschlägen zu VITO Frieröllter und/oder zum Benutzerhandbuch. (Siehe hierzu
auch die Kontaknformaonen.) Wir hoen, dass Sie lange Zeit viel Freude an Ihrem VITO Frieröllter haben
und die Ezienz in Ihrem Betrieb steigern. Mit VITO sind Sie im Besitz eines hochwergen Frierölltraons-
systemes von dem Sie eine lange Produkt - Lebensdauer und eziente Unterstützung bei Ihrer Arbeit erwarten
können.
4. Allgemeine Hinweise
Diese Bedienungsanleitung enthält wichge Informaonen über die Eigenschaen und die Anwendung von VITO
Frieröllter. Lesen Sie dieses Dokument aufmerksam durch und machen Sie sich mit der Bedienung von VITO
vor dem Einsatz vertraut. Bewahren Sie dieses Handbuch stets griereit auf, um bei Bedarf schnell nachschlagen
zu können. VITO ist ein Frierölltraonssystem. Es dient zur Reinigung von gebrauchtem Frieröl. Nach dem
Friervorgang ist das Öl mit Fremdparkeln der zubereiteten Speisen belastet. Mit VITO kann das Öl direkt in der
Frieuse bei Betriebstemperatur gereinigt werden. Das Filtern mit VITO verlängert die Lebenszeit des Frieröls.
Wir empfehlen die Filtraon mit VITO ein- oder zweimal am Tag. Der VITO Parkellter kann mehrfach benutzt
werden, bevor er gewechselt werden muss. Sobald das Öl nicht mehr durch die vorderen Auslässe der Filterein-
heit ießt, muss der Parkellter getauscht werden. Gebrauchte Filter sollten den örtlichen Besmmungen gemäß
entsorgt werden.
5. Sicherheitshinweise / Symbolerklärung
Fehlerhae Bedienung des VITO kann zu Gefahren und Verletzungen führen. Folgendes sollte beachtet werden.
Mögliche Gefahren sind mit diesen Symbolen markiert:
Warnung
Verletzungsgefahr bei Nichtbeachtung
Stromschlaggefahr
durch fehlerhae Handhabung oder
Önen des Gehäuses
Rutschgefahr
Verunreinigung auf dem Boden möglich
Vorsicht
wichger Sicherheitshinweis
Verbrennungsgefahr
durch fehlerhae Bedienung von VITO
Bedienungshinweis
Informaonen zur Bedienung von VITO
6. VITO 30/VITO 50/VITO 80 Nutzung
6.1 Besmmungsgemäßer Gebrauch
• VITO ist für den kommerziellen Einsatz in der Gastronomie konzipiert
• Beachten Sie die Sicherheitshinweise. Die Filtraon ist nur möglich, wenn das Öl üssig ist
• VITO sollte nur von entsprechend geschultem Personal verwendet werden
• VITO ist für den Aussetzbetrieb ausgelegt
6.2 Nicht besmmungsgemäßer Gebrauch
Die Nichtbeachtung der folgenden Fälle kann zur Beschädigung und Fehlfunkon von VITO führen.
• VITO ist NICHT für die Filtraon von anderen Flüssigkeiten als Frieröl zugelassen!
• Benutzen oder lagern Sie VITO NICHT im Freien! Beschädigung durch Regen und Feuchgkeit.
• VITO ist NICHT für den Dauerbetrieb ausgelegt! Überhitzungs- / Brandgefahr
• Die Lüungsschlitze (10) NICHT abdecken (VITO 50 / VITO 80)
• Das Netzkabel (8) NICHT mit nassen Händen anfassen!
• Das Netzkabel (8) NICHT einklemmen oder knicken!
• Kindern ist der Gebrauch von VITO strengstens untersagt!
• VITO darf nur an einer Schutzklasse I Verbindung betrieben werden (mit Schutzleiterkontakt).
Bei unsachgemäßem Gebrauch wird keine Haung übernommen!
Page 3

7. Vor Inbetriebnahme
7.1 Sicherheitshinweise
• Vor der Erstbenutzung VITO reinigen. (Siehe Kapitel 10 Pege und Wartung)
• Stellen Sie sicher, dass die örtliche Netzspannung mit der Spannung auf dem Typenschild (13)übereinsmmt.
• Lassen Sie das Netzkabel (8) NICHT in Kontakt mit heißem Öl oder sonsgen heißen Gegenständen kommen!
• Die maximale Betriebstemperatur beträgt 175°C (Öltemperatur)
• Pump-Filtereinheit (9) NICHT trocken laufen lassen!
• Auf Heizstäbe, Gier oder Thermofühler der Frieuse achten!
• VITO nur an den schwarzen Haltegrien (7) tragen
7.2 Auewahrung von VITO
Die Grie der Auangwanne (4) können wahlweise an Schmal- oder Längsseite befesgt werden.
• VITO nach Gebrauch oder zum Transport immer in die Auangwanne (4) stellen
• VITO nur in der Auangwanne (4) lagern
• Zulässige Umgebungstemperatur: +10 bis +35°C
7.3 Filtraonsdauer
Die Werkseinstellungen der Filtraonszeit von VITO sind
• VITO 30: 4,5 min, max. 3 Zyklen
• VITO 50: 4,5 min, max. 12 Zyklen
• VITO 80: 4,5 min, max. 12 Zyklen
Nach Erreichen der maximalen Anzahl von Zyklen muss VITO abkühlen, bevor die Filtraon fortgesetzt werden kann.
Abkühlphasen
• Bis zu 2 Stunden:
VITO 30
VITO 50 und VITO 80 (wenn Netzkabel (8) gezogen ist)
• Ca. 15 min:
VITO 50 und VITO 80 (wenn Netzkabel (8) eingesteckt ist)
Wenn die Temperatur von VITO zu hoch ist, akviert sich der Thermoschutz selbstständig.
(VITO 80 hat ein zusätzliches akussches Signal)
• Rote LED (1) blinkt.
• Der laufende Filtraonsprozess wird abgebrochen
7.4 Überprüfung der Werkseinstellungen
Jedes Betägen des Druckknopfes (3) wird durch ein Blinken der roten LED (1) bestägt
1. Drücken und halten Sie den Druckknopf (3)
2. Stecken Sie VITO ein.
3. Halten Sie den Druckknopf (3) für 5 Sekunden. ( VITO 80 gibt ein akussches Signal)
4. Die programmierte Zykluszeit wird durch Blinken der Anzeigen dargestellt.
5. Die rote LED (1) zeigt 1 Minute pro Blinken
6. Die grüne LED (2) zeigt 30 Sekunden pro Blinken
z.B.: 3x rot = 3 min
1x grün = 30 Sekunden
= Zykluszeit: 3min. 30sec.
7.5 Programmieren der Zykluszeit
Um die Zykluszeit neu einzustellen folgen Sie den Schrien in Kapitel 7.4 Überprüfung der Werkseinstellungen, dann:
1. Drücken Sie den Druckknopf (3) sofort nachdem die Zykluszeit angezeigt wurde.
2. Drücken Sie den Druckknopf (3) um die Zykluszeit um 30 Sekunden zum verlängern (startet bei 0 Sek.!)
(z.B. 3x drücken für 1,5min etc.)
3. Wenn die gewünschte Zykluszeit eingestellt ist, warten Sie bis die grüne LED (2) kurz aueuchtet ( VITO 80 zusätzliches Signal).
4. Ziehen Sie das Netzkabel (8)
Die neue Zykluszeit ist jetzt eingestellt.
7.6 Akvieren/Deakvieren des akusschen Signals und Einstellen der Lautstärke (nur VITO 80)
Um die Lautstärke des Signals einzustellen folgen Sie den Anweisungen in Kapitel 7.4 Überprüfung der Werkseinstellungen, dann:
1. Nachdem die Zykluszeit angezeigt, bzw. eingestellt wurde, warten Sie bis die grüne LED (2) kurz aueuchtet (VITO 80 gibt
zusätzlich ein akussches Signal)

2. Benutzen Sie den Druckknopf (3) um das Signal einzustellen
Die Anzeigen stellen den Status dar:
rote LED (1) = Ton aus
grüne LED (2) = halbe Lautstärke
rote LED (1) + grüne LED (2) = volle Lautstärke
3. Ziehen Sie das Netzkabel (8)
Die neue Lautstärkeeinstellung ist jetzt eingestellt.
8. Filtraonsvorgang
8.1 Voraussetzungen
VITO 30 / 50 / 80
• Iegen Sie den Parkellter in die Pump-Filtereinheit (9) ein (siehe Kapitel 11 Parkellterwechsel).
• Schließen Sie den Filterdeckel.
• Setzen Sie die Steuerungseinheit (6) auf die Pump-Filtereinheit (9).
• Ziehen Sie die Sterngrischrauben (5) an.
8.2 Hinweise zum Betrieb
• Filtraonsvorgang kann jederzeit durch drücken des Druckknopfes (3) unterbrochen werden.
• VITO während der Filtraon NICHT bewegen!
• VITO nicht schräg stehend betreiben!
• Die rote LED (1) und grüne LED (2) leuchten während des Betriebs.
8.3 Filtraonsvorgang starten
1. Stellen Sie sicher, dass sich ein Parkellter in der Pump-Filtereinheit (9) bendet.
2. VITO aus der Auangwanne (4) nehmen
3. Stellen Sie VITO in die Frieuse.
4. Festen Stand sicherstellen (für Haltewinkel siehe Kapitel 12 Zubehör)
5. Frierölpegel prüfen (Der Ölpegel muss zwischen der MIN und MAX Markierung auf der Pump-Filtereinheit
(9) liegen!)
6. Stecken Sie VITO ein
rote LED (1) leuchtet
Kühlungsvenlator läu (VITO50 / VITO 80)
7. Betägen Sie den Druckknopf (3)
8. grüne LED (2) leuchtet während der Filtraon.
8.4 Filtraon vorzeig abbrechen
1. Betägen Sie den Druckknopf (3)
grüne LED (2) geht aus
2. Ziehen Sie das Netzkabel (8): VITO 30
Lassen Sie VITO 50 / VITO 80 eingesteckt!
3. Heben Sie VITO an und lassen das Restöl in die Frieuse ießen
4. Platzieren Sie VITO in der Auangwanne (4)
9. Sicherheitsfunkonen
9.1 Umkipp- und Vibraonsschutz (nur VITO 80)
Wird VITO 80 mehr als 15° gekippt platziert, fällt um oder vibriert auf Grund falscher Platzierung oder eines Defek-
tes zu stark, schaltet sich das Gerät selbstständig ab. Die Bereitschasanzeige (rote LED) und die Filtraonsanzeige
(grüne LED) blinken und ein sich wiederholendes Tonsignal ertönt.
9.2 Akussches Signal (nur VITO 80)
Am Ende jedes Filtraonszyklus’ ertönt ein 5 Sekunden langes Tonsignal.
9.3 Temperatur Kontrolle
Bei Überhitzung stoppt VITO den Filtraonsvorgang.
Die rote LED (1) blinkt und VITO 80 gibt zusätzlich ein akussches Signal aus.
VITO muss aus der Frieuse genommen und der Fehler durch Bestägen des Druckknopfes (3) bestägt werden.
Die rote LED (1) blinkt, bis VITO abgekühlt ist.
Lassen Sie VITO 50 & VITO 80 eingesteckt, dadurch ist VITO nach etwa 15 min wieder einsatzbereit.
Es dauert bis zu 2,5 Stunden, wenn VITO ausgesteckt ist
Page 5

Sollte VITO zu lange zum Abkühlen benögen, nach einer temperatur- bedingten Abschaltung, ist möglicherweise die Umgebungs-
temperatur zu hoch oder VITO wurde in der Frieuse vergessen. VITO 80 gibt alle 40 Sekunden zusätzlich ein akussches Signal,
sollte die Abkühlung nicht erfolgen. Stellen Sie VITO an einen kühleren Platz und stecken ihn ein, sodass der Kühllüer läu.
Stellen Sie VITO NICHT in das Kühlhaus/Kühlschrank! Kondenswasser zerstört die Elektronik des Gerätes!
9.4 Speicherung
VITO speichert Laufzeit und Benutzungsdaten. Diese Werte können mit dem VITO data reader ausgelesen werden. (siehe Kapitel 12
Zubehör)
10. Pege und Wartung
10.1 Hinweise
• Reinigen Sie die Pump-Filtereinheit (9) bei jedem Wechsel des Parkellters
• Reinigen Sie VITO nur im kalten Zustand
• Benutzen Sie KEINE Scheuermiel
• Benutzen Sie KEINE Drahtbürste oder Ähnliches
10.2 Reinigung vorbereiten
1. Sicherstellen, dass VITO abgekühlt ist.
2. Sterngrischrauben (5) lösen (beidseig)
3. Steuerungseinheit (6) von der Pump-Filtereinheit (9) lösen
4. Pump-Filtereinheit (9) önen
5. Parkellter entsorgen
6. Manuelle oder maschinelle Reinigung
10.3 Manuelle Reinigung
1. Steuerungseinheit (6) nur mit einem feuchten Tuch reinigen!
KEIN ießendes Wasser! Dies zerstört die Elektronik des Gerätes!
2. Grundreinigung bei starker Verschmutzung / Reinigung der Pump Filtereinheit (9) mit Seifenlauge.
3. VITO mit einem Tuch abtrocknen
10.4 Maschinelle Reinigung
1. Steuerungseinheit (6) nur mit einem feuchten Tuch
reinigen! Die Steuerungseinheit (6) NIE in die
Spülmaschine geben! Dies würde die Elektronik
zerstören
2. Pump-Filtereinheit (9) und Auangwanne (4) in
die Spülmaschine geben.
3. Reinigungsprogramm starten.
11. Parkellterwechsel
Parkellter nur bei Bedarf wechseln. Der Wechselzyklus richtet sich nach dem Gebrauch von VITO und dem Verschmutzungsgrad
des Frieröls.
Achten Sie auf die Reinigungsleistung und die Austrismenge des Öls aus der Pump-Filtereinheit.
Wechseln Sie den Parkellter nur bei einer geringen Filtraonsleistung
Normal Zu wenig
This manual suits for next models
2
Table of contents
Languages:
Other VITO Water Filtration System manuals
Popular Water Filtration System manuals by other brands
RephiLe
RephiLe RephiSolo P Pack installation guide

Water Filters Australia
Water Filters Australia K-C-ECOINLINE owner's manual
Watts
Watts WM-120-PT Installation and operation manual
Hozelock Cyprio
Hozelock Cyprio BIOFORCE REVOLUTION 12000 manual
VT
VT PF 6000 User instructions
filtreau
filtreau UVC COMPACT 16W manual

Beko
Beko CLEARPOINT V Installation and operation manual

LAMA
LAMA Mini One user guide

WaterChef
WaterChef Countertop C7000 Installation, use & care guide

Gespasa
Gespasa FG-150 instruction manual

Yamato
Yamato Pure Line WL320A instruction manual
Metro Water Filter of the South
Metro Water Filter of the South 5600 Servicing instructions
