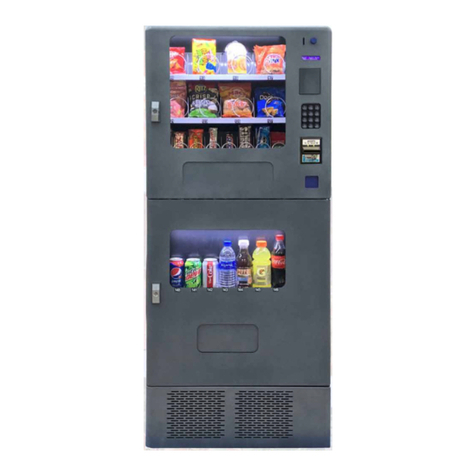
VKI Technologies Eccellenza Momentum User manual

April 3, 2019
VKI Publication #202377-001
Operation Manual

Momentum
Operation Manual
VKI Publication #202377-001
2
Carefully read this instruction manual before proceeding with the installation and operation
of this equipment. Keep this manual in a safe place for future reference.
Disclaimer:
Although the utmost care was taken putting together this publication, VKI Technologies accepts no liability for inaccuracies or omissions to this
publication. VKI Technologies is not responsible for misinterpretation of any information contained in this publication. VKI Technologies is not
responsible for injuries or damages resulting from incorrect or improper use of this equipment, unauthorized modifications to the equipment,
the use of non-original replacement components in the equipment, or improper installation of the equipment.
Copyright:
VKI Technologies © 2019
The information and contents of this publication are property of VKI Technologies. No part of this publication can be reproduced, reused,
modified or published in any format without the written permission of VKI Technologies.
VKI Technologies reserves the right to change the specifications to the equipment, and to modify the information contained in this publication
at any time and without prior notification to the purchaser of this equipment. All rights are reserved.
To view and download other equipment documentation, visit the "Documentation" section of our web
site at the following URL: http://www.vkitech.com/documentation.html
Contact Information:
VKI Technologies
3200 2e rue,
St-Hubert, Québec,
Canada, J3Y 8Y7
Phone
Local: 450-676-0504
Customer Service: 1-800-567-2951
Technical Support: 1-888-854-0207
Fax: 1-800-567-7776
Web Site
www.vkitech.com
Email
Customer Service: customer.service@vkitech.com
Technical Support: tech.support@vkitech.com

Table of Contents
Eccellenza Momentum
VKI Publication #202377-001
3
Table of Contents
Section 1 - Safety Information & Equipment Specifications .................................................... 7
Safety Symbols ...................................................................................................................................... 7
Important Safeguards and Precautions ................................................................................................ 8
Specifications ......................................................................................................................................10
Capacities............................................................................................................................................10
Equipment Dimensions ....................................................................................................................... 10
Installation Dimensions.......................................................................................................................10
Section 2 - Setting up the Equipment ................................................................................... 11
Unpacking ........................................................................................................................................... 11
Unlocking the Front Door and the Waste Bin .....................................................................................13
Cup Detection...................................................................................................................................... 13
Equipment Overview – Exterior........................................................................................................... 14
Equipment Overview - Interior............................................................................................................14
Installation Precautions ...................................................................................................................... 15
Water Connection ...............................................................................................................................15
Water Filter ......................................................................................................................................... 16
Starting the Equipment.......................................................................................................................16
Service Power Switch......................................................................................................................16
The Touch Screen ................................................................................................................................17
Selecting and Dispensing a Beverage..............................................................................................17
Filling the Coffee Bean Dispensers ......................................................................................................18
Filling the Powder Dispensers ............................................................................................................. 19
Setting the Cup Stand Overflow Detection ......................................................................................... 20
Installing a Cup Stand Drain................................................................................................................ 20
Checking Water Temperature.............................................................................................................21
Initial Adjustments ..............................................................................................................................21
Change PINs for the Operator and Administrator .......................................................................... 21
Setting the Date and Time ..............................................................................................................21
Water Levels ...................................................................................................................................21
Gram Throws................................................................................................................................... 21
Beverages........................................................................................................................................21
Notifications....................................................................................................................................21
Clearing Error and Reminder Messages.............................................................................................. 22
System Status Report Screen .............................................................................................................. 23
Section 3 - Configuring the Equipment ................................................................................. 25
Accessing the Configuration System................................................................................................... 25
Programming Menu Structure ............................................................................................................ 27
Menu Drop-List Overview...............................................................................................................27
Sub-Menu Tabs ...............................................................................................................................28
Exiting the Setup .............................................................................................................................28
Dashboard........................................................................................................................................... 29
Counters.......................................................................................................................................... 29
Beverages Tab.................................................................................................................................31
Ingredients Tab ...............................................................................................................................34
Emailing Data or Saving it to a USB Flash Drive .............................................................................. 34

Table of Contents
Operation Manual
VKI Publication #202377-001
4
System Status......................................................................................................................................35
Current Status .................................................................................................................................35
Fault Codes......................................................................................................................................36
Logs ................................................................................................................................................. 37
System Info ..................................................................................................................................... 37
Event Deactivation.......................................................................................................................... 38
General Settings..................................................................................................................................40
Installation ...................................................................................................................................... 40
Waste Management (Waste Chute) ...........................................................................................40
Cup Detection .............................................................................................................................40
Regional ..........................................................................................................................................40
Language ..................................................................................................................................... 40
Units of Measure.........................................................................................................................41
Date and Time.............................................................................................................................42
Auto Rinsing ....................................................................................................................................43
Counter Trigger ...........................................................................................................................43
Periodic Trigger ........................................................................................................................... 44
Power Settings ....................................................................................................................................45
Auto Dim Delay ...............................................................................................................................45
Energy Saving .................................................................................................................................. 46
Vending (Cashless Pay) ....................................................................................................................... 50
General Tab.....................................................................................................................................50
Beverages Tab.................................................................................................................................51
Setting the Base Price ..................................................................................................................... 52
Adjusting the Price for Exceptions ..................................................................................................54
Pricing Hot Water............................................................................................................................55
Network ..............................................................................................................................................56
WIFI .................................................................................................................................................56
SMTP ............................................................................................................................................... 59
Notifications....................................................................................................................................60
Telemetry........................................................................................................................................63
Setup ................................................................................................................................................... 64
Hoppers...........................................................................................................................................64
Beverages........................................................................................................................................64
Cup Size and Strength .................................................................................................................64
Disabling Beverages ........................................................................................................................65
Setting the Default Coffee Blend ....................................................................................................66
Configuring the Carafe....................................................................................................................66
Ingredients ......................................................................................................................................67
Recipes ............................................................................................................................................70
Setting Coffees ............................................................................................................................70
Gourmet Mode ...........................................................................................................................74
Setting Specialty Beverages ........................................................................................................75
Disabling “Press & Hold” Hot Water ...........................................................................................77
Restore Defaults.......................................................................................................................... 78
Water ..............................................................................................................................................79
Brewing ...........................................................................................................................................84
Water Temperature ....................................................................................................................85

Table of Contents
Eccellenza Momentum
VKI Publication #202377-001
5
Security................................................................................................................................................86
Administrator..................................................................................................................................87
Operator.......................................................................................................................................... 89
Maintenance .......................................................................................................................................91
Operations Menu............................................................................................................................91
Powder Rinse .............................................................................................................................. 91
Brewer Rinse ...............................................................................................................................91
Wiper Home Position..................................................................................................................92
Remove Filter ..............................................................................................................................92
Calibrate Powder Level ...............................................................................................................92
Manual Activation...........................................................................................................................93
Coffee System .............................................................................................................................93
Powder System ...........................................................................................................................96
Water System..............................................................................................................................97
Miscellaneous Components........................................................................................................98
Multimedia..........................................................................................................................................99
Beverages........................................................................................................................................99
Sleep Screen.................................................................................................................................. 100
Section 4 - Care and Maintenance...................................................................................... 101
Daily Care..........................................................................................................................................101
Every 1-2 Weeks................................................................................................................................ 101
Every 15,000 Cycles or 12 Months ....................................................................................................101
Every 3 Years.....................................................................................................................................102
Miscellaneous ................................................................................................................................... 102
Section 5 - Error and Reminder Messages .......................................................................... 103
Main Screen ...................................................................................................................................... 103
System Status Screen ........................................................................................................................104
Section 6 - Updating Firmware........................................................................................... 109
Section 7 - Installing the Card Reader Option ..................................................................... 111
Section 8 - Product Warranty Information.......................................................................... 117

Table of Contents
Operation Manual
VKI Publication #202377-001
6

Section 1 - Safety Information & Equipment Specifications
Eccellenza Momentum
VKI Publication #202377-001
7
SECTION 1
Safety Information & Equipment Specifications
Your safety is extremely important to us. To avoid personal injury or damage to the equipment
and its surrounding areas, it is imperative that you read and understand the safety information
outlined in this section before proceeding with the installation and operation of this equipment.
Safety Symbols
The following symbols are used throughout this publication:
Indicates an electrical shock hazard.
Indicates a potential safety risk, or a risk of damage to equipment and/or its
surroundings.
Indicates important information that must be understood before proceeding.
Indicates an important note or useful tip.

Section 1 - Safety Information & Equipment Specifications
Operation Manual
VKI Publication #202377-001
8
Important Safeguards and Precautions
This equipment is designed for indoor use ONLY and must never be installed outdoors.
This equipment requires a 120-Volt 20-Amp wall outlet like the one shown below:
The installation of this equipment must comply with all municipal, state/provincial, and
federal electrical and plumbing codes.
Installation and servicing of this equipment must only be performed by qualified
personnel. Do not attempt to install or service this equipment if you are not qualified as
it may result in personal injury. There are no user-serviceable parts inside the
equipment.
Do not use an electrical extension cord or power bar.
This equipment must be installed in a location with an ambient temperature between
5°C-35°C (40°F-95°F).
The main water supply pressure must be between a minimum of 20psi and a maximum
of 100psi.
This equipment must be positioned so that the wall plug and the main power switch are
both easily accessible.
Do not connect this equipment to a voltage supply other than the voltage indicated on
the serial number decal.
Do not immerse this equipment, or any part of this equipment, in liquid.
Do not install the equipment in an area where water spray is present.
This equipment must be installed securely on a level surface. If it does not appear to be
a stable location, select another installation location.
Leave a minimum of 2" (5cm) of space all around this equipment for proper ventilation.
Keep hands clear of the dispensing area at the front of this equipment. Liquids being
dispensed are extremely hot and can cause severe burns.
Never disconnect this equipment from the wall outlet by pulling on the service cord,
and never use this equipment if the service cord is damaged.

Section 1 - Safety Information & Equipment Specifications
Eccellenza Momentum
VKI Publication #202377-001
9
If the service cord is damaged, it must be replaced with a new service cord that is
available from your distributor or the manufacturer of this equipment.
Never circumvent the safety features incorporated into the equipment. They are there
for your protection and should never be disabled or bypassed under any
circumstances.
Always switch the power off and disconnect the service cord when cleaning the interior
of this equipment. Components inside this equipment can cause electrical shock
resulting in personal injury.
Use caution when servicing the water tank or any of its components - the water in the
tank and the tank components may be extremely hot and can cause severe burns.
Use caution when working inside this equipment as there may be sharp edges on some
components that can cause cuts.
To prevent electrical shock, remove all jewelry (rings, watches, etc.) when servicing this
equipment.
Use only original equipment manufacturer replacement parts. Unapproved
replacement parts can result in personal injury, fire and/or further damage to the
equipment.
Do not allow children to access this equipment. They are not aware of the potential
dangers that exist.
Never use ammonia-based cleaners on the surfaces of this equipment as they will
become discolored and/or damaged permanently. Use mild cleaning products, such as
dish soap.
Do not lean on, push or shake the equipment as there is a risk that it can tip or fall, or
cause water to overflow and contact electrical components creating a shock hazard.
Do not operate the equipment with the rear panel removed.
Unauthorized modifications made to this equipment
can result in serious
personal injury and/or damage to the equipment and its surroundings (including
a risk of fire), and voids all warranties and safety certifications/listings.

Section 1 - Safety Information & Equipment Specifications
Operation Manual
VKI Publication #202377-001
10
Specifications
Voltage Rating
120 Volts AC @ 60hz (120 Volt Model) – 20 Amp Plug
Plug/Outlet
Nema 5 – 20P
Heater Wattage
1700 Watts
Total Wattage
1800 Watts
Weight
130 lbs (59 kg)
Cup Sizes
3 cup sizes (from 6-oz to 32-oz), plus Carafe Option (64-oz)
Temperature
Control
Electronic Probe
Heating Time
30 minutes after power up
Brew Temperature
198°F (92°C)
Heater Protection
Yes
Overflow Protection
Yes
Backflow Prevention
Yes
Circuit Protection
Yes
Screen Size
18.5”
Certifications &
Listings
Capacities
Coffee Hopper 1
6 lbs (2.72 kg)Position 1: 1 lb (0.45 kg) Position 2: 2 lbs (0.9 kg)
Coffee Hopper 3
3 lbs (1.36 kg) Position 1: 0.5 lb (0.22 kg) Position 2: 1 lb (0.45 kg)
Coffee Hopper 2
6 lbs (2.72 kg) Position 1: 1 lb (0.45 kg) Position 2: 2 lbs (0.9 kg)
Powder Hopper 1
4 lbs (1.8 kg)
Powder Hopper 2
4 lbs (1.8 kg )
Powder Hopper 3
3.5 lbs (1.6 kg)
Water Tank
2 gallons (7.6 litres)
Waste Bin
Approximately 50 cups (12-oz)
Equipment Dimensions
Height:
35.0" (89 cm)
Width:
20.5” (52 cm) with door closed
24.0" (61 cm) with door open
Depth:
27.0" (69 cm) with drip tray
24.5” (62 cm) without drip tray
Installation Dimensions
Height:
42.0"(107 cm)
Width:
26.0" (66 cm)
Depth:
29.0"(74 cm)
Any references made in this manual to coffee blends, powder products and
beverages are for example purposes only. The actual products used in the
equipment may differ from the examples used in this manual.

Section 2 - Setting Up the Equipment
Eccellenza Momentum
VKI Publication #202377-001
11
SECTION 2
Setting up the Equipment
Unpacking
Prior to signing for the delivery, check the shipping carton for damage.
Indicate any damage on the delivery slip and have the delivery driver sign to
acknowledge the damage. Damages during shipping must be claimed with
the carrier, and not with VKI Technologies.
1. Cut the straps on the outside of the box (A).
2. Lift the top carton (B).
3. Remove the two side foam supports and remove the cup stand assembly secured
between them (C).

Section 2 - Setting Up the Equipment
Operation Manual
VKI Publication #202377-001
12
4. Remove the front and rear foam supports (C).
Do not discard the front foam support as it must be installed over the machine’s
screen to protect it during transport.
5. With the help of a colleague, lift the coffee maker off the base of the packaging (D) and
place it onto a workbench or cabinet. Do not attempt to lift the machine by yourself.
DO NOT lift the coffee maker by placing your hand underneath the front
door. It is not designed to support the weight of the machine, and serious
personal injury and/or damage to the unit may occur.
6. Remove the keys and the Telemetry Antenna from the cup stand. Install the telemetry
antenna to the round connector at the top right corner on the rear of the machine.
7. Slide the residue chute into the slots at the bottom of the machine.
8. Remove the blue shipping tape and protective film from the outside of the machine
and from the stainless steel drip tray grill.
Keep all packaging material in case the equipment must be transported or
shipped. When transporting the unit for installation, leave it on the base of
the packaging to reduce the risk of damage to the levelers.

Section 2 - Setting Up the Equipment
Eccellenza Momentum
VKI Publication #202377-001
13
Unlocking the Front Door and the Waste Bin
The Eccellenza Momentum uses a multi-position lock to lock the waste bin in place and to lock
the front door.
To lock both the front door and the waste bin, insert the key and turn it to position 1.
While in this position (with everything locked), the key can be removed from the lock.
To unlock the waste bin without unlocking the front door of the machine, insert the key
and turn it to position 2, as shown. If the key is removed while in position 2, the waste
bin will remain unlocked so that anyone can empty the waste bin. If the machine is
installed in a public location, we recommend removing the key in position 1, to leave the
waste bin locked.
To unlock both the front door and the waste bin, insert the key and turn it to position 3.
When the key is in this position, it cannot be removed from the lock.
Cup Detection
The Eccellenza Momentum is equipped with a cup detection system, which is activated by
default. If a cup is not detected on the cup stand, it is not possible to dispense a beverage. For
more information about enabling or disabling the cup detection system, go to page 40.

Section 2 - Setting Up the Equipment
Operation Manual
VKI Publication #202377-001
14
Equipment Overview – Exterior
Equipment Overview - Interior
Coffee
Dispensers
Powder
Dispensers
18” LCD Touch
Screen
Waste Bin (for
used grounds)
Installation
Location of
Optional Card
Reader
Cup Stand / Drip
Tray
Flip-Down Cup
Stand
Coffee
Dispensers
Powder
Dispensers
Brewer
Coffee Bean
Grinder
Cup Stand / Drip
Tray
Door
Powder
Whippers
Flip-Down Cup
Stand
Cup
Detectors

Section 2 - Setting Up the Equipment
Eccellenza Momentum
VKI Publication #202377-001
15
Installation Precautions
This equipment is designed for indoor use only and must never be installed
outdoors.
Avoid using extension cords and power bars when connecting this equipment
to a power source.
Installation of this equipment must comply with all local, state/provincial and
federal codes and regulations. It is the sole responsibility of the installer to
research and to comply with these codes and regulations.
This equipment must be installed on a dedicated 20 amp outlet. Do not
install other equipment on the same outlet/circuit.
Ensure that the equipment is level and stable. This is done by adjusting the
levelers (legs) at the bottom of the machine. Also, do not block any of the
equipment's ventilation ports.
Leave room at the rear of the equipment for the plumbing fitting and water
hose, as well as for adequate ventilation.
Leave ample room above the equipment to open and fill the product
hoppers.
Water Connection
Installation of this equipment must comply with all local, state/provincial
and federal codes and regulations. It is the sole responsibility of the installer
to research and to comply with these codes and regulations.
Accessibility to shut-off valve(s) must be provided and explained to customer
in the event water supply to brewing equipment must be shut off.
For multi-unit locations whereby the main water conduit is supplying water to
more than one unit (including water coolers), a separate in-line shut off valve
must be installed onto each individual equipment unit.
The Eccellenza Momentum is factory-equipped with an integrated backflow
prevention check valve. An additional external backflow prevention system is
not necessary.

Section 2 - Setting Up the Equipment
Operation Manual
VKI Publication #202377-001
16
Water Filter
We recommend the use of a high quality water filter which eliminates most odors present in
water, and reduces the amount of particles entering the water tank.
When installing a water filter, refer to the water filter manufacturer's installation instructions.
When the filter is installed or replaced, make sure to write the installation
date in the provided area on the filter cartridge. Always follow the
manufacturer’s recommendations for filter replacement intervals.
Starting the Equipment
The main power switch for the Momentum is located at the rear of the machine, on the right
side. To switch the power ON, toggle the power switch to the " l " position.
The Eccellenza Momentum now goes through a quick initialization process, after which, it is
ready to be used.
Service Power Switch
The Eccellenza Momentum is also equipped with a secondary power switch (Service Switch)
inside the machine, to the left of the coffee dispenser. This switch can be used to shut off the
machine power should the main power switch be inaccessible.

Section 2 - Setting Up the Equipment
Eccellenza Momentum
VKI Publication #202377-001
17
The Touch Screen
Available beverage list
Hot Water option
Vending price and credit information (if applicable)
Language selection and ADA access
Notifications
Shows currently selected beverage
Coffee blend selections
Cup size and coffee strength selection area
Start button - begins beverage preparation cycle
Back to main sceen
Selecting and Dispensing a Beverage
1. Place your cup or mug on the cup stand at the bottom of the door and select the type of
beverage desired.
2. Select the coffee type for the beverage that was initially selected.
3. Chose the cup size and the strength (if applicable) for the beverage that you selected.
4. Make your payment (if the Momentum is in vending mode).
5. Press the 'POUR'button to begin the beverage preparation cycle.
6. Remove your cup or mug, and enjoy your delicious beverage!

Section 2 - Setting Up the Equipment
Operation Manual
VKI Publication #202377-001
18
Filling the Coffee Bean Dispensers
The Momentum comes pre-configured as follows:
Coffee 1 – French Roast, Coffee 3 – Decaf, Coffee 2 – Colombian
Should you prefer a different configuration, you can reconfigure the coffee
blend names it in the 'Setup' menu (see page 67).
Do NOT pack the coffee beans into the dispensers!
1. Unlock and lift the coffee lid
2. Fill the dispensers with the desired coffee beans.
3. Close and lock the coffee lid.
If the dispensers are completely empty, you need to make a few vends until
the dispensers are properly primed.
Any ingredient references made in this manual are for example purposes
only. The actual products used in the equipment may differ from the
examples used in this manual.
Coffee 1 Coffee 3Coffee 2

Section 2 - Setting Up the Equipment
Eccellenza Momentum
VKI Publication #202377-001
19
Filling the Powder Dispensers
The Momentum comes pre-configured as follows:
Powder 1 – Hot Chocolate
Powder 2 – French Vanilla
Powder 3 – Milk*
Do NOT pack the powder into the dispensers!
*Do NOT use coffee whitener instead of milk as it may create blockages in
the whipper system!
To fill the powder dispensers, unlock and lift the main powder lid, remove the individual lid and
fill the respective dispenser with the desired powder product. Once filled, re-install the
individual lid back onto the dispenser and proceed to the next dispenser, if required.
If the dispensers are completely empty, you'll need to make a few vends until
the dispensers are properly primed. During this time, you may notice
dispenser-related errors on the screen - these errors will clear automatically
once the dispenser is primed.
Any ingredient references made in this manual are for example purposes
only. The actual products used in the equipment may differ from the
examples used in this manual.
1
2
3

Section 2 - Setting Up the Equipment
Operation Manual
VKI Publication #202377-001
20
Setting the Cup Stand Overflow Detection
By default, the overflow detection for the cup stand is set at approximately 8-oz. This means
that when 8-oz of liquid have accumulated in the cup stand, the “Empty Cup Stand” message
appears on the screen. By adjusting the position of one of the cup stand overflow sensors, you
can increase the amount of liquid in the cup stand to 24-oz before the “Empty Cup Stand”
message appears.
Installing a Cup Stand Drain
Alternatively, you can drill open the drain fitting at the rear of the cup stand to install a drain
hose that can be routed either into a large waste bin under the cabinet (easily done if a waste
chute system is used) or into an actual drain.
Other manuals for Eccellenza Momentum
1
Table of contents