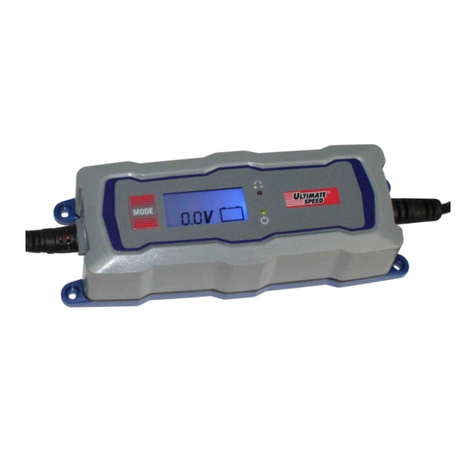
Volt Polska 12 8A User manual

1
Automatic Battery Charger
12/24V 8A
SAVE THESE INSTRUCTIONS
This manual contains important safety and operating instruction. To reduce the risk of injury, please read all instructions and follow them with
each use of this product.
IMPORTANT SAFETY INSTRUCTIONS
WARNING - BURST HAZARD
Do not use the unit for charging dry-cell batteries that are commonly used with home appliances. These batteries may burst and cause injury to
persons and damage property. Use the unit for charging/boosting a LEAD-ACID battery only.
WARNING - SHOCK HAZARD
• Do not operate unit with damaged cord or plug; or if the unit has received a sharp blow, been dropped, or otherwise damaged in any way. Do not
disassemble the unit; incorrect reassembly may result in a risk of electric shock or fire.
• NEVER submerge this unit in water; do not expose it to rain, snow or use when wet.
• To reduce risk of electric shock, disconnect the unit from any power source before attempting maintenance or cleaning.
WARNING - RISK OF EXPLOSIVE GASES:
• Working in the vicinity of a lead acid battery is dangerous. Batteries generate explosive gases during normal battery operation. Forthis reason, it
is of the utmost importance that each time before using the charger you read this manual and follow instructions exactly.
• To reduce the risk of battery explosion, follow these instructions and those published by the battery manufacturer and manufacturer of any
equipment you intend to use in the vicinity of the battery.
• This equipment employs parts that produce arcs or sparks. Therefore, if used in a garage or enclosed area, the unit MUST be placed not less
than 18 inches above the floor.
• THIS UNIT IS NOT FOR USE BY CHILDREN AND SHOULD ONLY BE OPERATED BY ADULTS.
CAUTION - TO REDUCE THE RISK OF INJURY OR PROPERTY DAMAGE:
• Pull cord by plug rather than cord when disconnecting the unit from the power source.
• NEVER ATTEMPT TO JUMP-START OR CHARGE A FROZEN BATTERY.
• When working with lead acid batteries, always make sure immediate assistance is available in case of accident or emergency.
• Always have protective eyewear when using this product: contact with battery acid may cause blindness and/or severe burns. Be aware of first aid
procedures in case of accidental contact with battery acid.
• Have plenty of fresh water and soap nearby in case battery acid contacts skin.
• If battery acid contacts skin or clothing, wash immediately with soap and water for at least 10 minutes and get medical attention immediately.
• Never smoke or allow a spark or flame in vicinity of vehicle battery, engine or battery charger.
• Remove personal metal items such as rings, bracelets, necklaces and watches when working with a lead acid battery. A lead acid battery can
produce a short circuit current high enough to weld a ring, or the like of a metal, causing a severe burn.
• Never allow battery acid to come in contact with this unit.
• Do not operate this unit in a closed area or restrict ventilation in any way.

2
• FIRST AID –SKIN:
If battery acid comes in contact with skin, rinse immediately with water, and then wash thoroughly with soap and water. If redness, pain, or
irritation occurs, seek immediate medical attention.
• FIRST AID –EYES:
If battery acid comes in contact with eyes, flush eyes immediately, for a minimum of 15 minutes and seek immediate medical attention.
PRODUCT FEATURES
•Using state of the art technology, the charger with 6 steps enables the re-charging of Batteries to almost 100% of their original capacity.
•Automatically diagnose, recover, charge and maintain batteries for months, fully automatic operation from Charge to Maintenance modes.
•Six output options are available - 28.8V, 29.4V, 14.4V, 14.7V, 13.6V Supply and 16V Boost.
•It features a 9-Stage charging strategy, i.e. Pulse Charge, 6A, 4A, 3A, 2.5A, 1.5A, Boost Charge, Maintenance & Power Supply.
•Supplied with two detachable and interchangeable color coded lead sets one with clamps for bench charging and one with eyelet terminals
for permanent attachment to the battery posts to allow quick connection/disconnection through connector.
•No risk of over charging
•Electronically safe against user error
•Spark proof
•Over heat protection
•Full protected against short circuit and wrong connections
•Works as power generator ( 13.6V/4A)
•Boosts deep discharged batteries (4.5V)
OPERATION INSTRUCTIONS
1. Connecting the terminal rings/clamps directly to the corresponding connectors on the battery posts.
Note:
Make sure correct polarity connection before plugging in theAC power.
•Position the RED terminal on the POSITIVE post connector
•Position the BLACK terminal on the NEGATIVE post connector
2. Connect the AC power cord with the AC power outlet.
•The Power LED indicator turns on after the connection.
•The charger will automatically select the right voltage according to the battery voltage type and the corresponding LED indicator will turn on.
14.4V/6A
14.7V/6A
28.8V/3A
29.4V/3A
(Press Mode button to select *for charging in cold conditions and AGM batteries)
•The Error LED indicator will turn on for incorrect polarity/Faulty.
Reverse polarity hook up
ON
Bad batteries cannot be recharged
Flashing for 12V batteries
Flashing for 24V batteries
•Rated maximum 6A charging current for 12V batteries;

3
•Rated maximum 3A charging current for 24V batteries;
•Charging status LED indicators to display the battery charging level.
3. Disconnect theAC power cord from theAC power outlet when fully charged. Then disconnect the connection with the battery.
Note:
•ALWAYS disconnect theAC power cord from theAC power outlet before connecting (or disconnecting) the charger to (or from) the battery.
CHARGING PHASES
1. Diagnosis & Recovery
As soon as charging instruction is given to the charger, the unique function automatically checks status of battery (detects voltage). If a deeply
discharged battery's voltage is over 4.5V ± 0.5V (for 12V battery) or 16V ± 0.25V (for 24V battery), charger begins charging with 1.5A low
current to recover it, which terminates when voltage reaches to 10.5V ± 0.25V for (12V battery) or 21V ± 0.25V (for 24V battery) at the
beginning of the process, the charger skips low current charging and it switches over to charging mode.
2. Bulk Charging
80% of energy is returned in this phase of charging. Here charger performs in multi-stages:
•For 24V battery
a) High Rate Charging: Charger delivers constant current of 3.0Auntil the voltage reaches to 25.6V
b) Medium Rate Charging: Charger delivers constant current of 2.5A until the voltage reaches to 28.2V at which point the charger switches to
Absorption phase
•For 12V battery
a) High Rate Charging: Charger delivers constant current of 6.0A until the voltage reaches to 12.8V.
b) Medium Rate Charging: Charger delivers constant current of 4.0A until the voltage reaches to 13.9V, at this level constant current is 3.0A
until voltage reaches to 14.0V. Finally charger delivers 2.5A current until voltage reaches to 14.1V at which point the charger switches to
Absorption phase. Since current is not delivered at highest constant level, the charger will minimize the heating up of the battery, and hence will
eliminate the build up of gases. This ensures more efficient and safer performances.
3. Absorption
Use of a constant high current for extended periods of time risks gassing the battery, therefore a constant low charging current is given at 1.5A
to raise voltage from 28.2V to 28.8V (for 24V battery) and 14.1V to 14.4V (for 12V battery). In this phase complete charging up to almost 100%
is achieved. Charger switches to trickle charge phase after sensing that the battery is truly fully charged.
4. Maintenance Charge
As charger continuously monitors the terminal voltage in order to determine if a maintenance charging should be initiated, if the battery is
loaded and/or terminal voltage falls below 25.6V (for 24V battery) or 12.8V (for 12V battery), the charger starts maintenance charging pulse at
constant 1.5A until voltage reaches to 28.8V (for 24V battery) or 14.4V (for 12V battery). Now maintenance charging is discontinued. Cycle of
trickle charging and maintenance charging is repeated indefinitely to keep battery in good condition when it is not in use and enables charger to
be left connected indefinitely.
5. Supply 13.6V
a) Maintenance of 12V SLA batteries: This mode is suitable for maintenance of 12V batteries with capacity range from 14-230Ah. The
charger delivers a constant voltage of 13.6V. This is maintenance mode for applications where maximum capacity from the battery is required,

4
such as Golf Carts, Floor sweepers, etc.
b) Power source: TE4-0226 battery charger is also used as a power supply, without attaching a battery in this mode. The charger delivers
13.6V/4A. In this mode spark free function is inactivated. However reverse polarity protection function still works.
To enter the 13.6V supply mode, here the steps:
a. Disconnect the battery;
b. Plug in theAC power;
c. Press the MODE button for 3~5 seconds to active the function;
When this mode is activated, the charger MAX output will be 13.6Volt / 4Amp. In this mode, we can use the charger as a Power Supply to
provide constant power to 12V DC appliances with Max 4A output current.
6. Boost 16V/1.5A
To recover severely discharged 12V batteries, this mode is useful. High voltage (17V max) at 1.5Ais applied to a maximum period of 2 hours. At
finish of this stage it would switch to normal charging setting (14.4V).
NOTE: High voltage may cause some water loss, hence this mode should be handled carefully.
TECHNICAL DATA:
Input Voltage:
200 - 260VAC, 50Hz
Output Voltage:
12 / 24V
Charging Voltage:
14.4 V / 14.7 V / 28.8 V / 29.4 V
Charging Current:
8 A/ 4 A
Max Power:
190 W
Surrounding Temperature:
-10°C do 40°C
IP-class:
IP 65
This manual suits for next models
1
Table of contents
Popular Automobile Batteries Charger manuals by other brands

Black & Decker
Black & Decker SIMPLE START BB7B instruction manual

GARO
GARO ENTITY PRO Installation and operation manual

ROLEC
ROLEC QUANTUM PEDESTAL Installation & operation manual

EM2GO
EM2GO EMB011AC1RW user manual

Radio Shack
Radio Shack Gigaware 20-449 quick start guide

Wattsaving
Wattsaving E22 user manual