VonHaus 3500127 User manual

2IN1 AIR STAPLER
+ NAILER
3500127 - Instruction Manual
01 0818-A5

CONTENTS
Safety Instructions 1
Safety Instructions 2
Safety Instructions 3
Safety Instructions, Safety Symbols 4
Compressed Air System, Staple/Nail Specification 5
Specification 6

Opening the Magazine, Inserting Staples 7
Inserting Nails, Firing a Round 8
Exhaust Direction, Clearing a Jam 9
Troubleshooting, Cleaning & Maintenance 10
User Notes 11
Warranty 12

WARNING
Please read and understand these Safety Warnings, Safety Symbols and Instructions carefully and retain
for future use
GENERAL SAFETY INFORMATION.
WARNING! Read all safety warnings
and all instructions. Failure to follow the
warnings and instructions may result in
electric shock, fire and/or serious injury.
Please retain all warnings and instructions
for future reference.
The term “tool” in the warnings refers
to your Compressed Air operated tool.
INTENDED USE.
This Tool is intended for domestic
use only and should not be used for
commercial or industrial purposes.
This tool is not intended for use by
persons with reduced physical, sensory or
mental capabilities, or lack of experience
and knowledge, unless they have
been given supervision or instructions
concerning the use of the tools by a
person responsible for their safety.
Children should be supervised to ensure
they do not play with the tool.
WORK AREA SAFETY.
Keep your work area clean and well lit.
Cluttered or dark areas invite accidents.
Do not operate tools in explosive
atmospheres such as in the presence of
flammable liquids, gases or dust. Tools
create sparks which may ignite the dust
or fumes.
Keep bystanders, children and animals
away whilst operating a tool. Distractions
can cause you to lose control.
BEFORE USE.
Stay alert, watch what you are doing, and
use common sense when operating a
tool. Do not use tools whilst you are tired
or under the influence of drugs, alcohol
or medication. A moment of inattention
while operating tools may result in serious
personal injury.
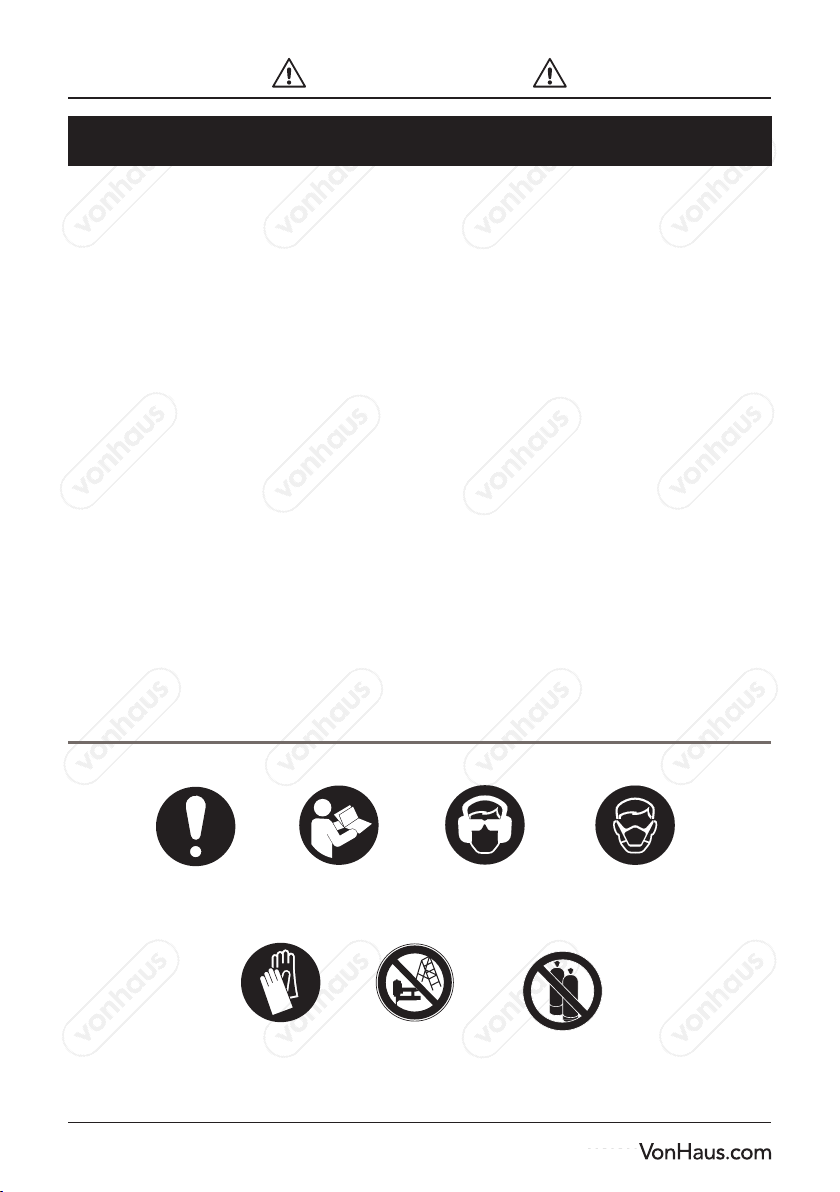
Use personal protective equipment.
Always wear eye protection. Protective
equipment such as a dust mask, non-
skid safety shoes, hard hat, or hearing
protection used for appropriate
conditions will reduce the risk of personal
injury.
Always wear eye protection. Any tool can
throw foreign objects into your eyes and
cause permanent eye damage. Always
wear safety goggles (not glasses) that
comply with ANSI safety standard Z87.1.
Every day glasses have only impact
resistant lenses. They are not safety
glasses.
WARNING! Wearing glasses or goggles
not in compliance with ANSI Z87.1 when
operating this tool could cause serious
injury.
Hand-held air tools may produce
vibration and should not be used for
long periods without a break. Vibration
can cause disease. Gloves may help to
maintain good blood circulation in the
fingers.
Prevent unintentional starting. Ensure
the switch is in the off position before
connecting to the power source and/or
battery pack, picking up or carrying the
tools. Carrying tools with your finger on
the switch, or energising tools that are
switched on, invites accidents.
Remove any adjusting key or wrench
before turning the tool on. A wrench or
key left attached to a rotating part of the
tool may result in personal injury.
Dress appropriately. Do not wear loose
clothing or jewellery. Keep your hair,
clothing and gloves away from moving
parts to prevent them from becoming
caught in the tool.
IMPORTANT SAFETY INFORMATION
FOR USE.
WARNING! Know your Tool. Do not
connect the tool to the compressor
1

WARNING
Please read and understand these Safety Warnings, Safety Symbols and Instructions carefully and retain
for future use
until you have read and understand the
information in this manual. Learn the
tool’s applications and limitations, as well
as the specific potential hazards related
to the tool, to reduce the risk of fire or
serious injury.
Use the tool, accessories and tools bits
etc. in accordance with these instructions,
taking into account the working
conditions and the work to be performed.
Use of the tool for operations different
from those intended could result in a
hazardous situation.
Only use accessories designed for use
with the tool.
Secure the workpiece. Use clamps or a
vice to hold the workpiece as this is safer
than using your hand and frees both
hands to operate the tool.
Do not use the tool if the trigger does not
turn it on and off. A tool that cannot be
controlled with the switch is dangerous
and must be repaired.
Do not force the tool. Always use the
correct tool for your application. The
correct tool will do the job better
and safer at the rate for which it was
designed.
Do not overreach. Keep proper footing
and balance at all times. This will enable
better control of the tool in unexpected
situations.
Disconnect the compressor from the
source and remove the nails/staples from
the tool before making any adjustments,
changing accessories or storing. Such
preventative safety measures reduce the
risk of starting the tool accidentally.
Store idle tools out of reach of children
and do not allow persons unfamiliar with
the tool or these instructions to operate
the tool. Tools are dangerous in the hands
of untrained users.
Maintain the tool. Check for misalignment
or binding of moving parts, breakage of
parts and any other condition that may
affect operation. If damaged, have the
tool repaired before use. Many accidents
are caused by poorly maintained tools.
only those fasteners which are specified
in the operating instructions shall be used
in fastener driving tools. The fastener
driving tool and the fasteners specified
in the operating instructions are to be
considered as one unit safety system;
quick action couplings shall be used for
connection to the compressed air system
and the non-sealable nipple must be
fitted at the tool in such a way that no
compressed air remains in the tool after
disconnection;
oxygen or combustible gases shall not be
used as an energy source for compressed
air operated fastener driving tools;
fastener driving tools shall only be
connected to an air-supply where the
maximum allowable pressure of the
tool cannot be exceeded by more than
10% in the case of higher pressure or a
pressure reducing valve which includes
a downstream safety valve shall be built
into the compressed air supply;
only spare parts specified by the
manufacturer or his authorized
representative shall be used in the repair
of fastener driving tools;
repairs shall be carried out only by the
qualified persons or by other experts,
having due regard to the information
given in the operating instructions.
DO NOT direct the adjustable vent
hole to the operator or other person or
animals during the use.

WARNING
Please read and understand these Safety Warnings, Safety Symbols and Instructions carefully and retain
for future use
TRIGGERING DEVICES
Fastener driving tools are operated
by actuating the trigger using finger
pressure.
In addition, fastener driving tool is fitted
with a safety yoke which enables the
driving operation to be carried out only
after the muzzle of the tool is pressed
against a work piece. Do not use the tool
without an effective safety yoke.
ACTUATING SYSTEMS
Depending on their purpose, fastener
driving tool is fitted with actuating system
of single sequential actuation and contact
actuation.
You could switch to one nail figure to
choose single sequential actuation,
and switch to two nail figure to choose
contact actuation.
• Single sequential actuation: An
actuating system in which the trigger and
the safety yoke have to be activated so
the only one single driving operation is
actuated via the trigger after the muzzle
of the tool has been applied to the
driving location, Thereafter further driving
operations can only be performed after
the trigger has been returned to the non
driving position whilst the safety yoke
remains depressed.
• Contact actuation (restricted version):An
actuating system in which the trigger and
the safety yoke have to be actuated for
each driving operation, with the order of
actuation not being specified .
For repeated driving operations, it is
sufficient if either the trigger remains
activated and the safety yoke is activated
thereafter, or vice versa.
Fastener driving tools equipped with
contact actuation must be marked with
the symbol” Do not use on scaffoldings,
ladders’ and shall not be used for specific
application for example:
when changing one driving location to
another involves the use of scaffoldings,
stairs, ladders, or ladder alike
constructions, e.g. roof laths; closing
boxes or crates; fitting transportation
safety systems e.g. on vehicles and
wagons.
Check prior to each operation that the
safety and triggering mechanism is
functioning properly and that all nuts and
bolts are right.
Do not carry out any alterations to
the fastener driving tool without the
manufactures authorization.
Do not disassemble or make inoperative
any parts of the fastener driving tool such
as the safety yoke.
Do not perform any emergency repairs
without proper tools and equipment.
The fastener driving tool should be
serviced properly and at regular intervals
in accordance with the Manufacturer’ s
instructions.
Avoid weakening or damaging the too,
for example by:
punching or engraving;
modification not authorized by the
manufacturer.
AIR TOOL SAFETY
It is the user’s responsibility to ensure
that other persons in the vicinity of the
work area are also equipped with the
appropriate protective equipment.
Use the correct air hose
Use lightweight hose to connect the tool
to the air compressor.
Most air tools should be fitted with a coil
hose.
Always disconnect and ensure that
your air tool has completely stopped

WARNING
Please read and understand these Safety Warnings, Safety Symbols and Instructions carefully and retain
for future use
functioning before putting it down
Disconnect an air tool from the air supply
before performing any servicing, or
changing any staples/nails.
Ensure all are correctly fitted before
reconnecting to air supply
Ensure the air tool is switched OFF before
connecting to air supply. Be aware that air
tools may hold residual pressure after use.
Always bleed air pressure from the tool
after shutting off air supply Do not abuse
the machine
Do not overload the machine. Allowing
the machine to work at its optimum speed
is more efficient and prolongs its service
life.
Do not increase air pressure above the
recommended level; excessive pressure
leads to wear of moving parts, possible
failure and may cause the machine casing
to split.
Do not attempt to modify air tools. Any
attempt to modify this air tool could result
in serious injury to you or others, and will
invalidate its warranty.
Do not aim the nailer away from the
workpiece when connected to an air
supply.
Never operate the tool with the safety
mechanism disabled.
Never aim the tool towards other people
in the work area or towards the main
reservoir tank of the air compressor
Do not operate the nailer when using
ladders or scaffolding
Never connect this tool to canisters or
bottles containing combustible gases
or portable compressed air canisters or
cartridges. It is designed to be used with
an air compressor
SAFETY SYMBOLS
WARNING! Pay
attention to all
safety and
guidance
Read manual
before use
Wear a dust
mask
Wear protective
gloves
Do not use on
scafolding and
ladders
Do not connect
to compressed air
canisters.
Wear eye and
ear protection
The following safety symbols may appear on this product. Please ensure you understand their meanings before
operating this product in order to prevent personal injury and avoid damage to the tool.

5
COMPRESSED AIR SYSTEM
Quick
Connector
Quick
Connector
Quick
Coupler
Air
Compressor
Lubricator
Regulator
Filter
Quick
Coupler
Tool
This 2 in 1 Air Stapler + Nailer is designed to be
operated at 4.8-7.5bar using clean, dry, regulated,
compressed air.
DO NOT exceed the 5.7bar maximum operating
pressure.
Before using the Air Nailer+ Stapler, regulate the air
pressure on your air compressor to the minimum psi
for your tool.
An in-line filter/lubricator/regulator unit, depicted below,
should be installed and should be located as close to the
Air Nailer+ Stapler, as possible.
The unit will protect your tool from damaging water build-
up, allow you to adjust and maintain constant air pressure
to your tool, and save you the inconvenience of having to
manually lubricate your tool every time you use it.
STAPLE/NAIL SPECIFICATION
(50mm) 1.969”
(45mm) 1.772”
(40mm) 1.575”
(38mm) 1.496”
(35mm) 1.378”
(32mm) 1.260”
(30mm) 1.181”
(25mm) .984”
(20mm) .787”
(15mm) .591”
(10mm) .394”
.224”
(5.7mm) .049
(1.25mm)
.630”
(16mm) .748”
(19mm)
.984”
(25mm)
1.260”
(32mm)
.039”
(1mm)
1.575”
(40mm)
.866”
(22mm)
1.102”
(28mm)
1.496”
(38mm)
039”
(1mm)
Ga18
.049
(1.25mm)
.071-.079
(1.8-2.0mm)
600
600

SPECIFICATION
7.5bar4.8-7.5bar White mineral
Oil 100
--
WORKING
PRESSURE
RECOMMENDED
LUBRICANT
MAGAZINE
CAPCITY
MAX
PRESSURE
10# pcs
A. Nose Cover Release Catch
B. Slider
C. Magazine
D. Tacker Head (Muzzle)
E. Soft Grip Handle
F. Trigger
G. Magazine Release
H. Exhaust Direction Dial
I. Air Inlet Quick Connector
J. Air Tool Oil Bottle
K. Nails & Staples
L. Safety Yoke
A
B
D
J
C
E
F
L
G
I
H

7
INSERTING STAPLES
OPENING THE MAGAZINE
Always remove the compressor pipe from the Nailer & Stapler before performing adjustments
or inserting Nails or Staples.

INSERTING NAILS
FIRING A ROUND
Always remove the compressor pipe from the Nailer & Stapler before performing adjustments
or inserting Nails or Staples.

CLEARING A JAM
EXHAUST DIRECTION
Always remove the compressor pipe from the Nailer & Stapler
before performing adjustments or inserting/removing Nails or Staples.
9

TROUBLESHOOTING
PROBLEM CAUSE SOLUTION
AIR LEAK NEAR BOTTOM OF
TOOL OR TRIGGER AREA
• O-Ring in trigger valve is
damaged.
• Trigger valve head is damaged.
Trigger valve stem, seal or O-Ring
are damaged.
• Check and replace O-Ring.
• Check and replace.
• Check and replace trigger valve
stem, seal or O-Ring.
AIR LEAK NEAR BOTTOM OF
TOOL
• Loose Screws.
• Worn or damaged O-rings or seals.
• Tighten Screws.
• Check and replace O-rings or
bumper.
AIR LEAK BETWEEN BODY
AND CYLINDER CAP
• Loose Screws.
• Worn or damaged O-rings or seals.
• Tighten Screws.
• Check and replace O-rings or
bumper.
BLADE DRIVING FASTNER
TO DEEP
• Worn bumper.
• Air Pressure is too high.
• Replace bumper.
• Adjust the air pressure.
TOOL DOES NOT OPERATE
WELL: CANNOT DRIVE
FASTNER OR OPERATION IS
SLUGGISH
• Inadequate air supply.
• Inadequate lubrication.
• Worn or damaged O-rings or seals.
• Exhaust port in cylinder head is
blocked.
• Varify adequate air supply.
• Place 2 to 6 drops of oil into air
inlet.
• Check and replace O-rings or seal.
• Replace damage internal parts.
TOOL SKIPS FASTNERS
• Worn bumper or damaged spring.
• Dirt in front plate.
Dirt or damage prevents fastners
from moving freely in the magazine.
• Replace bumper or pusher spring.
• Clean drive channel on front plate.
• Magazine needs to be cleaned.
• O-rings needs to be replaced and
lubricate.
• Replace sealing washer.
TOOL JAMS
• Incorrect or damaged fastners.
• Damaged or worn driver guide.
• Magazine or nose screw is loose.
• Magazine has become dirty.
• Change and use correct fastner.
• Check and replace the driver.
• Tighten the magazine.
• Clean the magazine.
CLEANING & MAINTENANCE
Clean dust and debris from the Air Stapler +
Nailer vents and magazine compartment using
compressed air.
Do not use solvents, or household cleaning
detergents containing ammonia to clean the
tool.
Use only mild soap and a damp cloth to clean
the tool.
Ensure you apply 2-3 drops of Machine/Air Oil
before each use.
Always unplug the tool from the mains supply before performing any cleaning & maintenance tasks
CAUTION Do not alter, attach special fixtures
to, or redesign parts of the tool. Do not fire
without staples, as this may cause damage.

USER NOTES

DISPOSAL INFORMATION
COPYRIGHT
WARRANTY
Please recycle where facilities exist. Check with your local authority for recycling advice.
All material in this instruction manual are copyrighted by DOMU Brands.
Any unauthorised use may violate worldwide copyright, trademark, and other laws.
To register your product and find out if you qualify for a free extended warranty please go to
www.Vonhaus.com/warranty.
Please retain a proof of purchase receipt or statement as proof of the purchase date.
The warranty only applies if the product is used solely in the manner indicated in the Warnings page of this
manual, and all other instructions have been followed accurately. Any abuse of the product or the manner in
which it is used will invalidate the warranty.
Returned goods will not be accepted unless re-packaged in its original packaging and accompanied by a
relevant and completed returns form. This does not affect your statutory rights.
No rights are given under this warranty to a person acquiring the appliance second-hand or for commercial or
communal use.
CUSTOMER SERVICE
If you are having difficulty using this product and require support, please contact
DECLARATION OF CONFORMITY
We:
DOMU Brands Ltd
5th Floor The Tower
Deva City Office Park
Manchester
M3 7BF
Declare under our sole responsibility that the product:
SKU: 3500127
Description: VonHaus 2 in 1 Air Stapler + Nailer
To which this declaration relates is in conformity with the following directives:
2006/42/EC

VonHaus is a registered trademark of DOMU Brands Ltd
Made in China for DOMU Brands Ltd M24 2RW.
Thank you for purchasing the 2 in1 Air Stapler + Nailer
Table of contents
Other VonHaus Power Tools manuals

VonHaus
VonHaus 3500197 User manual

VonHaus
VonHaus 0518 Guide

VonHaus
VonHaus 3500010 User manual

VonHaus
VonHaus 3515049 User manual

VonHaus
VonHaus 3515254 User manual

VonHaus
VonHaus 3500087 User manual

VonHaus
VonHaus 2515059 User manual

VonHaus
VonHaus E Series User manual

VonHaus
VonHaus 3515181 User manual

VonHaus
VonHaus 3500144 User manual