6
Step On It!
H
OW
TO
USE
YOUR
VC-4 F
OOT
C
ONTROLLER
.
s already stated, thanks to it three distinct
operational modes (PROGRAM SELECT
MODE, INDIVIDUAL MODE and TUNER
MODE), your new
VC-4 allows you to do a bunch of neat things when
it is hooked up to your Valvetronix amp. These
include changing programs, turning individual FX
on and off, controlling various effects, controlling
the amp’s volume, changing delay times and tuning
your axe. We’re gonna learn how it does all this
stuff by looking at the VC-4’s three modes…..
1. P
ROGRAM
S
ELECT
M
ODE
As already mentioned, when your VC-4 is in
PROGRAM SELECT MODE its BANK DISPLAY
will show a Bank number. And as you’d expect,
this number will match the one in the BANK DIS-
PLAY of the amp…duh! So, take a look at the
BANK DISPLAY and see what’s up. If it shows a
Bank number and it isn’t flashing, your VC-4 is
already in PROGRAM SELECT MODE. Let’s
assume it isn’t and suss out how to get there…
G
ETTING
TO
P
ROGRAM
S
ELECT
M
ODE
So, your BANK Display is displaying “ ”, “ ”,
“ ”, “ ” or is flashing, and you wanna be in PRO-
GRAM SELECT MODE, huh? Well, to get there is a
piece of cake – all you do is one or two of the fol-
lowing:
1. If the BANK DISPLAY is showing “ ” it means
that the amp is in MANUAL MODE (see “The
Guitarist’s Guide” that came with your combo).
As already stated, the only way to get out of
MANUAL MODE is via the amp. To do so, simply
press either the
▲
(UP) or
▼
(DOWN) button on
the amp’s Top Panel and both the amp and the
VC-4 will revert to PROGRAM SELECT MODE.
2. If the BANK DISPLAY is showing either “ ” or
“ ” it means it is in TUNER MODE. To get out
of it, simply step on the TAP TEMPO switch.This
will return the VC-4 to either PROGRAM
SELECT MODE or INDIVIDUAL MODE. If it
goes to PROGRAM SELECT MODE (i.e. the
BANK DISPLAY shows a Bank number) you’re
ready to roll, if it doesn’t then read on…
3. If the BANK DISPLAY is showing “ ” it means
the VC-4 is in INDIVIDUAL MODE. So, all you
have to do is hit the FX ON & OFF/CHANNEL
switch and it’ll revert to PROGRAM SELECT
MODE.
4. If the BANK DISPLAY is flashing, it means you’re
halfway through changing banks. To get out of
this and get back to PROGRAM SELECT
MODE, all you have to do is press the FX ON &
OFF/CHANNEL switch.
Right, now we’ve got our VC-4 Foot Controller in
PROGRAM SELECT MODE, let’s get into how
we can change programs by merely stamping
our feet….
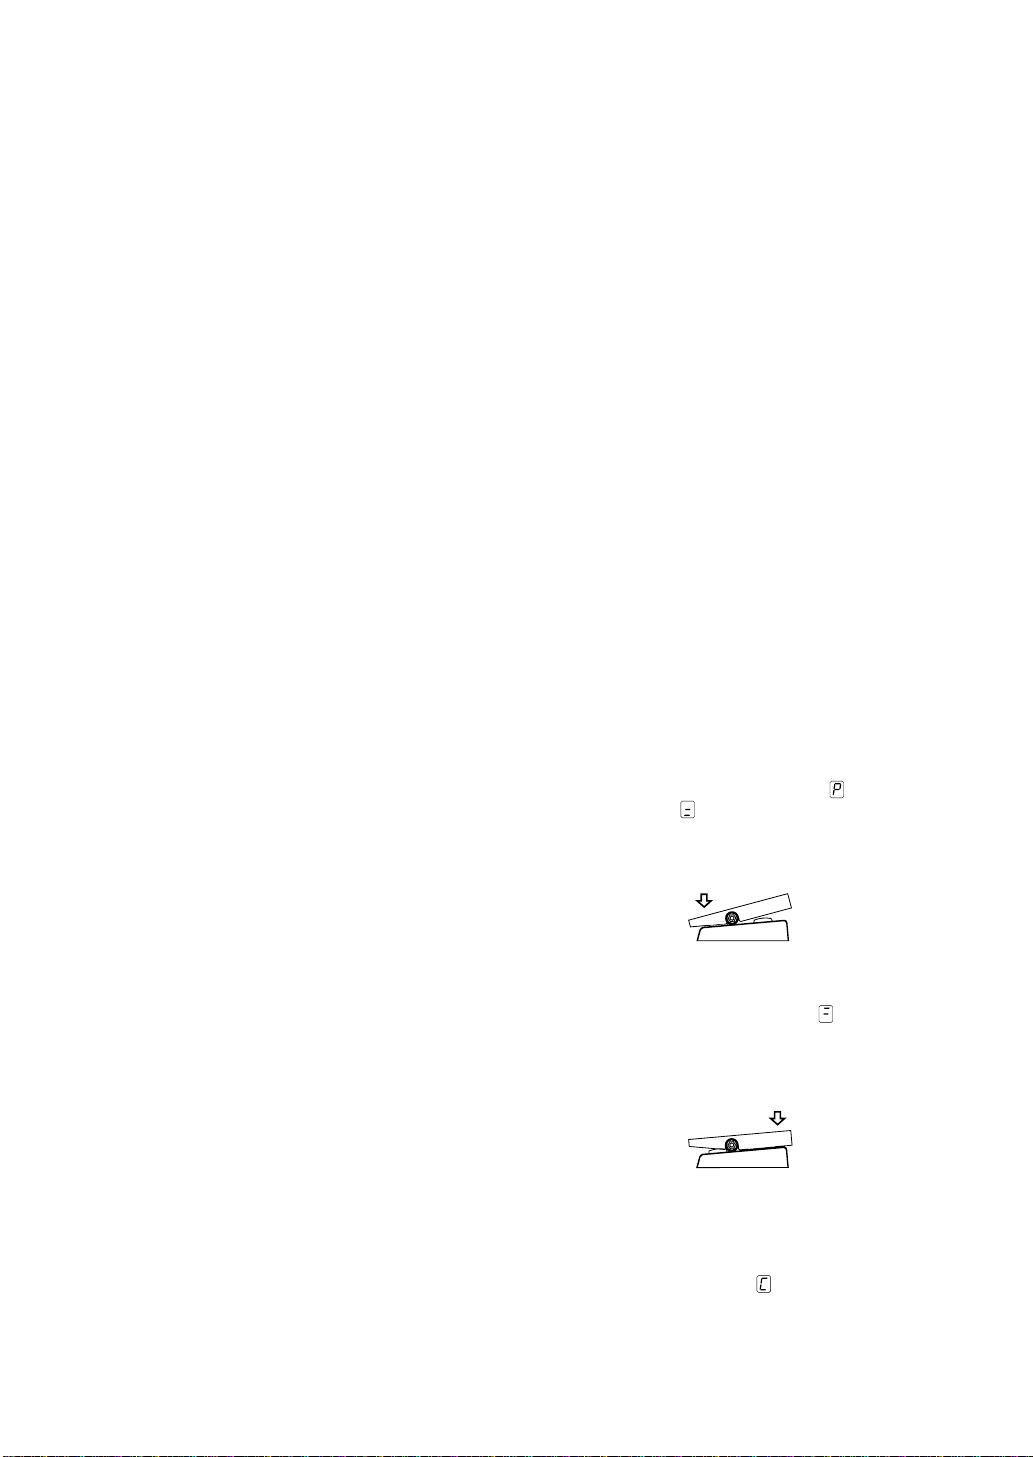
IMPORTANT NOTE:
When your VC-4 is in
PROGRAM SELECT MODE you can use
both the TAP TEMPO SWITCH and the
BUILT-IN PEDAL as already described.
i) C
HANGING
C
HANNELS
W
ITHIN
THE
S
AME
B
ANK
...
This is stupidly easy! As you know, the 32 pro-
grams your Valvetronix can remember are stored
in 8 Banks and each Bank consists of 4 Chan-
nels. Let’s assume for a second that the program
currently being used is 3-1. To switch to program
3-2, 3-3 or 3-4 from 3-1 using the VC-4 is incred-
ibly simple – all you do is step on the appropriate
CHANNEL BUTTON!!
For example, say you’re currently on program 2-
4 and you want to switch to program 2-2. All you
do is step on the CHANNEL 2 button on your
VC-4 and you’re there! Geddit!? Told you it was
“stupidly simple!”
ii) C
HANGING
B
ANKS
...
This is not quite as simple as changing channels
but is still a breeze. Before we get into “how”
though, an important announcement…
IMPORTANT PROGRAM CHANGING
NOTE:
When using the VC-4 Foot Controller
you can only change between the 16 pro-
grams stored in Banks 1 – 4 or the 16 stored
in Banks 1. – 4..This means you can’t use the
Foot Controller to change from program 2-1 to
program 3.-4, or from 1.-3 to 4-1 for instance.
The only way you can get your VC-4 from
Banks 1 – 4 to Banks 1. – 4. , or vice versa, is
via the Top Panel of the amp.
This said, let’s learn how to CHANGE BANKS
using our VC-4. We’re going to do this by follow-
ing an example. So, let’s say we want to go from
program 1-1 to 4-3 using our VC-4. Here’s the
simple three-step process…
NOTE:
Program 4-3 is stored in Bank 4,
Channel 3…remember?!
A