4
PC 1030
GB
SAFETY REGULATIONS
1 SAFETY REGULATIONS
The following sources are just a sample of those containing
safety requirements for mortar conveyors:
a) DIN EN 12001: 2004-05, Conveying, spraying and
placing machines for concrete and mortar - Safety
requirements; German version; German version EN
12001:2003
The following specications are to be observed in particular to
handle mortar spraying machines safely:
Usage of the mortar spraying machine
The mortar spraying machine PlastCoat 1030 may only be
used to process the coating materials described on page 38.
Any other usage is not allowed.
Proper usage also includes the observance of the operating
manual and the observance of the inspection and mainte-
nance conditions. Always keep the operating manual on hand
at the point of use of the mortar spraying machine.
The mortar spraying machine PlastCoat 1030 may only be op-
erated with a manometer. Only the mortar hose specied by
the manufacturer may be used.
Use only marked mortar hoses with at least 40 bars operating
pressure.
Protection of persons
In order to protect eyes, skin and the respiratory organs: Wear
safety goggles, protective clothing, gloves, possibly use
protective skin cream and respiratory equipment. Do
not decouple the mortar hose as long as it is under pressure.
Watch the manometer! Wear safety goggles! Do not point the
spray lance at persons!
In order to protect your ears wear ear protection.
Wear safety shoes when transporting the machine or working
with it.
People not needed to assist with machine installation, assem-
bly or operation, must keep away from the machine.
The PC 1030 is equipped with an EMERGENCY STOP switch
for emergencies.
Breathing masks
Make a breathing mask available to the processor in order to
protect against mineral dust. Refer to the regulations of the
German employer's liability insurance association ("Beruf-
sgenossenschaft") "Rules for the use of breathing masks"
(BGR 190) and "Processing coating materials" (BGV D25).
Connection to the mains network only via a special feed-
ing point, for example via a distribution board for con-
struction sites, with residual current protective device
with INF ≤30 mA.
Avoid soiling of the socket for the remote control at the
control unit.
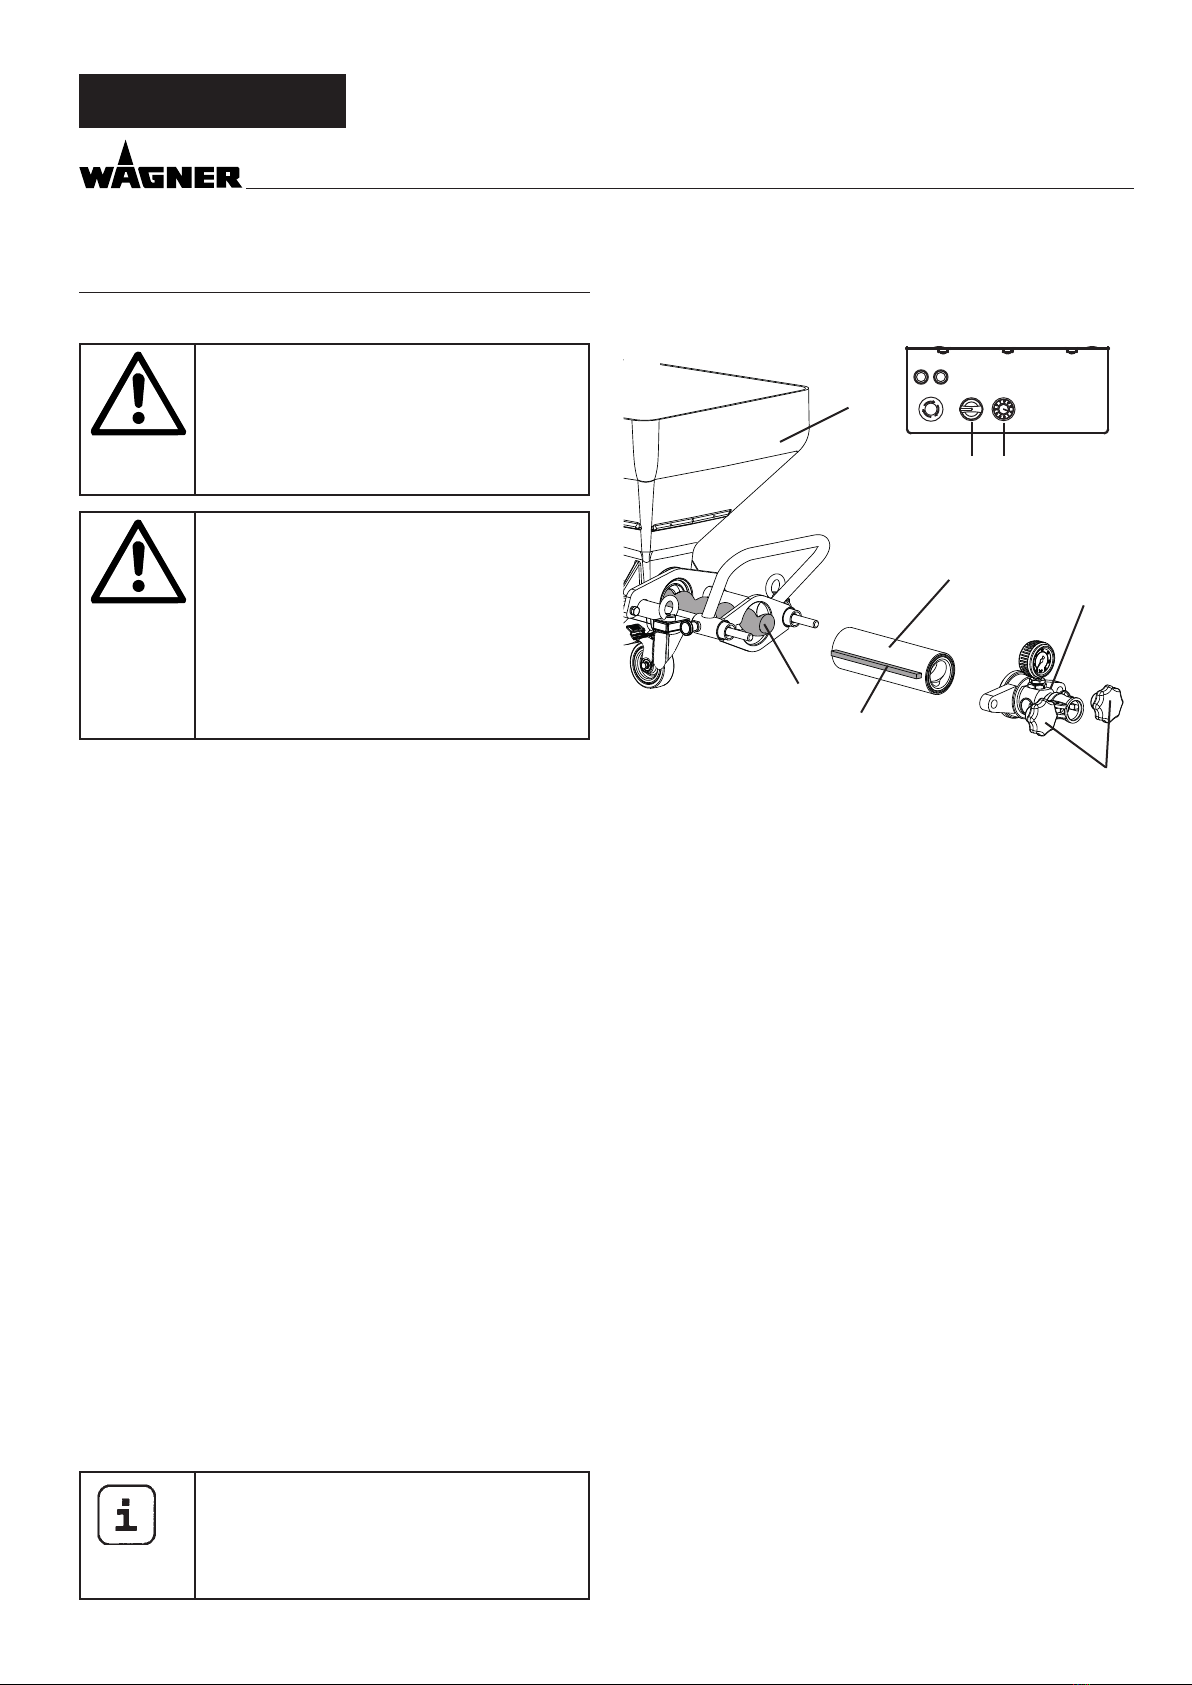
Risk of injury from escaping material.
Before switching on, always check that the
material tap on the spray lance is closed.
Close material tap whenever stopping
work.
Never operate the mortar spraying ma-
chine if the rotor is exposed or if the con-
tainer has been removed.
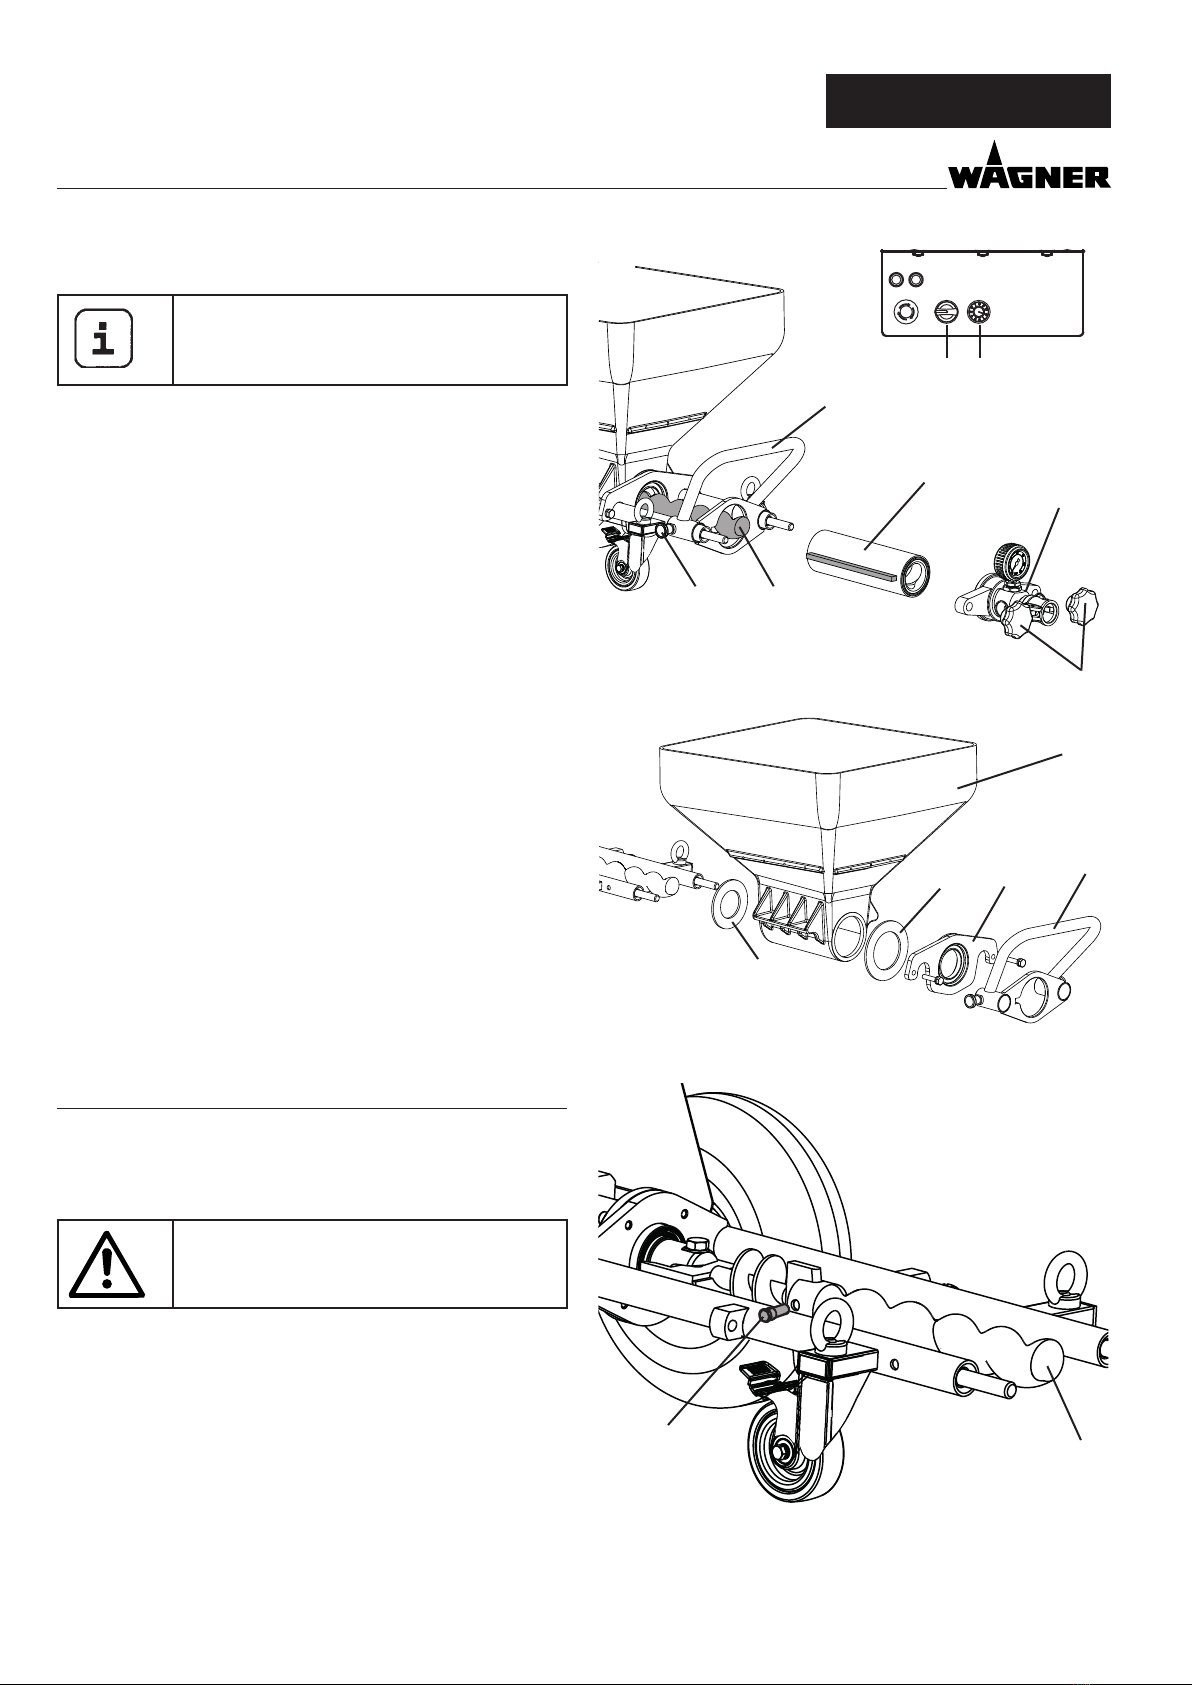
Do not reach into the rotor when it is mov-
ing. Risk of crushing.
Caution if you have long hair. Only wear
close-tting clothes at work.
Do not insert objects or body parts
through the protective grid.
Risk of crushing when folding in the han-
dles, assembling the pump unit and con-
necting the mortar hose.
Cleaning and maintenance
Never decouple mortar hose or disassemble machine when
under pressure. Note pressure reading on pressure gauge.
When performing maintenance work, always switch o mor-
tar spraying machine, disconnect mains plug and ensure it
cannot be plugged back in by mistake.
Do not spray down the motor and control unit of the mortar
spraying machine with a water-jet, high-pressure cleaner or
high-pressure steam cleaner. Danger of short-circuits caused
by water ingressing.
Electrical equipment
Work on the machine’s electrical equipment may be carried
out only by a qualified electrician. The electrical equipment is
to be checked regularly. Eliminate faults such as loose connec-
tions or scorched cables.
Keep the label on the mortar spraying machine clean and
legible.
Whenever the machine is automatically
brought to a standstill or during power
failure, immediately move the selec-
tor switch to “A” to prevent the machine
starting back up again unintentionally.
There is a danger of injury.