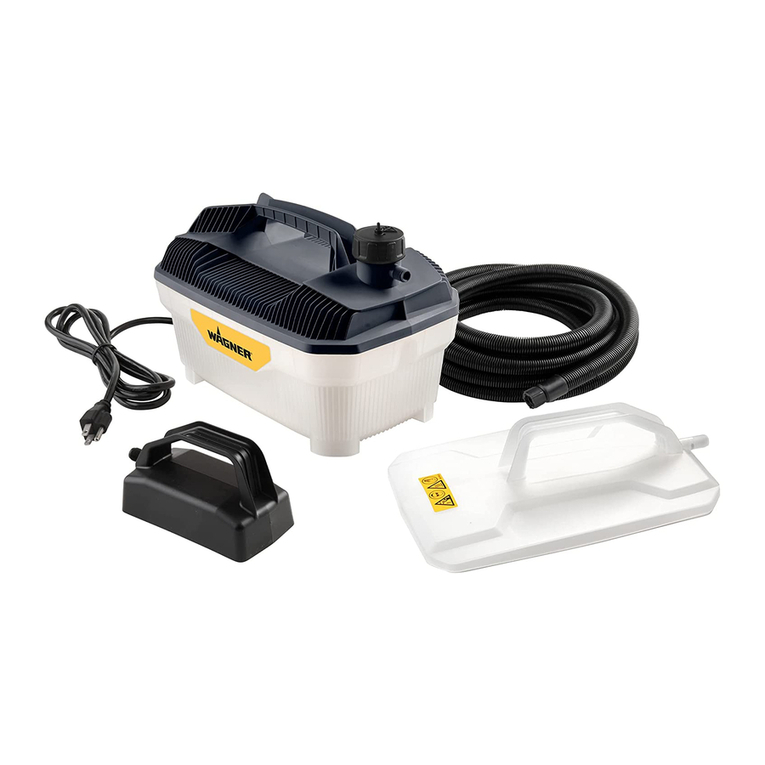
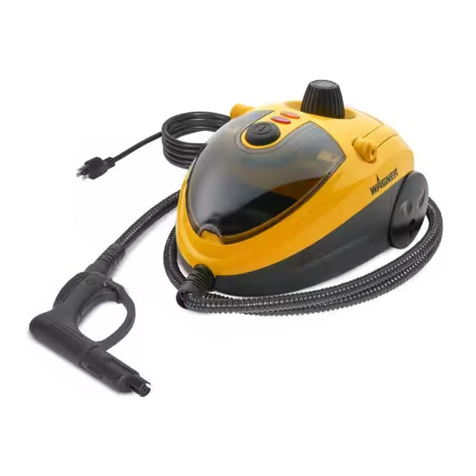
WAGNER SteamForce Pro User manual

wagner-group.com
DGB NL E
F
STEAMFORCE PRO
USER GUIDE
ORIGINALBETRIEBSANLEITUNG
IDK P
S

2
SteamForce Pro
MAX
MIN
A B
D E
C
F
Fig. 1

3
SteamForce Pro
MIN
MAX
6
8
18
15
7
5
14
19
13
3
2
4
10
9
1
16
15
16
17
26
25
29
30
20
20
21
22
23
24
26
27
28
12
11
Fig. 2

EN
4
SteamForce Pro
Drawing No. Part No. Description
12354056 5m Mains Cable 13A Plug (PS0029)
2354103 5m Mains Cable EUR
2382920 Mains Cable AUS/NZ
2382922 Mains Cable CH
22354041 Steamplate Assy Swivel (PS0242)
32353950 Small Steam Plate (ST7/b)
42370324 Hose Assembly Professional - Polyhose
52354058 Elbow (Tank to Hose) (PS0042)
62354038 Radiator Cap Plastic Screw (PS0303)
72354070 Sight Glass Kit (PS0193)
82354073 Tank (PSACC02)
92354068 Screw M6 PK 4 (Tank to Frame) (PS0036)
10 2354071 Tank Moulding Cover Black (PS0124)
11 2382315 Element Assy AUS CH 2400W 240V (PS0088)
2354045 Element Assy EU & UK 2750W (PS0404)
12 2354105 Thermal Fuse (PS0402)
13 2354064 Hexagon Lock Nut M6 x 3mm (PS0127)
14 2382383 Cover and Shield
15 2354061 Hexagon Nut M6 x 1.0 (PS0022)
16 2354042 Protective Cap M6 Pk 4 (PS0128)
17 2382385 Cable Assembly for Original Element
18 2354208 Switch Assy 230V (PS0302)
19 2354063 Stand/ Seat Cover (PS0007)
20 2354043 End Caps LMB Pk 2 (PS0332)
21 2354062 Hose Reel (PS0044)
22 2372745 Reel Tube Replacement Kit
23 2382328 Cable Reel (PS0045)
24 2374480 Frame Kit - End Frame RH inc. rubber feet
25 2374479 Frame Kit - End Frame LH inc. rubber feet
26 2374477 Frame Kit - S/plate & x-beam tubes
27 2374478 Frame Kit - Tank Mounting Tubes
28 2374476 Frame Kit - Seat Tubes
29 2354074 Tube Connector (PSACC03)
30 2354054 Securing Screw (PS0006)
Spare Parts (Fig. 2)

EN
4
SteamForce Pro
MANY THANKS FOR PLACING YOUR TRUST IN US
We would like to congratulate you on purchasing this WAGNER product; we are sure
that you will enjoy working with it greatly.
Please read the Operating Manual carefully and observe the safety information before
starting the tool. Store the Operating Manual in a safe place close to the product in
case it needs to be used by someone else.
We would be happy to be of assistance if you have any questions, suggestions or
requests. Please contact us via the phone number included on the back page or via our
homepage, www.wagner-group.com.
Contents
1. Explanation of symbols used .....................................................5
2. Scope of delivery ................................................................5
3. General Safety Instructions ......................................................5
4. Safety Instructions for Steam Wallpaper Strippers .................................6
5. Additional Safety Instructions for model SteamForce Pro..........................7
6. Intended use ....................................................................7
7. Protect your home...............................................................8
8. Extension Leads EU/UK ..........................................................8
9. Main Features ...................................................................8
10. Preparation ....................................................................8
11. Operation .....................................................................9
12. Relling ......................................................................10
13. Storage ......................................................................10
Storage Spools...................................................................10
Storage Steamplate ..............................................................10
14. Descaling ....................................................................11
15. Important Note regarding Product Liability! ...................................11
16. Correction of Malfunctions....................................................12
17. Technical Data................................................................12
18. Accessories...................................................................12
19. Environmental protection. . . . . . . . . . . . . . . . . . . . . . . . . . . . . . . . . . . . . . . . . . . . . . . . . . . . . 13

EN
5
SteamForce Pro
1. Explanation of symbols used
This symbol indicates a potential danger to you or for the tool.
Under this symbol you can nd important information on how to
avoid injuries and damage to the power tool.
Beware of steam.
iIndicates tips for use and other particularly useful information.
2. Scope of delivery
1Main unit
2Supply cord
3Steam hose 5m (plastic)
4Steamplates (A) large/(B) small
5Pressure-relief cap
6Operating manual
3. General Safety Instructions
CAUTION! Read all the instructions. Non-observance of the instructions below can cause
electric shock, re and/or serious personal injuries.
a) Keep your workplace clean and well lit. Disorderly or unlit workplaces
may result in accidents.
b) Never use the tool in hazardous areas that contain ammable liquids,
gases or dusts. Power tools generate sparks that can ignite dust or vapours.
c) Keep children other persons and animals away when using the power
tool. You can lose control of the tool if you are distracted.
d) The tool plug must t into the socket-outlet. The plug may not
be modied in any form. Do not use adaptor plugs together with
1
2
3
4A
wagner-group.com
DGB NL DK
F
STEAMFORCE PRO
USER GUIDE
ORIGINALBETRIEBSANLEITUNG
6
5
4B

EN
6
SteamForce Pro
protective-earthed tools. Unmodied plugs and suitable sockets reduce
the risk of an electric shock.
e) Avoid physical contact with earthed surfaces such as pipes, heating
elements, stoves and refrigerators. The risk through electric shock
increases if your body is earthed.
f) Never use outside when raining.
g) This appliance can be used by persons aged from 14 years and above
and persons with reduced physical, sensory or mental capabilities or
lack of experience and knowledge if they have been given supervision
or instruction concerning use of the appliance in a safe way and
understand the hazards involved.
h) If the supply cord is damaged, it must be replaced by the manufacturer
or its service agents to avoid a safety hazard.
4. Safety Instructions for Steam Wallpaper Strippers
ATTENTION!When working with hot steam (min.100°C), there is a risk of serious scalding.
Hot steam and boiling water can emit when the safety valve is activated due
to overpressure in incorrect operation of the unit.
Only move with the carrying frame.The steam unit, hose and steamplate can
be very hot. Always wear suitable protective clothing / gloves.
Operate the unit only with pure water without agents or additives. Do not
switch the unit on when empty.
Never point the steamplate / bar at people, animals, at objects sensitive to temperature
or other electrical equipment. Always ensure that the unit is standing securely in a
horizontal position (on the oor).
Do not stand on or place objects on the steam hose. Never over-twist or make kinks in
the steam hose and never block the valve. Never pull on the steam hose or supply cord.
Every time the accessory is changed for lling / relling and emptying or when the steam
unit is not in use (including work pauses), pull the mains plug out of the socket-outlet.
Never overll the unit. Unplug the unit in the event of overlling or a fault. Use only
WAGNER original spare parts and accessories!
Caution! Danger of short-circuits! Cover socket-outlets and switches and do not subject
them to steam. Be careful of overhead dripping, when using on overhead areas tilt the
steamplate away from the face and body and regularly empty the steamplate of any
collected condensation. Do not allow water or steam to enter light switches or socket-
outlets. Always visually check that the hose and steamplate inlet are not blocked before
attempting to use. Do not strain, kink or trap the hose under heavy objects. Use only 4 psi

EN
7
SteamForce Pro
(0.3 bar) pressure cap as supplied. It is also a safety valve. NEVER block o this outlet.
NEVER remove the pressure cap when unit is boiling - switch o and wait for 5 minutes.
Do not use any caustic cleaners on the tank. Do not allow to boil dry. Do not overll the
reservoir. Never detach the hose whilst the unit is switched on.
The appliance shall not be unattended while it is connected to the supply mains.The
appliance is not to be used if it has been dropped, if there are visible signs of damage or if it
is leaking. Keep the appliance out of reach of children when it is energised or cooling down.
Under no circumstances should you attempt to repair a unit unless qualied and authorised
to do so.
5. Additional Safety Instructions for model SteamForce Pro
When standing on the stripper always remain within the connes of the step/platform and
do not over-reach.
Maximum weight for standing on the unit is 127 kg (20 stone) and no more
than 1 person at a time.
Do not permit oil, grease or slippery material to accumulate on the step/platform.
Do not allow objects to accumulate on the step/platform.
Do not use a ladder or other device on the step to get greater heights.
Do not apply impact loads on the step/platform.
6. Intended use
Do not use this Stripper for any purposes other than those detailed in these instructions.
To ensure long life of the steam wallpaper stripper, clean your unit immediately and
thoroughly after each use.
Caution! - Check the state of your plaster before starting work.
Steam can loosen weak, porous or poorly bonded plaster - which also loosens
readily if cracked, holed or if steam plate is held in one position for too long
after the paper is soaked.
Weak plaster can normally be detected by tapping a few areas of the wall.
A hollow sound indicates that you should proceed only with extreme care -
stopping immediately if you hear a cracking sound or plaster starts to break
loose.
The steam stripper is safe for drywall/plaster board surfaces but whatever the
material, it is always wise to check a small area before starting work.

EN
8
SteamForce Pro
7. Protect your home
To prevent marks from steam on carpets and soft furnishings it is recommended the
unit be placed on a hard at board. Ensure the unit will not slip or tilt. Dust sheets and
newspapers are not suitable.
•
Supply cord must be connected to a grounded (3 prong) mains socket-
outlet.
•
Arrange replacement of a worn or damaged supply cord.
NEVER repair a supply cord.
•
Removal of grounding pin VOIDS guarantee.
8. Extension Leads EU/UK
If you are using an extension lead it must be rated at a minimum of 15 Amps (EU) / 13
Amps (UK) - 230V unit and fully unwound. Do not operate with an extension lead rated
less than 15 Amps / 13 Amps as this will cause premature failure of the element which is
not covered by the guarantee.
9. Main Features
WAGNER Steamers are professional, fast-action steam wallpaper strippers. They have
many added features:
•
Each tank is individually pressure-tested.
•
Storage for the hose and supply cord.
•
Neon mains ON/OFF switch.
•
Cooler running steam hose.
10. Preparation
To achieve fast paper removal always gently score the areas to be
stripped.With heavily embossed, vinyl-coated or painted papers this
is essential. Either use a proprietary perforator tool or alternatively
score the paper with the edge of a wall scraper in a‘criss-cross’pattern
with 150mm (6 inch) spacing (Fig. 1, A).
As with all decorating work be sure to protect carpets and furniture
with covers.

EN
9
SteamForce Pro
11. Operation
•Place the unit on a at surface near the area to be stripped and remove the steamplate.
•
Fully uncoil the hose and supply cord.
•
Connect the thread on the steamplate to the end of the hose. This only needs to be
hand tight. Do not overtighten (Fig. 1, B).
•
If the steamplate is tted with a metal swivel joint, tighten hose nut to thread
using two spanners. The steamplate can remain permanently attached to the hose
thereafter.
•
To ll the unit, remove the pressure cap and ll to the MAX water level. This must be
clean water, preferably hot.
Do not use additives - do not overll. (Fig. 1, C)
•
Replace the pressure cap, connect the supply cord from the unit to the socket-outlet
and switch on.
•
The mains switch on the unit has a neon light and will light when the unit is on.
Beware of Steam! The WAGNER SteamForce Pro is designed for safe, fast
removal of wallpaper but you must be aware that steam is produced at 100ºC
so be careful, wear protective clothing and protect your hands with heat-
resistant gloves or mitts.
•
It will take between 10 and 20 minutes for the 230V unit to start producing steam
depending on the temperature of the water used. DO NOT leave unattended.
•
Once steam is being produced at the steamplate you are ready to commence
operation. Prior to the steam being produced a small amount of bubbling will occur at
the steamplate.
Caution! Beware of hot water discharge prior to steam emission.
•
When the steam has been produced, lift the steamplate above the level of the tank
outlet to allow condensed steam to run back down the hose and into the tank.
i
If you are right-handed hold the steamplate in your left hand and place at
against the wall where you wish to commence removal. If you are left handed
you may nd it easier to operate with the other hand.
•
Leave the steamplate against the wall for approximately 10 seconds.
•
Move the steamplate to the section immediately next to where you have just been
working and use a wallpaper scraper to remove the section that has just been
steamed (Fig. 1, D).
•
You may need to leave the steamplate against the wall for longer periods with some
papers or re-steam if not completely removed.

EN
10
SteamForce Pro
12. Relling
iThe 230V unit will operate for approximately 80-100 minutes before requiring
relling.The water level is shown through the glass level indicator by a oating
red bead and should not be allowed to fall below MIN level (Fig. 1, C).
•
Switch the unit o when this level has been reached. If you require further use of the
steamer, ensure unit is switched o and has stopped boiling.
•
Wait for 5 minutes.
Beware of Steam! The Steam is very hot - wear gloves and keep face clear.
•
Slowly unscrew the cap, any remaining trapped steam will be released from beneath
the cap.
•
Rell to the MAX water level as before (Fig. 1, C) and follow above instructions.
You must never allow the unit to boil dry. There is a safety thermal cut-out
device tted to the unit. If the unit is allowed to boil dry this will operate and
prevent further use.
•
Switch the unit o and allow it to cool for at least 5 minutes, rell with water and then
switch on again - the thermal cut-out should automatically reset.
•
If this has not reset allow a further cooling period.
13. Storage
•
When you have nished using the unit allow any remaining water to cool and then
empty the unit. We recommend ushing the tank out with clean water before storing.
Never leave water in the unit whilst being stored.
Storage Spools
•
The supply cord and hose must be fully unwound before commencing to operate the unit.
•
To recoil the supply cord, t the plug into the socket-outlet on the side of the spool and
then wind the supply cord onto the spool.
•
To recoil the hose, place the steamplate end of the hose into the side aperture of the
spool and then wind the hose onto the spool (Fig. 1, E).
Storage Steamplate
•
The handle of the steamplate is shaped to locate between the frame and the tank.
•
Slide the steamplate into position with the handle against the tank and the thread
towards the base (Fig. 1, F).

EN
11
SteamForce Pro
Model Boiler Capacity Steam Time
SteamForce Pro 230V 7.5L 80 -100 Minutes*
*Approx. steam time before the safety cut-out operates.
14. Descaling
iRegular descaling is key to your steamer functioning properly.
Depending on water hardness, descale the steam wallpaper stripper
after 10 – 15 lls. Units which are defective due to a lack of descaling
are excluded from the guarantee!
•
Use a standard proprietary descaling agent. Observe the manufacturer's instructions
for use!
•
Mix the descaling agent with water (ratio 1:1).
•
Fill the steam wallpaper stripper with around 3.5 litres of descaling solution.
•
Switch the steam wallpaper stripper on for 10 minutes.
•
Switch the steam wallpaper stripper o again and unplug.
•
Leave the descaling solution to work for 30 minutes.
•
Then fully empty the steam wallpaper stripper.
•
Thoroughly rinse the unit two to three times with clear water to remove all descaling
solution residue.
15. Important Note regarding Product Liability!
In accordance with an EC directive, the manufacturer is liable for this product only if all parts
originate from or were approved by the manufacturer and the tools are assembled and
operated correctly.The use of other accessories and spare parts can partially or completely
invalidate the liability.

EN
12
SteamForce Pro
16. Correction of Malfunctions
Malfunction Cause Remedy
Unit fails to boil •
The thermal cut-out has operated
•
Usage of an extension lead
Switch o, allow to
cool, rell with water
then switch on again
Check that the thermal
reset button has not
tripped out.
Check that the
extension lead is rated
at minimum of 15
Amps (EU)/ 13 Amps
(UK) - 230V unit only
and fully unwound.
Unit keeps cutting
out •
Water is below MIN level
•
Usage of an extension lead
•
Additives have been used
Rell water
See above
Refresh water
Steam escaping
from pressure cap •
Blockage in hose or steamplate
•
Build up around cap area
Remove blockage
Clean seating around
cap area
i
If the unit still will not operate return the unit to the dealer or authorised agent
for investigation.
17. Technical Data
Power source: 220-240 V ~ 50Hz Power consumption: 2750W
Steaming time: 80-100 Minutes Hose length: 5 m
Boiler capacity: 7.5L Unit weight: 9.4kg
Max persons: 1Max standing weight: 127kg
18. Accessories
Further information about the WAGNER range of products for decorative preparation is
available on www.wagner-group.com.

EN
13
SteamForce Pro
19. Environmental protection
The tool and all accessories and packaging have to be recycled in
an environmentally friendly manner. Do not dispose of the tool with
household waste. Support environmental protection by taking the tool
to a local collection point or obtain information from a specialist retailer.
Leftover paint and solvents shall not be emptied into drains, the sewage system
or disposed of as household rubbish. It has to be disposed of separately as
special waste. Please pay special attention to the instructions on the product
packaging.
WARNING UK ONLY
Mains Connection 230V
The stripper is supplied fitted with a 13 Amp plug top and fuse. If a replacement fuse is
required this must be rated 13A and BS 1362 approved. If in doubt consult a qualified
electrician.
WARNING! This appliance must be earthed. For your total protection it is recommended
that a residual current device (RCD) rated at 30mA should be used in conjunction with
the stripper; load rating MIN 15 Amps, MAX 20 Amps.
If any electrical component is damaged or faulty, it must be replaced by the manufacturer
or its appointed service agents in order to avoid a safety hazard.
•
As the colours of the wires in the supply cord of this appliance may not correspond with
the coloured markings identifying the terminals in your plug, proceed as follows:
•
The wire which is coloured green and yellow must be connected to the terminal in the
plug which is marked with the letter E or by the earth symbol, or coloured green.
•
The wire which is coloured blue must be connected to the terminal which is marked
with the letter N or coloured black.
•
The wire which is coloured brown must be connected to the terminal which is marked
with the letter L or coloured red.

EN
14
SteamForce Pro
1 year guarantee
The guarantee runs for one year, counting from the date of sale (sales slip). It covers
and is restricted to free-of-charge rectication of faults which are demonstrably
attributable to the use of faulty materials in manufacture, or assembly errors; or free-
of-charge replacement of the defective parts. The guarantee does not cover incorrect
use or commissioning or tting or repair work which is not stated in our operating
instructions. Wearing parts are also excluded from the guarantee. We expressly reserve
the right to full the guarantee. The guarantee expires if the tool is opened up by
persons other than manufacturer service personnel. Transport damage, maintenance
work and loss and damage due to faulty maintenance work are not covered by the
guarantee. Under any guarantee claim, there must be proof of purchase of the tool
through submission of the original receipt. Wherever legally possible, we exclude all
liability for injury, damage or consequential loss, especially if the tool has been used
for a purpose other than that stated in the operating instructions, commissioned or
repaired other than in accordance with our operating instructions or if repairs are
performed by someone who is unqualied. We reserve the right to perform any repairs
in excess of those stated in our operating instructions. In case of guarantee or repair,
please refer to your point of sale. This guarantee does not aect your statutory rights.
EU Declaration of conformity
We declare under sole responsibility that this product conforms to the following
relevant stipulations:
2014/35/EU, 2014/30/EU, 2011/65/EU, 2012/19/EU
Applied harmonised norms:
EN 60335-1, EN 60335-2-54, EN 55014-1, EN 55014-2, EN 61000-3-2, EN 61000-3-3,
EN 62233
The EU declaration of conformity is enclosed with the product.
If required, it can be re-ordered using order number 2400204.

Material No. 2359766 A
08/2018
© Copyright by J.Wagner GmbH
www.wagner-group.com
Irrtümer und Änderungen vorbehalten.
Not responsible for errors and changes.
Sous réserves d’erreurs et de modifications.
Fouten en wijzigingen voorbehouden.
Con riserva di errori e modifiche.
Errores y modificaciones reservados.
Salvo erros e alteraçŏe.
Vi tager forbehold for eventuelle fijl og ændringer.
Vi påtar oss inget ansvar för eventuella felaktigheter och
förbehåller oss rätten att utföra ändringar.
J. WAGNER GMBH
Otto-Lilienthal-Str. 18
D-88677 Markdorf
T +49 0180 - 55 9246 37
F +49075 44-5 05 1169
WAGNER SPRAYTECH (UK) LTD
Opus Park
Moorfield Road
Guildford, Surrey, GU1 1SZ
T +44 (0)1483 454666
F +44 (0)1483 454548
WAGNER FRANCE S.A.R.L.
12 Avenue des Tropiques
Z.A. de Courtaboeuf
91978 Les Ulis Cedex
T +33 0825 011 111
F +33 (0)1 69 81 72 57
MAKIMPORT
HERRAMIENTAS, S.L.
C/ Méjico nº 6
Pol. El Descubrimiento
28806 Alcalá de Henares (Madrid)
T 902 199 021 / 91 879 72 00
F 91 883 19 59
ORKLA HOUSE CARE DANMARK A/S
Stationsvej 13
3550 Slangerup
Danmark
T +45 47 33 74 00
F +45 47 33 74 01
WAGNER SPRAYTECH
AUSTRALIA PTY. LTD.,
14-16 Kevlar Close
Braeside, VIC 3195
T +61 3 95 87- 20 00
F +61 3 95 80 - 91 20
J. WAGNER AG
Industriestraße 22
9450 Altstätten
T +41 71 -7 57 22 11
F +41 71 -7 57 23 23
HONDIMPEX KFT.
Kossuth L. u. 48-50
8060 Mór
T +36 (-22)- 407 321
F +36 (-22) -407 852
E-CORECO SK S.R.O.
Kráľovská ulica 8/7133
927 01 Šaľa
T +42 1948882850
F +42 1313700077
PUT WAGNER SERVICE
ul. E. Imieli 27
41-605 Swietochlowice
T + 48/32/346 37 00
F + 48/32/346 37 13
DE
FR
DK
SE
ES
PT
CH
AU
PL
GB
SK
ORKLA HOUSE CARE AB
Box 133
564 23 Bankeryd
Sweden
T +46(0)36 37 63 00
ROMIB S.R.L.
str. Poligonului nr. 5 - 7
100070 Ploiesti ,judet Prahova
T +40-344801240
F +40-344801239
RO
ORKLA HOUSE CARE NORGE AS
Nedre Skøyen vei 26,
PO Box 423, Skøyen
0213 Oslo
T +47 22 54 40 19
NO
E-CORECO S.R.O.
Na Roudné 102
301 00 Plzeň
T +42 734 792 823
F +42 227 077 364
CZ
HU
FHC SRL
Via Stazione 94,
26013 Crema (CR)
T 0373 204839
F 0373 204845
I
This manual suits for next models
1
Table of contents
Other WAGNER Kitchen Appliance manuals