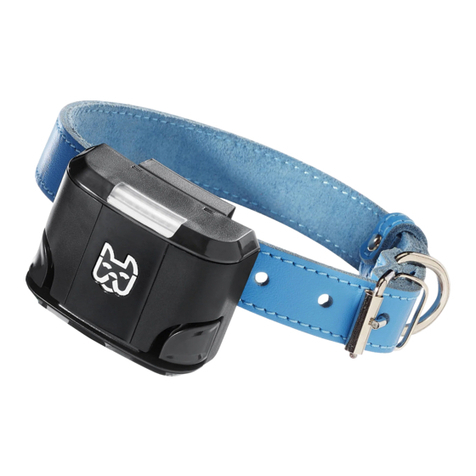
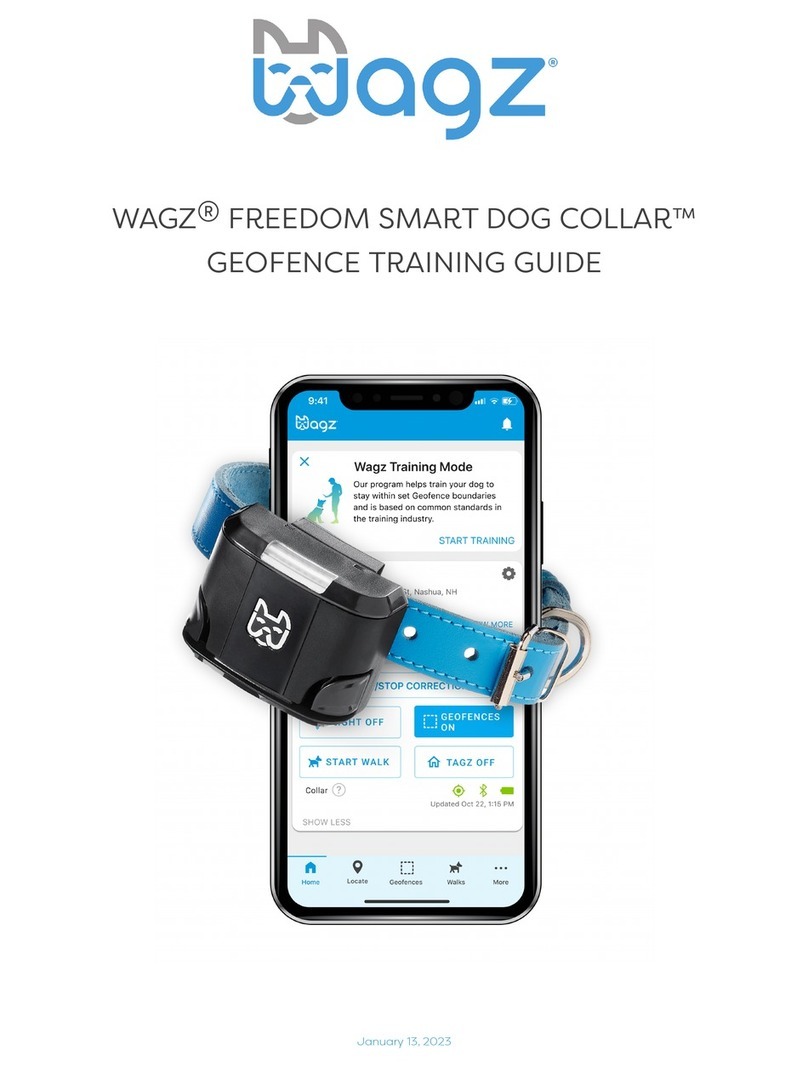
Wagz FREEDOM SMART DOG COLLAR User manual

WAGZ®FREEDOM SMART DOG COLLAR™
INSTRUCTIONS FOR USE
(August 17, 2021)

PART 1: ONBOARDING + SETUP
1. Quick Start Guide
2. Account Setup
2.1 Create Account
2.2 Login + Add Your Freedom Collar
2.3 Add Subscription
3. The Wagz App
4. Connecting Your Freedom Collar
5. Wi-Fi Setup
5.1 Wi-Fi Setup (iOS Only)
5.2 Wi-Fi Setup (Android Only)
6. Collar Activation + Updates
7. Pet Setup
PART 2: USING YOUR COLLAR
8. Wagz Dashboard
9. GPS Location Tracking
10. Geofence Guide
10.1 Finding Geofences
10.2 Adding Geofences
10.3 Selecting a Location For Geofences
10.4 Creating Geofences
10.5 Customizing Geofences
10.6 Checking GPS Signals for Geofences
11. Walks
12. Pet Settings
13. Collar Settings
14. LED Light Guide
PART 3: GEOFENCE TRAINING
15.1 How The Training Process Works
15.2 Introduction To Geofences
15.3 Geofence Boundary Training
Table of Contents
8.1 Features & Functions
8.2 Status Bar
8.3 Offline Status

1
1 Quick Start Guide
1 2
43
CHARGE
Push the battery up into the charger, and
plug in the USB charging cable. The charger
will show a red light while charging. Charge
for 2 hours, or until the light turns green.
TURN ON
Insert the battery into the collar when the
battery is fully charged. The collar’s light will
illuminate white momentarily while it boots
up. If it doesn’t, check to ensure the battery is
fully inserted into the collar.
GET GOING
Unleash the Freedom and enjoy doing
more with your pet!
For additional information, go to
support.wagz.com or contact us
at 1-844-252-3140.
SETUP
Visit setup.wagz.com and follow the instructions
to create your account. Install the Wagz app
and sign in using the same Wagz login and
password as the account you just created. Then
follow the instructions to complete setup.
Wagz products require the free Wagz app,
available in the Apple App Store for iOS
devices or Google Play Store for Android
devices.
Quick Start Guide
setup.wagz.com

2.1
2.1 Account Setup: Create Account
1
2
3
SIGN UP AT SETUP.WAGZ.COM
Click the “Sign Up” link in the upper right
and create an account.
SUCCESS
If successful, you will see this success
screen.
VERIFICATION EMAIL
When prompted, check your email for the
verification message and click on the included link.
Please note that the verification code is case
sensitive.
Account Setup: Create Account
TROUBLESHOOTING
If you do not receive your verification email, please check
your SPAM filter.

1
2
LOGIN AT SETUP.WAGZ.COM
Click the “Login” link in the upper right and
enter your account credentials.
ADD YOUR NEW COLLAR
TO YOUR ACCOUNT
Fill out the required information as
prompted.
When you are asked for the serial number, look
on the underside of the Wagz Freedom Collar
or on the box that it came in. The serial
number should be ten digits long.
Sometimes they will be all numerical digits, but
letters may appear in it too.
2.2
2.2 Account Setup: Login + Add Your Freedom Collar
Account Setup: Login + Adding Your Collar

2.3
2.3 Account Setup: Add Subscription
Account Setup: Add Subscription
1
2
3
SELECT A SUBSCRIPTION PLAN
ENTER PAYMENT DETAILS
SUCCESS!
Your product is ready to be activated using
the Wagz Mobile App.

3
3 The Wagz App
The Wagz App
1
2
INSTALL THE WAGZ APP
When directed to do so, download and install the
free Wagz App from the App Store (for iOS devices)
or Google Play (for Android devices).
OPEN THE WAGZ APP AND SIGN IN
Login using the same email and password credentials
you registered in step 1 of page 2.2 and tap “SIGN IN"
If you forgot your password, you can tap “FORGOT
PASSWORD” to request a password reset email.

4.1
4.1 Connecting Your Freedom Collar
Connecting Your Freedom Collar
1
2
NAVIGATE TO THE DEVICE SETUP SCREEN
Depending on the status of your account, you may already
be at the Device Setup screen when you login. If not, open
up the Main Menu by tapping on the three lines in the
upper left, select “Devices”, and hit the Add button ( ).
SELECT “FREEDOM COLLAR”
If you get a “Finish device registration” message, then
your account was not setup properly or the collar was
not successfully pre-registered (pages 2.1-2.3).
Log back into setup.wagz.com and make sure your
collar and subscription plan are complete. Check that
the serial number you entered is correct. It should be
10 digits long and may or may not include letters.
Once the collar is ready in your account, it will show
"Pending" status.

4.2
4.2 Connecting Your Freedom Collar (cont.)
Connecting Your Freedom Collar (cont.)
3
4
5
FOLLOW THE INSTRUCTIONS ON THE NEXT SCREEN
If onboarding multiple collars, we recommend powering up one at a
time, so that there is no confusion about which collar the mobile
app is seeing.
1 . Ensure the collar has a fully charged battery in place.
2. Wait for blinking blue light to appear.
3. Tap “SCAN FOR DEVICES” button below.
After inserting the battery, the collar will boot up and flash
white lights. The blinking blue lights should appear shortly after
this.
SELECT THE COLLAR THAT WAS FOUND
When the phone finds your collar, you will see this screen. Tap on
the circle next to “Freedom Collar.”
PROCEED TO SETUP WI-FI
A “SETUP WIFI” button will appear at the end of the previous step.
Tap this to go to the Setup Wi-Fi screen.
The next step is different between iOS devices and Android
devices. Please be sure to follow the step that applies to your
phone.
BUT THE COLLAR IS BLINKING RED OR GREEN LIGHTS!
THE APP DID NOT FIND MY COLLAR!
You may have inadvertently activated the collar’s self-diagnostic mode
with the button under the clip. Remove the battery, wait a few seconds,
and re-insert it.
If the Wagz App did not find your collar, make sure that Bluetooth is enabled
on your phone. Also make sure that the collar has a charged battery in it and
has not been onboarded already.

5.1
5.1 Wi-Fi Setup (iOS Only)
Wi-Fi Setup (iOS Only)
SETUP YOUR COLLAR TO USE YOUR WI-FI NETWORK
Select your Wi-Fi network from the picker menu on the bottom of
the screen.
Next, choose the type of network that you are connecting to. For a home
network, this will usually be “WPA/2”. Password-less networks must have
“Open” as the Network Type.
Then enter the network’s password and double-check that it is correct. If
the Wi-Fi network is an open network, leave this field blank.
When you are done entering the network information, tap the
“CONNECT” button and wait for the app to confirm that the operation
was successful or report an error message.
TROUBLESHOOTING
If you do not see your network in the list, select “RESCAN”.
TROUBLESHOOTING
If you receive an “Invalid Wi-Fi/Password” error message, then please check
the following:
•Check to make sure the correct Network Name is selected.
•Check to make sure the Password is correct. This field is case-sensitive.
•If the Wi-Fi network is an open, password-less network, make sure that
it does NOT have a mandatory sign-in page that appears when you
connect to it from your laptop or mobile device.
•Check to make sure the Network Type is correct.
•During initial collar setup, you'll want to make sure that the Wagz App
is open on only the phone that you are using for setup. If you have the
Wagz App installed on multiple devices, you will need to Force Quit
the Wagz App on the other devices before proceeding with setup.

5.2
5.2 Wi-Fi Setup (Android Only)
Wi-Fi Setup (Android Only)
SETUP YOUR COLLAR TO USE YOUR WI-FI NETWORK
Wait for the App to scan for all nearby Wi-Fi networks. Then, select
your Wi-Fi network from the drop-down menu.
Next, enter the network’s password and double-check that it is
correct. If the Wi-Fi network is an open network, leave
this field blank.
When you are done entering the network information, tap the
“CONNECT” button and wait for the app to confirm that the
operation was successful.
TROUBLESHOOTING
If you receive an “Invalid Wi-Fi/Password” error message, then please check
the following:
•Check to make sure the correct Network Name is selected.
•Check to make sure the Password is correct. This field is case-sensitive.
•If the Wi-Fi network is an open, password-less network, make sure that
it does NOT have a mandatory sign-in page that appears when you
connect to it from your laptop or mobile device.
•During initial collar setup, you'll want to make sure that the Wagz App
is open on only the phone that you are using for setup. If you have the
Wagz App installed on multiple devices, you will need to Force Quit
the Wagz App on the other devices before proceeding with setup.
TROUBLESHOOTING
•If you do not see your network in the list, select “RESCAN WIFI NETWORKS” .
•Make sure the “CONNECT” button at the bottom of this screen is blue before
proceeding. If it is not blue, you must hit the back arrow in the upper left and
redo the previous steps.
•The screen is likely to be unresponsive while the network list is loading. This
can take up to a minute. Thanks for being patient.

6
6 Collar Activation + Updates
Collar Activation + Updates
TROUBLESHOOTING
It is very important that the collar remains within the Wi-Fi network for this step. For
best results, position the collar near the Wi-Fi router so that the signal strength will
be optimal.
Once your collar is up and running, it will be less sensitive to variations in the Wi-Fi
network’s signal strength, and when the Wi-Fi signal is lost entirely it will use the
cellular network instead. But for this initial update stage, good Wi-Fi connectivity is
required.
1
2
ACTIVATE YOUR COLLAR
When the Wi-Fi setup step is successful, you’ll see the last
onboarding screen, which prompts you to tap an “ACTIVATE” button.
Tap this button.
GIVE YOUR COLLAR TIME TO UPDATE
Your collar will need 15-30 minutes to upgrade itself to the latest
firmware and to secure its initial GPS fix.
Place the collar somewhere with a clear view of the sky and within range
of your Wi-Fi router. A window sill near your Wi-Fi router is usually a good
place. Let it sit for 30 minutes or so.
During this time, your collar will flash different colors of lights as it
progresses through the different stages of updating and may reboot
itself multiple times. After the updating step is complete, it will start
searching for an initial GPS fix.
While the collar is updating, you may proceed to the next step of setting
up your pet.

7
7 Pet Setup
Pet Setup
SET UP YOUR PET
Tap the “SET UP PET” button. If you already entered your pet’s information into the Wagz App, then you
can simply select the pet to assign the new collar to it and continue from there.
If you haven’t yet entered your pet’s information, this would be a good time to complete. Not all fields are
required, but the more fields you fill out, the more accurate our various health and wellness algorithms
and metrics will be, so we recommend filling this information out as completely and accurately as
possible.
At the end of the process, make sure your new collar is assigned to your pet by opening up the Main Menu
(by tapping on the icon in the upper left of the main screen), selecting “Devices”, and selecting your new
device. The pet assignment field will appear within this screen.

The Wagz Dashboard is your home within the Wagz App. This screen is where you will find your pet's latest
information and be able to access the primary features of your collar.
8.1 Wagz Dashboard
8.1 Wagz Dashboard
COLLAPSED VIEW
You can collapse your dashboard
card to hide some of the buttons
and functionality by tapping
SHOW LESS in the bottom left
corner of the dashboard card.
This may be helpful if you have
multiple pets and want to be
able to see all of their cards at
one time.
There is a menu button ( ) on the top left corner of
the screen where you will be able to access your Pet
Profiles, Device details, and Walks history, as well as set
up a new Geofence or manage existing ones, find
Support information, and manage your Account.
MAIN MENU
NOTIFICATIONS
DASHBOARD CARD DETAIL
In the MY PETS tab of the dashboard, you will see a pet card for each of your pets. At the top of each pet card, you
will see their name and photo (if you have added one). You can access your Pet's Settings with the gear icon ( ).
Learn more about Pet Settings in Section 12.
You will see their last known location (or distance to their location) and can tap on the Locate button ( ) to see a
map view of the pet's location, request an updated location, get directions to their location, or see their location
history. Please note that Location history is not yet available on Android, but is a feature that will be coming soon.
Learn more about GPS Location Tracking in Section 9.
The next section of the dashboard shows their health summary information. Here you will see their Health &
Happiness Score and their Step Count for the day. You can tap the Metrics button ( ) to see more health and
wellness information, charts, and trends.
Below the health summary section, you will see a series of actions for your pet and their collar. You can send your pet
a Manual Correction, which can be useful to quickly correct any inappropriate behavior, like excessive barking,
digging, or getting too far away on a walk. This will trigger the same type of correction that you have saved in the
Pet Settings section of the app. You can turn on or off the collar's Safety Light ( ), and can turn on or off your pet's
Geofences ( ) with a quick tap. Holding down on the geofences button will also bring up the list of that pet's
geofences, where you can edit them or create new ones. Learn more about setting up and using geofences in
Section 10. From the dashboard, you can also Start a Walk ( ). Learn more about the Walks feature in Section 11.
In the NOTIFICATIONS tab of the Dashboard, you will see
a history of events for each of your pets, including
notifications about geofence activity, manual
corrections, walks, software updates, battery warnings,
and more.

8.2 Wagz Dashboard: Status Bar
DASHBOARD STATUS BAR
At the bottom of your pet's dashboard card is a status bar for their collar. This is where you will find information
regarding the collar's GPS signal strength, Wi-Fi signal strength, Cellular signal strength, Bluetooth connection, and
Battery status. The various states/colors for those items are shown below. This information can also be found
within your App by tapping on the Help button ( ) in the status bar.
WI-FI & CELLULAR
BLUETOOTH
BATTERY
GPS

8.3
8.3Wagz Dashboard: Offline Status
Wagz Dashboard: Offline Status
If you do not see the collar status bar and instead see a message about the collar being offline, that
means your collar is not connected to Wi-Fi or the cellular network. This may be because your collar
battery is dead and needs to be charged, or it could be a connectivity issue.
To confirm your collar is on, press the gray button on the back of your collar, in the middle of the clip. If
this causes a short beep, that means your collar is in fact on. If there is no beep, it is likely that your
battery is dead. Please recharge your battery and try again later.
If your collar is on and you are seeing the offline message, then one of the following things may be
happening:
1. You may be away from your Wi-Fi network and in an area with poor cellular coverage. In this
case, it is normal and correct to see this message.
2. If the status bar appears and disappears every few seconds or minutes, then it may be because
the collar is still doing its initial update (section 6 step 2).
3. Your Wi-Fi network may not configured properly within the Wagz App. While this shouldn’t be
the case if you got through the Wi-Fi setup step with a “success” message in the app, it’s possible
that the Wi-Fi credentials may not be valid if you subsequently went into the Device Settings
screen and added or altered Wi-Fi credentials from there. If that is the case and you can no
longer get online, we recommend performing the following steps:
•Go into the Device Settings screen for your collar.
•Remove all Wi-Fi networks from this screen.
•Add your home Wi-Fi network again, following the instructions from pages
5.1 (iOS) or 5.2 (Android).
•Navigate back to the Dashboard screen and select your pet’s card.
•Wait a few minutes for the Collar Status Bar to appear.
OFFLINE STATUS

9
9 GPS Location Tracking
GPS Location Tracking
TROUBLESHOOTING
For GPS tracking to work properly, make sure the 30 minutes from Step 6, Section
2 have elapsed and that the collar is not flashing lights of any color. If you do see
any flashing lights, go to Section 14 to learn about our LED indicators. Note that
the battery will drain faster than usual until this step is complete. This is normal,
as the collar is working harder than it will need to later to get the initial GPS fix.
If you haven't used your collar for a few days, or if it is brand new, it may take a
little longer than normal to report its location. Subsequent fixes will be faster
(barring adverse environmental conditions that may weaken the GPS signal).
LOCATION SUMMARY ON DASHBOARD
LOCATION MAP
On the Dashboard, under the “MY PETS” tab, you will see your pet(s). Go to your pet that
has had a collar assigned to it, and tap “SHOW MORE” at the bottom to ensure the pet
card is expanded. If you don't see "SHOW MORE" / "SHOW LESS", tap the or icon in
the top right corner of the dashboard card.
Here, you will see the status of your pet as well as the status of the collar. Look for the GPS
icon on the status bar. If the GPS icon ( ) is green then you know that you have a strong
GPS fix. If you don’t have a GPS fix, try moving the collar to a different location with a clear
view of the sky. Remember that it can take up to 30 minutes for the initial GPS fix.
(Don't worry, subsequent fixes will be faster!)
On iOS, you will see your pet's specific location at
the top of the dashboard card. On Android, you
will see the distance to their location.
Tap the Locate button ( ) on the pet's dashboard to open the location map. This will
show a map of your pets last known location. The timestamp of that location is shown at
the bottom of the screen. If that location timestamp is old, tap the Refresh Location
button ( ) to request a new location from the collar. This will be
particularly helpful if your pet has run away and you are actively trying to find him while he
continues to change location.
On this screen, you can also toggle on/off the geofence layer ( ) to see or hide any
geofences that are in the vicinity. You can also switch between Street View and Satellite
View ( ).
The street sign icon in the top right ( ) will open up your phone's mapping app and show
you step by step directions from your phone's current location to your pet. This will be
particularly helpful if your pet has run away and you are trying to get to him.
LOCATION HISTORY (IOS ONLY)
The iOS App includes a "HISTORY" tab in the Location Map screen. This screen provides
an animated walkthrough of your pet's day. You can tap on any of the gray points to
see at what time your pet was at that location. At the bottom of the screen, you can
scroll through each recent day to observe their movement and see where they spent
most of their time.
This feature is coming soon for Android devices.
IOS ANDROID

10.1 Geofence Guide: Accessing Geofences
OPEN GEOFENCES FROM THE MAIN MENU
Go to “Geofences” in your drop-down menu. This is where all
your Geofence information will be stored and where you can
create or edit your Geofences.
GEOFENCE SHORTCUT FROM PET CARD
There is also a shortcut to access your Geofences from your pet’s card
on the Dashboard.
Simply do a long press on the Geofences button ( ) toggle
button in order to see your pets:
•Total Active Geofences (in parentheses) and geofence names.
•Total Inactive Geofences (in parentheses) and geofence names.
You can also select “VIEW [Dog’s name] GEOFENCE” in order to
give you access to the selected pet’s Geofence list of filtered
Geofences.
10.1 Geofence Guide: Accessing Geofences

FIRST TIME USER
As a first time user, you can create your very first Geofence by
tapping either the “+” on the top right corner or by tapping
the green “ADD GEOFENCE”button.
ADD NEW GEOFENCE
All consecutive Geofences can be created by tapping the
“+” or by tapping the green “+ NEW GEOFENCE” button on
the bottom right corner.
10.2
10.2 Adding Geofences
Geofence Guide: Adding Geofences

10.3
10.3 Selecting a Location For Geofences
Geofence Guide: Selecting a Location For Geofences
NEW GEOFENCE
The app will open to a satellite map.
SEARCH FOR YOUR DESIRED GEOFENCE LOCATION
TOGGLE SATELLITE & MAP VIEW
This icon allows you to switch back and forth from Satellite View
to Map View.
FIND CURRENT LOCATION WITH GPS INDICATOR
ICON
This will be based off of your phone’s location, so be sure the
Location Permission in your App Settings is enabled.
DEFAULT VIEW
The view will default to Satellite View.
Choose the view that best fits your preference.
SEARCH FOR THE DESIRED GEOFENCE LOCATION
WITH THE MAGNIFYING ICON
Other manuals for FREEDOM SMART DOG COLLAR
1
Table of contents
Other Wagz Pet Care Product manuals
Popular Pet Care Product manuals by other brands

PawHut
PawHut D02-062 Assembly instruction

Communications Specialists
Communications Specialists Locator owner's manual

Fudajo
Fudajo 50027 instruction manual

Richell
Richell Pet Stuff Tower instruction manual

Pharmacy Solutions
Pharmacy Solutions Mini-Ticker Introducing

Dogtra
Dogtra 1900NCP Field Star Series owner's manual