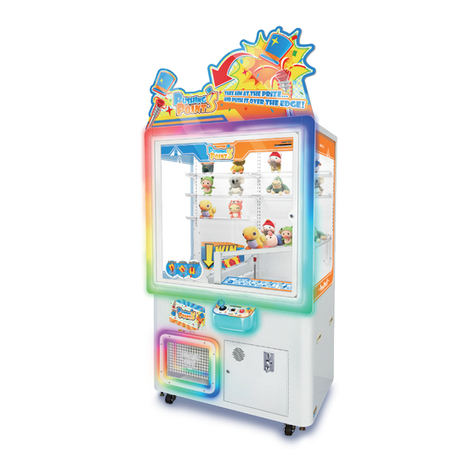
WAHLAP TECH LUMBER JACK User manual

Please keep this manual properly for convenient reference as needed.
For safety reasons, please read the manual first before plugging in machine.
:$51,1*
Ver.2.00
For sa
f
et
y
reasons, please read the manual
f
irst be
f
ore plu
gg
in
g
in machine
.
:
$51,1
*
Ve
r.
2.
00

$ERXW7KLV0DQXDO

3. Game Description 13
4. Test and Setting 14
4.2 Test Menu 15
4.1 Description about service panel and power switch14
4.4 Bookkeeping Data21
4.6.1 Clearing of number of remaining coins and lotteries23
4.2.1 Input test, output test and other self-tests 15
4.2.2 U-shaped photoelectric unit test18
4.3.1 5 Total tickets20
4.3 Game parameter setting-factory setting 19
4.5 Record query of ten rounds 22
4.6 Data Clear 23
4.6.2 Total revenue clear 23
4.7 Error place guide24
4.8 Error NO.guide25
5. Maintenance and Service28
5.1 Maintenance and service 28
2.7 Warranty 12
2.4 Shipment List9
2.5 Packing List10
2.6 Instructions for installation 11
1. Safety Precautions 1
1.1 Warning Stickers1
1.2 Placing Site 1
1.3 Safety Precautions 2
1.4 Precaution during Play 3
1.5 Transporting and Moving 3
1.6 Installing and Placing 4
1.7 Caution & Warning Stickers5
About This Manual
7DEOHRI&RQWHQWV
2. Product Description 6
2.1 Product Specification 6
2.2 Overview7
2.3 Parts Name 8
3.1 Appearance Design 13
3.3 How to play 13
3.2 Game introduction 13

5.2 Part Replacement29
5.2.1 LOGO RGB LED change29
5.2.4 Stand interior RGB LED change 30
5.2.2 LOGO white LED change 29
5.2.3 Stand bordering RGB LED change 30
5.2.5 Console bordering RGB LED change 31
5.2.6 Side bordering RGB LED change 32
5.2.7 Front side trimming RGB LED change 32
5.2.9 Hillside RGB LED change33
5.2.8 Cover RGB LED change 33
5.2.10 Axe RGB LED change35
5.2.11 Bonus white LED change 35
5.2.12 JP(BONUS) digital tube change36
5.2.13 Score digital tube change 36
5.2.14 Replacement of speaker 36
5.2.15 Axe electromagnet change 37
5.2.16 Front slider electromagnet change37
5.2.17 Small tree electromagnet change38
5.2.20 JP(Bonus)Ticket control U-shaped photoelectric board change40
5.2.19 JP˄Bonus˅Ticket control motor change39
5.2.18 Opposite photoelectric board change of axe reset 39
5.2.21 Slope photoelectric detection board change 40
5.2.22 Linear slider change41
5.2.24 Cooling fan change 43
5.2.23 Adjustment of limit screw42
5.2.25 Ticket dispenser change 43
5.2.26 Coin selector change43
5.2.27 Replacement of fuse 44
5.2.28 Service panel 5V LCD screen change 44
5.2.29 Service panel button board change 44
5.2.30 Replace power box 45
5.2.31 Character assembly change 45
5.4.1 Replacement of overseas-version ticket dispenser50
5.4.2 Replacement of overseas-version ticket dispenser pin-board 51
5.3 Replacement or repairing of main-board46
5.4 Overseas-version ticket dispenser (only for overseas-version ticket dispenser )49

6.3.1 Box assembly (FMG2-0101000)56
6.3.2 Power box assembly
(FMG2-0102000)58
6.3.3 Service panel assembly (FMG2-0103000) 59
6.3.4 Circuit board assembly (FMG2-0104000) 60
6.3.6 Coin box assembly (FMG2-0106000)62
6.3.5 Switching power supply assembly (FMG2-0105000) 61
6.3.7 Front side LED assembly of machine(FMG2-0107000) 63
6.3.9 Hillside assembly (FMG2-0109000) 66
6.3.8 Axe seat assembly (FMG2-0108000) 64
6. Assembly Drawing 52
6.2 General assembly (FMG2-0000000)53
6.1 Assembly Tree Drawing 52
6.3 Frame assembly (FMG2-0100000) 55
7. Printing Pattern91
8. Wiring Diagram 92
6.3.9.1 Score electric eye assembly (FMG2-0109000-01) 68
6.3.9.2 Stop rack assembly (FMG2-0109000-02) 69
6.3.9.3 Regulating motor assembly (FMG2-0109000-03)70
6.3.9.4 Small tree electromagnet group (FMG2-0109000-04)71
6.3.9.5 Motor assembly (FMG2-0109000-05)72
6.3.9.6 Motor photo eye board assembly (FMG2-0109000-06) 73
6.3.9.7 Left bearing assembly (FMG2-0109000-07) 74
6.3.9.8 Character assembly (FMG2-0109000-08)75
6.3.10 Console decoration assembly (FMG2-0110000)76
6.3.11 Start button assembly (FMG2-0112000)77
6.4.3 LOGO LED box assembly (FMG2-0203000)82
6.4.4 Sign board LED assembly 1 (FMG2-0204000) 83
6.4.1 Stand assembly (FMG2-0201000) 80
6.4.2 Stand interior assembly (FMG2-0202000) 81
6.4.5 Bonus LED assembly (FMG2-0205000) 84
6.4.6 Upper rear door assembly (FMG2-0206000) 85
6.6 Lower rear door assembly (FMG2-0400000) 87
6.5 Front door assembly (FMG2-0300000) 86
6.4 General assembly of stand (FMG2-0200000)78
6.7 Hillside cover assembly (FMG2-0500000) 88
6.9 Right POP board assembly (FMG2-0700000) 90
6.8 Left POP board assembly (FMG2-0600000)89
After-sales Service

:DUQLQJ6WLFNHUV
3ODFLQJ6LWH
In order to avoid injury to related people and damage to property, please
observe the followings:
PLEASE READ FIRST
The following marks can be used to indicate the magnitudes of risk and
damage caused by ignorance or improper operation:
Warning
Caution
means “may result in serious injury or death”
means “may result in minor injury or property
damage”
Serious Injury: refers to the situations in which hospital treatment or long-term treatment
will be accepted because of losing sight, getting hurt, getting burnt, electric
shock, fracture or intoxication.
Minor Injury: refers to the cases that there is no need to go to hospital or accept long-term
treatment.
Property Damage: refers to the damage of house, facility, or hurt of livestock and pet
Warning
This machine is designed for indoor use only. Never install the machine
outdoors. Meanwhile, please avoid the following locations indoor:
please make sure the place line has been grounded before product
installation, setup, testing, operation or repair
The rear part has the vent for heat emission from PC or screen.
Don’t place anything nearby to avoid game failure.
Provide a space of minimum 30cm between the rear of the machine
and the wall for good ventilation and heat emission
Direct sunlight, water leakage, damp and high temperature places.
Near Flammable, volatile, or/and dangerous substance.
Slope, unstable places or locations subject to frequent vibration.
Near emergency exit, fire extinguisher or similar equipment.
6DIHW\3UHFDXWLRQV

Warning
6DIHW\3UHFDXWLRQV
The owner shall pay attention to the followings when placing, checking
and repairing machine to insure player’s security and avoid damage:
Make sure to plug the game into 120V or 220V main outlet to avoid fire
and electric shock.
please check the voltage is 120V or 220V before the machine connectes
to the power supply,or it may cause a fire or electric shock.
Do not unplug or plug the plug instantly.
Don’t touch the power plug with a wet hand to avoid electric shock.
Don’t expose the power cord/grounding line on the passageway.
Failure to do this will damage the power cord, causing electric shock
or short circuit.
Don’t lay anything near the power cord to avoid fire.
Do not pull the power cord when unplugging, please hold the plug to
avoid power cord damage, causing fire or electric shock.
Only use fuse and spare parts specified by our company
Connect the connector firmly and tighten the screws.
Do not dismount, replace or convert the product without our permission
in order to avoid damage and human injury due to improper operation.
Check and maintain the machine regularly.
Keep “Warning stickers” clean and legible. Replace it immediately
when the words are not legible or the dirt can’t be removed.
Please contact our service center when performing any work that is
not described in this manual, and follow the instruction provided.
Make sure to turn off the power when performing maintenance and
service to avoid electric shock or short circuit.
In case of power cord damage, please contact the local distributor for
replacement

Transporting
When transporting the machine with an elevator, be sure to employ “Lift Point”
to prevent accident and damage to the machine.
To prevent movement when transporting the machine on a vehicle, please fix the
casters and fully retract the adjusters. Failure to do this may cause damage to the
machine.
When carrying the machine with a forklift, be sure to insert the fork to fork position
and lift stably. If not, it may cause accident and damage to the machine.
The Acrylic of the machine is fragile. High precision components are required for
vibration or shock resistance.
Moving
Before moving the machine, unplug the power plug to prevent accident.
Don’t damage the cord.
Pay attention to the obstructions and uneven surface when moving the machine
to prevent accident and damage to the machine.
Fully retract all adjusters before moving to prevent accident and hazard.
Make sure to use at least two persons to conduct the above work to avoid accident
and injury
Pay attention to the moving direction, see fig.
3UHFDXWLRQVGXULQJ3OD\
Caution
Caution
Person with poor health condition, such as hypertension or heart disease.
When a player feels uncomfortable during play, remind the person to have
a break, or stop playing.
Make sure the player reads the warning labels and other indications, and
plays in accordance with the instructions to avoid accidents such as electric
shock and short circuit.
Bystander shall not operate any button when the player is playing the game
to avoid unnecessary trouble.
In order to avoid injury and accident during play, the following people shall
not play the game:
People who are injured or less mobile.
Person wearing high-heeled or slippery shoes.
Person who can’t touch the pedal.
Pregnant woman, drunk people.
7UDQVSRUWLQJDQG0RYLQJ

,QVWDOOLQJDQG3ODFLQJ
Pay attention to the following when placing the machine.
Use the adjusters to fix the machine (See diagram 1)
1.Loosen the nuts for the adjusters (clockwise), tighten the bolts with a wrench (clockwise).
2.Tighten the nut firmly(counter clockwise) and fix it well.
Diagram (1)
Diagram (2)
Provide a space of minimum 30cm between the rear of the machine and
the wall for good ventilation and heat emission (See diagram 2).
Wall
bracket
Lock nut
Lock place
Caster Adjuster Bolt
Caution
Place the machine on the flat and slip resistant area.

&DXWLRQ:DUQLQJ6WLFNHUV
LumberJack
08/24/2022
SN: WLA00000234
GGSGA22QIK001
)0*3&(&
Lumber Jack
08/24/2022
SN: WLA00000234
GGSGA22QIK001

120V
60Hz
350 W
115kg
5~40。
C
Front View
Game-machine weight
Location
3URGXFW'HVFULSWLRQ
3URGXFW6SHFLILFDWLRQ
Indoor Only
Dimension
Rated Voltage
Frequency
Power Consumption
Temperature Range
Side View
70mm
2141mm
993mm
646mm
1788mm
755.5mm
1173mm
1127mm
540mm
1127(W)×1173(D)×2141(H)

2YHUYLHZ
Rear View
Bottom View
Side View
Top View

3DUWV1DPH
Upper rear door
Lower rear door
POWER/Fuse/Socket box
PMMA cover
Hand clasping
The POP theme board
Right side of the POP
Left side of the POP
Light box
Speaker Mesh
Start button
Right side of the decoration
Hand clasping
Front side lamp
Ticket dispenser
Coin selector
Axe ejection assembly
Scoreboard
Small tree
Ramp assembly
Character slider assembly
LED strip assembly on
both sides of cover
Triangular light assembly
Front door
Cover LED strip assembly

6KLSPHQW/LVW
Modes of packing
Note
10
FMG2-0700D01
POP plate right side
POP plate left side
Andy plate-5.0T
Andy plate-5.0T
Andy plate-5.0T
1
9
FMG2-0600D01
1
8
FMG2-0000D01
POP plate
1
7
Accessory box
1
6FMG2-0000000-A
Shipment assembly
components
1
5
FMG2-9901E05
Frame limit wood02 Solid wood
30.0*30.0*1365.0
1
4
FMG2-9901E04
Frame limit wood01
Solid wood 30.0*20.0*620.0 1
3
FMG2-9901E03
Frame canopy Waterproof
3C 1400g T-10 1
2
FMG2-9901E02
Frame enclosure Waterproof
3C 1400g T-10 1
1
FMG2-9901E01
Frame platform
1
No. Drawing No. Name Material/specifications Qty. Remarks

3DFNLQJ/LVW
Please check the following items after purchasing our product. If any part
missing or damaged, please contact our sales person!
Power cord
Fuse tube
Allen large flat head screw
Hex domed cap nut
6.3A/ 125V(5X20)
Copper printing paper
3m(1.0mm) 1
1
Color&Ticket Guide PVC
Character
Small tree
Display bracket
Flat gasket
PVC-0.5T 1
1
Description Specification Quantity Remarks
Specification
8
M4*8(chroming)
M4*12(chroming)8
8
M4*16(chroming)
ĭĭ(chroming)
M4(chroming)
SPCC-1.5T
5
5
4
PC-1.0T
POM-1.0T
1
5

,QVWUXFWLRQVIRULQVWDOODWLRQ
Package transportation parts
General assembly
of stand
Hex domed cap nut M4
1Remove 2 inner hexagonal screws
M4*20 on the rear upper door, and
open the rear upper door.
3Remove 2 hexagonal flange nuts
M5, and remove the general assembly
of stand.
4Remove screws of package transportation iron “1”,
package transportation iron “2”, package transportation
iron “3”, and package transportation iron “4” (4 cross
large flat head screws M4*12, and 4 cross large flat
head screws M6*30).
5Remove 2 hexagon socket large truss head screws M6*30
and 2 hexagon socket large truss head screws M4*12 of the
package transportation protection wood, and remove the
protection wood.
6Install the general assembly of stand with cross round
head three- combinations screws M6*30 and flat
VSDFHUVijijIODWVSDFHUV
7Install the main stand assembly
and acrylic cover hood 2 inner
hexagonal screws M4*12.
9Use inner hexagonal screw M4*8 screw to
install 4 exhibition board bracket right bottom
on the stand respectively.
10 Use hex socket screws M4*12 and cap nuts
to assemble the left side of POP board and
the right side of POP board respectively.
11 Install the POP board with hex socket
VFUHZV0DQGWKHIODWVSDFHUVijij
2Remove 2 hexagon socket large
truss head screws M4*12 of the
package transportation iron “3” and
the package transportation iron “4” for
fixing general assembly of stand.
flat spacer ij6*ij20*2
The three combination screw
round head M6*30
Exhibition board bracket
right bottom
Hexagon socket large
truss head screw M4*12
Hexagon socket large
truss head screw M4*8
POP board right side
Hexagon socket large
truss head screw M4*16
Flat spacersij4*ij10*1
Package transportation iron 2
Package transportation iron 1
Package transportation iron 4
Package transportation iron 3
Package transportation
protection wood
Check the unit after installation.
General assembly
of stand
POP board
POP board left side
Connect 4 terminals and install
the rear door.

:DUUDQW\
Damage caused by force majeure such as god will.
Failure caused by carelessness, such as water contact, falling down,
toppling, knocking.
Failure caused by disobeying the instructions in this manual.
Failure caused by operating the machine on inappropriate site.
Change the original design and configuration for the game without notice.
Failure to perform regular service and clean.
Failure to fix the product in line with the manual’s requirement.
Malfunction or part damage caused by electromagnetic interference other
electronic equipments generated.
Non-warranty Consumables
Light tube and bulb
Button lamp and switch
Fragile items
Solenoid
Other spare parts
Scope
Inquiry regarding product can be assisted for free.
The warranty scope for consumables and durables may differ from product
to product. Please contact our after-sales service center for detailed
information. The right of final interpretation is reserved.
Exclusive

*DPHLQWURGXFWLRQ
+RZWRSOD\
“LUMBER JACK” is a kind of machine whose theme is high mountain and forest, which is
built by mainly yellow and additionally green whole appearance combined with the colorful
lamps. One conspicuous axe is placed on the console of the machine, according to the
process of the game, different light effects combined with special effects of game music,
to create a new and exciting experience of woodcutting.
“LUMBER JACK” is a kind of single person game used to test the players’ grasp of the
strength. The player can pull the axe handle by controlling the strength to eject the woodcutter
to different colorful areas so as to obtain the number of lotteries corresponding to the color.
*DPH'HVFULSWLRQ
$SSHDUDQFH'HVLJQ
1. After coining, yellow start button flashes.
2. After pressing the yellow button, the axe lamp
starts to flash and the color bar in game zone
and the number of lotteries in lottery zone are
updated.
3. Pull the axe with proper strength.
4. Loosen the axe handle and eject the woodcutter
to the colorful area; step on the colorful area to
obtain the corresponding lottery number and
finish the game; the red area corresponds to
Bonus.

COIN
K3 Add
K4 subtract、Exit
TICKET
K5 Setting、Exit and save
K2 Move up, Previous item
K1 Move down, Next item SOUND
POWER
TEST SERVICE
Power switch
Power socket
Fuse holder
(6.3A125V)
Open front access door, and then you can see service panel above coin box.
ɋDescription about service panelɌ
7HVWDQG6HWWLQJ
'HVFULSWLRQDERXWVHUYLFHSDQHODQGSRZHUVZLWFK
ɋPower boxɌ
,
,
, ,
,

K4 Exit
K2 Previous item
K1 Next item
,QSXWWHVWRXWSXWWHVWDQGRWKHUVHOIWHVWV
1.Open the front maintenance door with the key and find the service panel.
2.Turn on the power of the machine, at the same time, press[Test] key continuously to
enter into the test mode, press key to move to next item, press key to move to
previous test, when the test finishes, press key to quit the test.
12、3
2、3
4
5
6
After finishing all tests, press key to quit the test.
7HVW0HQX
No. Test items Remarks
1Redemption TEST
In test mode, insert the lottery properly, press the start button, when the lottery machine sends
out one lottery, it shows the lottery machine is OK, otherwise, it shows the lottery machine or
the lines are fault
y
.
2
Motor FWD & Sensor
In test mode, press key to choose the test item of JP˄Bonus˅Ticket control [Motor FWD &
Sensor], and the motor drives the slice to move forward, when the photoelectric board 1, the
photoelectric board 2 and the photoelectric board 3 are sensed, it makes three kinds of sound
(ONE, TWO, THREE), if so, it shows the JP˄Bonus˅Ticket control motor moves forward and
the photoelectric board is OK, if the motor does not move, it shows the motor is faulty, if the
motor can moves and it does not make three kinds of sound, it shows the photoelectric board
is fault
y
.
3
Motor back & Sensor
In test mode, press key to choose the test item of JP˄Bonus˅Ticket control [Motor back &
Sensor], and the motor drives the slice to move backward, when the photoelectric board 1, the
photoelectric board 2 and the photoelectric board 3 are sensed, it makes three kinds of sound
(ONE, TWO, THREE), if so, it shows the JP˄Bonus˅Ticket control motor moves backward and
the photoelectric board is OK, if the motor does not move, it shows the motor is faulty, if the
motor can moves and it does not make three kinds of sound, it shows the photoelectric board is
fault
y
.
4 >>AxeMa
g
net TEST In test mode, press the start button to make pick-up contact once.
5 #1Slide Ma
g
net TEST In test mode,
p
ress the start button to make
p
ick-u
p
contact a
g
ain and a
g
ain.
6 #2Slide Ma
g
net TEST In test mode, press the start button to make pick-up contact a
g
ain and a
g
ain.
,
,
, ,
,
Other WAHLAP TECH Arcade Game Machine manuals
Popular Arcade Game Machine manuals by other brands

Pop-A-Shot
Pop-A-Shot PASHOM17-02 Assembly instructions

Raw Thrills
Raw Thrills Halo: Fireteam Raven Super Deluxe Setup and Operatin Service Manual

Andamiro
Andamiro DC SUPER HEROES Service manual

Ace Amusement
Ace Amusement Robot Storm manual

Nintendo
Nintendo POPEYE TPP2-UP Operation manual

Midway
Midway CRUIS'N USA manual

EXIDY
EXIDY CRASH installation instructions

Deltronic Labs
Deltronic Labs Ticket Eater D2000 manual

Roberto Sport
Roberto Sport COMPETITION instructions

Sega
Sega OUTRUN 2 SPECIAL TOURS SDX Service manual

Bob's Space Racers
Bob's Space Racers HANG TIME Operator's manual

Coastal Amusements
Coastal Amusements Yahtzee Standard Operating Manual