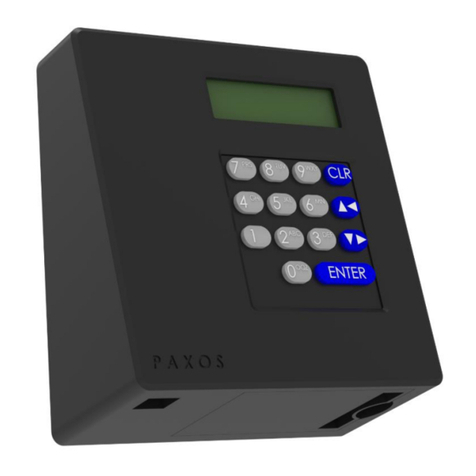
WALDIS PAXOS ADVANCE User manual

www.tresore.ch
OPERATING INSTRUCTIONS
SAFE LOCK
PAXOS ADVANCE WITH ROTARY KNOB,
DUAL LOCK
Electronic safe lock for WA safes and reinforced doors

Many thanks!
Many thanks for choosing Waldis to give you the security you want.
The safe you have decided to purchase is a product tested in compliance with the
EN1143-1 standard. A Swiss quality product with security tested by the VdS (German
Association of Indemnity Insurers).
Before starting to use your strongbox, please read these instructions thoroughly!
Your contact in case of questions:
WALDIS Tresore AG
Hofwisenstrasse 20
CH-8153 Rümlang
Telephone: +41 43 211 12 00
Fax: +41 43 211 12 12
Email: info@tresore.ch

Table of contents
Overview ..............................................................................................................................1
1.1. Operating controls: WALDIS First and Premium ....................................................1
1.2. Description of operating controls..............................................................................2
1.3. Functions of the rotary knob......................................................................................2
Starting to use your safe....................................................................................................3
Operation .............................................................................................................................5
3.1. Opening the safe .........................................................................................................5
3.2. Locking the safe...........................................................................................................6
3.3. Opening the safe under threat ..................................................................................6
3.4. Reprogramming codes ...............................................................................................7
3.4.1. User code 01 (OCa1) and user code 02 (OCb1) for lock 1...........................7
3.4.2. User code 01 (OCa2) and user code 02 (OCb2) for lock 2...........................8
3.4.3. Master code 00 (MA1).........................................................................................9
3.4.4. Master code 00 (MA2).........................................................................................9
3.5. Setting the date and time .........................................................................................10
3.6. Replacing the battery................................................................................................10
Malfunctions.......................................................................................................................11
4.1. Battery.........................................................................................................................11
4.2. Tamper block .............................................................................................................12
Assignment of connections on the I/O box ...................................................................12
5.1. Assignment of terminals on the I/O box.................................................................12
5.2. Connection data for the I/O box..............................................................................13
Basic rules for secure codes...........................................................................................16

500.0026-A 1 Subject to technical changes
Overview
The Paxos Advance is installed in the WALDIS First and WALDIS Premium series of
models, and in WG 9 reinforced doors. Because of their high security class, this is the only
lock that can be installed in these series of models. Users find that the display makes it
easy and clear to operate. Various additional functions can also be used with the Paxos
Advance.
1.1. Operating controls: WALDIS First and Premium
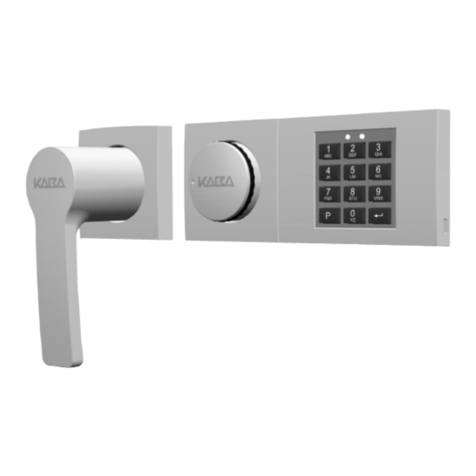
Input unit
Rotary opening handle
NOTE: These operating instructions describe how to handle a safe; in each case, they
show a version with the hinge on the right-hand side of the door. If you have a safe with
the hinge on the left-hand side of the door, you need to perform all the turning, opening
and closing movements in the opposite direction!

500.0026-A 2 Subject to technical changes
1
2
4
3
1.2. Description of operating controls
Pos. 1 = LCD display Menu and input display
Pos. 2 = Rotary knob Input and selection
Pos. 3 = USB port Connection for computer with programming software
Pos. 4 = Battery case
1.3. Functions of the rotary knob
Rotary knob command:
Function:
Press the rotary knob briefly.
-Confirm inputs
-Call up the user menu from the
standard operating display
Press the rotary knob > 1.5 seconds.
-Delete inputs
-Cancel a function
-Go back to the previous menu level
Turn the rotary knob to the left or
right.
-Select the next or previous menu
item
-Select the next or previous input
value
-Increase or decrease the displayed
value
Press the rotary knob and keep it
pressed down. As soon as the "Info"
menu appears, release the rotary
knob.
-Call up the "Info" menu

500.0026-A 3 Subject to technical changes
1
2
Starting to use your safe
As soon as the safe has been delivered and correctly anchored, you can start operating
the lock and using the safe.
To do so, please keep to the following procedure:
1. Check that the rotary opening handle is
in the 'closed' position. Do this by
applying gentle pressure to move the
rotary opening handle counterclockwise
into the end position.
2. Use your finger to release the battery
case that is slotted into the input unit
from below, and swivel it downwards and
outwards.
3. The battery holder (B) is inserted in the
battery case; release it from the case,
and fit six 1.5 V AA alkaline batteries
(LR6, E91 or AM3) into it. As an option,
you can also insert a rechargeable
battery pack (A) from Dorma Kaba; in
this case, there is no need for the battery
holder.
➔Operation with rechargeable
batteries is only possible with an
external power supply.
4. Carefully re-insert the battery holder (B)
or the rechargeable battery pack (A) into
the battery case.
Pay attention to the polarity of the
batteries!
A
B
B
A

500.0026-A 4 Subject to technical changes
1
2
5. Carefully re-insert the battery case and
swivel it upwards into the housing of the
input unit until the battery housing clicks
into place.
As soon as the input unit is supplied with
power, the display shows one of these
messages: "Battery case was open,
battery inserted" or "Battery case was
open, rechargeable battery pack
inserted".
6. To delete the battery message, you must
first press the rotary knob and then enter
the master code (MA1) or the battery
code (11111111). The lock can then be
used again in the normal way.
7. Press the rotary knob, and the display
will show the "Date, time saved"
message.
8. Press the rotary knob repeatedly, and
the display will show the "Open menu"
message; confirm this by pressing the
rotary knob again.
9. The display shows the "Lock code 1"
message to indicate that user code 1 or
2 for lock 1 (11223310 or 11223320)
must be entered. If the code was entered
correctly, the display shows the "Lock 1
is opening" message, followed by "Lock
is opened". The display then shows the
"Lock code 2" message to indicate that
user code 1 or 2 for lock 2 (12223310 or
12223320) must be entered. If the code
was entered correctly, the display shows
the "Lock 2 is opening" message,
followed by "Locks are open, open bolts".
The rotary opening handle can only be
moved clockwise after the second "Open
bolts" message.
10.
11. Open the door (display shows
"Released").
12. Programme the new code as per section
3.4.

500.0026-A 5 Subject to technical changes
Operation
3.1. Opening the safe
1. First, press the rotary opening handle
counterclockwise into the "closed"
position to make sure that the lock bolt is
relieved of pressure.
2. Press the rotary knob, and the display
will show the "Date, time saved"
message.
3. Press the rotary knob repeatedly, and the
display will show the "Open menu"
message; confirm this by pressing the
rotary knob again.
4. The display shows the "Lock code 1"
message to indicate that user code 1 or
2 for lock 1 (11223310 or 11223320)
must be entered. If the code was entered
correctly, the display shows the "Lock 1
is opening" message, followed by "Lock
is open". The display then shows the
"Lock code 2" message to indicate that
user code 1 or 2 for lock 2 (12223310 or
12223320) must be entered. If the code
was entered correctly, the display shows
the "Lock 2 is opening" message,
followed by "Locks are open, open bolts".
The rotary opening handle can only be
moved clockwise after the second "Open
bolts" message.
5. Open the door (display shows
"Released").
NOTE: Every movement of the rotary knob is acknowledged by an acoustic signal. If the
interval between two numeric inputs is more than 25 seconds, the display switches off and
you must input the entire code from the beginning again. If you make an incorrect entry,
you can delete the entire code with the CLR key and re-enter your code.

500.0026-A 6 Subject to technical changes
3.2. Locking the safe
1. Close the door while the rotary opening
handle is in the "open" position.
2. Turn the rotary opening handle
counterclockwise into the "closed"
position (lock closes automatically).
Wait for the "Lock closed!" message
on the display.
3. Gently press the rotary opening handle
clockwise to check whether the lock –
and therefore the safe –are locked.
3.3. Opening the safe under threat
If the locking system is connected to an alarm installation, a silent alarm (which cannot be
heard at your location) can be sent to the alarm centre when the code to open the safe is
entered in the normal way. To trigger the threat alarm, the value of the last two digits of
the opening code must be increased by three. This input sends an alarm and the lock
opens (so as not to arouse suspicion).
Make sure that the threat code does not result in a valid opening code!
Explanation:
Last digits of the opening code:
Addition:
Input:
XXXXXX96
96 + 3 = 99
XXXXXX99
XXXXXX97
97 + 3 = 100
XXXXXX00
XXXXXX98
98 + 3 = 101
XXXXXX01
XXXXXX99
99 + 3 = 102
XXXXXX02
XXXXXX00
00 + 3 = 03
XXXXXX03
XXXXXX05
05 + 3 = 08
XXXXXX08
Examples:
Opening code:
Threat code:
19275339
19275342
19275342
19275345
19275398
19275301

500.0026-A 7 Subject to technical changes
3.4. Reprogramming codes
NOTE: A new code must always be programmed while the door is open so that the safe is
not closed in case of an incorrect input, which would result in an incorrect code being
programmed!
If the code has been forgotten or can no longer be reconstructed, an emergency opening
of the safe must be performed and it must be repaired or replaced at the owner's expense!
The certification lapses in case of a repair.
The Paxos Advance lock contains two user codes and one master code. Up to 95
"employee codes" can be defined in addition. The following factory codes are
programmed:
The following codes must be changed:
Lock 1:
User code 01 (OCa1): 11 22 33 10
User code 02 (OCb1): 11 22 33 20
Lock 2:
User code 01 (OCa2): 12 22 33 10
User code 02 (OCb2): 12 22 33 20
The following codes can be changed:
Master code 00 (MA1): 11 99 88 77
Master code 00 (MA2): 12 99 88 77
Battery code (BC94): 11 11 11 11
(The lock cannot be opened with this code; it is needed to define the "employee codes"
and the time functions.)
The Paxos Advance electronic high-security lock is normally in "Sleep mode" (power-
saving mode). The lock is activated by pressing the rotary knob.
3.4.1. User code 01 (OCa1) and user code 02 (OCb1) for lock 1
NOTE: It is essential to reprogramme the two user codes 1 and 2, because the two factory
codes could be known to a third party and the safe could be opened.
Procedure:
1. Open the door with the current codes.
2. Leave the rotary opening handle in the "open" position.
3. Press the rotary knob on the input unit, and confirm the "Code functions" menu that is
shown on the display by pressing the rotary knob again.
4. The display shows "Lock 1"; also confirm this with the ENTER key.
5. Turn the rotary knob to select "01 OCa1" / "02 OCb1" and confirm by pressing the
rotary knob; the display shows "Change".
6. Confirm this by pressing the rotary knob and enter the existing code 1 (OCa1/ OCb1)
(when you reprogramme for the first time, this is 11223310 for code 1 and 11223320
for code 2), and confirm by pressing the rotary knob.

500.0026-A 8 Subject to technical changes
7. Then enter the new code (8 digits) and confirm again by pressing the rotary knob.
8. Enter the new code again to confirm it, and press the rotary knob to complete the
confirmation. The display shows: "Code saved".
9. With the door open, move the rotary opening handle counterclockwise into the
"closed" position (lock closes automatically).
10. Enter the newly programmed code and open the lock again by moving the rotary
opening handle clockwise.
11. If the test opening works, this guarantees that the new code has been saved and the
door can be closed.
NOTE: If errors occur while making the change, the old code remains valid. You must start
the programming procedure from the beginning again.
3.4.2. User code 01 (OCa2) and user code 02 (OCb2) for lock 2
Procedure:
1. Open the door with the current codes.
2. Leave the rotary opening handle in the "open" position.
3. Press the rotary knob on the input unit, and confirm the "Code functions" menu that is
shown on the display by pressing the rotary knob again.
4. On the display, use the arrow key to select "Lock 2" and also confirm this with the
ENTER key.
5. Turn the rotary knob to select "01 OCa2" / "02 OCb2" and confirm by pressing the
rotary knob; the display shows "Change".
6. Confirm this by pressing the rotary knob and enter the existing code 1 (OCa2/ OCb2)
(when you reprogramme for the first time, this is 12223310 for code 1 and 12223320
for code 2), and confirm by pressing the rotary knob.
7. Then enter the new code (8 digits) and confirm again by pressing the rotary knob.
8. Enter the new code again to confirm it, and press the rotary knob to complete the
confirmation. The display shows: "Code saved".
9. With the door open, move the rotary opening handle counterclockwise into the
"closed" position (lock closes automatically).
10. Enter the newly programmed code and open the lock again by moving the rotary
opening handle clockwise.
11. If the test opening works, this guarantees that the new code has been saved and the
door can be closed.

500.0026-A 9 Subject to technical changes
3.4.3. Master code 00 (MA1)
RECOMMENDATION: Use the same code for the master code and user code 01 (OCa1),
or leave the master code on the factory setting (11998877). The safe cannot be opened
with the master code on its own!
Procedure:
1. Open the door with the current codes.
2. Leave the rotary opening handle in the "open" position.
3. Press the rotary knob on the input unit, and confirm the "Code functions" menu that is
shown on the display by pressing the rotary knob again.
4. Turn the rotary knob to select "Lock 1" and then "00 MA1"; confirm by pressing the
rotary knob, and the display shows "Change".
5. Confirm this by pressing the rotary knob and then enter the existing lock code (MA1)
(when you reprogramme for the first time, this is 11998877), and confirm by pressing
the rotary knob.
6. Then enter the new code (8 digits) and confirm again by pressing the rotary knob.
7. Enter the new code again to confirm it, and press the rotary knob to complete the
confirmation. The display shows: "Code saved".
3.4.4. Master code 00 (MA2)
RECOMMENDATION: Use the same code for the master code and user code 01 (OCa2),
or leave the master code on the factory setting (12998877). The safe cannot be opened
with the master code on its own!
Procedure:
1. Open the door with the current codes.
2. Leave the rotary opening handle in the "open" position.
3. Press the rotary knob on the input unit, and confirm the "Code functions" menu that is
shown on the display by pressing the rotary knob again.
4. Turn the rotary knob to select "Lock 2" and then "00 MA2"; confirm by pressing the
rotary knob, and the display shows "Change".
5. Confirm this by pressing the rotary knob and then enter the existing lock code (MA2)
(when you reprogramme for the first time, this is 12998877), and confirm by pressing
the rotary knob.
6. Then enter the new code (8 digits) and confirm again by pressing the rotary knob.
7. Enter the new code again to confirm it, and press the rotary knob to complete the
confirmation. The display shows: "Code saved".

500.0026-A 10 Subject to technical changes
1
2
3.5. Setting the date and time
1. With the door open and the rotary opening handle in the "open" position, press the
rotary knob; turn the rotary knob to select the "Time functions" menu, and confirm by
pressing the rotary knob.
2. On the display, confirm the "Lock 1" menu by pressing the rotary knob.
3. Enter the master code (MA1) and confirm by pressing the rotary knob.
4. The display shows the "Date/time" menu, which you must confirm by pressing the
rotary knob.
5. Use the rotary knob to enter the date and time, and confirm by pressing the rotary
knob. The date and time are then saved.
3.6. Replacing the battery
1. Purchase the batteries (6 x 1.5 V AA
alkaline batteries: LR6, E91 or AM3).
2. Use your finger to release the battery case
that is slotted into the input unit from
below, and swivel it downwards and
outwards.
3. The battery holder (B) is inserted in the
battery case; release it from the case, and
fit six 1.5 V AA alkaline batteries (LR6, E91
or AM3) into it. As an option, you can also
insert a rechargeable battery pack (A)
from Dorma Kaba; in this case, there is no
need for the battery holder.
➔Operation with rechargeable batteries
is only possible with an external power
supply.
Note the expiration date!
Pay attention to the polarity of the batteries!
A
B

500.0026-A 11 Subject to technical changes
1
2
4. Carefully re-insert the battery holder (B) or
the rechargeable battery pack (A) into the
battery case.
5. Carefully re-insert the battery case and
swivel it upwards into the housing of the
input unit until the battery housing clicks
into place.
As soon as the input unit is supplied with
power, the display shows one of these
messages: "Battery case was open,
battery inserted" or "Battery case was
open, rechargeable battery inserted".
6. To delete the battery message, you must
first press the rotary knob, then enter the
master code (MA1) or the battery code
(1111111), and confirm by pressing the
rotary knob. The lock can then be used
again in the normal way.
Malfunctions
4.1. Battery
If there is insufficient battery voltage, the display shows the "Battery flat" message.
If you observe the warning just mentioned, the battery for the lock must be replaced as
quickly as possible (section 3.6.).
The lock can be operated until the battery voltage drops below 6.5 volts.
No codes or settings are deleted when a battery is replaced. You only need to check the
date and time, and reset them if necessary (section 3.5.).
NOTE: Do not use rechargeable AA batteries (accumulator batteries) because they do not
have enough capacity to ensure fault-free operation!
B
A

500.0026-A 12 Subject to technical changes
4.2. Tamper block
After 5 invalid code inputs, the rotary knob is blocked for 6 minutes. The remaining lockout
time is shown on the display, and it cannot be bypassed. If the incorrect code is entered
again after the lockout time has elapsed, the lockout time of 6 minutes will start again.
From the tenth successive incorrect input onwards, the lock will block inputs for 20
minutes. The lockout time ends as soon as the valid code has been entered correctly.
Assignment of connections on the I/O
box
NOTE: Installation and connection of the safe to an alarm or security system must only be
performed by trained specialist staff!
5.1. Assignment of terminals on the I/O box
The I/O box has 8 inputs and 8 outputs, connections for the power supply, and an RS232
interface.
NOTE: The I/O box functions are only available when the I/O box is connected to an
external power source. In case of a power outage, the batteries in the input unit guarantee
the lock functions but not the functions of the I/O box.
Assignment of terminals on the I/O box

500.0026-A 13 Subject to technical changes
5.2. Connection data for the I/O box
Terminal
Description
Capacity/comments
1 (IN1) / 2 (GND) **
Input 1
Standard: remote
lockout
12 ... 24 VDC (min. 5 mA)
*Connection without tamper
monitoring switch (factory
configuration):
** Connection with tamper monitoring
switch (factory configuration):
3 (IN2) / 4 (GND) *
Input 2
Standard: bypass
opening delay
5 (IN3) / 6 (GND) *
Input 3
Standard: interrupt
lockout time
16 (IN4) / 17 (GND)
*
Input 4
Standard: external
tamper contact
18 (IN5) / 19 (GND)
*
Input 5
Standard: not assigned
20 (IN6) / 21 (GND)
*
Input 6
Standard: not assigned
31 (IN7) / 32 (GND)
*
Input 7
Standard: not assigned
33 (IN8) / 34 (GND)
*
Input 8
Standard: not assigned
INx
GND
6.8
k
Ÿ
ext.
I/O box
INx
GND
ext.
I/O box

500.0026-A 14 Subject to technical changes
Terminal
Description
Capacity/comments
7 (OUT1+) / 8
(OUT1–)
Output 1
Standard: lock 1 open
Output voltage: 24 VAC
Power load at output:
0.4 A at 25°C
0.3 A at 50°C
ext.
OUTx +
OUTx –
9 (OUT2+) / 10
(OUT2–)
Output 2
Standard: all locks and
door bolts open
11 (OUT3+) / 12
(OUT3–)
Output 3
Standard: resistance
monitoring input
sabotaged
22 (OUT4+) / 23
(OUT4–)
Output 4
Standard: external
tamper input
24 (OUT5+) / 25
(OUT5–)
Output 5
Standard: threat alarm
impulse
35 (OUT6+) / 36
(OUT6–)
Output 6
Standard: threat alarm
with code
37 (OUT7+) / 38
(OUT7–)
Output 7
Standard: battery case
open
NO
I/O box

500.0026-A 15 Subject to technical changes
Terminal
Description
Capacity/comments
39 (NC) / 40 (COM)
/ 41 (NO)
Output 8
Standard:
monitoring of
external power supply
Output voltage: 24 VAC
power load at output:
0.4 A at 25°C
0.3 A at 50°C
ext.
NC (39)
COM (40)
NO (41)
14 (VDC) / 15
(GND)
External power supply
12 VDC ... 24 VDC
700 ... 200 mA
ext. I/O box
12...24 VDC (14)
GND (15)
28 (RxD) / 29 (TxD)
/ 30 (GND)
Serial interface (e.g. for
online logging)
ext. I/O box
RxD (28)
TxD (29)
GND (30)
I/O box

500.0026-A 16 Subject to technical changes
Basic rules for secure codes
What you should avoid:
•Don't use commonplace sequences such as 00000000 or 12345678.
•Do not use your own birthday or any car registration numbers, phone numbers or
names (your own name or those of your spouse, children, pets, company, place where
you live, etc.); the code should not have a logical structure.
•Do not use any standard passwords such as "password" or "safe".
•Writing backwards is also too simple.
•Don't use a password that you already use elsewhere.
Keeping a password secure:
•A password is only secure if it stays secret!
•You should memorise passwords –don't write them down.
•Think how the password would still be kept available in case the person who has it is no
longer able to disclose it (e.g. if they die). Deposit a sealed envelope with your notary.
NOTE: If the password/code has been forgotten or can no longer be reconstructed, the
safe must be drilled open and repaired or replaced at the owner's expense!
Other manuals for PAXOS ADVANCE
1
Table of contents
Other WALDIS Lock manuals

WALDIS
WALDIS CAWI 7215 Manual

WALDIS
WALDIS CAWI BLUECAM User manual

WALDIS
WALDIS CAWI 7215 User manual

WALDIS
WALDIS PAXOS ADVANCE DUAL LOCK User manual

WALDIS
WALDIS CAWI EVO User manual

WALDIS
WALDIS PAXOS ADVANCE User manual

WALDIS
WALDIS COMBI B 30 User manual

WALDIS
WALDIS CAWI PRIMOR 1000 User manual

WALDIS
WALDIS Tresore AXESSOR USB User manual

WALDIS
WALDIS AXESSOR User manual