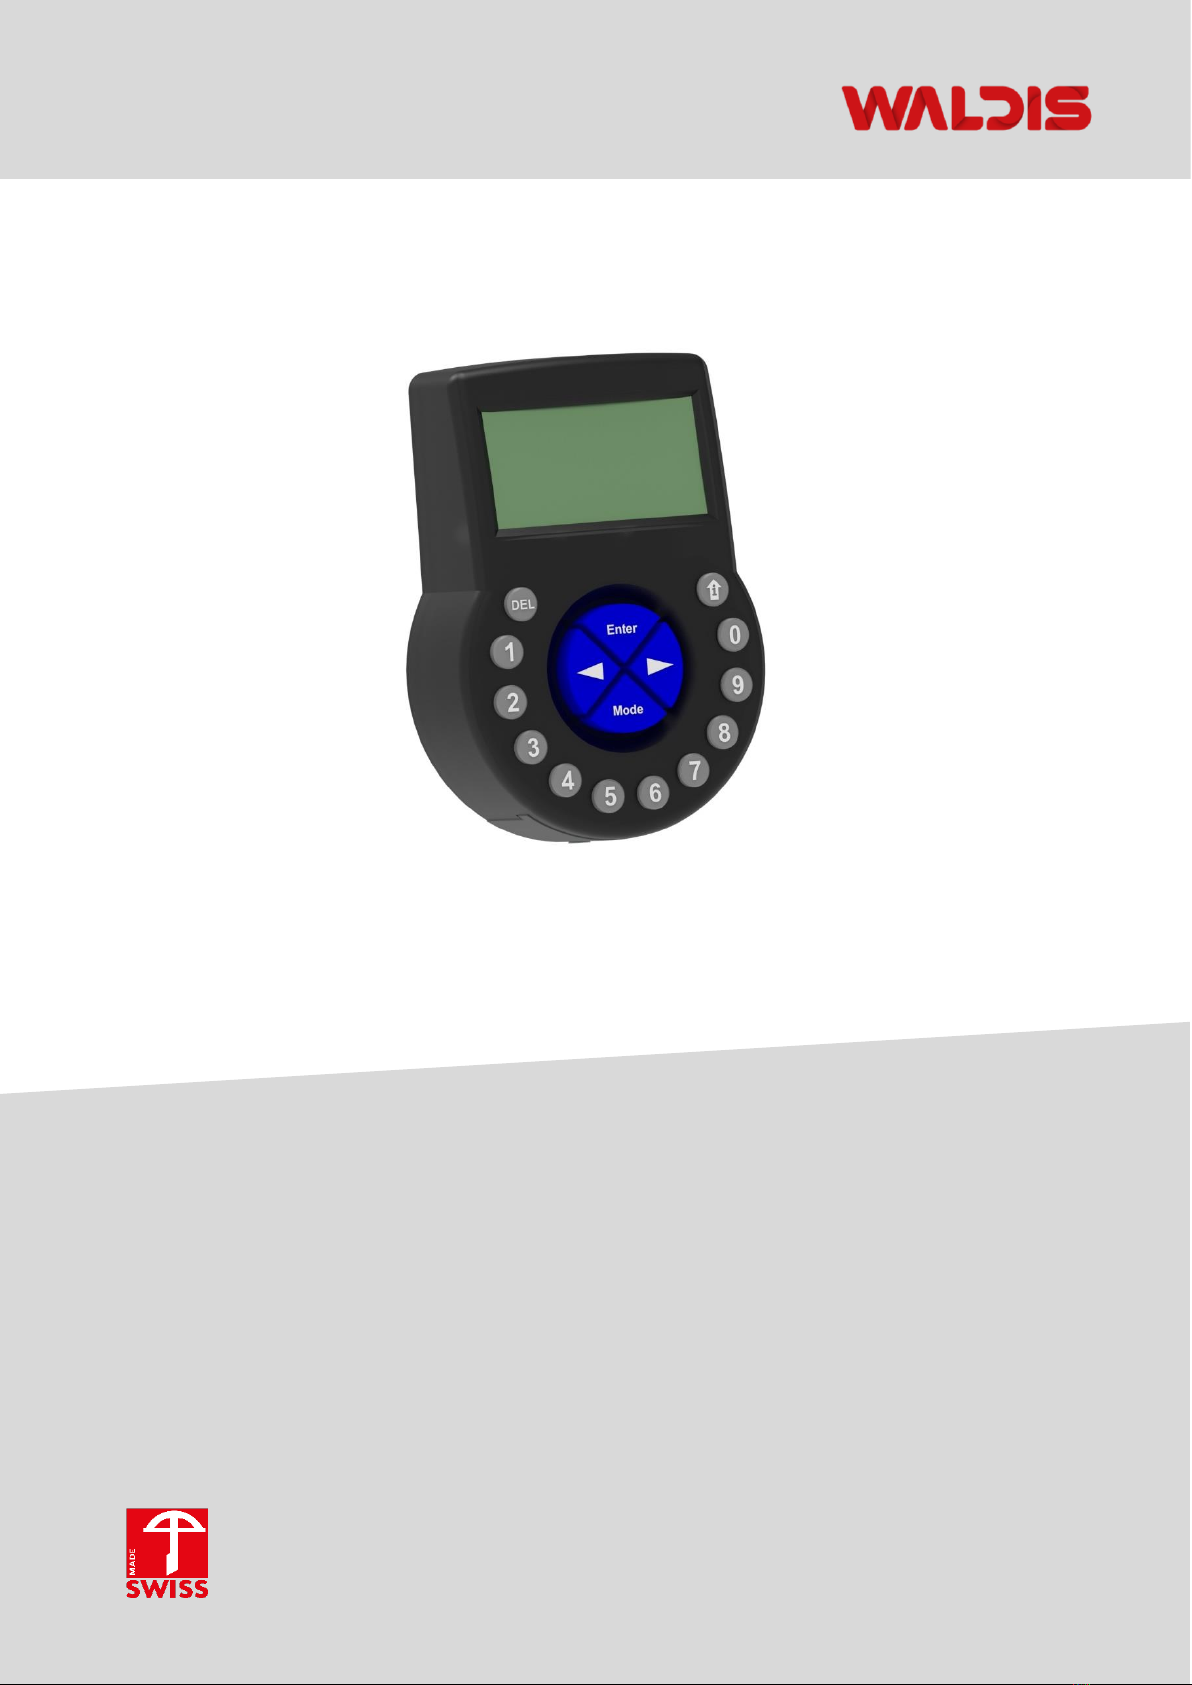
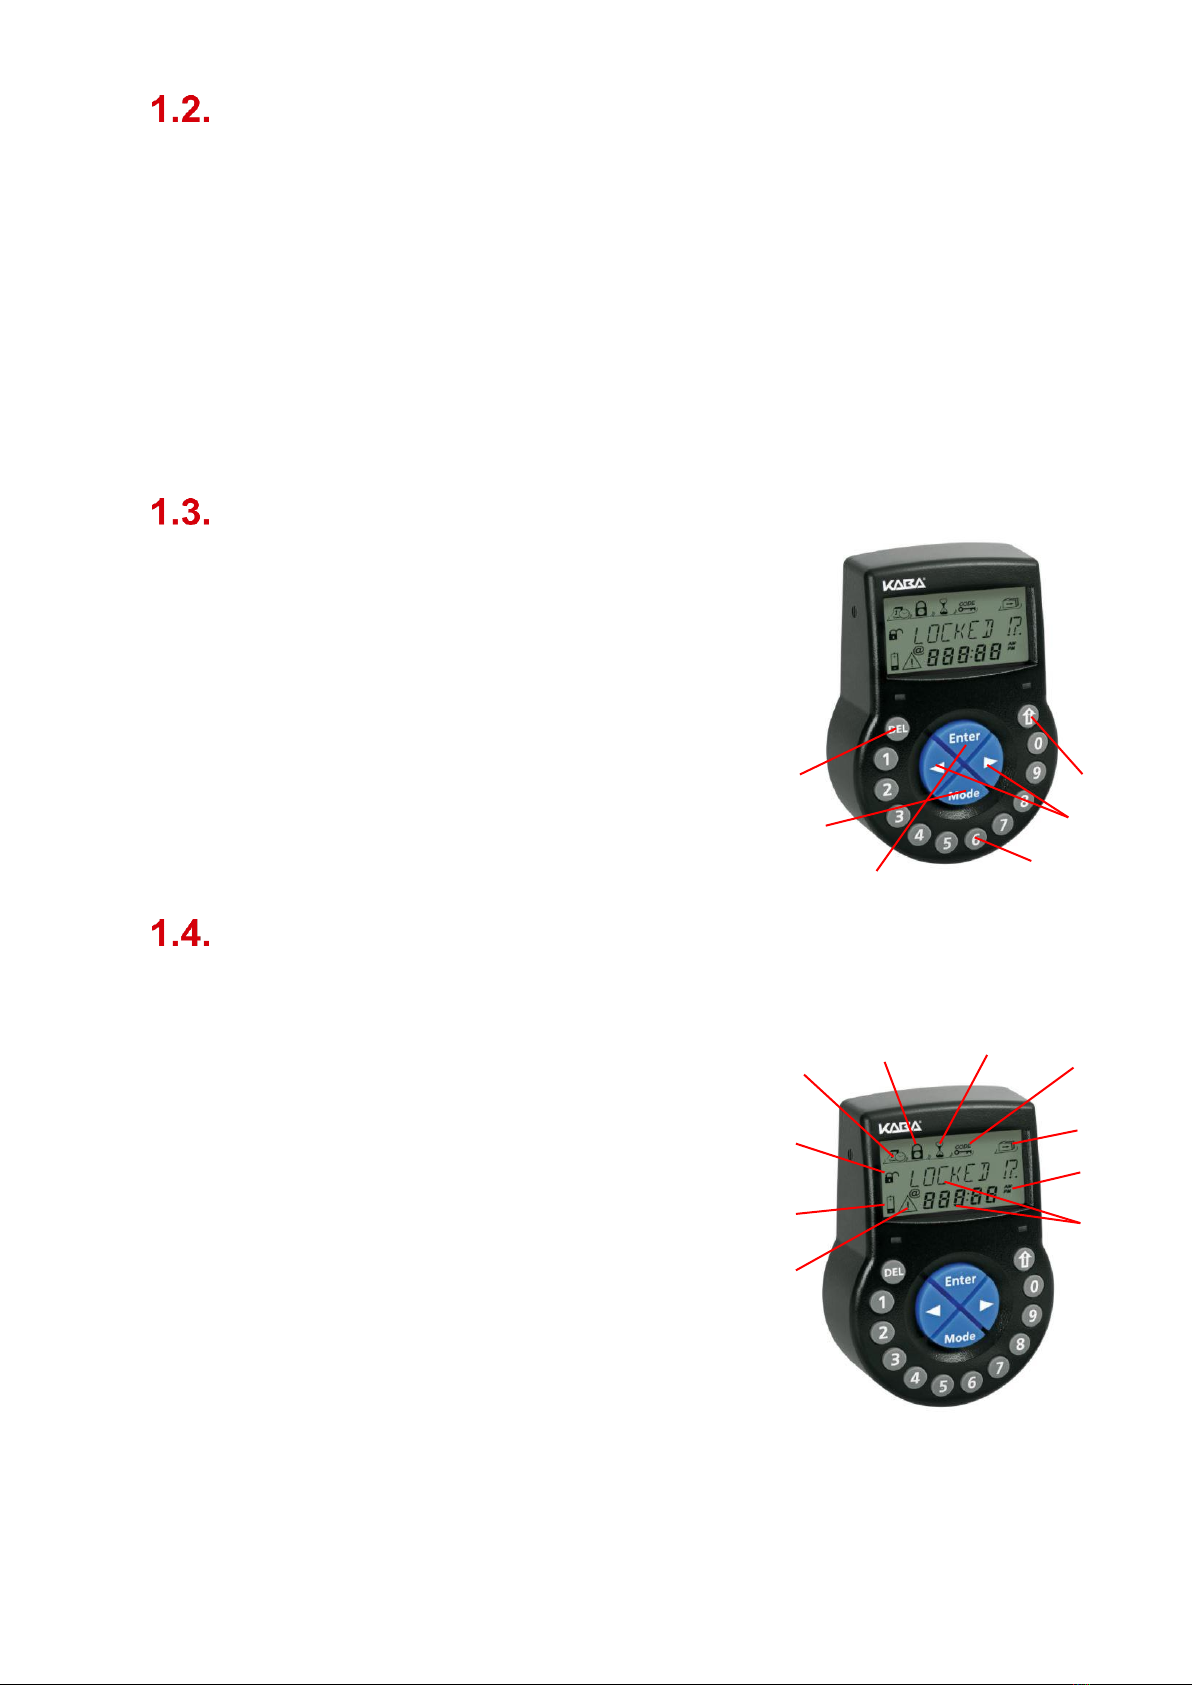
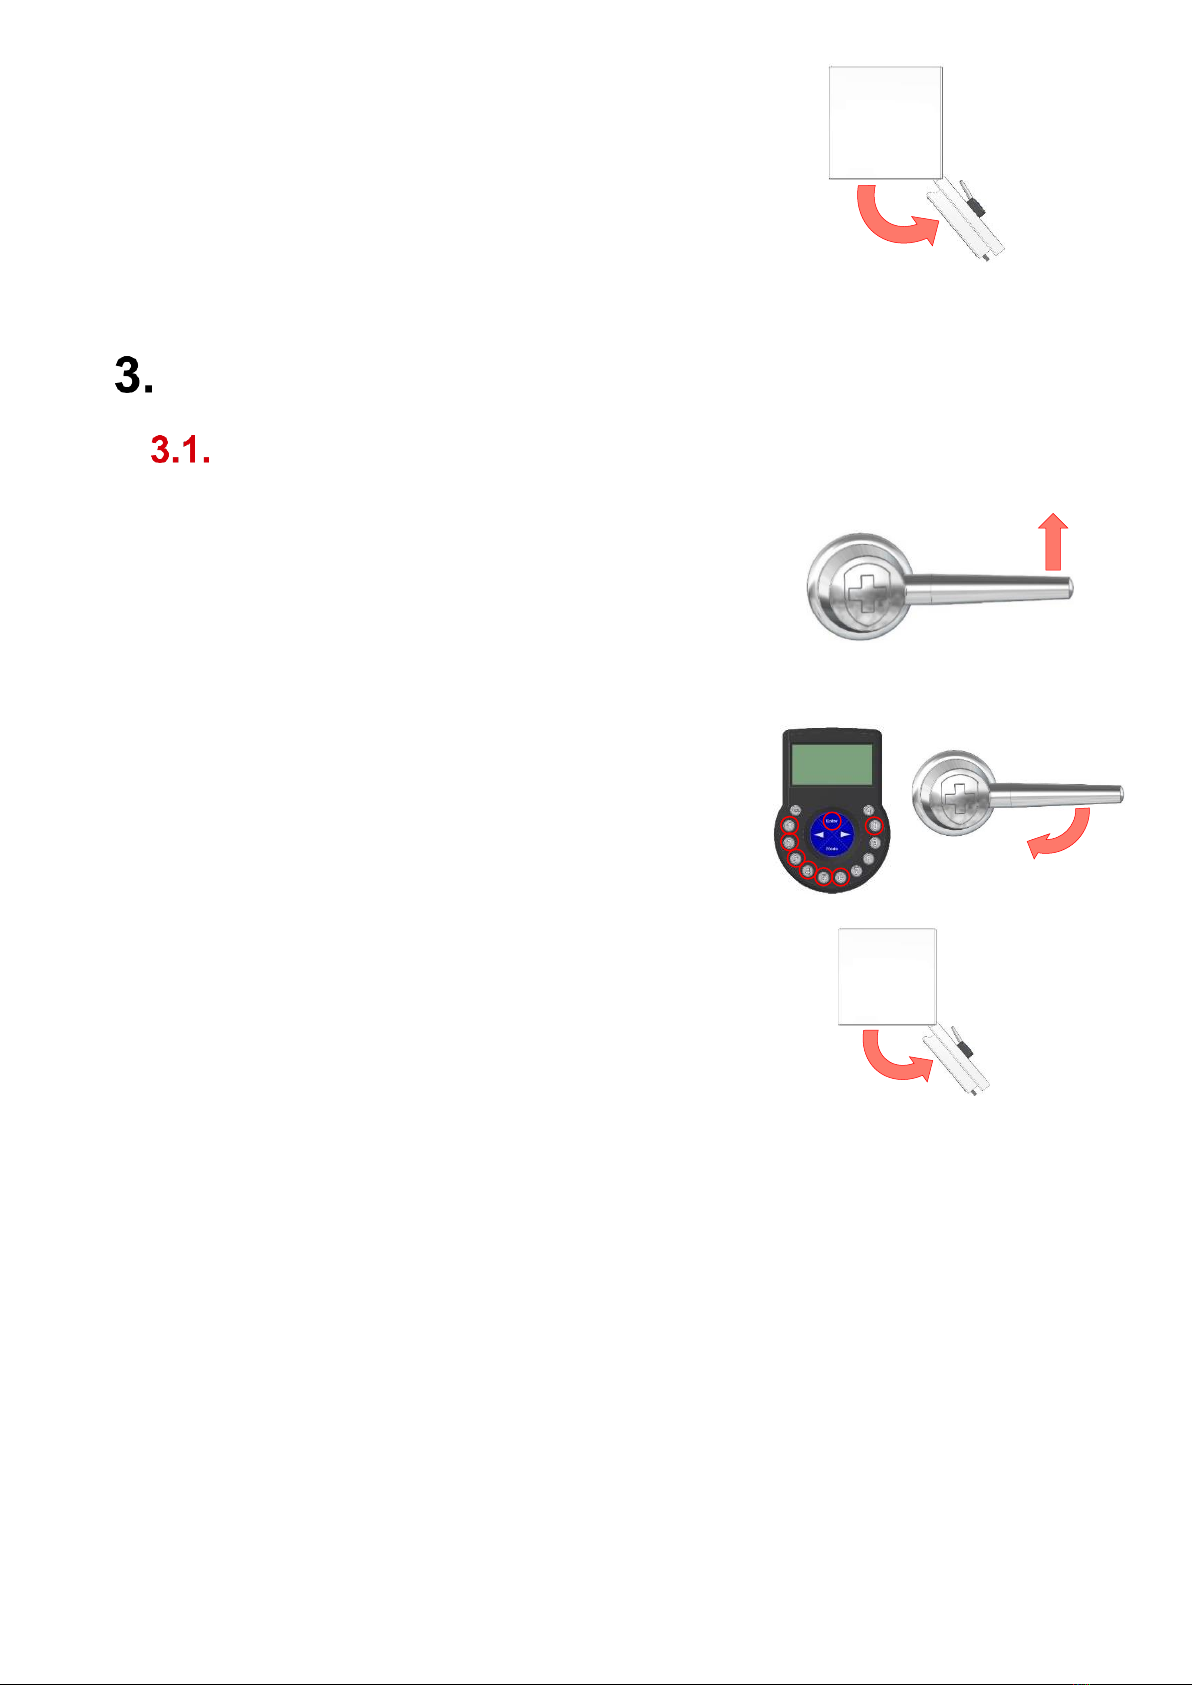
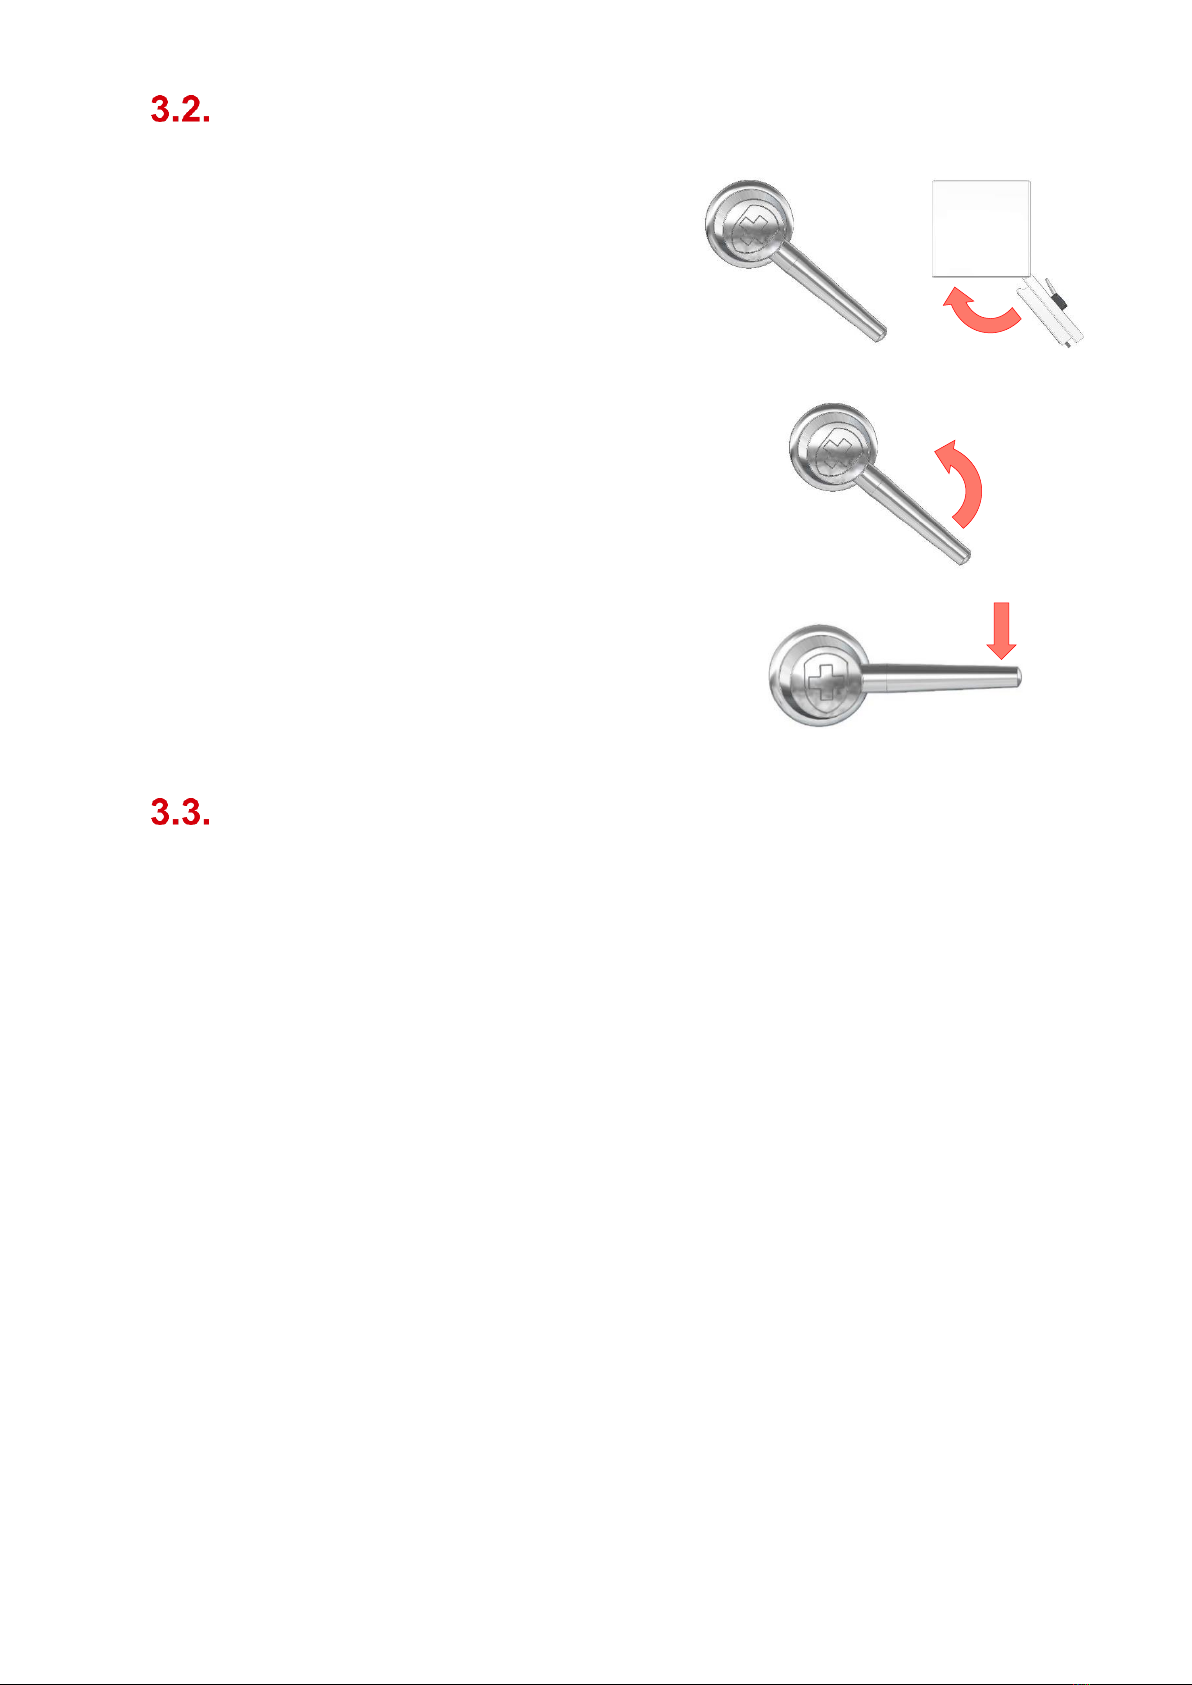
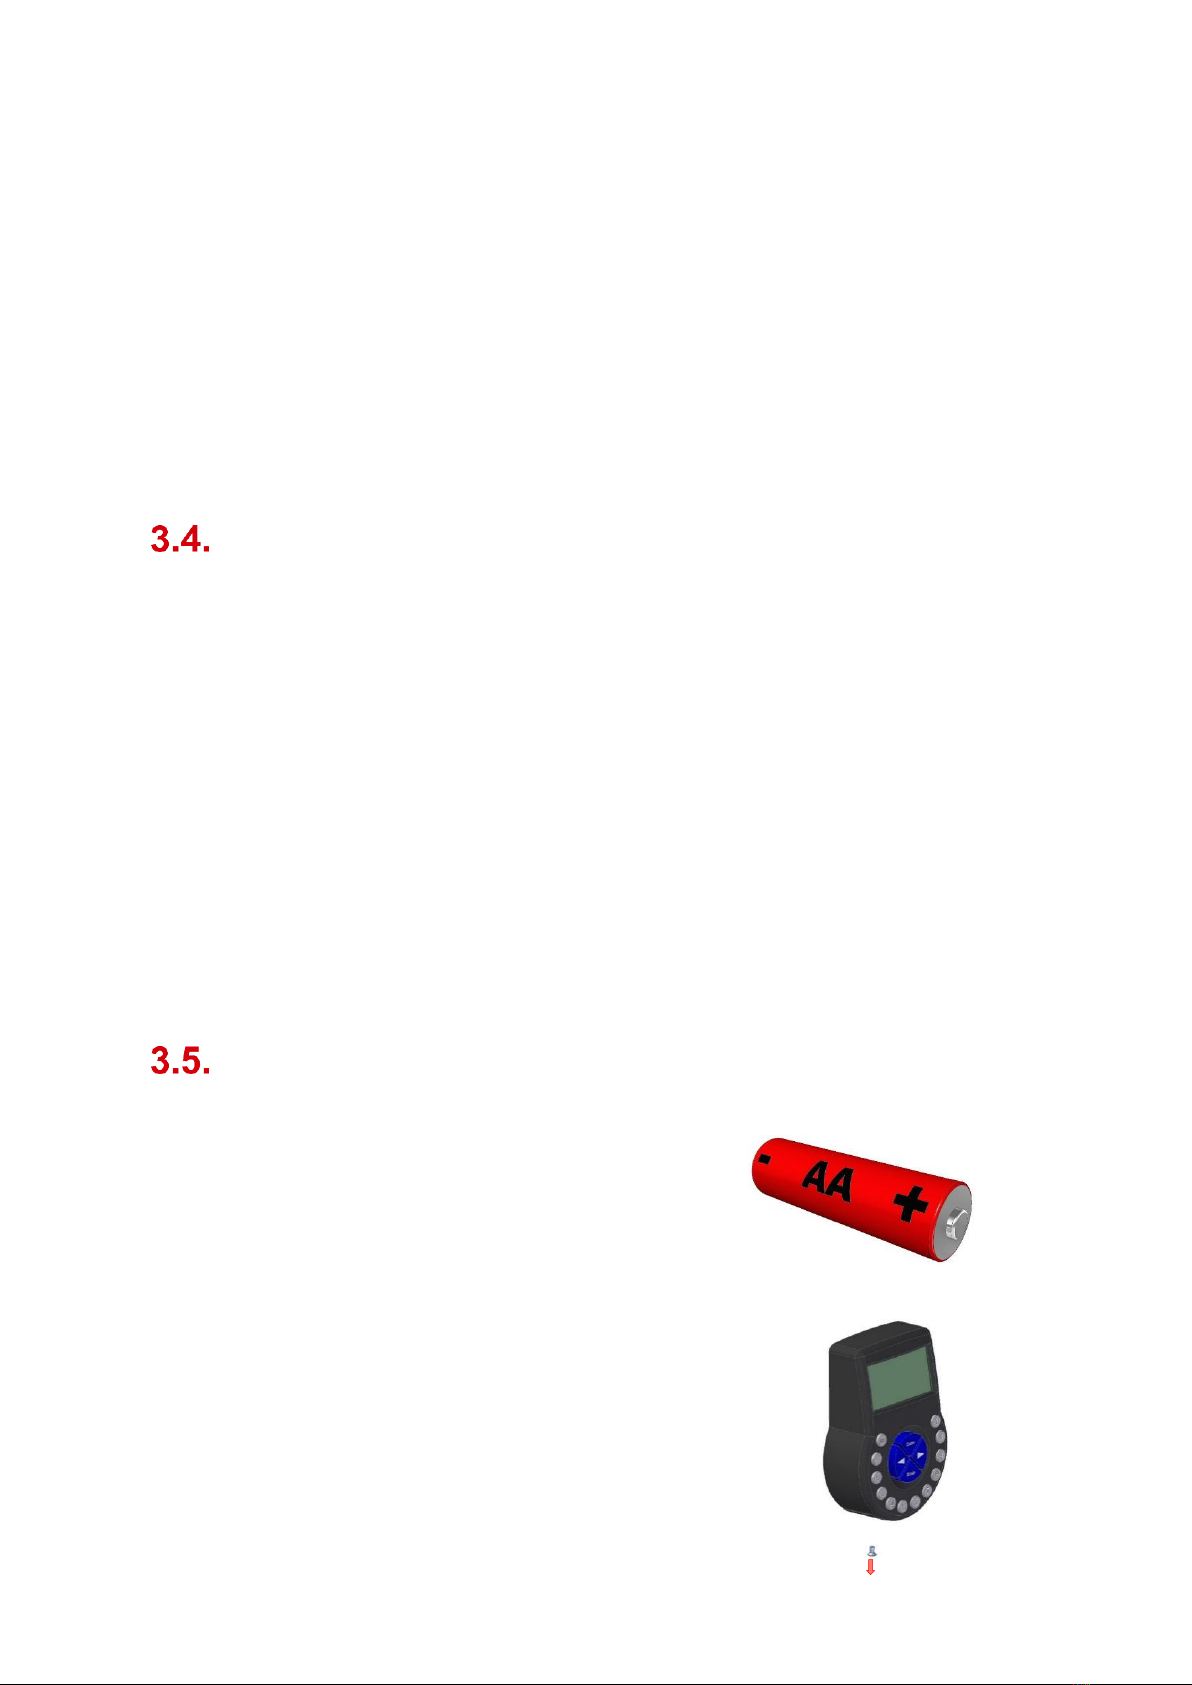
WALDIS AXESSOR User manual

www.tresore.ch
OPERATING INSTRUCTIONS
SAFE LOCK
AXESSOR
Electronic safe lock for WA safes

Many thanks!
Many thanks for choosing Waldis to give you the security you want.
The safe you have decided to purchase is a product tested in compliance with the
EN1143-1 standard. A Swiss quality product with security tested by the VdS (German
Association of Indemnity Insurers).
Before starting to use your strongbox, please read these instructions thoroughly!
Your contact in case of questions:
WALDIS Tresore AG
Hofwisenstrasse 20
CH-8153 Rümlang
Telephone: +41 43 211 12 00
Fax: +41 43 211 12 12
Email: info@tresore.ch

Table of contents
Overview ..............................................................................................................................1
Operating controls: WALDIS Eco and Business .....................................................1
What the acoustic signals mean................................................................................2
Description of the keys ...............................................................................................2
Description of display messages...............................................................................2
Starting to use your safe....................................................................................................3
Operation .............................................................................................................................4
Opening the safe .........................................................................................................4
Locking the safe...........................................................................................................5
Reprogramming codes ...............................................................................................5
Setting the time and date ...........................................................................................6
Replacing the battery..................................................................................................6
Malfunctions.........................................................................................................................7
Battery...........................................................................................................................7
Tamper block ...............................................................................................................8
Basic rules for secure codes.............................................................................................8

500.0022-A 1 Subject to technical changes
Overview
The AXESSOR is installed as an optional lock in the WALDIS Eco and WALDIS Business
series of models. Thanks to its display, it is easier and clearer to operate than the standard
lock.
Operating controls: WALDIS Eco and Business
Input unit
Rotary opening handle
NOTE: These operating instructions describe how to handle a safe; in each case, they
show a version with the hinge on the right-hand side of the door. If you have a safe with
the hinge on the left-hand side of the door, you need to perform all the turning, opening
and closing movements in the opposite direction!

500.0022-A 2 Subject to technical changes
What the acoustic signals mean
1x short signal Input acknowledged
1x short, low signal Action denied
6x short signals The battery compartment was opened
6x short signals The lock is open
The volume of the acoustic signals can be adjusted or turned off altogether. To do this,
please contact your specialist dealer.
Description of the keys
Pos. 1 = DEL key Delete
Pos. 2 = MODE key Access to programming mode
Pos. 3 = ENTER key Confirm input
Pos. 4 = INF / ESC key Lock information /
go back one menu level
Pos. 5 = Arrow key Scroll through menu
Pos. 6 = Numeric keys Code inputs
Description of display messages
Pos. 1 TIME menu
Pos. 2 PROG menu
Pos. 3 DELAY menu
Pos. 4 CODE menu
Pos. 5 VARIOUS menu
Pos. 6 Time format (12 / 24 hours)
Pos. 7 Text lines
Pos. 8 "Warning" symbol
Pos. 9 "Change battery" symbol
Pos. 10 "Lock open / blocked" symbol
1
2
3
4
5
6
7
8
9
10
1
3
5
4
2
6

500.0022-A 3 Subject to technical changes
Starting to use your safe
As soon as the safe has been delivered and correctly anchored, you can start operating
the lock and using the safe.
To do so, please keep to the following procedure:
1. Check that the rotary opening handle is
in the 'closed' position. Do this by
applying gentle pressure to move the
rotary opening handle counterclockwise
into the end position.
2. Carefully unscrew the flathead screw
(positioned centrally under the input unit)
out of the housing (2 mm Allen key).
3. Carefully pull the battery case
downwards out of the input unit housing
(six acoustic signals) and insert three 1.5
V AA alkaline batteries (LR6), or 1.5 V AA
lithium batteries (FR6) into the battery
case.
4. Push the battery case carefully back up
into the housing and screw it in tightly
with the flathead screw (2 mm Allen key).
The display shows: BATCASE OPEN. To
delete this message again, enter the
opening code and confirm it with the
Enter key.
5. Enter the factory code (0-0-1-2-3-4-5-6)
and confirm with the Enter key, then turn
the rotary opening handle clockwise into
the end position.
6. Open the door. A short acoustic signal
(six beeps) every 30 seconds via the
Pay attention to the polarity of the
batteries!

500.0022-A 4 Subject to technical changes
input unit confirms that the door (lock) is
open until the door is closed again.
7. Programme the new code as per section
3.3.
Operation
Opening the safe
1. First, press the rotary opening handle
counterclockwise into the "closed"
position to make sure that the lock bolt is
relieved of pressure.
2. Press any key to activate the input unit.
Enter the code and confirm it with the
Enter key. Within 5 seconds after the
short acoustic signal (six beeps), you
must turn the rotary opening handle
clockwise to the "open" position.
3. Open the door. A short acoustic signal
(six beeps) every 30 seconds via the
input unit confirms that the door is open
until it is closed again.
NOTE: Every keystroke is acknowledged by an acoustic signal. If you enter an incorrect
code, you can delete the entire code with the DEL key and re-enter your code.

500.0022-A 5 Subject to technical changes
Locking the safe
1. Close the door (rotary opening handle in
"open" position).
2. Turn the rotary opening handle
counterclockwise into the "closed"
position (lock closes automatically).
3. Gently press the rotary opening handle
clockwise to check whether the lock –
and therefore the safe –are locked.
Reprogramming codes
NOTE: A new code must always be programmed while the door is open so that the safe is
not closed in case of an incorrect input, which would result in an incorrect code being
programmed!
If the code has been forgotten or can no longer be reconstructed, an emergency opening
of the safe must be performed and it must be repaired or replaced at the owner's expense!
The certification lapses in case of a repair.
Procedure:
1. Open the door with the current code.
2. Leave the rotary opening handle in the "open" position.
3. On the input unit, press the Mode key; the display shows: PRG-MOD.
4. Enter the existing master code, confirm with the Enter key, and the display will show
TIME.
5. Press the arrow key until CODE appears, and confirm with the Enter key.
6. The display shows MASTER; confirm with the Enter key, and the display shows:
CHANGE? YES; also confirm with the Enter key.
7. Input the new master code 00 X X X X X X and confirm with the Enter key; the display
shows CONFIRM.
8. You must enter the new code again to confirm it, and acknowledge with the Enter key.
The display now shows ACCEPT.

500.0022-A 6 Subject to technical changes
9. Press the Info key two or three times to exit the menu.
10. With the door open, move the rotary opening handle counterclockwise into the
"closed" position (lock closes automatically).
11. Enter the newly programmed code and open the lock again by moving the rotary
opening handle clockwise.
12. Repeat steps 10 and 11 to make sure that the new code was accepted by the lock,
and that it works.
13. If the test opening of the lock was successful, the new code has been programmed
and the safe can be closed.
NOTE: If errors occur while making the change, the old code remains valid. You must start
the programming procedure from the beginning again.
Setting the time and date
1. With the door open and the rotary opening handle in the "open" position, press the
Mode key; the display shows PRG-MOD.
2. Input the existing master code, confirm with the Enter key, and the display will show
TIME.
3. Confirm this with the Enter key.
4. Use the numeric keys to input the current time and confirm with the Enter key.
5. The display shows SAVE YES?; confirm with the Enter key, and the display shows:
ACCEPT.
6. Use the arrow key to scroll to DATE and confirm with the Enter key.
7. Use the numeric keys to input the current date, confirm with the Enter key, and the
display shows ACCEPT. The time and date have now been set.
8. Press the Info key two or three times to exit the menu.
Replacing the battery
1. Purchase the batteries (3 x 1.5 V AA
alkaline batteries - LR6, or 1.5 V AA lithium
batteries - FR6).
Note the expiration date!
2. Carefully unscrew the flathead screw
(positioned centrally under the input unit)
out of the housing (2 mm Allen key).

500.0022-A 7 Subject to technical changes
3. Carefully pull the battery case downwards
out of the input unit housing (six acoustic
signals) and insert three 1.5 V AA alkaline
batteries (LR6), or 1.5 V AA lithium
batteries (FR6) into the battery case.
4. Push the battery case carefully back up
into the housing and screw it in tightly with
the flathead screw (2 mm Allen key).
The display shows: BATCASE OPEN. To
delete this message again, enter the
opening code and confirm it with the Enter
key.
Malfunctions
Battery
If there is insufficient battery voltage, the display shows the "Change battery" symbol.
If you observe the warnings just mentioned, the battery for the lock must be replaced as
quickly as possible (section 3.5.).
NOTE: If the lock is without a power supply for more than 5 minutes, the clock stops and is
reset to the top of the last hour. All other programming is still available.
Pay attention to the polarity of
the batteries!

500.0022-A 8 Subject to technical changes
Tamper block
After 4 invalid code inputs, the keypad is blocked for 5 minutes. The remaining lockout
time is shown on the display, and it cannot be bypassed. If two more incorrect codes are
entered again after the lockout time has elapsed, the lockout time of 5 minutes will start
again. The lockout time ends as soon as the valid code has been entered correctly.
Basic rules for secure codes
What you should avoid:
•Don't use commonplace sequences such as 000000 or 123456.
•Don't use your own birthday, or any car registration numbers or phone numbers.
•Don't use a code that you already use elsewhere.
How should a code be structured?
•The code should not have a logical structure.
•Use all the keys, as far as possible (the keypad shows signs of wear over time,
revealing the individual numbers used in the code).
Keeping a code secure:
•A code is only secure if it stays secret!
•You should memorise codes –don't write them down.
•Think how the code would still be kept available in case the person who has it is no
longer able to disclose it (e.g. if they die). Deposit a sealed envelope with your notary.
NOTE: If the code has been forgotten or can no longer be reconstructed, the safe
must be drilled open and repaired or replaced at the owner's expense!
Table of contents
Other WALDIS Lock manuals

WALDIS
WALDIS CAWI 7215 User manual

WALDIS
WALDIS CAWI EVO User manual

WALDIS
WALDIS COMBI B 30 User manual

WALDIS
WALDIS PAXOS ADVANCE DUAL LOCK User manual

WALDIS
WALDIS PAXOS ADVANCE User manual

WALDIS
WALDIS CAWI BLUECAM User manual

WALDIS
WALDIS CAWI 7215 Manual

WALDIS
WALDIS Tresore AXESSOR USB User manual

WALDIS
WALDIS CAWI PRIMOR 1000 User manual

WALDIS
WALDIS PRIMOR 1000 User manual
Popular Lock manuals by other brands

Schlage
Schlage ND170 installation instructions

ARCAS OLLE
ARCAS OLLE 600 Series user manual

Weiser
Weiser Smartcode 5 Installation and user guide

M-LOCKS
M-LOCKS EC1070 EuroLine series Technical manual

Kit-Lock
Kit-Lock 1000 Programming instructions

Simons Voss Technologies
Simons Voss Technologies LockNode SREL2.G2 quick guide