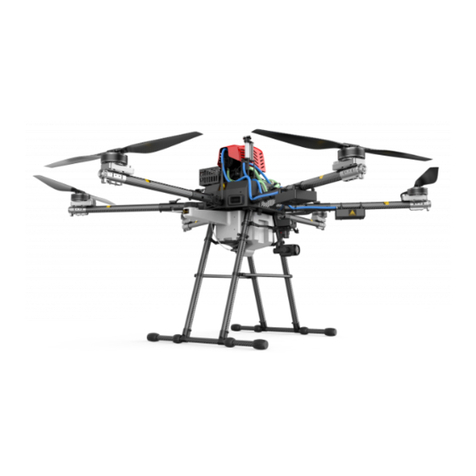
Walkera V1100 PRO User manual

www.walkera.com
January 20th, 2021
QUICK START GUIDE V1.2


Table of Contents
3
9.1 Deploy arms, paddles, GPS antennas
9.2 Install PTZ Camera (Gimbal)
1.0 Safety Summary
2.0 About the UAV
3.0 About the Remote Control
4.0 Specifications
5.0 Check Battery Level
6.0 Charge
7.0 V1100Pro Software Interface Introduction
8.0 Prepare the Remote Control
9.0 Prepare the Aircraft
4-6
13
14
14
8-9
20
21
21
21
22
23
23
15
15
16
16
15
7-8
6-7
10
10-11
12-13
10.1 Activate the aircraft
10.2 Get binding of your aircraft
10.3 Run V1100Pro software
10.4 Description of GPS signal indications
10.5 Unlock/lock the motor
16-19
11.0 Flight control
12.0 Gimbal Control
13.0 Photo & Video
14.0 End Flight
16.0 Instructions for safe use of battery
16.1 Battery use
16.2 Battery storage
15.1 Compass calibration
15.2 Remote control stick mode switch and stick calibration
15.0 Additional instructions
10.0 Prepare for Flight

Walkera All Rights Reserved
V1100 PRO Quick Start Guide
4
1.0 Safety Summary
Use of the V1100 PRO may pose certain safety risks. It is not suitable for people under
the age of 18. The Safety Summary contains only a portion of the flight safety knowledge,
so be sure to read the entire Quick Start Guide carefully to avoid property damage or even
personal injury due to improper operation.
The UVA adopts 2.4G/5.8G dual-frequency image transmission. Please fly it away from the crowd in an open, unobstructed area
without electromagnetic interference.
Fly below 5000 meters above sea level.
Before flying in legal areas, please consult local flight management department to comply with local laws and regulations.
Do not fly in severe weather, such as strong wind (wind speed is 8 m/s or above), snowy, foggy weather, etc.
When flying the aircraft, please keep it within sight and keep at least 10 meters away from obstacles, people,water and other objects
at all times.
Do not operate the aircraft indoors.
1.1 Environment
1.2 Check before Flying
1.3 Operation
Make sure the antennas of the remote control and the aircraft are firmly mounted and not loose.
Adjust the resolution and bit rate of the camera; it is recommended that the resolution of the camera is set to 1080P and the bit rat
e
is set between 2M~ 4M.
Make sure the power of each device is sufficient.
Make sure all parts are in good condition. If any parts are aged or damaged, please replace them before flying.
Make sure the camera and fire extinguisher launcher are firmly installed and all screws are locked.
Make sure the propeller is firmly installed without damage, and the arm is fully deployed and tightened.
Make sure the aircraft motor is clean and undamaged.
Make sure that the position of the GPS antenna is correct(it has been erected).
Do not get close to the propeller and motor which are working.
During the flight, try not to move the antenna of the remote control. If the image signal is weak, you should adjust the direction of
the remote control slightly, swing it slightly until you find the best direction.
If the GPS is interfered during flight, the drone will automatically switch the flight mode to fixed altitude mode, and will not be able to
hover automatically before the GPS signal is restored, so the pilot should fly cautiously according to the flight data returned and the
visual position and attitude of the drone.
Fully pushing the sticks or otherwise stopping the motor during flight will cause the aircraft to crash.
Do not make any phone calls during the flight and do not operate the aircraft while under the influence of alcohol or drugs
After landing, first disconnect the power of the aircraft and then turn off the remote control.
Please maintain control of the aircraft throughout the flight. Do not rely solely on the information and data provided by the remote
control display, but combine it with visual observation to reasonably judge the flight status, avoid obstacles in time, and set the
corresponding flight and return altitude according to the flight environment.

5
Walkera All Rights Reserved V1100 PRO Quick Start Guide
Warnings
Caution
Caution
Disclaimer & Warnings
Legal Norms and Flight Restrictions
Legal Norms
There are safety risks associated with the use of the V1100 PRO UAV. It is not suitable for use by persons under the age of 18. Keep
children away from the aircraft, and special care must be taken when operating it in scenes where children are present. Please read this
document carefully before using this product. This statement is of great importance for the safe use of this product and for your legal rights.
The product is a multi-rotor aircraft and will provide an effortless flying experience when the power supply is working normally and all
components are undamaged. Walkera reserves the right to update this disclaimer at any time. It is important that you read this document
carefully to understand your legal rights, responsibilities and safety instructions before using this product; failure to do so may result in
property damage, accidents and personal safety hazards. Once you use this product, you are deemed to have understood, approved
and accepted the terms and conditions of this statement in its entirety. The user undertakes to be responsible for his or her own actions
and for all consequences arising therefrom. The user undertakes to use this product only for legitimate purposes and agrees to these
terms and conditions and to any related policies or guidelines that Walkera may establish. To the fullest extent permitted by law, in no
event will Walkera be liable for any indirect, consequential, punitive, incidental, special or criminal damages, including damages resulting
from your purchase of, use of, or inability to use this product (even if Walkera has been advised of the possibility of such damages).
The laws of some countries may prohibit the exemption of warranties, so your rights may vary from country to country. Walkera reserves
the right of final interpretation of these terms and conditions, subject to the laws and regulations of the country in which you reside.
Walkera reserves the right to update, revise or discontinue these terms and conditions at any time without prior notice.
In order to avoid violations, possible injuries and damages, the following must be observed:
1) Do not fly the drone in the vicinity of manned aircraft. If necessary, land immediately.
2) Use of the aircraft in densely populated areas is prohibited. These areas include, but are not limited to, cities, sports venues, exhibitions,
concerts, stations and areas where temporary events are held.
3) Ensure that the unmanned aircraft will fly in such a way that it does not affect large manned aircraft on the route,Remain alert and
avoid other aircraft at all times.
In order to avoid violations, possible injuries and damages, the following must be observed:
1) It is forbidden to manoeuvre the aircraft into the vicinity of no-fly zones and sensitive building facilities as defined by laws and regulations.
This may include: airports, borders, major cities, heat power stations, hydroelectric power stations, prisons, major transportation routes,
government buildings and military installations.
2) It is forbidden to fly in the airspace that exceeds the limit altitude.
3) Ensure the aircraft is flying within your visual range. If necessary, observers can be arranged to help you monitor the position of the
aircraft.
4) It is forbidden to carry any illegal and dangerous goods on the aircraft.
1) Ensure that you have a clear understanding of the category of flying activities (e.g. recreational, business or commercial). Always
obtain a permit from the relevant authorities before flying the aircraft. If necessary, consult your local legal practitioner for a detailed
definition of the category of flying activity. Please note that some regions or countries prohibit the use of aircraft for any kind of
commercial activities.
2) Please be sure to respect the privacy of others when filming with the aircraft. It is forbidden to use this product for any unauthorized
surveillance activities, including but not limited to surveillance of people, groups, events, shows, exhibitions or buildings.
3) Please note that in some regions or countries, although not for commercial purposes, the use of cameras to video or photograph
other people, groups, events, shows, exhibitions, etc. may also violate the copyright, privacy or other legal rights of others.

6
Walkera All Rights Reserved
V1100 PRO Quick Start Guide
Caution
Restricted Areas
Flight Restrictions
Walkera always emphasizes flight safety, and to achieve this, Walkera provides various technical means to assist users in using the
aircraft safely and in compliance with local laws and regulations. It is strongly recommended that users download and install the latest
firmware from Walkera’s official channels to ensure that the aircraft can work properly with the flight restriction features. The flight
restriction features include:
1) The restricted areas include but is not limited to major airports, major cities/regions and areas for temporary events in the world.
Before flying, please consult local flight management department to comply with local laws and regulations.
2) In different restricted areas, you will be subject to different levels of flight restriction, including but not limited to warning, no takeoff,
flight altitude restriction, forced landing and so on.
3) All flight-related functions will be affected to different degrees when the aircraft is near or in the restricted areas. This includes, but
is not limited to: when approaching a restricted area, the aircraft will be slowed down, you will not be able to set up a flight mission,
the mission in progress will be interrupted. etc.
To avoid possible injuries and damages, be sure to observe the following: Always keep children away from the parts of the aircraft as
wires and small parts may pose a danger to them.
1) Store the flight battery in a dry and ventilated place and reduce direct sunlight to prevent the battery from overheating. If the battery
is to be stored for more than three months, the recommended storage temperature is around 25℃. Do not store the battery in an
environment where the temperature is higher than 40℃or lower than -10℃.
2) Do not expose the camera to liquid or immerse it in water. If the camera is immersed in water, please wipe it off immediately with a
dry, fluffy cloth. Do not turn on the power immediately after the aircraft hits the water, or it will cause permanent damage to the aircraft.
Do not use liquids containing alcohol or other volatile components to clean the camera lens. Don' t store the camera in a humid place.
3) If the aircraft and the camera are to be stored for a long period of time or transported over long distances, the camera should be
removed from the aircraft, otherwise the shock absorber may be damaged.
* 1) Before using V1100 PRO, please watch the tutorial video at www.walkera.com to upgrade the relevant firmware and calibrate the
relevant items and read the “Quick Start Guide” carefully to avoid property damage or even personal injury due to improper operation.
2) The propellers rotating at high speed are dangerous, so the operator should keep a safe distance from the aircraft and keep it away
from people, buildings, trees or other obstructions to avoid a collision.
Product Storage and Transportation
Warnings
2.0 About the UAV
The body adopts a full carbon fiber structure, and the arm can be folded for easy carrying.
Equipped with an integrated quick-disassembly pan/tilt camera, it is simple and convenient to assemble and realize quick start operation.
The body adopts a closed design, has IP43 three-proof capability, and has industrial-grade waterproof, dustproof and anti-corrosion capabilities.
Equipped with a 30x optical zoom camera, it can observe the front environment in real time and provide a real-time reference for rescue work.
Equipped with a large-capacity battery pack, the maximum continuous flight time is up to 63 minutes (no-load state, hovering flight
under no wind at sea level).
Adopt 2.4GHz&5.8GHz dual-frequency long-distance digital encryption transmission system, up to 10km.
It adopts a six-rotor power system with abundant power to make the flight safer and more reliable. It can easily carry a load of up to
7kg for operation.
1)Keep the flying height below 120 meters. The aircraft should be far away from any tall buildings when flying.
2) If you need to fly above the default height limit, users need to read and click on the disclaimer information that pops up from the App
before proceeding with the remaining operations.
Height limit

Fig. 3.0-1
Fig. 3.0-2
WKRC-H15Z1
C
Power
RTH
D
Waypoint
GPS
Manual
G
19
98 10
21 22 23 24
17
15
13
11
18
20
16
14
12
7
Upgrade port
Charge Port
15V 4A
Spray
Gimbal UP
Gimbal L
Extinguisher
1 3 4 62 5
7
Walkera All Rights Reserved V1100 PRO Quick Start Guide
Fig. 2.0-1
Fig. 2.0-2
Using a 2.4GHz & 5.8GHz dual-band long distance digital encryption transmission technology, combine with complete function buttons,
the remote control enables various aircraft and camera operations and settings within a maximum distance of 10 km, and allows live
display of HD image on its screen.
3.0 About the Remote Control
1) Gimbal Pitch Wheel
2) Idle
3) Upgrade Remote
Control Port
4) Charge Port
5) Idle
6) Gimbal Yaw Wheel
7) Antenna
8) Charge Complete Indicator
9) Battery Level Indicator
10) Charge Indicator
11) Flight Mode Switch
12) G channel three
gear switch
13) Left Stick
14) Right Stick
15) Button A
16) Return To Home Button
17) Button B
18) Button D
19) Button C
20) ON/OFF Button
21) SD Card Slot
22) HDMI Output Port
23) Upgrade Android
System Port
24) Touch Screen
Power on: press and hold the power switch to turn on the remote control.
Power off/restart:
Press and hold the power switch, and the “Power Off” and “Restart” operation
interface will pop up on the remote control screen. Tap “Power Off” to turn off
the remote control; tap “Restart” to restart the remote control;
Turn off the screen: press the power switch once to turn off the screen;
Turn on the screen: press the power switch once, the remote control screen
will light up after 4 seconds;
Forced power off: in special cases, press and hold the power switch, and
then press the return button 8 seconds later to force the power off.
Instructions of remote control power switch:
※Warning: Forced power off may result in loss of data of the remote control. Normally, the function is forbidden. It can only be used in special cases.
3
5
7
1
2
2
1
7
3
4
6
4
4
3
8
9
12
11
10
12
13 14
1) Arm lock nut
2) Head light
3) Positive blade
4) Anti-blade
5) GPS antenna
6) Quick release integrated camera gimbal
7) Communication antenna
8) Rear indicator light
9) Battery compartment
10) Throwing device connection line
11) Megaphone cable
12) Tripod
13) Aircraft power cable (negative)
14) Aircraft power cord (positive)

Aircraft
Symmetrical
motor
wheelbase
1188mm
Unfold:1291× 1129× 480mm (Arm unfolded, Blades folded);
Folded:600× 480× 480mm
Diameter x screw pitch: 22.4x8 inch
KV value: 160rpm/V
Sustained current: 60A(Good heat dissipation conditions)
Fuselage
size
Propeller
Standard
Take-off
Weight
Motor
ESC
Max.
take-off
weight
Max.
ascending
speed
Max.
horizontal
flight speed
GPS mode: 5~ 10 m/s adjustable(windless);
Cruise mode: 10 m/s(windless); Attitude mode: 15 m/s(windless)
Vertical: ± 0.5 m(when GPS positioning is working normally);
horizontal: ± 0.1 m(when GPS positioning is working normally)
Max.
pitch angle
Max.
bearable
wind speed
Maximum
endurance
Max.
rotational
angular
velocity
Max.
descending
speed
Left
Front
Rear
Right
Left Stick
Up
Down
Turn
Left
Turn
Right
Left Right
Fig. 3.0-3
Fig. 3.0-5
Forward
Backward
Tilt
Left
Tilt
Right
Fig. 3.0-6
Fig. 3.0-4
8
Walkera All Rights Reserved
V1100 PRO Quick Start Guide
The default control mode of the remote control is an “American Hand Mode” (left hand throttle). The left stick controls the aircraft’s flight
altitude and direction, while the right stick controls the forward, backward and left/right flight direction.
* 1) The remote control provides American Hand Mode and J apanese Hand Mode to suit different operation habits, which can be
changed in theV1100Pro interface. It is recommended that beginners use the American Hand Mode for control.
2) Ja panese Hand Mode (right hand throttle): left stick- ELEV/RUDD; right stick - THRO/AILE.
3) American Hand Mode (left hand throttle): left stick- THRO/RUDD; right stick - ELEV/AILE.
4) Please fly the aircraft in an open and unobstructed environment without electromagnetic interference. The maximum communication
distance of the remote control is about 10km, which is measured under experimental environment and only for reference.
4.0 Specifications
Right Stick
10kg (including battery)
17kg(Near sea level)
5m/s
GPS mode: 30°;Cruise mode:30°;
Attitude mode: 30°
120°/s
63 minutes (no load)
8m/s
5000m
Working
environment
temperature
Recommended 0℃to + 40℃
2m/s
Max.
flight altitude
Hovering
accuracy
(GPS)

System
PTZ Camera System with 3-Axis Gimbal
4K 30fps
6.7-134.5mm
5000Mm (wide Angle - telescopic)
Max. 64 Mbps
H.264 / H.265
File system: FAT32; Image format: JP G;
Video format: MP4
Micro-SD card up to 128G with a transfer rate of
Class 10 and above or UHS-1 rating
3840× 2160
30 X optical zoom
Appr. 2.0 seconds
59.8 ° ~ 3.0 ° (wide Angle - telescopic)
Video storage
code stream
Photograph
resolution
Focal length
Zoom
magnification
Zoom speed
Horizontal
angle of view
Close up
distance
Video
recording
resolution
Compression
standard
Supported file
storage
formats
Supported
memory
card types
Size 136× 98× 139mm
12V
Pitch:30°/s; yaw:30°/s; roll: direct angle control
12 million
2s
1/2.3 SONY IMX 117 CMOS
Video: 100~3200;
Photo: 100~1600
452g
3 axis (pitch, roll, yaw)
Static: ± 0.008°; Dynamic: ± 0.02°;
Anti-shake: ± 0.008°
Pitch: -110° ~ + 60°; Yaw: ± 150°; Roll: ± 10°
Weight
Input voltage
Stability
system
Angle control
accuracy
Controllable
rotation
range
Max control
speed
Pixels
Focus time
Sensor
ISO range
Gimbal
Camera
Camera
9
Walkera All Rights Reserved V1100 PRO Quick Start Guide
Max.
communication
distance
7.4V 9000mAh LiPo 2S
Mini HDMI;Type-C
Recommended 0℃to + 40℃
Support 64GB Micro SD card
Output Interface
Working environment
temperature
Charging environment
temperature Recommended + 5℃to + 40℃
Support memory
card type
Battery
Display screen
Remote Controller
7.86 inch screen, resolution 1536x2048, brightness
2000cd/m2
2400MHz~ 2483.5MHz;5725MHz~ 5850MHz
10km (open and unobstructed, no electromagnetic
interference)
RAM: 4G; ROM: 16G
Android
Memory
Operating
frequency
1300W(650* 2) Lithium battery (LiPo) /
high voltage lithium battery (LiHV)
Supports balanced charging
and battery storage
6 cell* 2
1.5A
Support rechargeable
battery type
Support lithium
battery cell number
Charging mode
Max. balance
current
Discharge
power
Balance charger
50W(25W* 2)
100~ 240V
Max.25A* 2
Charging
current range
Input
Voltage
Output
Power
Capacity 25000mAh LiHV 12S
10C
Discharge rate
Type
Aircraft Battery
45.6V(22.8V* 2)
Voltage

10
Walkera All Rights Reserved
V1100 PRO Quick Start Guide
※Please turn on the remote controller to check the battery level. Be sure to fully charge the battery for the first time of use.
Method:
Press and hold the ON/OFF button on the remote control for 2~ 3 seconds to turn on the remote control.
5.0 Check Battery Level
1) Please charge with the remote control turned off.
2) The green light on the remote control charging complete indicator
is on --- it means it is fully charged.
6.1 Charge the remote control
There are two ways to charge the remote control battery
rechargeable battery:
Method one:
Without removing the battery, use a DC15V 4A power adapter
to directly connect to the charging port of the remote control
for charging.
Note: The input power of the DC15V 4A power adapter is 100~240V 50/60HZ AC.
Fig. 6.1-1
Charging port
6.0 Charge
1) To charge with the GA008 charger, the battery must be removed from the remote control, as shown in Figure 6.0-2.
2) Connect the remote controller battery, GA008 charger, 15V 4A power adapter to charge as shown in Figure 6.0-3.
3) The GA008 charger indicates that the red light is always on --- means charging, and the green light is on --- means it is fully charged.
Method two:
Charge with GA008 charger.
Fig. 6.1-3
Finished charge
green indicator
Charging Red
indicator
Fig. 6.1-2
Press the buttons on both sides
and remove the battery upward
Level
Low High
Fig. 5.0
Tips:
Pls. remove battery from the remote control and charge the battery by GA008 charger
in order to shorten the charging time of the battery.

11
Walkera All Rights Reserved V1100 PRO Quick Start Guide
6.2 Charge the aircraft lithium battery
1) Connect the conversion wire and the balance charging wireextension wire:
Connect the balanced charging wire to the balanced charging wire extension wire and the battery power wire to the conversion
wire -- connect the black wire to the black wire, and connect the red wire to the red wire (as shown below).
4) Set current:
Press key to set the current to 10A (recommended
value).
2) Connect the charger:
Please connect the battery to the charger according
to the following connection method.
(Note: The battery charging conversion wire and balanced
charging wire extension wire must be connected to the
charger at the same time.)
3) Power on:
Connect AC power supply (100 ~ 240V 50 / 60Hz), turn on the
power switch, the charger beeps, and the fan self-test turns.
Battery Power Wire Conversion Wire
Balance charging wire
extension wire
Battery
Balanced
Charging Wire
6) High-voltage lithium battery (LiHV) switching:
Press the and keys at the same time for
5 seconds until the high-voltage lithium battery indicator
lights up.
Battery1
Battery2 5) Set the working mode:
Press the key to set the working mode to "Charging".
7) Start charging:
Long press the key for 2 seconds to start, display
screen of the battery level starts to flash.
Charger can charge 2pcs aircraft batteries at the same time.
2pcs batteries maintain charge and discharge at the same time, to ensure best performance.
When charging, put it in a dry, ventilated place, keep away from the heat source and flammable and explosive.
Each time the charger starts, the default battery type is LiPo.
For details, please refer to the charger User Manual.

13) Camera working mode switch: Each time the icon “ ” is
tapped, the camera will switch once between Photo and
Video modes.
When switching to Photo mode: tap the icon “ ” to trigger
the camera to take photos.
When switching to Video mode: tap the icon “ ” to start
/stop recording.
14) Camera zoom control: divided into Wide-angle (W) and
Telescope (T).
15) PTZ quick actions: Back to center and down.
16) Latitude & Longitude: Display the longitude and latitude
of the aircraft’s position.
17) GPS positioning status: “GPS Positioning” is shown when
GPS signal connected; “GPS Not Positioning” is shown
when GPS signal not connected.
18) Volume adjustment: Tap the icon to show the volume
adjustment switch of the tone.
19) Remote control system navigation icons:
“ ”
Back: Tap the icon to go back to the previous page;
“ ” Return to Home Screen: Tap the icon to return to the
system home screen;
“ ” Task Management: Tap the icon to display all currently
running tasks;
20) Screen Capture: Tap the icon to capture and save an
image of the entire screen currently being displayed.
1) Back: Back to previous page.
2) Device connection status: Display Aircraft connected or
disconnected.
3) Flight time: Aircraft flight time.
4) Aircraft mode: Display aircraft’s flight mode.
5) Aircraft satellites: Display the number of satellites received
by the aircraft.
6) Positioning accuracy: Display positioning accuracy of the aircraft.
7) HD image transmission signal strength: Display the strength
of the video signal transmitted between the aircraft and the
remote control.
8) Remote signal strength: Display the control signal strength
between the remote control and the aircraft.
9) Remote control battery level: Display the current remaining
battery of the remote control in real time.
10) Aircraft battery voltage: Display the current battery voltage
of the aircraft in real time.
11) Settings: Tap the icon “ ” to open the Settings menu, where
General, aircraft, remote control, gimbal and battery can be set.
12) Camera settings: Tap the icon “ ” for Pro, Photo, Video
and Other settings. For videos with the same resolution,
the higher the bit rate, the better the image quality, and the
image transmission distance will be shortened accordingly.
Others: (1) Grid; (2) Anti-flicker; (3) Defog;
(4) 2.4G & 5.8G Switch; (5) Navigator.
In this interface, you can preview the live HD video and photos taken by V1100 PRO, and dynamically set the
parameters of the aircraft, remote control, gimbal and battery.
5
4
3 m
15
14
N/A
GPS Ready
15 m
D H H.S V.S
17.1 m 0.0 m/s 0.0 m/s P0.0° R0.0° Y0.0°
Connected
GPS
03:58:45
AUTO Mode 18
2.4G
98%
51.98V
Center Down
18
T
W
2X
22
19
23
21
24
26
1 2 3 54 6 7 8 9 1110
13
14
12
17
16
15
25
20
Fig.7.0-1 Subject to the interface of the actual product
12
Walkera All Rights Reserved
V1100 PRO Quick Start Guide
7.0 V1100Pro Software Interface Introduction
Camera working mode switch: Each time the icon “ ” is
MODE

Fig.7.0-2
N / A
Waypoints
Connected
GPS
03:58:45
AUTO Mode 18
2.4G
98%
51.98V
GPS Ready
15 m
D H H.S V.S
17.1 m 0.0 m/s 0.0 m/s P0.0° R0.0° Y0.0°
RoutePlant
Input
Center Down
Map lock
No-fly zone display
Map switch
Heading of the aircraft
5
4
3m
15
14
Route planning
Route flying
Latitude and longitude input
The aircraft must be operated so that it is within optimum communication range. Adjust the
orientation and distance between the operator and the aircraft in a timely manner to ensure
that the aircraft is always within optimum communication range.
Install antennas
Install the left and right antennas and adjust their position.
Fig.8.0-1 Fig.8.0-2
Strong
Weak
13
Walkera All Rights Reserved V1100 PRO Quick Start Guide
8.0 Prepare the Remote Control
21) Flight status parameters:
D-Distance: horizontal distance between the aircraft and
the point of return.
H-Height: vertical distance between the aircraft and the
point of return.
H.S - Horizontal Speed: the speed of the aircraft in the
horizontal direction.
V.S - Vertical Speed: the speed of the aircraft in the vertical
direction.
P - Pitch Angle: the front and rear tilt angle of the aircraft.
R- Roll Angle: the left and right tilt angle of the aircraft.
Y - Yaw Angle: the left and right turning angle of the aircraft.
22) Map thumbnail: tap the map thumbnail to quickly switch to
the map interface (Before flight, please turn off the aircraft,
and tap “Map Thumbnail” to cache the map, as shown in
Figure 7.0-2).
23) Reserved function switch (spare).
24) Navigator.
25) Reserved function window (spare).
26) Throttle meter: real-time current throttle amount.

9 .2 Install PTZ Camera (Gimbal)
Slide the PTZ camera into place along
the slideway and it will lock automatically.
Remove the camera cap. Way to remove: Press the red buttons on
both sides to remove it along the slideway.
9 .1 Deploy arms, paddles, GPS antennas
Unfold the arm upwards as indicated by the red arrows in turn and tighten the arm locking nut as indicated by the blue arrows in a
clockwise direction.
Rotate the paddles outward as indicated by the red arrows to unfold them.
Fig.9.1-2
Fig.9.1-1
Rotate the GPS antenna upward as indicated by the red arrows to unfold It.
Fig.9.1-3
14
Walkera All Rights Reserved
V1100 PRO Quick Start Guide
9 .0 Prepare the Aircraft
3
2
1

5
4
3 m
15
14
N / A
T
W
2X
Connected
GPS
03:58:45
AUTO Mode 18
2.4G
98%
51.98V
GPS Ready
15 m
D H H.S V.S
17.1 m 0.0 m/s 0.0 m/s P0.0° R0.0° Y0.0°
Center Down
Warning
Confirm
Make sure the GPS antenna
position is correct first!
1)Tap the “V1100Pro” icon
on the touch screen.
2)Tap “Select Device”, select “V1100Pro-30 Zoom”
and tap “Go to Connect".
3)After entering the main interface, first check
the aircraft to confirm that the GPS antenna
has been turned on, and then click "Confirm"
Before fly the aircraft, please cache the map (turn off the aircraft and tap the “Map Thumbnail” as
connected to the Internet to cache the map). Please place the aircraft in an open outdoor area with
the operator facing the tail of the aircraft.
Place the aircraft in a horizontal position, and the indicator light of
the aircraft will change from fast flashing to slow flashing to indicate
successful code matching. (Check connection status with APP)
10.1 Activate the aircraft
10.2 Get binding of your aircraft
10.3 Run V1100Pro software
Turn on the remote control.Open the battery compartment door to
load two batteries and connect the two
batteries in series.
Connect the battery power cord to the
aircraft power cord (red to red, black to
black), then close and lock the battery
compartment door.
Make sure to use two identical batteries to power the aircraft.
Before installing the batteries, ensure that the batteries is fully charged.
Connect the aircraft power: first connect the negative pole (the black wire connects to the black wire),
and then connect the positive pole (the red wire connects to the red wire).
Power off the aircraft: first disconnect the positive pole (red wire) and then the negative pole (black wire).
It is forbidden to short-circuit the positive and negative terminals of the battery.
Fig.10.2
15
Walkera All Rights Reserved V1100 PRO Quick Start Guide
10.0 Prepare for Flight
WKRC-H15Z1
Common
GPS
Manual
Take off
Landing
C
Power
RTH
D
2 33
1

Unlock the motor
Lock the motor
10.4 Description of GPS signal indications
The aircraft indicator light flashes slowly to indicate that the GPS signal has been
received. The status bar of the APP interface shows that the number of satellites is
large and the positioning accuracy is high, which indicates that the current GPS
signal is strong.
10.5 Unlock/lock the motor
After the code matching is successful, put the left and right joysticks at the lowest position at the same time and keep it still until the
motor rotates. and the aircraft nose and tail indicator lights are always on.
Once unlocked, the motor will rotate. So, please release the sticks in time.
Note: Before unlocking, make sure the number of satellites is more than 12, the positioning accuracy is 100%, the
horizontal and vertical speed is less than 0.2m/s, the roll and pitch angles are less than 10 degrees when the aircraft
is positioned horizontally, and the (drone) heading icon arrow on the map interface is pointing in the same direction
as the actual drone’s nose.
Fig.10.5-1
Fig.10.4-1
When the aircraft is landed,push the throttle stick to the lowest position and hold it for 5 seconds, then the motors will stop rotating
and the aircraft nose and tail indicator lights will flash.
Fig.10.5-3
1) Confirm that the GPS antenna has been activated and received GPS signals (The aircraft indicator light flashes
slowly andthe status bar on the APP interface shows the number of satellites and the positioning accuracy is high).
2) Do not operate by the touch screen until the flight status indication area in APP interface shows “ Device
Connected”.
3) The aircraft can take off only when it is positioned horiz ontally and the P and R angle values in the flight status
parameters in the APP interface are stable.
4) Before takeoff, please switch the flight mode (check the current flight mode in the APP interface).
5) Please unlock the motor before takeoff.
16
Walkera All Rights Reserved
V1100 PRO Quick Start Guide
11.0 Flight control
Number of satellites Positioning accuracy
Connected
GPS
03:58:45
AUTO Mode 2.4G
98%
51.98V
18
24
Fig.10.4-2
Fig.10.5-2
Fig.10.5-4

Throttle stick (left stick for American hand mode)
Auto Takeoff
Attentions:
1) Auto Takeoff can work only in GPS mode.
2) The default altitude of Auto Takeoff is 3m. When you need to control the throttle manually, you must push the throttle stick to the
middle point or over to release the Auto Takeoff mode.
3) After auto takeoff, please switch to the remote control flight mode according to your needs.
Operate the sticks as shown in Figure 11.0-1 to start the motor, then push the throttle stick up to allow the aircraft to take off.
Manual takeoff
Left and right sticks (to start the motor)
Fig.11.0-1
Fig.11.0-2
Fig.11.0-3 Fig.11.0-4
Manual Landing
Pull down on the throttle stick until the aircraft lands on the ground. When the aircraft is landed, push the throttle stick down to the
lowest position and hold it for 5 seconds. The motors will then stop.
Flight mode switch In GPS mode, short press the automatic take-off and landing button D key, the aircraft will land automatically.
After landing on the ground, the motor will automatically stop.
Throttle Stick
Fig.11.0-5
Fig.11.0-6
Auto Landing
Attentions:
1) During landing, you can operate the aircraft forward and backward/left and right.
2) If you need to cancel the landing during the landing, short press the D key again to cancel the landing.
17
Walkera All Rights Reserved V1100 PRO Quick Start Guide
After the motor is unlocked, in the GPS mode, short press the D button of the automatic take-off and landing button and the aircraft
will take off automatically and hover 3 meters above the ground.
Press the D button
Waypoint
GPS
Manual
In the GPS mode
Power
RTH
Press the D button
Waypoint
GPS
Manual
In the GPS mode
Power
RTH

Attentions:
1)The first flight of the aircraft defaults to GPS Mode after each power on.
2) In GPS mode, altitude holding, location fixing and braking functions are available, and the flight speed is lower.
3) If the GPS signal is poor or there is no signal, it can only set the altitude, but not the location.
4) After switching to manual mode, location fixing is invalid.
GPS Mode
Turn the flight mode switch to the “GPS” position and push the throttle stick back to center. Then, the aircraft will enter the GPS mode.
Waypoint
GPS
Manual
Turn the flight mode switch to the "Waypoint" position, and the aircraft will enter the waypoint flight mode.
Waypoint mode
Waypoint
GPS
Manual
18
Walkera All Rights Reserved
V1100 PRO Quick Start Guide
Y ou can only enter the route flight and route planning interfaces when the aircraft is in GPS mode.
Click this icon to add waypoints
Add
Clear Click this icon to clear waypoints
Start
Click this icon to start waypoints flight
Exit Click this icon to exit
Route flight (operate in APP map interface) Route planning (operate in APP map interface)
Tap the icon in the map interface to enter the route flight
interface.
Tap the icon in the map interface to enter the route planning
interface.
Tap the icon in the map interface to enter the route planning
30
4
H
Angle:
Angle:
W
GENERATE
LINE
Firstly, set the waypoint on the
map interface and touch this
icon to generate the route.
Set fore-
and-aft
course
overlap
H: Set waypoint
height
W: Set sidelap
Click this icon to clear waypoints
CLEAR
Touch this icon to align the edges
after the route is generated.
ALIGN
EDGE
Touch this icon to start flying.
START
Click this icon to exit
EX IT
Fig.11.0-7
Fig.11.0-8

19
Walkera All Rights Reserved V1100 PRO Quick Start Guide
Press the RTH button to allow the aircraft to automatically return to home.
Return To Home
Horizo ntal distance between aircraft and Home point > 30m
a. When the aircraft flight altitude is over 25 meters, the aircraft will maintain its current altitude, automatically fly back to the top of the
Home point, and then descend vertically.
b. When the aircraft flight altitude is below 25 meters, the aircraft will ascend vertically to 25 meters, automatically fly back to the top
of the Home point, and then descend vertically.
Horizo ntal distance between aircraft and Home point < 30m
a. When the aircraft flight altitude is over 25 meters, the aircraft will maintain its current altitude, automatically fly back to the top of the
Home point, and then descend vertically.
b. When the aircraft flight altitude is below 25 meters, the aircraft will maintain its current altitude, automatically fly back to the top of
the Home point, and then descend vertically.
Power
RTH
D
Low Voltage Protection
When the aircraft battery voltage is too low, the aircraft will automatically land from the current position. During the landing, you can
control the throttle and direction.
Attentions:
1) Do not operate other switches or buttons after pressing the RTH button.
2) When the aircraft loses the signal of the remote control, it will automatically enter the Uncontrolled RETURN TO HOME mode.
3) If the GPS signal is abnormal or the GPS does not work, Return to Home is impossible. Please operate the aircraft to land manually.
4) Press the RTH button once again during the RETURN TO HOME to cancel the RETURN TO HOME.
5) During the Uncontrolled RETURN TO HOME, after the remote control signal returns to normal, the RETURN TO HOME process
will continue, but you can switch to manual mode to cancel the RETURN TO HOME.
6) If the aircraft is landing too fast when the altitude is lower than 15 meters during the Uncontrolled RETURN TO HOME landing
process, you must manually push up the throttle stick slightly to slow down the aircraft' s descent speed to ensure the aircraft' s
safe landing.
Altitude difference from home point >25m
Horizontal distance between aircraft and Home point >30m or <30m
Horizontal distance between
aircraft and Home point <30m
Horizontal distance between aircraft and Home point >30m
Altitude difference
from home point <25m Ascend
first
25m (can be
defined from
25 to 100m)
Home point
Attentions:
1) Do not operate other switches or buttons after pressing the RTH button.
2) When the aircraft loses the signal of the remote control, it will automatically enter the Uncontrolled RETURN TO HOME mode.
aircraft and Home point <30m
defined from
25 to 100m)
Home point
Descend vertically
Descend vertically
a
b
Fig.1.0-10
Fig.11.0-9

5
4
3 m
15
14
N/A
GPS Ready
15 m
D H H.S V.S
17.1 m 0.0 m/s 0.0 m/s P0.0° R0.0° Y0.0°
Connected
GPS
03:58:45
AUTO Mode 18
2.4G
98%
51.98V
Center Down
T
W
2X
The 3-axis gimbal can stabiliz e the camera, to enable the camera to take stable images even when the aircraftis flying at high
speed.
Y ou can control the pitch and yaw angles of the gimbal via the gimbal wheel or in the APP interface.
12.0 Gimbal Control
Follow Mode
Gimbal orientation changes
as the nose orientation changes
Lock Mode
Gimbal orientation does not
change as the nose orientation
changes
Fig.12.0-1
Fig.12.0-2
Fig.12.0-3
Turn the Gimbal Pitch Wheel UP or DN
In APP image interface
swipe up or down.
Pitch angle (PIT)
Fig.12.0-4
Attentions:
1)It is necessary to select the mode first and then adj ust the angle. The yaw angle (Y AW) is not adj ustable in Follow Mode.
2)The speed of change of the Gimbal is determined by the amplitude by which the wheel is turned: the speed is 0 when it
returns to the midpoint, the larger the amplitude, the faster the change of the Gimbal system, and the opposite is slower.
WKRC-H15Z
Common
GPS
Manual
Take off
Landing
C
Power
RTH
D
D
N
<
<
<
G
i
m
b
a
l
>
>
U
P
L
<
<
<
G
i
m
b
a
l
>
>
R
In APP image interface
swipe right or left.
Turn the Gimbal Yaw Wheel L or R
Y aw angle (Y AW)
Fig.12.0-5
Take off
Landing
Power
RTH
D
+ 60°
-110°
0°
0°
+ 150°
-150°
20
Walkera All Rights Reserved
V1100 PRO Quick Start Guide
There are two gimbal modes: Follow Mode and Lock Mode. Please select the gimbal mode you need in the APP interface.
5
4
3 m
15
14
N / A
GPS Ready
15 m
D H H.S V.S
17.1 m 0.0 m/s 0.0 m/s P0.0° R0.0° Y0.0°
Connected
GPS
03:58:45
AUTO Mode 18
2.4G
98%
51.98V
Center Down
T
W
2X
Tip:
Only when the main interface of the APP has received the image transmitted by the aircraft camera, the touch screen can be
used for control.
Table of contents
Other Walkera Drone manuals

Walkera
Walkera T210 MINI User manual

Walkera
Walkera Starlight F420 User manual

Walkera
Walkera W100S Instruction Manual

Walkera
Walkera QL 1800 User manual

Walkera
Walkera UFOMX400S Instruction Manual

Walkera
Walkera Runner 250 PRO User manual

Walkera
Walkera T210 MINI User manual

Walkera
Walkera TALI H500 User manual

Walkera
Walkera R400 User manual

Walkera
Walkera Runner 250 User manual