7
8 8 8
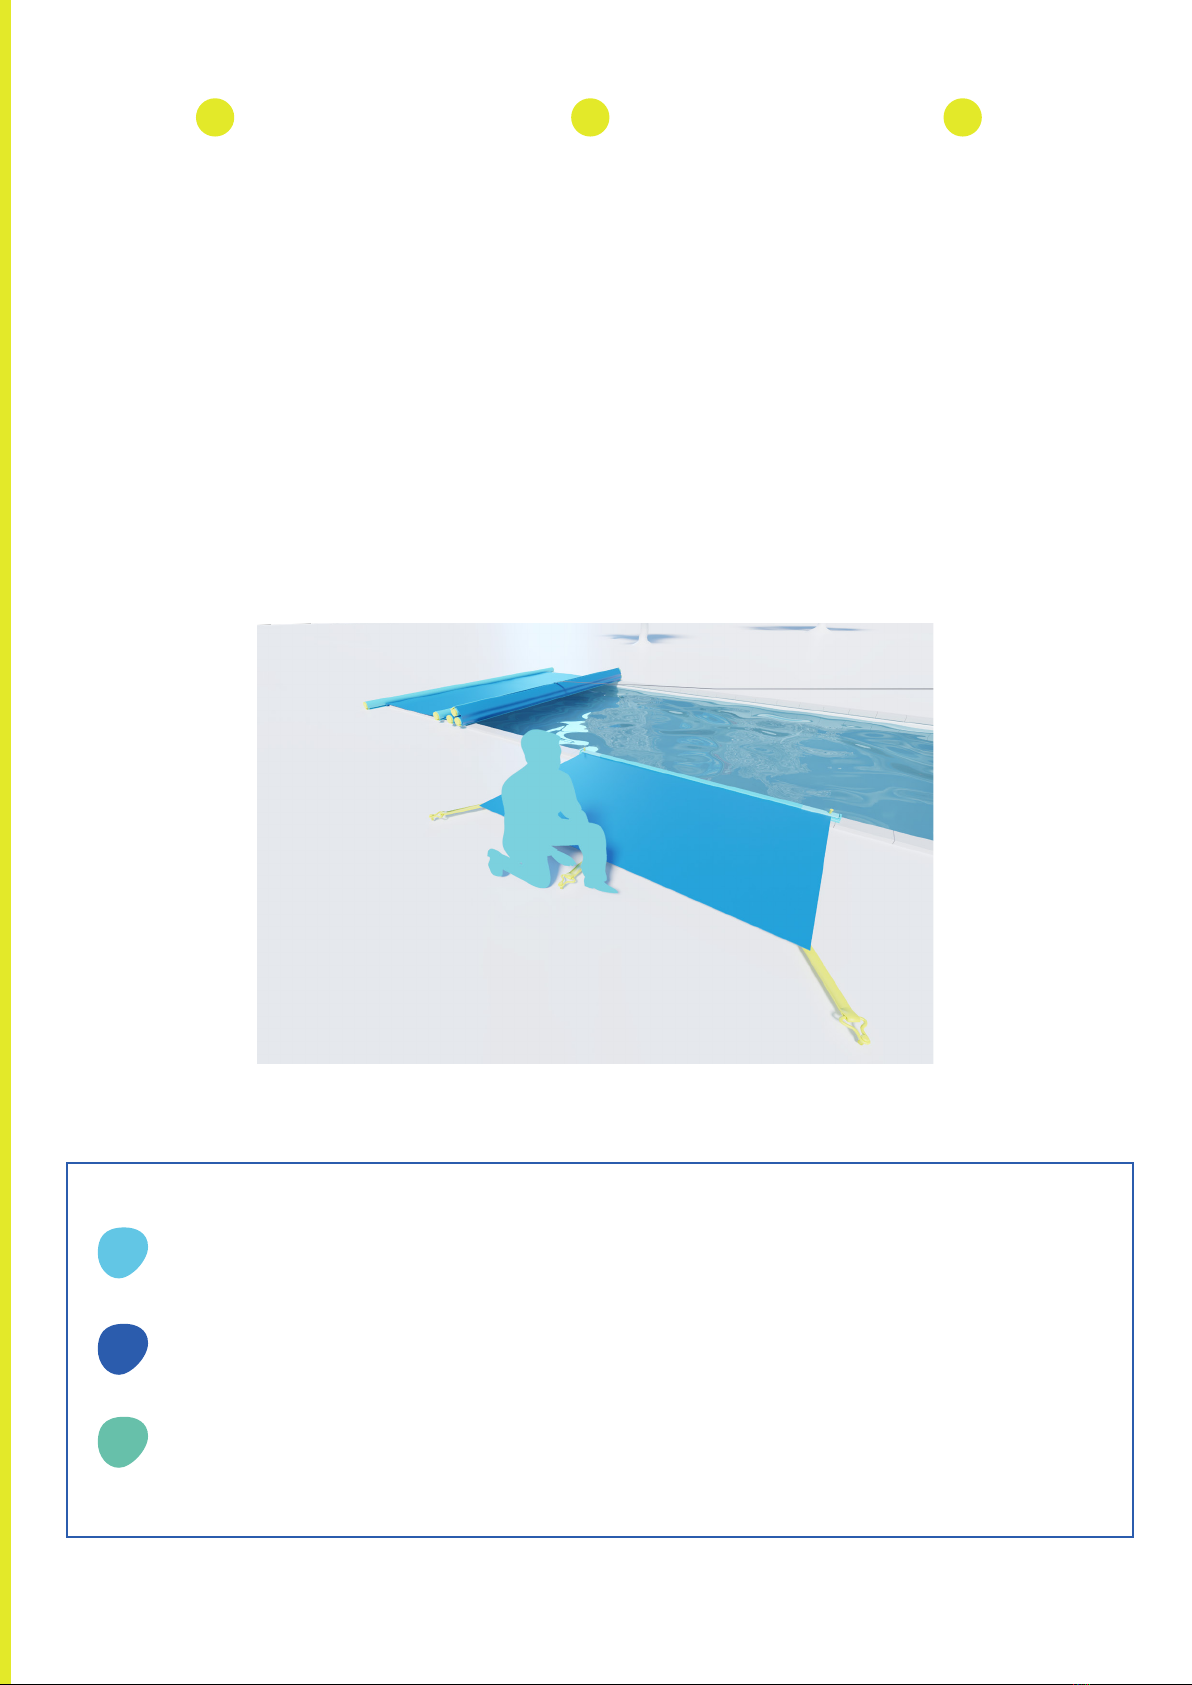
IMPORTANT : se positionner à
l’autre bout de la piscine, face à
la zone déjà xée. Les cliquets de
tension doivent être positionnés
à 10 cm de chaque extrémité du
tube d’enroulement. Puis répartir
les autres cliquets à distance égale.
Bloquer les sangles en translation,
en serrant les vis de blockage
positionnées dans la gorge
du prol à l’aide de la clé Allen
fournie. Si la couverture dispose
d’une bavette escalier, positionner
également les cliquets de tension à
l’endroit des sangles.
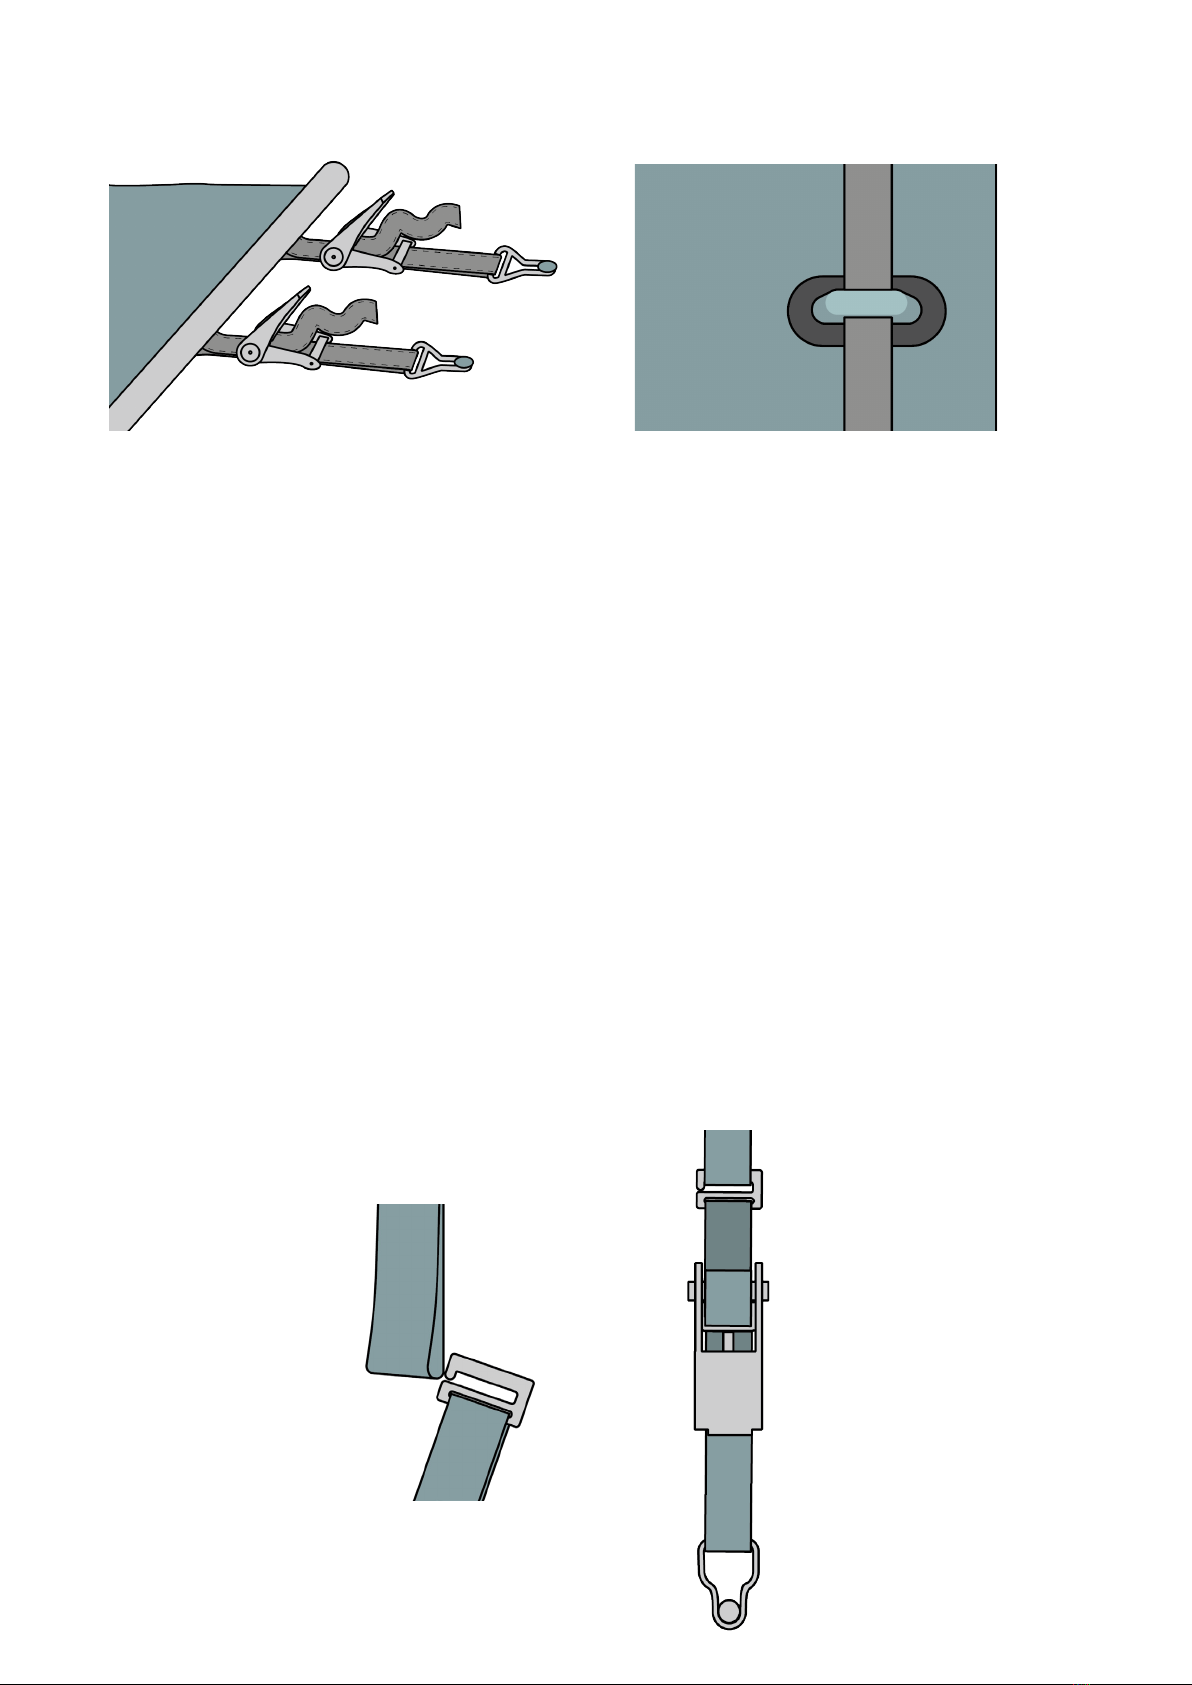
Percer en ø 10 mm avec une
profondeur de 80 mm en face de
chaque sangle et à 400 mm de la
couverture pour la mise en place
des pitons escamotables inox.
Passer la sangle dans la fente de
l’axe du cliquet, puis actionner
la poignée de façon à enrouler
la sangle autour de l’axe jusqu’à
obtenir une tension parfaite de la
couverture. Terminer la mise sous
tension de la couverture en mettant
la poignée horizontalement.
Nota : Dans les régionsventeuses,
il est recommandé de rajouter un
KIT VENT composé de sangles de
maintien (en option).
WICHTIG: Stellen Sie sich auf
die andere Beckenseite hin,
gegenüber dem Bereich, den
Sie bereits befestigt haben.
Besitzt die Abdeckung einen
Treppenlappen, positionieren Sie
die Spannratschen ebenfalls an
den entsprechenden Gurtstellen.
Für jeden Gurt bohren Sie in 400
mm Abstand von der Abdeckung
mit ø 10 mm und einer Tiefe von
80 mm die Einsetzstellen für die
herausziehbaren Edelstahlstifte.
Führen Sie den Gurt durch den
Schlitz in der Ratschenachse durch
und betätigen den Gri so, dass der
Gurt um die Achse eingerollt und
die Abdeckung richtig gespannt
wird. Wenn die Abdeckung gut
gespannt ist, positionieren Sie den
Gri waagerecht.
Nota : In windigen Regionen,
empfehlen wir ein Wind-Kit
(Zusatzaustattungen) um die
Windfestigkeit ihrer Walu First zu
erhöhen. (Umfasst 1 Gurt 35mm,
1 Spanner mit Ratsche, 2 D-Ringe
und 2 Arretierstifte.).
IMPORTANT: Position yourself at
the other end of the pool, facing
the area already xed. The tensio-
ning ratchets should be positioned
10 cm from each end of the roll-
up bar. Then distribute the other
ratched equally. Lock the straps
in place by tightening the locking
screws in the prole groove with
provided Allen key. If the cover
has a stair ap, also position the
tensioning ratchets at the straps.
Drill a ø 10 mm hole 80 mm deep
in front of each strap and 400
mm from the cover to t the
stainless steel retractable bolts.
Pass the strap through the slot
in the ratchet axle, then ope-
rate the handle to wind the strap
around the axle until the cover is
perfectly tensioned. Complete
the tensioning of the cover by
putting the handle horizontally.
Note: In windy areas, it is recom-
mended to add a WIND KIT with
support straps (optional).
Les pitons et pitons à douilles doivent être xés sur un dallage solide (dalle béton) et dans le strict respect
des conseils de pose.
Die Stifte und die Stifte mit Hülse müssen auf einer soliden Bodenplatte und unter Einhaltung der
Montageanweisungen festgemacht werden.
The anchoring bolts must be xed to a solid surface and in strict compliancewith the installation instructions.
FR
DE
EN
FR DE EN
10 cm