manuals.online logo
Brands
  1. Home
  2. •
  3. Brands
  4. •
  5. Waterpik
  6. •
  7. Accessories
  8. •
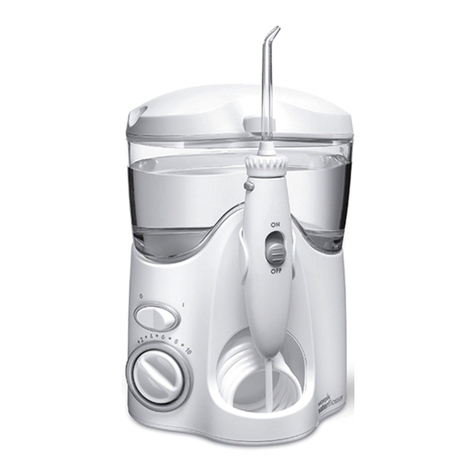
  9. Waterpik Waterflosser WP-150 Series User manual

Waterpik Waterflosser WP-150 Series User manual

Waterpik®Water Flosser
Model WP-150 Series
Waterpik
Waterpik
®
®
沖牙機
沖牙機
型號
型號
WP-150
WP-150
I
O
1
•
2
•
3
•
4
•
5
•
6
•
7
•
8
•
9
•
1
0
ON
OFF
. . . . . . . . . . . . . . . . .
www.waterpik.com
DO NOT PRINT
DATE: 04.26.2021
CLIENT: WATERPIK
FILENAME:
20030488-FAA_WP150EC_Traditional_IM_r4.indd
DESCRIPTION: WP-150 Instruction Manual
LANGUAGES: 2 (Eng, Traditional Chinese]
FILE TYPE: Adobe InDesign CC
SCD JOB# / PREPARED BY: 21WPOH6841 / AM
CLIENT ROUND: r4
SCALE: 100%
UPC: N/A
SIZE: 10”x 7” flat; 5” x 7” folded
FORM NUMBER: 20030488-F AA
INK: Process Black
NOTES:
20030488-FAA_WP-150EC_Traditional_IM_r4.indd 120030488-FAA_WP-150EC_Traditional_IM_r4.indd 1 4/29/21 9:05 AM4/29/21 9:05 AM
ENGLISH
2 3
IMPORTANT SAFEGUARDS
IMPORTANT
SAFEGUARDS
• For household use only.
When using electrical products, especially when
children are present, basic safety precautions
should always be followed, including the following:
READ ALL INSTRUCTIONS
BEFORE USING.
DANGER:
To reduce the risk of
electrocution:
• Always unplug product aer using.
• Do not handle plug with wet hands.
• Do not place in or drop into water or other
liquid.
• Do not use while bathing.
• Do not place or store product where it can fall
or be pulled into a tub or sink.
• Do not reach for a product that has fallen into
water. Unplug immediately.
• Check the power supply cord for damage before
the rst use and during the life of the product.
• The supply cord cannot be replaced. If the cord
is damaged, the appliance should be scrapped.
WARNING:
To reduce the risk of burns,
electrocution, ire, or injury to
persons:
• Do not plug this device into a voltage system
that is dierent from the voltage system
specied on the device or charger.
• Do not use this product if it has a damaged
cord or plug, if it is not working properly, if it
has been dropped or damaged, or dropped
into water. Contact Water Pik, Inc. at
www.waterpik.com or
InternationalService@waterpik.com
• Do not direct water under the tongue, into the
ear, nose or other delicate areas. This product is
capable of producing pressures that may cause
serious damage in these areas.
• Use this product only as indicated in these
instructions or as recommended by your
dental professional.
• Only use ossing brush heads and accessories
recommended by Water Pik, Inc.
• Do not drop or insert any foreign object into any
opening or hose.
• Keep electrical cord away from heated
surfaces.
• Do not use outdoors or operate where aerosol
(spray) products are being used or where
oxygen is being administered.
• Do not use iodine or water insoluble
concentrated essential oils in this product.
Use of these can reduce performance and will
shorten the life of the product. Use of these
products may void warranty.
• Fill reservoir with water or other dental
professional recommended solutions only.
• Remove any oral jewelry prior to use of this
product.
• Do not use if you have an open wound on your
tongue or in your mouth.
• If your physician or cardiologist has advised
you to receive antibiotic premedication before
dental procedures, you should consult your
dentist and/or medical professional before
using this product or any other oral hygiene aid.
• Close supervision is necessary when this
product is used by, on or near children or
invalids.
• If the Pik Pocket™ tip (not included in all models)
separates from the sha for any reason,
discard tip and sha and replace with new Pik
Pocket™ tip.
• Do not use this product for more than 5 minutes
in each two-hour period.
• This appliance has a polarized plug (one blade is
wider than the other). As a safety feature, this plug
is intended to t into a polarized outlet only one
way. If the plug does not t fully into the outlet,
reverse the plug. If it still does not t, contact a
qualied electrician. Do not attempt to modify the
plug in any way.
• This appliance is not intended for use by persons
(including children) with reduced physical,
sensory or mental capabilities, or lack of
experience and knowledge, unless they have
been given supervision or instruction concerning
the use of the appliance by a person responsible
for their safety.
• Children should be supervised to ensure that
they do not play with the appliance.
SAVE THESE
INSTRUCTIONS
20030488-FAA_WP-150EC_Traditional_IM_r4.indd 2-320030488-FAA_WP-150EC_Traditional_IM_r4.indd 2-3 4/29/21 9:05 AM4/29/21 9:05 AM
ENGLISH
4 5
PRODUCT DESCRIPTION
TABLE OF CONTENTS
Product Description 5
Getting Started 6
Cleaning and Troubleshooting Your Waterpik® Water Flosser 8
Limited Three-Year Warranty 9
1. Reservoir cover w/
tip storage
2. Tip eject button
3. Reservoir valve
4. Power ON/OFF
5. Pressure control dial
6. Tip
7. Rotating direction
control knob
8. Reservoir
9. Water ON/OFF switch
10. Handle
11. Base
1
2
4
5
6
7
10
9
8
11
3
I
O
1
•
2
•
3
•
4
•
5
•
6
•
7
•
8
•
9
•
1
0
ON
OFF
NOT ALL TIPS INCLUDED IN ALL MODELS
A
D
B
E
C
F
TIPS
A. Orthodontic Tip*
- Braces/General Use
B. Pik Pocket™ Tip*
- Periodontal Pockets/
Furcations
C. Plaque Seeker™ Tip*
- Implants/Crowns/Bridges/
Retainers/General Use
D. Toothbrush Tip*
- General Use
E. Classic Jet Tip**
- General Use
F. Tongue Cleaner**
- Fresher Breath
*Replace Every 3 months **Replace Every 6 months
To nd detailed information about tips, other accessories, and product
usage please visit our website at www.waterpik.com or email at
InternationalSer[email protected].
20030488-FAA_WP-150EC_Traditional_IM_r4.indd 4-520030488-FAA_WP-150EC_Traditional_IM_r4.indd 4-5 4/29/21 9:05 AM4/29/21 9:05 AM
6 7
ENGLISH
Powering the Unit
Plug the cord into an electrical outlet. If the outlet is controlled by a wall switch, be
sure it is turned on.
Preparing the Reservoir
Remove the reservoir and lid from the base. Fill the reservoir with warm water.
Return the reservoir to the base and press down rmly.
Inserting and Removing Tips
Insert tip into the center of the Water Flosser handle, pressing down rmly until the
tip clicks into place. The colored ring will be ush with the top of the handle if the tip
is correctly locked into place. To remove tip from the handle push the tip eject button
on the handle.
Prime Unit (First Time Use Only)
Set pressure control dial on base to high (pressure setting No.10), point the handle and
tip into sink. Turn power and water ON until water ows from the tip. Turn unit OFF.
Adjusting the Pressure Setting
Turn the pressure control dial on the base of the unit to the lowest setting (pressure
setting No.1) for rst-time use. Gradually increase pressure over time to the setting
you prefer – or as instructed by your dental professional.
Using the Water Flosser
Always place the tip in your mouth before turning the water ON. With water
switch on handle in OFF position, turn power on.
Lean over sink and slightly close lips enough to prevent splashing while still
allowing water to ow from mouth into the sink. Turn water switch ON.
When nished, turn water switch and power OFF. During use you can stop the
ow of water by sliding the water switch on handle to the OFF position.
NOTE: Motor will continue to run.
Recommended Technique
For best results, start with back teeth and work toward the front teeth. Direct
the stream at a 90-degree angle to your gumline with tip in mouth. Glide tip along
gumline and pause briey between teeth. Continue until you have cleaned the inside
and outside of both the upper and lower teeth.
When Finished
Turn the unit o. Empty any liquid le in the reservoir.
NOTE: If you used mouthwash or other solution besides water, see “Using
Mouthwash and Other Solutions” section.
GETTING STARTED
NOTE: NOT ALL TIPS INCLUDED WITH ALL MODELS.
TIP USAGE
Pik Pocket™Tip
The Pik Pocket™ tip is specically designed to deliver water or anti-bacterial
solutions deep into periodontal pockets.
To use the Pik Pocket™ tip, set the unit to the lowest pressure setting. Place
the so tip against a tooth at a 45-degree angle and gently place the tip under the
gumline, into the pocket.
Orthodontic Tip
To use the orthodontic tip, gently glide tip along gumline, pausing briey to lightly
brush area between teeth and all around orthodontic bracket, before proceeding to
the next tooth.
Tongue Cleaner Tip
Set to lowest pressure setting, place tip in the center/middle of your tongue about
half way back. Pull forward with light pressure. Increase pressure as you prefer.
Plaque Seeker™Tip
To use the Plaque Seeker™ tip, place the tip close to the teeth so that the bristles are
gently touching the teeth. Gently glide tip along gumline, pausing briey between
teeth to gently brush and allow the water to ow between the teeth.
Toothbrush Tip
Place the toothbrush tip in mouth with the brush head on the tooth at the gumline.
The toothbrush tip can be used with or without toothpaste. Using a light pressure
(bristles should not bend) massage the brush back and forth with very short strokes
– much like you would with a manual toothbrush.
I
O
1
•
2
•
3
•
4
•
5
•
6
•
7
•
8
•
9
•
1
0
ON
OFF
ON
OFF
ON
OFF
Fill
Eject
Insert
I
O
1
•
2
•
3
•
4
•
5
•
6
•
7
•
8
•
9
•
1
0
O
ON
OFF
I
O
1
•
2
•
3
•
4
•
5
•
6
•
7
•
8
•
9
•
1
0
ON
OFF
Power
ON
High
Low
ON
OFF
ON
OFF
Water
ON
Water
ON
20030488-FAA_WP-150EC_Traditional_IM_r4.indd 6-720030488-FAA_WP-150EC_Traditional_IM_r4.indd 6-7 4/29/21 9:05 AM4/29/21 9:05 AM
8 9
ENGLISH
Using Mouthwash and Other Solutions
Your Waterpik®Water Flosser can be used to deliver mouthwash and antibacterial
solutions. Aer using any special solution, rinse unit to prevent clogging by partially
lling reservoir with warm water and running unit with tip pointed into sink until unit
is empty.
Cleaning
Before cleaning, unplug from the electrical outlet. Clean the product when necessary
by using a so cloth and mild non-abrasive cleanser.
The water reservoir is removable for easy cleaning and is top rack dishwasher safe if
temperature does not exceed 140° Fahrenheit (60° Celsius).
It is recommended that the reservoir is removed and cleaned weekly.
NOTE: Remove reservoir valve by pushing up from bottom of reservoir, before
placing reservoir in dishwasher.
Removing Hard Water Deposits / General Cleaning
Hard water deposits may build up in your unit, depending on the mineral content of
your water. If le unattended, it can hinder performance.
Cleaning internal parts: add 2 tablespoons of white vinegar to a full reservoir of
warm water. Point the handle and tip into sink. Turn unit ON and run until reservoir is
empty. Rinse by repeating with a full reservoir of clean warm water.
This process should be done every 1 to 3 months to ensure optimal performance.
Leakage
If leaking due to a damaged hose, replacement hoses and handles can be purchased
at www.waterpik.com or contact Water Pik Inc. customer service for a self service
repair kit at InternationalSer[email protected].
If leakage occurs from the reservoir, ensure the valve is right side up or contact
Water Pik Inc. customer service for a replacement valve.
Service Maintenance
Waterpik® Water Flossers have no consumer-serviceable electrical items and do not
require routine service maintenance. For all accessories go to www.waterpik.com or
contact InternationalService@waterpik.com.
Refer to the serial and model numbers in all correspondence. These numbers are
located on the bottom of your unit. Replacement tips can be purchased from
www.waterpik.com or by contacting InternationalService@waterpik.com.
Water Pik, Inc. warrants to the original consumer of this new product that it is free
from defects in materials and workmanship for 3 years from the date of purchase.
Consumer will be required to submit the original purchase receipt as
proof of purchase date and if requested, the entire product, to support a
warranty claim. Water Pik, Inc. will replace at its discretion the product, which in
its opinion is defective, provided the product has not been abused, misused, altered
or damaged aer purchase, was used according to instructions, and was used
only with accessories or consumable parts approved by Water Pik, Inc. This limited
warranty excludes accessories or consumable parts such as tips, etc. Use with
improper voltage will damage product and VOID warranty.
This warranty gives you specic legal rights. You may also have other rights that
vary, depending on the law in your place of residence.
LIMITED THREE-YEAR WARRANTY
CLEANING AND TROUBLESHOOTING YOUR WATERPIK® WATER FLOSSER
Remove Replace
20030488-FAA_WP-150EC_Traditional_IM_r4.indd 8-920030488-FAA_WP-150EC_Traditional_IM_r4.indd 8-9 4/29/21 9:05 AM4/29/21 9:05 AM
10 11
繁體中文
重要安全事項
重要安全事項
重要安全事項
重要安全事項
• 僅限家庭使用。
當 使 用 電 氣 產 品 時,尤 其 有 兒 童 在 場
時,請 務 必 遵 循 下 列 基 本 的 安 全 防 範
措 施:
請在使用前閱讀所有說明。
請在使用前閱讀所有說明。
危 險:
危 險:
為降低觸電危險,請注意以下事項:
為降低觸電危險,請注意以下事項:
• 用完後務必拔掉產品的電源插頭。
• 切 勿 用 濕 手 插 拔 插 頭。
• 切勿把產品放入或掉進水或其他液
體 中。
• 切勿在洗澡時使用。
• 切 勿 將產 品 放 置 或 存 放 於可能 掉 落
或被拉扯入浴盆、盥洗池的位置。
• 如果產品不慎落入水中,切勿伸手去
取。而 應 立 即 拔 掉 電 源 插 頭。
• 無論是首次使用本產品之前,還是
在本產品的使用期間,應始終注意檢
查電源線是否已損壞。
• 電源線無法更換。電源線損壞後,相
應 設 備 應 需 報 廢。
警 告:
警 告:
為降低燒傷、觸電、火災或個人生命
為降低燒傷、觸電、火災或個人生命
傷害的風險,請謹記:
傷害的風險,請謹記:
• 切勿將本設備連接至本設備或充電
器規定之外的電壓系統。
• 如果產品電源線或插頭損壞、或產
品工作不正常、或產品被摔、損壞
或掉入水中,不要使用它。請聯繫
Water Pik, Inc.:www.waterpik.com或
InternationalService@waterpik.com
• 切 勿 將 水 注 入 舌 下,耳 朵,鼻 子 或 其
他的敏感部位。本產品產生的壓力可
能 對 這 些 部 位 造 成 嚴 重 傷 害。
• 按照本說明書的規定或者您牙醫的
建 議 使 用 本 設 備。
• 僅允許使用Waterpik®公司推薦的刷
頭 和 附 件。
• 切勿在任何開口或者軟管中放入或
插 入 異 物。
• 電線須遠離加熱表面。
• 切勿在戶外、使用氣霧劑(噴霧器)
或供氧的場所使用或操作本產品。
• 不要在產品中使用碘或水不溶性濃
縮精油。使用它們能降低產品性能
並縮短產品壽命。使用這些東西可
能會讓保修作廢。
• 用 水 或 牙 醫 推 薦 的 溶 液 將水 箱 注
滿。
• 使 用 本 產 品 前 摘 除 所 有 牙 飾。
• 如若口腔或舌頭有傷口,請勿使用。
• 如 果 醫 師 或 心 臟 病 專 家 建 議 您 在 牙
療 前 服 用 抗 生 素,應 在 使 用 本 儀 器
前或其他任何口腔衛生輔助設備之
前,向 您 的 牙 醫 諮 詢。
• 兒童或傷殘人士操作,使用或在其
附近使用本產品時、應予以密切監
督。
• 如果Pik Pocket深層/牙周噴頭(並非
所 有 的 型 號 均 包 含 此 噴 頭 )由 於 任
何 原 因 與 手 柄 分 開,請 丟 掉 該 噴 頭 和
手柄,更換新的Pik Pocket深層/牙周
噴 頭。
• 在 每 兩 個 小 時 之 內,使 用 本 產 品 的
時 間 不 得 超 過 5 分 鐘。
• 本 設 備 附 有 一 個 極 性 插 頭( 其 中 一
個插頭片比另外一個大)。作為一種
安全裝置,這種插頭被設計成只能
以一個方向插入極性插座。如果插
頭不能完全插入插座,請翻轉插頭。
如果仍然不合適,請聯繫合格的電
工。切勿試圖以任何方式改裝插頭。
• 本設備不得用於身體、感官或心理
能力較弱或缺乏經驗和知識的個人
( 包 括 兒 童 ), 除 非 有 負 責 其 安 全 的
人員給予有關使用本設備的監護和
指 導。
• 請 避 免 兒 童 玩 弄 本 設 備。
務 必 謹 記 上 述 說 明。
務 必 謹 記 上 述 說 明。
20030488-FAA_WP-150EC_Traditional_IM_r4.indd 10-1120030488-FAA_WP-150EC_Traditional_IM_r4.indd 10-11 4/29/21 9:05 AM4/29/21 9:05 AM
12 13
繁體中文
產品說明
產品說明
目錄
目錄
產品說明 13
使用前的準備事宜 14
Water pik® 沖牙機的清洗和故障排除 16
三年有限保固 17
1. 帶噴頭存放處的水箱蓋
2. 刷頭彈出按鈕
3. 水箱閥門
4. 電動開關(電機)
5. 壓力控制盤
6. 噴/刷頭
7. 旋轉方向控制旋鈕
8. 水箱
9. 水開/關開關
10. 手柄
11. 底座
1
2
4
5
6
7
10
9
8
11
3
I
O
1
•
2
•
3
•
4
•
5
•
6
•
7
•
8
•
9
•
1
0
ON
OFF
並非所有的型號均包含所有類型的刷頭。
A
D
B
E
C
F
噴/刷頭
A. 矯正噴頭*
- 牙箍
- 一般用途
B. Pik Pocket 深層/ 牙周噴頭*
- 牙周/牙根分叉
C. Plaque Seeker牙菌斑噴刷頭*
- 植牙/
- 齒冠
- 牙橋
- 一般用途
D. 牙刷頭*
- 一般用途
E. 標準噴頭**
- 一般用途
F. 舌苔清洗噴頭**
- 清潔口腔
*每3個月進行更換 **每6個月進行更換
有關刷頭、其他配件和產品使用的詳細資訊,請訪
問我們的網站www.waterpik.com,或寄送電郵至
InternationalService@waterpik.com。
20030488-FAA_WP-150EC_Traditional_IM_r4.indd 12-1320030488-FAA_WP-150EC_Traditional_IM_r4.indd 12-13 4/29/21 9:05 AM4/29/21 9:05 AM
14 15
繁體中文
給裝置通電
給裝置通電
將電源線插入電源插座。如果電源插座由牆壁開關控制,確保已
開 啟 該 牆 壁 開 關。
準備
準備
準備水箱 從底座上取下水箱和水箱蓋。向水箱內注 入溫水。把
水箱放回底座,並按壓牢固。
噴/刷頭的插入與移除
將噴/刷頭插入沖牙機手柄的中心,用力向下按,直到噴/刷頭卡入
到位。如果噴/刷頭正確定位,有色圓環應與手柄的頂端對齊。要
從手柄上取下噴/刷頭,按壓噴頭彈出按鈕即可。
注水裝置(僅供首次使用)
把底座上的壓力操控盤調整到高(10號壓力設置),把手柄和噴
頭指向盥洗池。打開電源直到水從噴頭中流出。關閉電器。
壓力調整
壓力調整
首次使用時,旋轉裝置 底座上的壓力控制盤至最低壓力(1號壓
力水準)。逐漸增加壓力 到你想要的壓力或牙 醫推薦的壓力。
如何使用Waterpik
如何使用Waterpik
®
®
沖牙機
沖牙機
每次使用時,在把 水開關滑動至開 位置前,要把噴頭始放在嘴
中。在手柄上的水開關位關位置時,啟動裝置。把身
體俯在盥洗池上方,閉上嘴巴以避免水流濺射,但要留有一定縫
隙 以便讓水持續從嘴中流到盥洗池。滑動水開關至開位置。當
清洗結束後,滑動水開關 至關位置,並關閉電源。在使用中,通
過滑動手柄上的水開關至關位置可隨時停止水流。注意:電機
仍 在運轉。
推薦技巧
推薦技巧
為獲得最佳效果,從後牙開始朝門牙方向清洗。把噴頭放在口
中,使噴射流與牙齦線呈90度角的方向。將噴頭沿牙齦線移動,
並在齒間短暫停留。繼續清洗,直到上齒和下齒的內外側都清洗
乾 淨。
清洗完成後
清洗完成後
關閉設備。倒掉殘留在水箱中 的所有液體。拔掉設備的電源插頭。
注 意:
注 意:如 果 除 了水 之 外 您 還 使 用 漱 口 液 或 其 他 溶 液,請 參 考「使
用 漱 口 液 和 其 他 溶 液 」部 分。
使用前的準備事宜
使用前的準備事宜
I
O
1
•
2
•
3
•
4
•
5
•
6
•
7
•
8
•
9
•
1
0
ON
OFF
ON
OFF
ON
OFF
注水
彈出
I
O
1
•
2
•
3
•
4
•
5
•
6
•
7
•
8
•
9
•
1
0
O
ON
OFF
I
O
1
•
2
•
3
•
4
•
5
•
6
•
7
•
8
•
9
•
1
0
ON
OFF
水開關處
於開位置
通電
高
低
ON
OFF
ON
OFF
注意:
注意:並非所有的型號均包含所有類型的刷頭。
噴/刷頭的用法
噴/刷頭的用法
Pik Pocket 深層/牙周噴頭
Pik Pocket 深層/牙周噴頭
Pik Pocket 深層/牙周噴頭專為將水或抗菌溶液輸送至深層牙周
袋 而 設 計。
使用PikPocket深層/牙周噴頭時,請務必將產品設置為最 小壓力
值。將柔性 噴頭正對牙齦線呈45度角靠在一顆牙 上,輕緩地移
動噴頭直至其置於牙齦偏下位置,進入牙周袋內。 開啟設備,沿
牙齦 線滑動清洗。
矯正噴頭
矯正噴頭
使用矯正噴頭時,沿著牙齦線輕輕滑動噴頭,在齒間和矯正托槽
周圍所有部位短暫停留並輕刷,然後滑動噴頭清洗下一顆牙齒。
舌苔清洗噴頭
舌苔清洗噴頭
使用舌苔清洗噴頭時,請將壓力設置為最小值。將刷頭放在舌前
後部等距的中央/中線位置,然後開啟沖牙機。從低壓開始向前
推動。根據您的喜好增加壓力。.
Plaque Seeker 牙菌斑噴刷頭
使用Plaque Seeker 牙菌斑噴刷頭時,將刷頭貼近牙齒使得刷毛能
夠輕觸牙齒。沿著牙齦線輕柔地滑動刷頭,在牙縫處稍作停留並
輕輕地刷動,讓水流經牙縫。
牙刷頭
牙刷頭
將牙刷頭置於口腔內,並在牙齦線處將刷頭對準牙齒。牙刷頭可
與牙膏配合 使用,也可不使用牙膏。開啟沖牙機,讓水流通過刷
頭。用低壓力(不應彎曲刷毛)並以極小的幅度來回刷動牙刷頭
一一就像使用傳統的牙刷一般。
水開關處
於開位置
20030488-FAA_WP-150EC_Traditional_IM_r4.indd 14-1520030488-FAA_WP-150EC_Traditional_IM_r4.indd 14-15 4/29/21 9:05 AM4/29/21 9:05 AM
16 17
繁體中文
使用漱口液和其他溶液
使用漱口液和其他溶液
Waterpik® 沖牙機可以用來輸送漱口液和抗菌溶液。在水箱中使
用任何特殊溶液後,應沖洗產品以防堵塞。沖洗方法為:在水
箱中注入部分溫水,然後將噴/刷頭對準盥洗池,開啟設備並運
轉直至排空水箱為止。
清洗
清洗
在清洗產品之前,請先從電源插座上拔掉電源線。如有需要,
用一塊軟布蘸溫和的非磨蝕性清潔劑來清洗產品。
水箱可取下以方便清洗。也可把水箱放在洗碗機頂層架上清
洗,只要溫度不超過華氏140°(攝氏60°)。
建議每週把水箱取下進行清洗。
注意:
注意:在將水箱放入洗碗機之前,請移除水箱閥門。
清除硬水沉積/一般清潔
硬水沉積物可能會在您的電器上積累,這取決於水中的礦物質含
量。 如果對此不管,會降低電器的性能表現。
清潔內部零件:將水箱灌滿溫水,并加入2湯匙白醋。把手柄和噴
頭指向盥洗池內。打開電器,讓其運行,直到水箱變空。再向水箱
加滿乾淨溫水,重複上述操作來進行沖洗。
應每隔1至3個月重複該操作,以確保最佳性能。
洩漏
洩漏
如因軟管損壞導致洩漏,可訪問 www.waterpik.com購買替
換的軟管和手柄,或聯繫Water Pik Inc.服務尋求自助維修套
件:[email protected]。
如果水箱發生洩漏,請確
保水箱閥門是正面朝上的,亦可聯繫Waterpik®公司客戶服務部
獲取更換用的新閥門。
WAT E R PI K
WAT E R PI K
®
®
沖牙機的清洗和故障排除
沖牙機的清洗和故障排除
取下
取下
放回
放回
維護服務
維護服務
Waterpik®冲牙機不含任何需用戶維護的電氣零件,且無需
例 行 維 護 操 作。
所有備件均可訪問www.waterpik.com,或聯
繫:InternationalService@waterpik.com.
通訊時請説明序列號和型號。該號碼位於您產品的底部。
替換的噴頭可在from www.waterpik.com購買,或聯繫
InternationalService@waterpik.com.
Water Pik, Inc. 向這款新產品的原始消費者提供保證,自購買之
日起3年內,不存在材料和工藝方面的缺陷。消費者將被要求提
交原始購買收據作以證明購買日期,並且如有需要,須提交整個
產品,以支持保修索賠。Water Pik, Inc.將自行決定更換其認為有
缺陷的產品,前提是確定產品在購買後未被濫用、誤用、塗改或
損壞,並且根據說明來使用,僅使用Water Pik, Inc.認可的配件或
消 耗 部 件。
此有限保修不包括附件或消耗部件,如噴/刷頭等。
使用的電壓不正確會損壞產品並讓保修作廢。
本保修賦予您特定的法律權利。您可能擁有其他權利,具體取決
於您居住地的法律。
三年有限保固
三年有限保固
20030488-FAA_WP-150EC_Traditional_IM_r4.indd 16-1720030488-FAA_WP-150EC_Traditional_IM_r4.indd 16-17 4/29/21 9:05 AM4/29/21 9:05 AM
20030488-FAA_WP-150EC_Traditional_IM_r4.indd 18-1920030488-FAA_WP-150EC_Traditional_IM_r4.indd 18-19 4/29/21 9:05 AM4/29/21 9:05 AM
Form No. 20030488-F AA
©2021 Water Pik, Inc.
Designed in USA. Made in China.
美 國 設 計。中 國 製 造。
Water Pik, Inc., a subsidiary of
Church & Dwight Co., Inc.
1730 East Prospect Road
Fort Collins, CO 80553-0001 USA
844-821-4873
www.waterpik.com
20030488-FAA_WP-150EC_Traditional_IM_r4.indd 2020030488-FAA_WP-150EC_Traditional_IM_r4.indd 20 4/29/21 9:05 AM4/29/21 9:05 AM
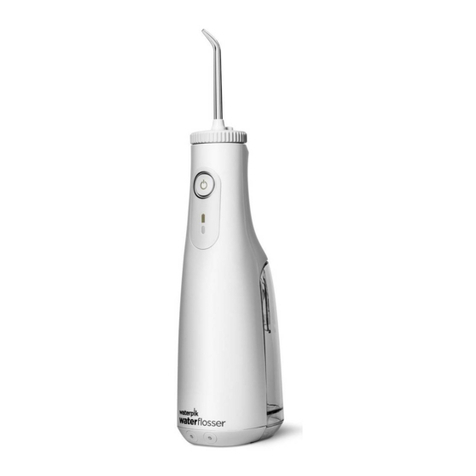
Other manuals for Waterflosser WP-150 Series

5

Other Waterpik Accessories manuals

Waterpik Express User manual

Waterpik

Waterpik Express User manual

Waterpik Water Flosser WP-450 User manual

Waterpik

Waterpik Water Flosser WP-450 User manual

Waterpik WF-10 Series User manual

Waterpik

Waterpik WF-10 Series User manual

Waterpik 600 Series User manual

Waterpik

Waterpik 600 Series User manual

Waterpik WF-05 User manual

Waterpik

Waterpik WF-05 User manual

Waterpik Water Flosser WF-03 User manual

Waterpik

Waterpik Water Flosser WF-03 User manual

Waterpik Waterflosser WP-950 Series User manual

Waterpik

Waterpik Waterflosser WP-950 Series User manual

Waterpik Water Flosser WP-450 User manual

Waterpik

Waterpik Water Flosser WP-450 User manual

Waterpik WF-05UK User manual

Waterpik

Waterpik WF-05UK User manual

Waterpik Water Flosser WP-560 User manual

Waterpik

Waterpik Water Flosser WP-560 User manual

Waterpik Waterflosser WP-900 User manual

Waterpik

Waterpik Waterflosser WP-900 User manual

Waterpik Waterflosser WF-02 User manual

Waterpik

Waterpik Waterflosser WF-02 User manual

Waterpik Waterflosser WF-02 User manual

Waterpik

Waterpik Waterflosser WF-02 User manual

Waterpik 600 Series User manual

Waterpik

Waterpik 600 Series User manual

Waterpik WP-500 Series User manual

Waterpik

Waterpik WP-500 Series User manual

Waterpik Water Flosser CC-01 Series User manual

Waterpik

Waterpik Water Flosser CC-01 Series User manual

Waterpik WP-650 User manual

Waterpik

Waterpik WP-650 User manual

Waterpik WF-16 User manual

Waterpik

Waterpik WF-16 User manual

Waterpik Waterflosser WF-02 User manual

Waterpik

Waterpik Waterflosser WF-02 User manual

Waterpik WP-400 Series User manual

Waterpik

Waterpik WP-400 Series User manual

Waterpik WP-600 Series User manual

Waterpik

Waterpik WP-600 Series User manual

Waterpik WP-662UK User manual

Waterpik

Waterpik WP-662UK User manual

Waterpik Water Flosser WP-560 User manual

Waterpik

Waterpik Water Flosser WP-560 User manual

Waterpik 500 Series User manual

Waterpik

Waterpik 500 Series User manual

Popular Accessories manuals by other brands

stellar labs SI Cable Host owner's manual

stellar labs

stellar labs SI Cable Host owner's manual

Microtips Technology Omago SG-101 user manual

Microtips Technology

Microtips Technology Omago SG-101 user manual

Coopers 9268 Instructions for use

Coopers

Coopers 9268 Instructions for use

MOB MO9051 user manual

MOB

MOB MO9051 user manual

CONVEY-ALL 1685-SP Operator's manual

CONVEY-ALL

CONVEY-ALL 1685-SP Operator's manual

Baolong TMSS5B5 Operation manual

Baolong

Baolong TMSS5B5 Operation manual

Squirrel AURA 3 user manual

Squirrel

Squirrel AURA 3 user manual

Omron F400 datasheet

Omron

Omron F400 datasheet

Baumer FZAM 18N6460/S14 quick start guide

Baumer

Baumer FZAM 18N6460/S14 quick start guide

Uniden U-Bell quick start guide

Uniden

Uniden U-Bell quick start guide

SICK DT1000 operating instructions

SICK

SICK DT1000 operating instructions

sauter EGQ222F931 Operating Instructions, Mounting & Installation

sauter

sauter EGQ222F931 Operating Instructions, Mounting & Installation

Hioth CT-EDZW4006-FBR user manual

Hioth

Hioth CT-EDZW4006-FBR user manual

Invacare Matrx user manual

Invacare

Invacare Matrx user manual

JF.EGWO SK100-13-US user guide

JF.EGWO

JF.EGWO SK100-13-US user guide

MICRO-EPSILON optoCONTROL CLS-K-10 instruction manual

MICRO-EPSILON

MICRO-EPSILON optoCONTROL CLS-K-10 instruction manual

Thermaltake TOUGHLIQUID Ultra 280 RGB quick start guide

Thermaltake

Thermaltake TOUGHLIQUID Ultra 280 RGB quick start guide

Tait T880 II Series Adjustment manual

Tait

Tait T880 II Series Adjustment manual

manuals.online logo
manuals.online logoBrands
  • About & Mission
  • Contact us
  • Privacy Policy
  • Terms and Conditions

Copyright 2025 Manuals.Online. All Rights Reserved.