manuals.online logo
Brands
  1. Home
  2. •
  3. Brands
  4. •
  5. wattstopper
  6. •
  7. Controllers
  8. •
  9. wattstopper MRDS10 User manual

wattstopper MRDS10 User manual

Drawn by: SOWINSKI
PLM:
Engineer:
MarComm:
Q.A.
Sheet: 1 of 1 Scale: 1 : 1
SANTA CLARA, CALIFORNIA
Title:
MRDS10/MRDP10 Installation Instructions
Drawing #: Original Drwg. Date: 8 NOV 05 Rev #:
05988 Rev. Date: 5 DEC 05 2
MATERIAL: Paper, white
FLAT (cut) SIZE: 8.5 W x 11" H
PRINT:2 Sides
# Sheets: 1
Pages: 2
Staple: None
FOLDING: Quarter fold
INK COLOR: Black
REV. DESCRIPTION INT: REV. DATE APPROVED
1 ECO#C01475 MJS 11/14/2005 CG
All information in this drawing is the property of
Watt Stopper/Legrand and cannot be copied or
used without the written approval of Watt Stopper/Legrand.
2ECO #C1622 MJS
TITLE PAGE ONLY
DO NOT PRINT
Status LED Indicator
The LED can display one of three co lo rs: green, yellow (amber, a
combination of red and green), or red. The co lor can be co n stant, or
can flash at one of three ra tes to further distinguish re p o r te d
conditions. To determine the flash ra te, count the number of fla s h e s
in 5 seco n d s :
5fla s h e s.. . . .. . . .. . . .. . . .. . . .. . . .. . . .. . . .. . . .. . . .. . . .. . . .. . . .. . . .. . . .. . . .. . . .. . . .. . . .. . . .1 Hz
10flas h es. . .. . . . .. . .. . .. . .. . . . .. . .. . .. . .. . .. . . . .. . .. . .. . .. . . . .. . .. . .. . .. . .. . . . .. . .. . .. . .2 Hz
15flas h es. . .. . . . .. . .. . .. . .. . . . .. . .. . .. . .. . .. . . . .. . .. . .. . .. . . . .. . .. . .. . .. . .. . . . .. . .. . .. . .3 Hz
MRDS10 LED Indications are as fol lows :
Colo r B e h a v i o r Meanin g
non e O f f Device is not powe red or is in “sleep ”
mod e .
Gre e n On, not fla s h i n g Device is powered, has a house ID,
o p e rating normally.
Gre e n Flashing @ 2 Hz During binding, devi ce is excluded, but
can be added.
Yel low On, not fla s h i n g De v i ce does not have a house ID.
Yel low Flashing @ 2 Hz Dev ice is part of a binding proce ss, either
Group or Room. Binding was sta r ted by
some other device and must be stoppe d
on the other device.
Yel low Flashing @ 3 Hz Dev ice is the master of a binding
proce ss. Binding was sta r ted on this
d ev i ce and must stop on this device.
Red Flashing @ 2 Hz Dev ice has enco u n te red an error. An
i n valid command was atte m p ted.
Caution: Battery Vol tage is Low ~ 10s
every 1-2 minute s
Red Flashing 3 Hz Shutting down Tou c h screen due to low
bat tery cond i t ion
APPLICATION ASSISTANCE
The wirele ss network may co n tain a variety of wirele ss devi ces .
I n structions for installation, binding operations, and use are
included with the relevant wirele s s devices. Application support
information and installation guides for Watt Stop p er / Leg ra nd
wirele ss network devi ces are avai lable at www.wat t s topp e r. co m .
SPECIFICATIONS
UL and cUL Liste d
Power Supply/ C h arger (MRDP10)
Input Vol ta g e . ... . . ... . . ... . . ... . . ... . . ... . .... . ... . . ... . . .120 VAC, 0.15A, 60 Hz
Output Voltag e . . .... . . ... . . .... . . .... . . .... . . ... . . .... . . .... . . .... . . ..8VDC, 600mA
Tou chsc reen (MRDS10)
Input (charging) Vol t a g e . . . . . . . . . . . . . . . . . . . . . . . . . . . . . . . . . . . . . . . . .8VDC,600 mA
DESCRIPTION
The MRDS10 Tou c h screen is a Top Dog™ wire less network House,
Room and Group level con t rolle r. It has a 2-co lor LCD touch panel
dis p l ay.
The Tou chsc reen can be opera ted with power supplied by the
MRDP10 wall-mount charger, the optional MRDC10 ta b le - to p
cha rger, or it can be te m p o ra r i ly removed from the power supply to
be used as a porta b le hand-held device.
Top Dog™ Wireless Communication
Watt Stopper wire le ss devi ces use radio signals to co m m u n i ca te with
each other to co n t rol lighting and other types of electric loads in
sele c ted areas. These wireless devi ces use the 900MHz band for
high-speed co ntrol co m m u n i cation. Using the Watt Stop pe r ’s own
“fre quen c y -ag i le” Top Dog™ tec h no logy, these wire le ss devi ces avo i d
inte r fere nce with other 900MHz devices, such as cord le ss phones
and baby monito rs .
OPERATION
The MRDS10 Tou c h s c re e n is a house level scene con t rolle r.
The MRDP10 is included with the MRDS10 package. It is a wall-
mou n ted power supply and battery charger for the Tou c hscreen. The
Tou chsc reen can be used while attached to the MRDP10, or it can be
te m po ra r i ly rem oved from the MRDP10 and used as a portab le
handheld dev i ce. The Tou chsc reen should be returned to a MRDP10
or MRDC10 power supply to rec h a rge its batteri e s .
Human Interface
The primary human inte r fa ce on the MRDS10 is the Touc h s cre e n .
The menus and con trol functions are acce ssed by
touching the labels and icons on the screen. The
Tou chsc reen has a help system built into each page.
To acce ss help and information about a particular
page, press the question mark button at the top of any
pag e .
The MRDS10 also uses a multi-co lor LED (gree n / amb e r /red) to
ind i c a te dev i cestatus. Direct ly below the LED there is a single push-
but ton. Momenta r i ly pre ss this button to wake up the devi ce when in
p ower save mode. This button also acts as a software reset (reb o o t)
function when held for a period of 10 seconds. When this is done the
fa c tory default co n t ra st and brightness settings are res to red. No
other setup information is altered.
To reset the unit to a fa c to r y
default sta te, the user must use
the Touch s c reen to go into the
setup menu and perform this
function in the Lock/Reset page.
Power Fail Memory
A f ter a power fail u re, all wire le ss devi ces automa t i cally return to the
sta te that they we re in immediate ly prior to loss of powe r. All
co nfi g u ration and scene co n t rol information is pre s e r ved.
MRDS10
Wi reless To uch screen Controller with
wall-mount power supply & charger
WALL-MOUNT POWER SUPPLY INSTALLATION
The MRDP10 can be instal led in a user occupied space within radio ran ge
of the wirele s s network devi ces. It must be insta l led by qualifie d
p e rsonnel in acco rd a n ce with national and lo cal ele c t r i cal code s .
The MRDP10 housing is designed for installation in a 3-gang elec t rical box
using four mounting holes on the unit. Radio co m m u n i cation cannot be
g u a ra n teed if the unit is mounted in a metallic elec t rical enclos u re.
1. Co m p le te the physical installation and binding of all other wirele ss
dev i c es in the network.
2. Shut off the circuit brea ker.
3. In stall a 3-gang (minimum) elec trical wall box in a location conve n i ent
to the system user.
Back of MRDP10
4. Wi re the MRDP10 to the 120VAC supply circuit using the NEUTRAL and
LINE terminals as indica ted on the back of the MRDP10.
5. Se c u re the MRDP10 to the elect r i cal wall box using the 4 mounting hole
screw locati o n s.
Front of MRDP10
Do not loca te the MRDP10 close to any device that may ca u s e
inte r fe re nce or behind large metal objects that can block rad io
reception. Avoid fluo r e scent light fixt u r es, TV sets, co m p u te rs ,
re f r i g e ra to rs, microw a ve ovens, range hoods, safes, etc.
CAUTION
TURN THE POWER OFF AT THE CIRCUIT
BREAKER BEFORE INSTALLING THE MRDP10.
2800 De La Cruz Boulevard, Santa Clara, CA 95050
Te c h n i cal Support: 800.879.8585 • 972.578.1699
www. w attsto p p e r.com 05988r2 12/2005
FCC NOTICE
This equipment has been tested and found to co m p ly with the limits
for a Class B digital devi ce, pursuant to part 15 of the FCC Rules .
These limits are designed to provide re a son a b le protection against
harmful inte r fe re n c e in a residential installation. The devi ce and its
a n tenna(s) must not be co- lo c a ted or operating in conjunction with
any other antenna or tra n s m i t ter. This equipment genera tes, uses
and can ra d i a teradio frequency energy and, if not insta l led and used
in acco rdan c e with the instructions, may cause harmful inte r fe ren ce
to radio co m m u n i cations. However, there is no guarantee that
inte r fe re nce will not occur in a particular installation. If this
equipment does cause harmful inte r fere nce to radio or te levis i o n
reception, which can be determined by turning the equipment off and
on, the user is encou r aged to try to co rrect the interfe re n ce by one or
more of the fol l owing measures:
• Reorient or re lo cate the receiving ante n n a .
•Inc rease the separation between the equipment and rece i ve r.
• Connect the equipment into an outlet on a circuit diffe rent fro m
that to which the rece i ver is con ne c te d .
• Consult the dealer or an ex p e r i e n ced radio/TV technician for help.
Caution: Any changes or modifications to this devi ce not exp l icit ly
app roved by Watt Sto p p e r / L e g rand could void your authority to
o p e ra tethis equipment.
6. Hang the To u c hscreen from the Tou c hsc reen Hanger Arms on the fron t
of the MRDP10. Once yo u ’ re sure that the hanger arms are in all 4 slot s
of the To u chsc reen, lightly push downwa rd on the Tou c hscreen frame to
ens u re that the Low Vo l tage Contacts make connection to the
Tou chsc reen battery con ta c ts.
7. The status LED lights yellow, indicating that the unit is ready fo r
co nfi g u ration. See SET HOUSE ID below.
SET HOUSE ID
All Watt Stopper Top Dog wirele ss devi ces insta l led in the same system
m u st acquire the same unique House ID before use. This process is
k n own as house binding. Each wirele s s device is bound to all other
wirele ss devices in the house. If you are not familiar with the binding
process for the devices in your installation, please rev i ewthe Instal l a tio n
Guide, or individual installation instructions provided with the devi ces .
The House ID binding gives the Tou c h screen the same House ID as the
rest of the wire less network.
1. Ma ke sure all devi c es are instal l ed and energized and all group, house,
and room bindings are co m p le te. Make sure that every other wire less
d ev i ce LED is green and the MRDS10 is ye l low (amber).
2. Pre s s on any p revi o u s ly bound d ev i ceuntil its LED flashes amber
(about 2 seco n d s ) .
3. Verify that the LED on the MRDS10 starts flashing green. This sets the
House ID to match the other devices in the house.
4. Return to the same prev i o u s ly bound d ev i ce used in step 2 and press
until its LED changes to solid green (about 2 seconds). All dev i ce
LEDs including the MRDS10 should now be solid green.

This manual suits for next models

1

Other wattstopper Controllers manuals

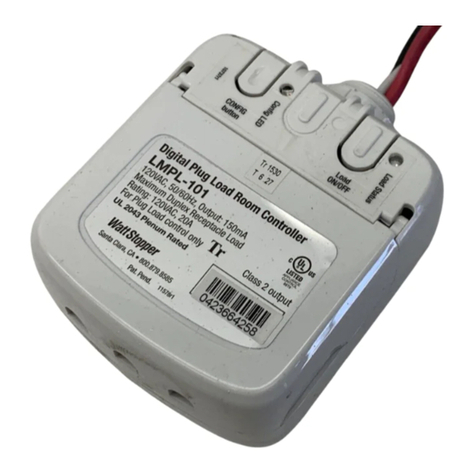
wattstopper LMPL-101 User manual

wattstopper

wattstopper LMPL-101 User manual

wattstopper WRC-15 Series User manual

wattstopper

wattstopper WRC-15 Series User manual

wattstopper LMRC-222 User manual

wattstopper

wattstopper LMRC-222 User manual

wattstopper LightSaver LS-100XA Service manual

wattstopper

wattstopper LightSaver LS-100XA Service manual

wattstopper LMZC-301 User manual

wattstopper

wattstopper LMZC-301 User manual

wattstopper DRD8 v2 User manual

wattstopper

wattstopper DRD8 v2 User manual

wattstopper LMRC-101 User manual

wattstopper

wattstopper LMRC-101 User manual

wattstopper legrand LMRC-102 User manual

wattstopper

wattstopper legrand LMRC-102 User manual

wattstopper LMPL-201 User manual

wattstopper

wattstopper LMPL-201 User manual

wattstopper LMZC-301 User manual

wattstopper

wattstopper LMZC-301 User manual

wattstopper WRC-15 Series User manual

wattstopper

wattstopper WRC-15 Series User manual

wattstopper DRD6 v2 User manual

wattstopper

wattstopper DRD6 v2 User manual

wattstopper LS-101 User manual

wattstopper

wattstopper LS-101 User manual

wattstopper LMRC-111 User manual

wattstopper

wattstopper LMRC-111 User manual

Popular Controllers manuals by other brands

Schnick-Schnack-Systems Long Distance Controller user guide

Schnick-Schnack-Systems

Schnick-Schnack-Systems Long Distance Controller user guide

Naturela NPBC-V3C-B user manual

Naturela

Naturela NPBC-V3C-B user manual

Precision Governors E-611 installation manual

Precision Governors

Precision Governors E-611 installation manual

Emerson Damcos KC 65 Quick installation guide

Emerson

Emerson Damcos KC 65 Quick installation guide

Danfoss ECL Comfort 296 Service guide

Danfoss

Danfoss ECL Comfort 296 Service guide

Pentair AUTOTROL LOGIX 740 quick start guide

Pentair

Pentair AUTOTROL LOGIX 740 quick start guide

Mophie 1190_RCN-RMT-BLk user manual

Mophie

Mophie 1190_RCN-RMT-BLk user manual

Nice To-Max Installation and use instructions and warnings

Nice

Nice To-Max Installation and use instructions and warnings

Fisher 67D Series instruction manual

Fisher

Fisher 67D Series instruction manual

rotork IQ70 F25 B4 Instructions for Safe Use, Installation, Basic Setup and Maintenance

rotork

rotork IQ70 F25 B4 Instructions for Safe Use, Installation, Basic Setup and Maintenance

LEGRAND 0 488 51 quick start guide

LEGRAND

LEGRAND 0 488 51 quick start guide

Bosch D1255TD quick start guide

Bosch

Bosch D1255TD quick start guide

Honeywell S7014A Series quick start guide

Honeywell

Honeywell S7014A Series quick start guide

echoflex EREB-AP installation guide

echoflex

echoflex EREB-AP installation guide

Novusun CNC NVBDH+ manual

Novusun CNC

Novusun CNC NVBDH+ manual

J+J J4C S20 Handbook

J+J

J+J J4C S20 Handbook

Mitsubishi AL-6MR-A Quick start up guide

Mitsubishi

Mitsubishi AL-6MR-A Quick start up guide

Linear Technology DC1723A Demo Manual

Linear Technology

Linear Technology DC1723A Demo Manual

manuals.online logo
manuals.online logoBrands
  • About & Mission
  • Contact us
  • Privacy Policy
  • Terms and Conditions

Copyright 2025 Manuals.Online. All Rights Reserved.