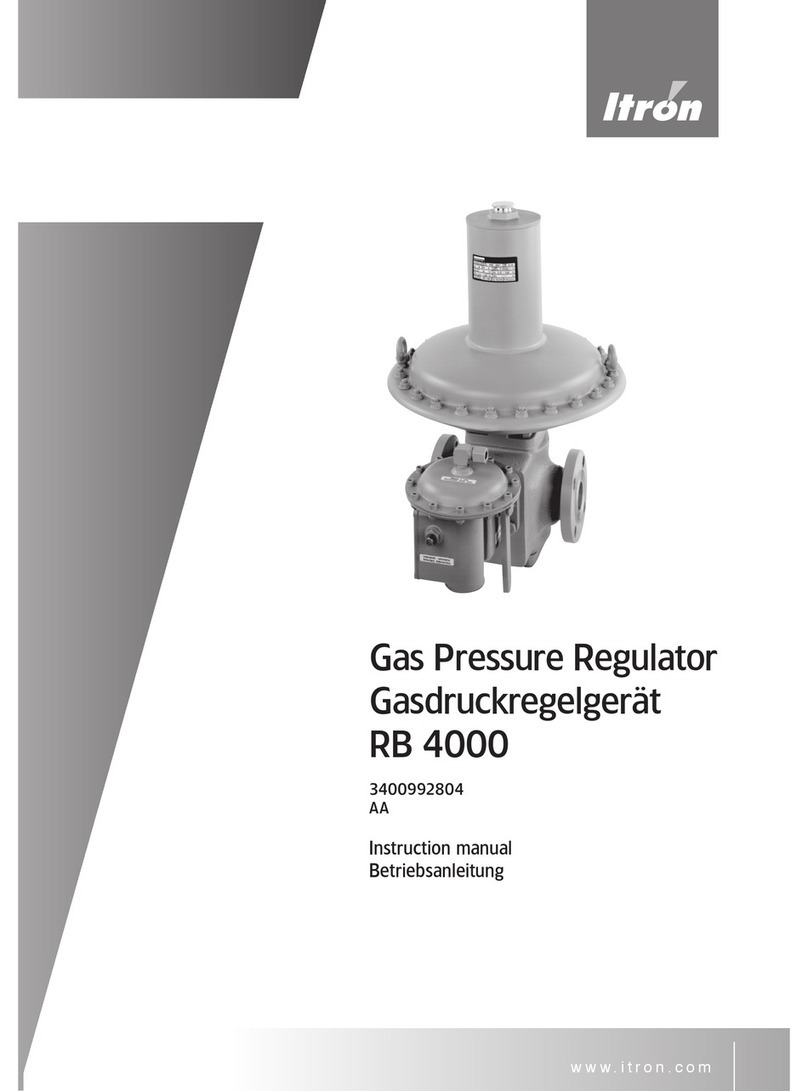
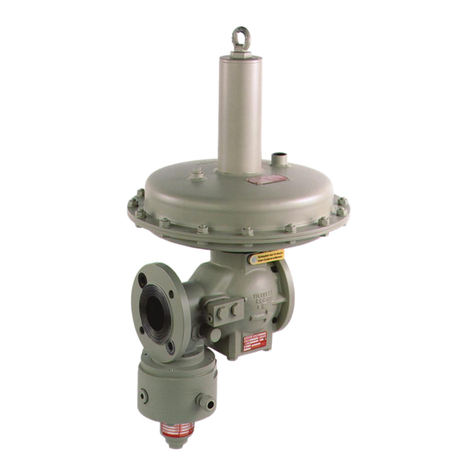
ITRON RB 4000 User manual

RB 4000
Gas Pressure Regulator
Gasdruckregelgerät
3400992804-AB
Instruction Manual
Betriebsanleitung
GAS
EN
DE

CONTENTS PAGE
Declaration of conformity ...................................................................................................................................................................... 3
Important safety instructions ................................................................................................................................................................ 4
SSV 8500: description, resetting .......................................................................................................................................................... 5
SSV 8600: description, resetting .......................................................................................................................................................... 7
Installation ............................................................................................................................................................................................. 9
Regulator start-up ............................................................................................................................................................................... 10
Maintenance ....................................................................................................................................................................................... 10
Annex .................................................................................................................................................................................................. 19
- Sectional View ....................................................................................................................................................................... 19
- Outlet Pressure Range .......................................................................................................................................................... 20
- Installation exemple ............................................................................................................................................................... 21
- Tools ...................................................................................................................................................................................... 22
- Spare Part kits ....................................................................................................................................................................... 23
INHALTSVERZEICHNIS SEITE
Sicherheitshinweise .............................................................................................................................................................................11
Beschreibung/technische Daten ........................................................................................................................................................ 12
SAV 8500: Beschreibung, Wiedereinrasten ........................................................................................................................................ 13
SAV 8600: Beschreibung, Wiedereinrasten ........................................................................................................................................ 15
Einbau Anleitung ..................................................................................................................................................................................17
Inbetriebnahme ................................................................................................................................................................................... 18
Instandhaltung..................................................................................................................................................................................... 18
Annektieren ........................................................................................................................................................................................ 19
- Schnittbild.............................................................................................................................................................................. 19
- Ausgangsdruckbereich ......................................................................................................................................................... 20
- Beispielinstallation ................................................................................................................................................................. 21
- Werkzeuge ............................................................................................................................................................................ 22
- Ersatzteil-Kits......................................................................................................................................................................... 23
EN
DE

3
EN

4
Keep this manual easily accessible for all users.
IMPORTANT SAFETY INSTRUCTIONS:
»Only use for dry and clean gases. For use with aggressive
gases please contact ITRON for special versions.
For applications with Hydrogen, after maintenance, purge the
device with inert gas like nitrogen.
Never use with oxygen: Danger of explosion!
»Please respect all national standards and codes of practices
for installation, operation, testing and service of gas regulators
and of gas pressure regulating stations.
»Before mounting please check the regulator for possible
damage due to transport. The sealing surfaces must be clean.
»Arrange enough room for the serving of the regulator.
»To protect the regulator from dirt a sieve or a filter is
recommended.
»The regulator must be installed tension free in the piping.
»After installation please check the tightness of the thread
connection.
»The technical data given on the name plate must be respected.
If necessary safety devices must be installed.
»Repairs and maintenance must be done by trained or qualified
personal. Only use original spare parts from Itron. Afterwards
a tightness test with 1.1 x PS must be performed. When
changing pressure containing parts their compliance with the
PED must be assured.
»If used with wet gas, internal and external effect of corrosion
has to be checked regularly and in case of severe corrosion,
the regulator has to be replaced.
»The device must be cleaned with a wet cloth only.
Please don’t use solvent or alcohol containing products to
clean the regulator.
»Before removing the regulator please depressurise completely.
Some gas may still be inside the regulator and the pipe,
therefore sufficient ventilation is required.
REMARKS FOR USE IN POTENTIALLY
EXPLOSIVE ATMOSPHERES (ATEX):
»If film of rust is possible (flying rust in the immediate regulator
surroundings), all outer aluminium parts have to be protected
accordingly (e.g. by varnish).
»The product must be electrically connected to adequately
earthed installation.
»For installation, removing or repair of the regulator on site, only
tools allowed for the corresponding explosion area can be
used.
»The regulator shall not be exposed to: flames, ionised radiation
and ultrasound.
»Ambient temp. conditions must be considered, including
possible additional heating effects due to other devices in
immediate vicinity.
The RB 4000 pressure regulator is designed for gas supply
networks, district station regulation, industrial service regulation,
and all applications where accurate pressure control, ease of
adjustment, and fast response are required such as for burners,
industrial ovens, boilers, etc.
It may be fitted with an integrated safety shut-off device type SSV
8500 or SSV 8600.
TECHNICAL FEATURES
Allowable pressure 25 bar
Max inlet pressure 19 bar
Outlet pressure DN 25 10 mbar to 2.5 bar
Others 10 mbar to 2.0 bar
Accuracy class up to AC 5
Closing pressure class up to SG10
Operating temperature -20°C to +60°C
Ambient temperature -30°C to +60°C (body material)

5
Operating principle of the shut-off valve
The safety shut off device have the task of automatically shutting
off the gas flow in the downstream pipe system as soon as the
pressure value increase or decrease beyond the preset values.
Shut-off valve with screw reset
The device consists of a valve body 10, a control head, a
diaphragm assembly 4 – 15 and a stem-valve plug assembly 12-
18 which remain in a balanced position through a mechanical ball
latching system.
The shut-off valve is triggered when the pressure value in the
control chamber 5, that from the downstream pipe flow into
this chamber through the sensing line 15 increase or decrease
beyond the preset values, thus moving from its balancing
position. In this action the SSV measurement diaphragm stem
valve plug system switch. The stem 18 connected to the valve
disc 12 triggers under the force of the closing spring 13 the valve
disc to the orifice 8 by cutting automatically the flow of gas.
SSV 8500 (FOR RB 4000 MODELS WITH INTEGRATED SSV 8500)
Item Description
1Screwing ring
2Cover
3Vent
4Diaphragm
5Control Chamber
6Flange
7Closing spring plate
8Valve seat / Orifice
9Inlet chamber
10 Valve body
11 Outlet chamber
12 Valve disc
13 Closing spring
14 Lower diaphragm case
15 Sensing line Connection
16 Ball latching mechanism
17 OPSO spring
18 Stem
19 Cover
20 Screwing ring
21 UPSO spring
1
19
18
17
16
15
14
13
20
21
12
11
2
3
4
5
6
7
8
9
10

6
Resetting of the shut-off valve
The shut-off valve must be reset only after having verifying the
reason for the intervention and after having re-established normal
conditions of work, proceeding as follows:
Resetting of the shut-off valve with screw reset
»Close the downstream stop valve
»Remove the cover 29, unscrewing it (fig.a)
»Screw it upside down into the stem 28 until in comes into
contact with the cover (fig.b)
»Continue to screw it slowly: with this operation (by-pass)
pressure fills the downstream pipe part
»Pull the cover outwards in order to permit the seating of the
balls on the stem: the shut-off valve is reset (fig.c).
After these operations, screw the cover to it is housing (fig.d) and
slowly open the downstream valve.
Fig. a Fig. b
Fig. c Fig. d

7
Shut-off valve with screw reset
The device consists of a valve body 1, a control unit 2 used to
compare the pressure, a lever system 3 and a stem-valve disc
assembly 4. The shut off valve is triggered when the pressure
value to be checked in the control chamber 5 increases or
decreases beyond the preset values, thus moving from its
balancing position.
In this action the diaphragm assembly 6 triggers the lever system
3 by releasing the stem-valve disc assembly 4. By effect of the
force of the closing spring 7, the assembly 4 comes immediately
into contact with the orifice 8 interrupts automatically the flow of
gas.
SSV 8600 (FOR RB 4000 MODELS WITH INTEGRATED SSV 8600)
Item Description
1Valve body
2Control unit
3Lever system
4Stem-valve disc assembly
5control chamber
6Diaphragm assembly
7Closing spring
8Valve seat / Orifice
9Screwing ring OPSO
10 Screwing ring UPSO
11 Resetting lever
12 Outlet chamber
13 By-pass
11
2
3
9
7
8
12
10
13
5
4
6
1
Shown body is for single SSV, for integrated SSV in one body
with the regulator all described items are identical.

8
»Close the downstream stop valve
»Slowly operate the resetting lever 27 clockwise until the internal
by-pass is open 26. This leads to filling the downstream area
12 and the control chamber 19.
»When the pressure indicated on the manometer installed in the
downstream pipe is stabilized, continue to move the lever 27
in order to permit the connection of the lever system 24; at this
point the lever will remain stable on the opening position.
After these operations, the shut-off valve is into operation and it is
possible to proceed slowly with the opening of the downstream
valve
Shut-off Valve Adjustment
The shut-off valve is usually supplied with preset values
according the order. Should be necessary to modify the
calibration value, it must be considered that the modification
can be effected only within the specific set range of the spring
installed, otherwise it is necessary to substitute with a suitable
spring to be selected referring to the provided tables.
When the installed spring is appropriate to obtain the required
pressure, proceed as follows:
»Over pressure shut-off operation
Rotate in a clockwise direction the external screwing ring 21,
increases the set point value, or in a anticlockwise direction to
reduce it.
»Low pressure shut-off operation
Rotate in a clockwise direction the central screwing ring to
increase the set point value or in an anticlockwise direction to
reduce it.
Resetting of the shut-off valve with lever reset (Type SSV 8600)
26
19
24
27
21 22

9
Installation
»Check that the maximum inlet pressure is not higher than the
design pressure of the regulator.
»Regulator should be lifted only with belts around the body.
»Arrange enough room for the serving of the regulator.
Before installing the pressure regulator in the piping, the following
must be checked:
»The upstream and downstream flanges must be parallel so as
to install the regulator without undue stress.
»The upstream piping must be cleaned from all impurities (sand,
welding slag, etc.)
»The pressure regulator must not be visibly damaged.
»The inlet and outlet chambers of the pressure regulator must
be perfectly clean.
Make sure that the direction of gas flow corresponds to the arrow
on the pressure regulator body.
When tightening the flange bolts, the following maximum torque -
applicable to Class 5.6 bolts - should not be exceeded:
(DN) 25 40 50 80 100
PN16 35Nm
(M12)
85Nm
(M16)
85Nm
(M16)
85Nm
(M16)
85Nm
(M16)
ANSI 150 55Nm
(M14)
55Nm
(M14)
85Nm
(M16)
85Nm
(M16)
85Nm
(M16)
These torque’s values are mentioned per screw and are valid for metal soft material gaskets. Other
gaskets can require another torque’s values.
The screws used for the flange connection must be according to the flange size and must be adapted
to the temperature range of the regulator. Please tighten the screws crosswise.
After the installation works are completed, the tightness of the connections (threaded or flanged)
must be checked with appropriate means.
For ease of operation, we recommend performing installation
with the valve body in horizontal alignment, with actuator
upwards. Installation with actuator downwards or vertical
installation are also possible.
Fig 4 gives a typical example of installation:
»The downstream vent valve eases start-up and changes in
pressure setting
»The creep relief valve - optional -limits pressure surges
(example: gas thermal expansion in case of downstream piping
exposed to sun radiation at zero flow).
Outlet buffer volume
In case of fast variations of gas demand (ON/OFF), the response
time of the regulator may cause transient pressure surges or
drops that may trigger the overpressure or under-pressure
protection devices. These pressure changes can be limited to
acceptable values by providing for a downstream piping volume
greater than 1 dm3per m3/h of flowrate variation.
Sensing line
The sensing line must be connected to a section reasonably
free from turbulences, preferably in a straight section of the
downstream piping as shown in Fig 3.
Outlet pipe dimensions shall be such that the gas velocity at
pressure sensing tap does not exceed those given below:
»Outlet pressure < 200 mbar
15 to 20 m/s
»Outlet pressure > 200 mbar
20 to 40 m/s
Pipework should be made to prevent impurities and condensates
from collecting and obstructing the passage of the gas. Pipework
slope upwards from the pressure tap is recommended -
see Fig 3.
INSTALLATION WITH SAFETY SYSTEMS
SSV
The SSV must have a dedicated sensing line, whose point of
sensing provides a representative pressure. An isolating valve on
the sensing line is not permitted.
Monitor
The RB4000 regulator can be used as monitor regulator. It
sensing shall be piped downstream from the active regulator, as
shown in the Fig 5.
sensing line
180°
plug connection
horizontal axis
connection to be
welded on pipe
Messleitung
180°
Verschraubung
Horizontale Achse
Einschweißmuffe
sensing line
180°
plug connection
horizontal axis
connection to be
welded on pipe
Messleitung
180°
Verschraubung
Horizontale Achse
Einschweißmuffe
Fig. 3

10
Regulator Start-up
After the pressure regulator has been installed, make sure that
the on/off valve upstream and downstream and the vent valve are
all closed.
»Partially open the upstream on/off valve slowly enough to pass
a very small amount of gas;
»Reset the safety shutoff valve (see the relevant Instruction
Manual). Note that a safety shutoff valve with over and
under- pressure protection is always closed in absence of
gas downstream from the regulator, where its sensing line is
connected.
»Check that the pressure rises slowly; the downstream pressure
must stabilize around the set value. If the pressure continues to
rise, interrupt the starting procedure by closing the upstream
on/off valve and identify the cause of the malfunction;
»After the outlet pressure has stabilized, open the on/off valve
completely;
»Then slowly open the downstream on/off valve until the piping
is completely filled.
At this point, the pressure regulator is operative.
Monitor Start-up
The same procedure must be followed when starting a monitor
and active system, bearing in mind that the pressure gauge
installed in the section in between the two regulators must
indicate the same pressure value as the upstream gauge.
Pressure Regulator Setting
The pressure regulator is usually delivered already set to the
specifications indicated in the order sheet. Whenever the set
pressure must be modified, this value must be set within the
setting range of the spring installed.
Make sure there is a flow demand or open the vent valve
downstream of the regulator. This valve should be closed after
the desired set pressure is obtained.
»To increase the set pressure: rotate the adjustment screw
clockwise using the adjustment wrench - see Fig 8.
»To decrease the set pressure: proceed as above, rotating the
spring adjustment screw counter-clockwise.
Maintenance
The maintenance operations required for the pressure regulator
(and the safety shutoff valve) are closely linked to the quality of
gas supplied (in terms of moisture content, liquid hydrocarbons
and impurities in general) and to the degree of filtration performed
upstream of the pressure regulator.
For this reason we recommend always installing a cartridge
filter upstream from the pressure regulator that is capable of
withholding the solid and liquid particles present in the gas that
might otherwise compromise efficient operation.
All pressure must be discharged before performing any
maintenance operation on the pressure regulator by proceeding
as follows:
»Close the on/off valves upstream and downstream,
»Slowly discharge the pressure by opening the vent valve
downstream from the pressure regulator until the gauge
indicates zero.
Before performing any maintenance operation on pressure
regulators fitted with overpressure and under pressure
shutoff devices, open the bypass between the inlet and outlet
chambers (see Instruction Manuals for safety shutoff valve). This
relieves the pressure that otherwise would be trapped upstream
from the valve disc of the safety shutoff device.
Disassembly
Check the following before beginning any disassembly
operations on the pressure regulator:
»The regulator must be depressurized as described above;
»The wrenches and other tools required for the operation must
be close at hand;
»Spare parts to replace damaged parts must be immediately
available.
Remember to:
»Disassemble the actuator top casing only after removing the
loading spring;
»Disassemble all parts carefully in order to avoid damage. Pay
extra attention to the rubber parts (using the appropriate tool
for the disassembly of the O-rings) and replace all parts that
exhibit even the slightest signs of damage.
Built-in safety valve
Thanks to its modular design, the retrofit - or change of
safety valve model - can be easily made on the field without
dismounting the regulator from the gas line. See Fig 9.
Noise abatement cage (silencer)
This part can be easily accessed from the bottom cap. See Fig 7
Fig. 8 - Setting key
Fig. 8 - silencer assembly (detail) Fig. 9 Safety shutoff valve assembly (detail)
Adjustment
screw
Setting key
The setting key - ref. 20231000 -
is provided on request.

11
DE

12
Diese Betriebsanleitung muss leicht zugänglich aufbewahrt
werden.
SICHERHEITSHINWEISE:
»Nur für saubere und trockene Gase verwenden. Bei
aggressiven Medien kontaktieren Sie bitte Itron für
Spezialausführungen. Bei Medium Wasserstoff nach
Wartungsarbeiten Anlagenabschnitt mit Stickstoff spülen. Auf
keinen Fall bei Sauerstoff anwenden: Explosionsgefahr!
»Die nationalen Vorschriften für die Inbetriebnahme, den
Betrieb, Prüfungen und die Wartung von Gasgeräten müssen
eingehalten werden.
»Der Einbau der Geräte ist mit Sorgfalt auszuführen. Sie sollten
nur an den vorgesehenen Tragösen, oder mittels Tragegurte
am Ventilkörper angehoben werden.
»Das Gerät sollte vor der Montage auf eventuelle
Transportschäden untersucht werden und darf nur in
einwandfreiem Zustand montiert werden. Eventuelle
Lackbeschädigungen sollten nachgebessert werden. Die
Dichtflächen der Flansche müssen beschädigungsfrei und
sauber sein.
»Zum Warten und Bedienen ist ausreichend Bauraum
vorzusehen.
»Das Gerät ist so zu installieren, dass es in seiner Funktion nicht
durch andere Installationskomponenten beeinträchtigt wird.
»Die angegebenen Anzugsdrehmomente der Schrauben
sollten nicht überschritten werden. Die Schrauben für die
Flanschverbindung müssen der Flanschgröße entsprechen
und für den Temperaturbereich des Gerätes ausgelegt sein.
Die Schrauben sind über Kreuz anzuziehen.
»Die Länge der bei Flanschverbindungen eingesetzten
Schrauben muss so gewählt werden, dass die Schrauben
mindestens einen Gewindegang über die Muttern hinausragen.
»Nach dem Einbau muss die Dichtigkeit der Flanschverbindung
überprüft werden.
»Die auf den Typenschildern angegebenen
Betriebsbedingungen müssen eingehalten
werden; gegebenenfalls müssen entsprechende
Sicherheitseinrichtungen vorgesehen werden.
»Reparaturen am Gerät dürfen nur von unterwiesenem Personal
oder durch Fachkräfte erfolgen. Danach ist ein Dichtheitstest
mit 1,1 x PS durchzuführen. Es müssen original Verschleißteile
von Itron verwendet werden. Beim Austausch drucktragender
Teile ist darauf zu achten, dass diese der Druckgeräterichtlinie
entsprechen. Gewährleistung nur bei Reparatur durch Itron.
»Bei Korrosionsgefahr im Innen- und Außenbereich muss
das Gerät regelmäßig untersucht werden und bei merklicher
Korrosion aus dem Verkehr genommen werden.
»Das Gerät darf nur mit einem feuchten Tuch gereinigt werden.
Zum Reinigen des Gerätes dürfen keine lösemittel- bzw.
alkoholhaltigen Reinigungsmittel verwendet werden.
»Das Gerät ist nicht für Erdbeben und Hochwasser ausgelegt.
»Vor dem Ausbau des Gerätes den Druck vollständig ablassen.
Eine Restmenge Gas kann austreten, deshalb ist für
ausreichende Belüftung zu sorgen.
»Abhängig vom Aufstellungsort des Gerätes sind
gegebenenfalls Schallschutzmaßnahmen zu treffen.
HINWEISE FÜR DEN EX-EINSATZ (ATEX):
»Wenn in der unmittelbaren Reglerumgebung Flugrost möglich
ist, sind alle Aluminium-Außenteile entsprechend zu schützen
(z.B. durch Lackieren).
»Die Geräte sind elektrisch leitend in die geerdete Anlage
einzubauen.
»Für den Ein-/Ausbau der Geräte bzw. deren Reparatur vor Ort
dürfen nur die Werkzeuge, die für die betreffende Ex-Zone
zugelassen sind, verwendet werden.
»Geräte dürfen nicht Flammen, ionisierter Strahlung, Ultraschall
oder starken elektro-magnetischen Wellen ausgesetzt werden.
»Sofern zusätzliche Wärmequellen in der direkten Umgebung
vorhanden sind, müssen diese bei der Betrachtung der
Umgebungstemperatur beachtet werden.
Das RB 4000 Gasdruckregelgerät ist für unterschiedlichste
Anwendungen in der Gasversorgung entwickelt, wie
Verteilerstationen, Bezirksregelanlagen und weitere industrielle
Applikationen bei welchen genau Ausgangsdruckregelung,
einfache Justierbarkeit und schnelle Reaktionszeit verlangt
werden.
Das Produkt kann optional mit einem integrierten Sicherheits-
absperrventil der Typenreihe 8500 oder 8600 ausgestattet
werden.
TECHNISCHE DATEN
Maximaler Prüfdruck PS 25 bar
Maximaler Eingangsdruck Pumax 19 bar
Ausgangsdruckbereich wd DN 25 10 mbar bis 2.5 bar
andere 10 mbar bis 2.0 bar
Genauigkeitsklasse bis AC 5
Schließdruckgruppe bis SG10
Betriebstemperatur -20°C bis +60°C
Umgebungstemperatur -30°C bis +60°C (Ventilkörper)

13
Funktionsprinzip des Sicherheitsabsperrventiles
Das SAV schließt, wenn das Druckniveau hinter dem
Regelgerät (Ausgangsdruck) den eingestellten Wert über-
oder unterschreitet. Dadurch wird der Gasstrom automatisch
gestoppt.
Absperrventil mit Rückstellung mittels Schraubkappe
Dieses Ventil besteht aus Ventilkörper 10 (gemeinsam mit
Regelgerät), Messwerk, einem Membrangehäuse 4 - 15 und
einer Ventilstange mit Ventilbaugruppe 12 - 18, welche in stabiler
Offen - Position durch ein Kugelrast - System gehalten wird.
Das SAV löst aus, wenn das Druckniveau im Vergleicherraum 5,
welcher durch die Messleitung 15 mit Ausgangsdruck versorgt
wird, den eingestellten SAV Wert über- oder unterschreitet. Durch
das Kraft Ungleichgewicht wird die Baugruppe Membrane 4 - 15
bewegt und das Kugelrast System entriegelt. Die Ventilstange 18
gemeinsam mit dem Ventilteller 12 bewegt sich durch die Kraft
der Sollwertfeder 13 und schließt im Zusammenwirken mit der
Düse 8 den Gasstrom automatisch.
Hinweis: die schematische Darstellung bezieht sich auf das
SAV 8500, das Funktionsdesign wird ausserdem auch für die
Baureihen 8200 und 8300 verwendet.
SAV 8500 (FÜR RB 4000 AUSFÜHRUNG MIT INTEGRIERTEM SAV 8500)
Item Beschreibung
1Justierring
2Deckel
3Atmungsanschluss
4Membrane
5Vergleicherraum
6Flansch
7Schließfederplatte
8Düse
9Eingangsdruckbereich
10 Ventilkörper
11 Ventilkörper Ausgang
12 Ventilteller
13 Schließfeder
14 Membrangehäuse
Unterteil
15 Anschluss für Messleitung
16 Kugeln
17 Feder für Überdruck
18 Ventilstange
19 SAV Schraubkappe
20 Justierring
21 Feder für Druckabfall
1
19
18
17
16
15
14
13
20
21
12
11
2
3
4
5
6
7
8
9
10

14
Wiedereinrasten des SAV
Das SAV darf nur wiedereingerastet werden, wenn vorher
der Grund für das Auslösen überprüft ist und die normal
Betriebsbedingungen wieder hergestellt sind. Bitte wie folgt
vorgehen:
Wiedereinrasten des SAV durch Schraubkappe
»Schließe den Kugelhahn im Ausgang
»Entferne die Schraubkappe 29 durch herausschrauben (Fig. a)
»Schraube die Kappe über Kopf auf die Ventilstange 28 bis
diese am Gehäuse anliegt (Fig. b)
»Langsam weiter hereindrehen: dadurch wird der
Druckausgleich am Ventil hergestellt und der Ausgangsbereich
gefüllt
»Ziehe die Schraubkappe heraus bis die Kugeln des Rast
Systems die Ventilstange verriegeln (Fig. c)
Nach diesen Schritten wird die Schraubkappe in das Gehäuse
eingeschraubt (Fig. d) und der Ausgangshahn langsam wieder
geöffnet.
Fig. a Fig. b
Fig. c Fig. d

15
SAV mit Rückstellhebel (SSV 8600)
Dieses Gerät besteht aus Ventilkörper 1, Messwerk
2, Schaltgetriebe 3 und Stellantrieb mit Ventilteller
4. Das Sicherheitsabsperrventil löst aus, wenn das
Ausgangsdruckniveau, welches durch die Vergleichermembrane
5 überwacht wird ansteigt oder abfällt.
Bei über- oder unterschreiten der Ansprechwerte wird die
Position der Membraneinheit 6 verändert, das Schaltgetriebe 3
löst aus und die Ventiltellereinheit 4 wird geschlossen. Aufgrund
der Federkraft 7 wird die Ventiltellereinheit 4 gegen die Düse 8
gepresst und der Gas Durchfluss wird unterbrochen.
SAV 8600 (RB 4000 AUSFÜHRUNG MIT INTEGRIERTEM SAV 8600)
Item Beschreibung
1Ventilkörper
2Messwerk
3Schaltgetriebe
4Ventiltellereinheit
5Vergleichermembrane
6Membraneinheit
7SAV Schließfeder
8SAV Düse
9Justierschraube
10 Justierschraube
11 Rückstellhebel
12 Ventilkörper Ausgang
13 Druckausgleich
11
2
3
9
7
8
12
10
13
5
4
6
1
Der gezeigte Ventikörper ist für ein Solo-SAV, für die intergrierte
Version werden identische Bauteile verwendet.

16
»Schließen der Ausgangs-Absperrarmatur
»Langsames Öffnen des Rückstellhebels 27 im Uhrzeigersinn,
bis der interne Druckausgleich 26 geöffnet hat: durch diese
Vorgehensweise wird der Bereich hinter dem SAV Ventilteller
und der Ausgangsdruckraum 12 sowie der Messraum 19
gefüllt, was durch ein installiertes Manometer im Ausgangsrohr
überwacht werden kann.
»Sobald der Druck im Ausgang konstant steht wird durch die
weitere Bewegung des Öffnungshebels 27 die Verriegelung mit
dem Schaltgetriebe 24 in Offenstellung erreicht.
Jetzt ist das SAV in Betriebstellung und der Ausgangshahn
kann langsam geöffnet werden.
Justieren des SAV Messwerkes
Das SAV ist ab Werk auf die in der Kundenbestellung vorgegeben
Werte eingestellt. Falls die Einstellwerte geändert werden,
bitte zuerst prüfen, ob die neuen Werte mit den eingebauten
Federbereichen realisiert werden können. Anderenfalls vorher die
geeignete Feder einbauen.
Unter der Voraussetzung der geigneten Feder, bitte in folgender
Reihenfolge vorgehen:
»Obere Abschaltung
Drehen der Justierschraube (größerer Ø) im Uhrzeigersinn erhöht
den Schaltpunkt, Gegenuhrzeigersinn senkt ab.
»Untere Abschaltung
Drehen der Justierschraube (kleinerer Ø) im Uhrzeigersinn erhöht
den Schaltpunkt, Gegenuhrzeigersinn senkt ab.
Öffnen des SAV mit dem Öffnungshebel (Typ SAV 8600)
26
19
24
27
21 22

17
Einbau Anleitung
»Prüfen, dass der tatsächliche Eingangsdruck nicht höher als
der Prüfdruck des Reglers ist
»Regelgerät nur mit Gurten um den Ventilkörper anheben
»Ausreichend Platz für das Handling bereitstellen
Vor dem Einbau des Regelgerätes in die Leitung, die folgende
Punkte prüfen:
»Eingangs- und Ausgangsflansche der Leitung müssen parallel
sein, um das Regelgerät ohne Verspannung montieren zu
können
»Die eingangsseitige Leitung muss frei von Schmutz,
Schweißschlacke etc. sein
»Das Regelgerät darf nicht sichtbar beschädigt sein
»Der Eingangs- und Ausgangsbereich und Flansche des
Regelgerätes müssen völlig sauber sein.
Unbedingt sicherstellen, dass die Durchflussrichtung, die am
Gerät mit einem Pfeil angezeigt wird, eingehalten ist
Beim Anziehen der Flanschverbindung die maximalen
Drehmomente – zutreffend für Klasse 5.6 Schrauben – nicht
überschreiten
(DN) 25 40 50 80 100
PN16 35Nm
(M12)
85Nm
(M16)
85Nm
(M16)
85Nm
(M16)
85Nm
(M16)
ANSI 150 55Nm
(M14)
55Nm
(M14)
85Nm
(M16)
85Nm
(M16)
85Nm
(M16)
Wir empfehlen die Geräte in horizontaler Leitung mit dem
Membrangehäuse nach oben zu installieren. Einbaulagen mit
Membrangehäuse nach unten oder in vertikalen Leitungen sind
anteilig möglich (ggf. Rücksprache mit Itron)
In Fig. 4 ist ein typisches Installationsbeispiel dargestellt:
»Ein Entlüftungsventil im Ausgangsbereich vereinfacht die
Inbetriebnahme und Neujustieren des Regelgerätes
»Das optionale Sicherheits-Abblaseventil begrenzt
Druckerhöhungen (Beispiel: Druckerhöhung durch
Temperatureinfluss auf die Ausgangsleitung ohne
Gasverbrauch).
Puffervolumen hinter dem Regelgerät
Im Falle schneller Lastwechsel des Gasverbrauches (Auf/Zu)
kann die Reaktionszeit des Reglers zu Druckschwankungen
führen, die die obere oder untere Abschaltung des SAV auslösen
können.
Diese Schwankungen können durch ein Leitungsvolumen >
1 dm3pro m3/h des Lastwechsel Durchflusses hinter dem
Regelgerät stark verbessert werden.
Messleitung
Die Messleitung muss an eine vorzugsweise gerade,
turbulenzfreie Zone im Ausgangsrohr, wie in Fig. 3 dargestellt,
angeschlossen werden.
Der Querschnitt dieser Rohrleitung sollte in Bezug auf die
Fließgeschwindigkeit am Messleitungs-Anschluss folgende
Werte einhalten:
»Ausgangsdruck < 200 mbar
15 to 20 m/s
»Ausgangsdruck > 200 mbar
20 to 40 m/s
Vor dem Regelgerät sollten Einrichtungen zur Verhinderung
von Verunreinigungen und Kondensat installiert sein. In der
Ausgangsleitung empfehlen wir Druckanschlüsse nach Fig 3
sensing line
180°
plug connection
horizontal axis
connection to be
welded on pipe
Messleitung
180°
Verschraubung
Horizontale Achse
Einschweißmuffe
sensing line
180°
plug connection
horizontal axis
connection to be
welded on pipe
Messleitung
180°
Verschraubung
Horizontale Achse
Einschweißmuffe
Fig. 3

18
Inbetriebnahme des Regelgerätes
Nach Einbau des Regelgerätes bitte prüfen, dass Eingangs-,
Ausgangs- und Abströmventil geschlossen sind. Danach wie
folgt vorgehen:
»Langsames anteiliges Öffnen des Eingangsventiles, um einen
kleinen Volumenstrom einströmen zu lassen
»Öffnen des Sicherheitsabsperrventiles unter Beachtung,
dass ein SAV für obere und untere Abschaltung nicht
in Offenstellung verriegelt werden kann, solange der
Ausgangsdruck < als der Schaltwert für untere Abschaltung
ist.
»Prüfen, dass das Druckniveau langsam ansteigt und im
Bereich des eingestellten Ausgangsdruckes zum Stillstand
kommt. Sollte dies nicht der Fall sein, bitte Eingangshahn
schließen und den Fehler für die Fehlfunktion ermitteln.
»Wenn sich der Ausgangsdruck stabilisiert hat, kann der
Eingangshahn vollständig geöffnet werden
»Danach das Ausgangsventil langsam öffnen solange bis die
dahinter liegende Leitung vollständig gefüllt ist.
Jetzt ist das Regelgerät betriebsbereit.
Einstellung des Ausgangsdruckes
Normalerweise wird das Gerät im Werk auf die Einstellwerte der
Bestellung eingestellt. Falls eine Neueinstellung erforderlich wäre,
könnte dies innerhalb des Federbereiches der installierten Feder
eingestellt werden.
Als Voraussetzung für eine korrekte Federeinstellung sollte
das Gerät mit Gasdurchfluss eingestellt werden. Falls kein
Verbraucher aktiv ist, kann
»Anhebung des Druckes: Justierschlüssel im Uhrzeigersinn
drehen (Werkzeug siehe Fig 8)
»Absenken des Druckes: Justierschlüssel im
Gegenuhrzeigersinn drehen
Instandhaltung
Der Instandhaltungsbedarf für Regelgerät (und SAV) stehen in
einem direkten Zusammenhang zur gelieferten Gasqualität (in
Bezug auf Verunreinigungen, Feuchte und hochwertige Kohlen-
Wasserstoffe) und zum Grad der Filterung vor dem Regelgerät.
Aus diesem Grund empfehlen wir einen Filter mit
auswechselbarem Filtereinsatz vor dem Regelgerät, der in der
Lage ist, die festen und flüssigen Bestandteile aufzuhalten, die
ansonstendie Funktion des Gerätes beeinflussen könnten.
Unbedingt sicherstellen, dass das Gerät komplett drucklos ist,
bevor Instandhaltungsmaßnahmen eingeleitet werden, dazu bitte
wie folgt vorgehen:
»Ein- und Ausgangshahn schließen
»Druck langsam abbauen, dazu das Entlüftungsventil im
Ausgangsrohr solange öffnen bis Manometer „0“ anzeigt
Bitte darauf achten, dass für Geräte mit oberer und untere
Abschaltung der Druckausgleich zwischen Eingangs- und
Ausgangsdruckbereich (siehe auch Betriebsanleitung SAV)
durchgeführt wird. Dadurch wird das Druckniveau entspannt,
das anderenfalls vor dem SAV Ventilteller eingeschlossen sein
kann.
Zerlegen
Bitte vor dem Zerlegen überprüfen:
»Das Regelgerät muss, wie oben beschrieben, drucklos sein
»Werkzeuge sollten griffbereit verfügbar sein
»Ersatzteile, die ersetzt werden, sollten kurzfristig verfügbar sein
Nicht vergessen:
»Membrangehäuseoberteil nur abbauen, wenn die
Sollwertfeder entspannt ist
»Alle Teile vorsichtig demontieren, um Beschädigungen zu
vermeiden. Besondere Aufmerksamkeit für das Entfernen der
Dichtungsteile (Spezialwerkzeug für O-Ringe) und Austausch
aller Teile, die beschädigt sind oder bis zum nächsten Intervall
der Benutzung nicht standhalten können.
Eingebautes Sicherheitsabsperrventil
Aufgrund der modularen Bauweise ist es möglich eine SAV
Baugruppe nachzurüsten oder umzubauen (techn. Stand
beachten).
Diese kann ohne das Gerät aus der Leitung auszubauen vor Ort
durchgeführt werden. (siehe Fig 9)
Schalldämpfer
Dieses Bauteil kann von unten auf die Grundplatte aufgesetzt
werden (siehe Fig. 7)
Fig. 8 - Justierschlüssel
Fig. 8 - Schalldämpfer Fig. 9 SAV Baugruppe
Justierschraube
Justierschlüssel
Der Justierschlüssel – Nr. 20231000 –
kann bei Bedarf geliefert werden.

19
ANNEX / ANNEKTIEREN
SECTIONAL VIEW / SCHNITTBILD
Fig 1 - RB 4000 sectional view / RB 4000 Schnitt
6
Adjustment screw /
Justierschraube
Breather / Atmung
Loading spring / Sollwertfeder
Actuator / Stellantrieb
Anti-pumping valve /
Impulsdämpfung
Sensing line / Messleitung
Valve disc / Düse
Valve seat /
Ventilteller
Safety Shutoff valve (SSV) /
Sicherheitsabsperrventil (SAV)
SSV Sensing line /
SAV Messleitung
Diaphragm / Membrane
Fig 2 - RB 4000 with built-in safety shutoff valve / RB 4000 mit integriertem SAV

20
OUTLET PRESSURE RANGE / AUSGANGSDRUCKBEREICH
DN 25
Spring
Code /
Feder Nr.
Spring Characteristic /
Feder Eigenschaften Colour / Farbe
Spring Range / Federbereich
d
(mm)
Di
(mm)
Lo
(mm) Lt 4010/11/12
(Ø 360)
4020/21/22
(Ø 220)
4030/31/32
(Ø 220/TR)
20567075 3.5 43 200 15.5 Yellow / Gelb 18 - 27 mbar - -
20567076 3.5 43 200 10.75 Red / Rot 25 - 33 mbar - -
20567662 4.5 43 160 11 White / Weiß 25 - 55 mbar - -
20567663 5.5 43 160 10.5 Purple / Lila 55 - 100 mbar 0.12 - 0.20 bar -
20567664 6.5 43 160 10.5 Orange / Orange 85 - 210 mbar 0.20 - 0.55 bar -
20567665 743 140 10.5 Brown / Braun -0.30 - 0.65 bar 0.50 - 1.00 bar
20567666 7.5 43 160 10.5 Green / Grün -0.40 - 0.90 bar 0.60 - 1.35 bar
20567761 843 140 9Black / Schwarz - - 1.10 - 1.70 bar
20567762 943 140 9Grey / Grau - - 1.10 - 2.50 bar
DN 40 / DN 50 / DN 50 x 80
Spring
Code /
Feder Nr.
Spring Characteristic /
Feder Eigenschaften Colour / Farbe
Spring Range / Federbereich
d
(mm)
Di
(mm)
Lo
(mm) Lt 4010/11/12
(Ø 480)
4020/21/22
(Ø 360)
4030/31/32
(Ø 360/TR)
20568085 463 320 15 Orange/Sliver
Orange/Silber 10 - 14 mbar - -
20568086 463 320 10.5 Brown/Silver
Braun/Silber 14 - 19 mbar - -
20568087 563 320 16.5 Dark Green/Silver
Dunkelgrün/Silber 19 - 27 mbar - -
20568088 563 320 13 Light Green/Silver
Hellgrün/Silber 25 - 36 mbar - -
20568089 563 320 9.25 Light Blue/Silver
Hellblau/Silber 35 - 48 mbar 0.068 - 0.107 bar -
20568081 6.5 63 270 9.75 Purple/Silver
Lila/Silber 50 - 85 mbar 0.11 - 0.18 b ar -
20568082 8.5 63 270 15 Yellow / Gelb 82 - 130 mbar 0.18 - 0.28 bar -
20568083 8.5 63 270 11.5 Blue/Silver
Blau/Silber 110 - 140 mbar 0.28 - 0.37 bar -
20568183 963 260 11.5 Blue / Blau 120 - 240 mbar 0.27 - 0.45 bar -
20568283 963 243 10.8 Blue / Blau -0.30 - 0.50 bar -
20568282 10 63 243 11 Silver / Silber -0.48 - 0.66 bar 0.70 - 1.02 bar
20568281 11 63 243 11 Purple / Lila -0.65 - 0.82 bar 0.99 - 1.20 bar
20568286 11.5 63 243 10.8 Yellow/Silver
Gelb/Silber -0.80 - 1.00 bar 1.18 - 1.55 bar
20568284 12 63 243 10 Red/Silver
Rot/Silber -0.99 - 1.30 bar 1.50 - 2.00 bar
DN 80 / DN 100
Spring
Code /
Feder Nr.
Spring Characteristic /
Feder Eigenschaften Colour / Farbe
Spring Range / Federbereich
d
(mm)
Di
(mm)
Lo
(mm) Lt 4010/11/12
(Ø 600)
4020/21/22
(Ø 480)
4030/31/32
(Ø36 0/TR)
4040/41/42
(Ø 360/TR)
20569590 680 350 12.5 Orange / Orange 17 - 25 mbar - - -
20569591 6.2 80 350 10 Brown / Braun 23 - 30 mbar - - -
20569592 6.5 80 350 10 Dark Green /
Dunkelgrün 28 - 37 mbar - - -
20569593 780 350 9.5 Light Green / Hellgrün 38 - 54 mbar - - -
20569594 880 350 11.5 Black / Schwarz 43 - 68 mbar - - -
20569690 980 320 10.5 Red / Rot 58 - 96 mbar - - -
20569691 9.5 80 320 10 light Blue / Hellblau 72 - 117 mbar - - -
20569585 11 80 320 10.5 White / Weiß 94 - 170 mbar - - -
20569586 13 63 320 12.5 Pink / Rosa 150 - 200 mbar - - -
20568082 8.5 63 270 15 Yellow / Gelb -0.082 - 0.13 bar - -
20568083 8.5 63 270 11.5 Blue/Silver
Blau/Silber -0.11 - 0.14 bar - -
20568183 963 260 11.5 Blue / Blau -0.12 - 0.24 bar - -
20568283 963 243 10.8 Blue / Blau - - 0.30 - 0.50 bar -
20568182 10 63 260 11.5 Silver / Silber -0.18 - 0.29 bar - -
20568282 10 63 243 11 Silver / Silber - - 0.48 - 0.66 bar 0.70 - 1.02 bar
20568181 11 63 260 11.5 Purple / Lila -0.24 - 0.37 bar - -
20568281 163 243 11 Purple / Lila - - 0.65 - 0.82 bar 0.99 - 1.20 bar
20568186 11.5 63 260 11.5 Yellow/Silver
Gelb/Silber -0.30 - 0.47 bar - -
20568286 11.5 63 243 10.8 Yellow/Silver
Gelb/Silber - - 0.80 - 1.00 bar 1.18 - 1.55 bar
20568184 12 63 260 10.5 Red/Silver
Rot/Silber -0.38 - 0.50 bar - -
20568284 12 63 243 10 Red/Silver
Rot/Silber - - 0.99 - 1.30 bar 1.50 - 2.00 bar
Spring characteristics / Feder Eigenschaften:
d: wire diameter / Drahtdurchmesser Lo: height / Höhe
Di: internal diameter / Innendurchmesser Lt: no. of spires / Zahl der Windungen
Other manuals for RB 4000
2
This manual suits for next models
2
Table of contents
Languages:
Other ITRON Controllers manuals

ITRON
ITRON RR 16 User manual

ITRON
ITRON RB 4700 Series User manual

ITRON
ITRON RB 3200 User manual

ITRON
ITRON RB1700 How to use

ITRON
ITRON RB 4000 User manual

ITRON
ITRON MLOG User manual

ITRON
ITRON RB 4000 Instructions and recipes

ITRON
ITRON 133 User manual

ITRON
ITRON RR 16 User manual

ITRON
ITRON RB 4600 User manual