manuals.online logo
Brands
  1. Home
  2. •
  3. Brands
  4. •
  5. Weber
  6. •
  7. Griddle
  8. •
  9. Weber LP User manual

Weber LP User manual

Other Weber Griddle manuals

Weber 79386 User manual

Weber

Weber 79386 User manual

Weber GENESIS II User manual

Weber

Weber GENESIS II User manual

Weber Cast-Iron Griddle User manual

Weber

Weber Cast-Iron Griddle User manual

Weber GENESIS II User manual

Weber

Weber GENESIS II User manual

Weber Gourmet BBQ System 178901 User manual

Weber

Weber Gourmet BBQ System 178901 User manual

Weber LUMIN User manual

Weber

Weber LUMIN User manual

Weber 178728 User manual

Weber

Weber 178728 User manual

Weber BABY Q 100 User manual

Weber

Weber BABY Q 100 User manual

Weber Baby Q Operating instructions

Weber

Weber Baby Q Operating instructions

Weber Q 3000 Series User manual

Weber

Weber Q 3000 Series User manual

Weber Original 178763 User manual

Weber

Weber Original 178763 User manual

Weber TRAVELER GP17 User manual

Weber

Weber TRAVELER GP17 User manual

Popular Griddle manuals by other brands

Magikitch'n MKG24 Installation & operation manual

Magikitch'n

Magikitch'n MKG24 Installation & operation manual

Proctor-Silex 25340 manual

Proctor-Silex

Proctor-Silex 25340 manual

New House Kitchen NH33-C user guide

New House Kitchen

New House Kitchen NH33-C user guide

Magikitch'n 24 Installation and operation instructions

Magikitch'n

Magikitch'n 24 Installation and operation instructions

Anvil FTA7116 Specifications

Anvil

Anvil FTA7116 Specifications

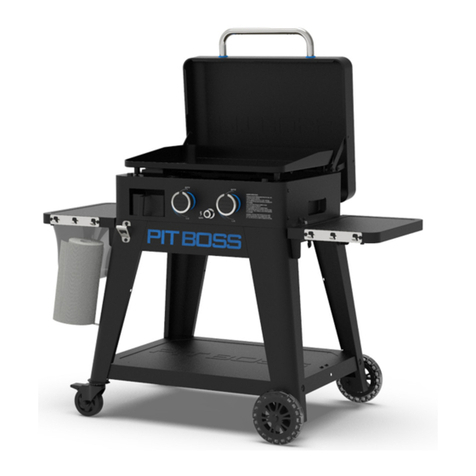
Pit Boss PB2BGT1 Instruction guide

Pit Boss

Pit Boss PB2BGT1 Instruction guide

Dyna-Glo DGL260SNP manual

Dyna-Glo

Dyna-Glo DGL260SNP manual

Char-Broil 19952085 Product guide

Char-Broil

Char-Broil 19952085 Product guide

APW Wyott HMG-2424 Installation and operating instructions

APW Wyott

APW Wyott HMG-2424 Installation and operating instructions

Pit Boss Ultimate Griddle PB2BGD2 Assembly guide

Pit Boss

Pit Boss Ultimate Griddle PB2BGD2 Assembly guide

Airxcel Suburban Elite SOP-1005A Operation guide

Airxcel

Airxcel Suburban Elite SOP-1005A Operation guide

Hobart GGO36S instruction manual

Hobart

Hobart GGO36S instruction manual

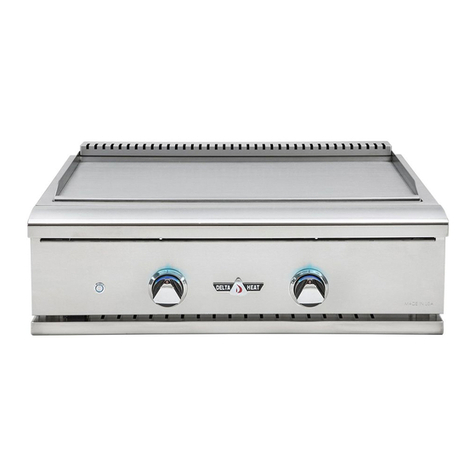
Delta Heat DHTG32 Installation, use & care manual

Delta Heat

Delta Heat DHTG32 Installation, use & care manual

Broil King USG-10 use and care manual

Broil King

Broil King USG-10 use and care manual

AccuTemp Accu-Steam GG24A Installation & operator's manual

AccuTemp

AccuTemp Accu-Steam GG24A Installation & operator's manual

croydon GR2G instruction manual

croydon

croydon GR2G instruction manual

Barbecook THERMICORE user guide

Barbecook

Barbecook THERMICORE user guide

Proctor-Silex 38513 use & care

Proctor-Silex

Proctor-Silex 38513 use & care

manuals.online logo
manuals.online logoBrands
  • About & Mission
  • Contact us
  • Privacy Policy
  • Terms and Conditions

Copyright 2025 Manuals.Online. All Rights Reserved.

WEBER GRIDDLE 28in
Keep this Owner’s Manual for future reference, thoroughly read through it, and
if you have any questions please contact us today.
LP Owner’s Manual
79617
11/29/22
enUS
REGISTER TODAY
Register your grill and receive special content to
make you the ultimate backyard hero.
Scan the QR code or text a photo of the camera
icon to 71403.
Or register online at weber.registria.com
Need help? Visit photoregister.com/help or text "help" to 71403
2
Installation and Assembly
mDANGER: This grill is not intended to be installed in
or on recreational vehicles or boats.
mWARNING: Do not use this grill unless all parts
are in place and the grill was properly assembled
according to the assembly instructions.
mWARNING: Do not build this model of grill in any
built-in or slide-in construction.
mWARNING: Do not modify the appliance (grill). Liquid
propane gas is not natural gas. The conversion or
attempted use of natural gas in a liquid propane gas
unit or liquid propane gas in a natural gas unit is
unsafe and will void your warranty.
• In the United States, installation must conform with
local codes or, in the absence of local codes, with
either the National Fuel Gas Code, ANSI Z223.1/
NFPA 54, Natural Gas and Propane Installation Code,
CSA B149.1; or Propane Storage and Handling Code,
B149.2; or the Standard for Recreational Vehicles,
ANSI A119.2/NFPA 1192, and CSA Z240 RV Series,
Recreational Vehicle Code, as applicable.
• InCanada, the installation of this grill must comply
with local codes and/or the latest edition of Standard
CAN/CSA-B149.2 (Propane Storage and Handling
Code). These instructions, while generally acceptable,
do not necessarily comply with the Canadian
installation codes, particularly with piping above and
below ground.
• In Mexico, if there are local codes that apply to
portable gas appliances, you must comply with the
latest edition of Ocial Mexican Standard (NOM).
• If an external electrical source is utilized (such as
a rotisserie) it must be electrically grounded in
accordance with local codes or, in the absence of local
codes, with the National Electrical Code, ANSI/NFPA
70, or the Canadian Electrical Code, Part 1, CSA C22.1.
Operation
mDANGER: Only use the grill outdoors in a well-
ventilated area. Do not use in a garage, building,
breezeway, tent, any other enclosed area, or
beneath overhead combustibleconstruction.
mDANGER: Do not use the grill in any vehicle or in any
storage or cargo area of any vehicle. This includes,
but is not limited to, cars, trucks, station wagons,
mini-vans, sport utility vehicles, recreational
vehicles, andboats.
mDANGER: Do not use the grill within 24 inches (61
cm) of combustible materials. This includes the top,
bottom, back and sides of the grill.
mDANGER: Keep the cooking area clear of flammable
vapors and liquids such as gasoline, alcohol, etc.,
and combustible materials.
mDANGER: This appliance (grill) must be kept away
from flammable materials during use.
mDANGER: Do not put a grill cover or anything
flammable on, or in the storage area under the grill
while it is in operation or is hot.
mDANGER: Should a grease fire occur, turn o all
burners and leave lid closed until fire is out.
mWARNING: Accessible parts may be very hot.
Keepyoung children away.
mWARNING: The use of alcohol, prescription drugs,
non-prescription drugs, or illegal drugs may impair
the consumer’s ability to properly and safely
assemble, move, store, or operate thegrill.
mWARNING: Never leave the grill unattended during
pre-heating or use. Exercise caution when using
this grill. The entire cookbox gets hot when in use.
mWARNING: Do not move the appliance (grill)
duringuse.
mWARNING: Keep any electrical supply cord and the
fuel supply hose away from any heated surfaces.
mCAUTION: This product has been safety-tested and
is only certified for use in a specific country. Refer
to country designation located on outside of box.
• Do not use charcoal or lava rock in the grill.
Storage and/or Non-Use
mWARNING: Turn o the gas supply at the gas
cylinder (tank) after use.
mWARNING: LP tanks must be stored outdoors out of
the reach of children and must not be stored in a
building, garage, or any other enclosed space.
mWARNING: After a period of storage and/or nonuse,
the grill should be checked for gas leaks and burner
obstructions before use.
mStorage of the grill indoors is permissible only if the
LP tank is disconnected and removed from the grill.
California Proposition 65
mWARNING: Combustion byproducts produced when
using this product contain chemicals known to the
state of California to cause cancer, birth defects, or
other reproductive harm.
mPROPOSITION 65 WARNING: Handling the brass
material on this product exposes you to lead, a
chemical known to the state of California to cause
cancer, birth defects, or other reproductive harm.
Wash hands after handling this product.
mDANGER
If you smell gas:
• Shut o gas to the appliance
(grill).
• Extinguish any open flame.
• Open lid.
• If odor continues, keep away
from the appliance (grill)
and immediately call your
gas supplier or your fire
department.
mWARNING
• Do not store or use gasoline
or other flammable liquids
or vapors in the vicinity
of this (grill) or any other
appliance.
• An LP cylinder (tank) not
connected for use shall
not be stored in the vicinity
of this (grill) or any other
appliance.
USE OUTDOORS ONLY.
READ THE INSTRUCTIONS BEFORE USING
THE APPLIANCE (GRILL).
NOTICE TO INSTALLER: These instructions
must be left with the consumer.
NOTICE TO CONSUMER: Retain these
instructions for future reference.
Important
SafetyInformation
DANGER, WARNING, and CAUTION
statements are used throughout this
Owner's Manual to emphasize critical and
important information. Read and follow
these statements to help ensure safety and
prevent property damage. Thestatements
are defined below.
mDANGER: Indicates a hazardous
situation which, if not avoided,
will result in death or seriousinjury.
mWARNING: Indicates a hazardous
situation which, if not avoided,
could result in death or seriousinjury.
mCAUTION: Indicates a hazardous
situation which, if not avoided,
could result in minor or moderateinjury.
Welcome to Weber
3
Welcome to Weber
TABLE OF CONTENTS
2Welcome to WEBER
Important SafetyInformation
Griddle Features
4The WEBER Promise
5Getting Started
Important Information about LPGas
& Gas Connections
LP Tank Installation & LeakChecking
Refilling or Replacing an LPTank
8Operation
Igniting the Grill
Before You Cook
Tips for Cooking
Every Time You Cook
12 Product Care
Cleaning and Maintenance
13 Troubleshooting
15 FAQ's
16 Replacement Parts
HELLO!
We are so glad that you have joined us on the journey to grilling happiness.
Pleasetake some time to read through this Owner’s Manual to ensure that you
are up and grilling quickly and easily. We want to be with you for the life of your
grill, so please take just a couple of minutes to register yourgrill. When you
sign up for a WEBER account as part of your registration, wewill deliver special
grill-related content just for you to enjoy.
So, come along and join us online, on your smart device or however else you'd
like to stay in touch.
Thank you for choosing WEBER.
We are happy you are here.
GRIDDLE FEATURES
ASide Tables
Use the side tables to keep platters, seasonings, and
tools within arm’s reach. Hang your essential grilling
tools on the hooks for easy access and organization of
your backyard workspace.
B Protective Hard Cover
The hard cover protects the cooking surface of the grill
when not in use.
mWARNING: Do not operate the grill with the hard
cover closed. The hard cover is to be used for
storage purposes only to protect the griddle.
CGriddle
The griddle cooking surface heats quickly so you can
enjoy all of your favorites like pancakes, eggs, fajitas
and smashed burgers.
DMain Burner Snap Ignition
Each control knob snap igniter creates a spark from
the igniter electrode to the burner lighting tube. You
generate the energy for the spark by pushing in the
control knob and turning it to START/HI. This will ignite
each individual burner.
EGrease Management System
Grease and food debris can be scraped into the hole in
the cooking surface, and into the disposable drip pan
located under the griddle. Simply remove the catch
tray and replace the drip pan as needed.
FFuel Hanger
The fuel hanger, located under the right side table,
makes the fuel tank and tank valve easy-to-reach.
C
A
D
EF
B
The grills illustrated in this Owner’s Manual may vary
slightly from the model purchased.
4
The WEBER Promise
PROTECT YOUR
INVESTMENT
Shield your grill from the elements with
a heavy-duty premiumgrillcover.
Thank you for purchasing a WEBER product. Weber-Stephen Products LLC,
1415 S. Roselle Road, Palatine, Illinois 60067 (“WEBER”) prides itself on
delivering a safe, durable, and reliableproduct.
This is WEBER’s Limited Warranty provided to you at no extra charge. It
contains the information you will need to have your WEBER product repaired
in the unlikely event of a failure or defect.
Pursuant to applicable laws, the customer has several rights in
case the product is defective. Those rights include supplementary
performance or replacement, abatement of the purchasing price, and
compensation. In the European Union, for example, this would be a
two-year statutory warranty starting on the date of the handover of
the product. These and other statutory rights remain unaected by this
warranty provision. In fact, this warranty grants additional rights to
the Owner that are independent from statutory warranty provisions.
WEBER’S LIMITED WARRANTY
WEBER warrants, to the purchaser of the WEBER product (or in the case of
a gift or promotional situation, the person for whom it was purchased as
a gift or promotional item), that the WEBER product is free from defects in
material and workmanship for the period(s) of time specified below when
assembled and operated in accordance with the accompanying Owner’s
Manual. (Note: If you lose or misplace your WEBER Owner’s Manual, a
replacement is available online at www.weber.com, or such country-specific
website to which Owner may be redirected.) Under normal, private single
family home or apartment use and maintenance, WEBER agrees within the
framework of this warranty to repair or replace defective parts within the
applicable time periods, limitations, and exclusions listed below. TO THE
EXTENT ALLOWABLE BY APPLICABLE LAW, THIS WARRANTY IS EXTENDED ONLY
TO THE ORIGINAL PURCHASER AND IS NOT TRANSFERABLE TO SUBSEQUENT
OWNERS, EXCEPT IN THE CASE OF GIFTS AND PROMOTIONAL ITEMS AS NOTED
ABOVE.
OWNER’S RESPONSIBILITIES UNDER THIS WARRANTY
To ensure trouble-free warranty coverage, it is important (but it is not
required) that you register your WEBER product online at www.weber.com,
or such country-specific website to which Owner may be redirected. Please
also retain your original sales receipt and/or invoice. Registering your
WEBER product confirms your warranty coverage and provides a direct link
between you and WEBER in case we need to contact you.
The above warranty only applies if the Owner takes reasonable care of the
WEBER product by following all assembly instructions, usage instructions,
and preventative maintenance as outlined in the accompanying Owner’s
Manual, unless the Owner can prove that the defect or failure is independent
of non-compliance with the above mentioned obligations. If you live in
a coastal area, or have your product located near a pool, maintenance
includes regular washing and rinsing of the exterior surfaces as outlined in
the accompanying Owner’s Manual.
WARRANTY HANDLING / EXCLUSION OF WARRANTY
If you believe that you have a part which is covered by this Warranty, please
contact WEBER Customer Service using the contact information on our
website (www.weber.com, or such country-specific website to which Owner
may be redirected). WEBER will, upon investigation, repair or replace (at its
option) a defective part that is covered by this Warranty. In the event that
repair or replacement are not possible, WEBER may choose (at its option)
to replace the grill in question with a new grill of equal or greater value.
WEBER may ask you to return parts for inspection, shipping charges to be
pre-paid.
This WARRANTY lapses if there are damages, deteriorations, discolorations,
and/or rust for which WEBER is not responsible caused by:
• Abuse, misuse, alteration, modification, misapplication, vandalism,
neglect, improper assembly or installation, and failure to properly perform
normal and routine maintenance;
• Insects (such as spiders) and rodents (such as squirrels), including but
not limited to damage to burner tubes and/or gas hoses;
• Exposure to salt air and/or chlorine sources such as swimming pools and
hot tubs/spas;
• Severe weather conditions such as hail, hurricanes, earthquakes, tsunamis
or surges, tornadoes or severe storms.
Any parts that are used and/or installed on your WEBER product that are
not genuine WEBER parts are not covered by this Warranty. Any damages
that result from the use and/or installation of parts on your WEBER product
that are not genuine WEBER parts are not covered by this Warranty. Any
conversion of a gas grill not authorized by WEBER and performed by a
WEBER authorized service technician will void this Warranty.
PRODUCT WARRANTY PERIODS
Cookbox:
5 years, no rust through/burn through
(2 years paint excluding fading or discoloration)
Hard cover assembly:
5 years, no rust through/burn through
(2 years paint excluding fading or discoloration)
Stainless steel burner tubes:
5 years, no rust through/burn through
Carbon Steel Cooktop
5 years (excluding rust)
All remaining parts:
5 years (excluding normal wear and tear)
DISCLAIMERS
APART FROM THE WARRANTY AND DISCLAIMERS AS DESCRIBED IN THIS
WARRANTY STATEMENT, THERE ARE EXPLICITLY NO FURTHER WARRANTY
OR VOLUNTARY DECLARATIONS OF LIABILITY GIVEN HERE WHICH GO
BEYOND THE STATUTORY LIABILITY APPLYING TO WEBER. THE PRESENT
WARRANTY STATEMENT ALSO DOES NOT LIMIT OR EXCLUDE SITUATIONS
OR CLAIMS WHERE WEBER HAS MANDATORY LIABILITY AS PRESCRIBED
BY STATUTE.
NO WARRANTIES SHALL APPLY AFTER THE APPLICABLE PERIODS OF THIS
WARRANTY. NO OTHER WARRANTIES GIVEN BY ANY PERSON, INCLUDING
A DEALER OR RETAILER, WITH RESPECT TO ANY PRODUCT (SUCH AS
ANY “EXTENDED WARRANTIES”), SHALL BIND WEBER. THE EXCLUSIVE
REMEDY OF THIS WARRANTY IS REPAIR OR REPLACEMENT OF THE PART
OR PRODUCT.
IN NO EVENT UNDER THIS LIMITED WARRANTY SHALL RECOVERY OF ANY
KIND BE GREATER THAN THE AMOUNT OF THE PURCHASE PRICE OF THE
WEBER PRODUCT SOLD.
YOU ASSUME THE RISK AND LIABILITY FOR LOSS, DAMAGE, OR INJURY
TO YOU AND YOUR PROPERTY AND/OR TO OTHERS AND THEIR PROPERTY
ARISING OUT OF THE MISUSE OR ABUSE OF THE PRODUCT OR FAILURE
TO FOLLOW INSTRUCTIONS PROVIDED BY WEBER IN THE ACCOMPANYING
OWNER’S MANUAL.
PARTS AND ACCESSORIES REPLACED UNDER THIS WARRANTY ARE
WARRANTED ONLY FOR THE BALANCE OF THE ABOVE MENTIONED
ORIGINAL WARRANTY PERIOD(S).
THIS WARRANTY APPLIES TO PRIVATE SINGLE FAMILY HOME OR
APARTMENT USE ONLY AND DOES NOT APPLY TO WEBER GRILLS USED
IN COMMERCIAL, COMMUNAL OR MULTI-UNIT SETTINGS SUCH AS
RESTAURANTS, HOTELS, RESORTS, OR RENTAL PROPERTIES.
WEBER MAY FROM TIME TO TIME CHANGE THE DESIGN OF ITS PRODUCTS.
NOTHING CONTAINED IN THIS WARRANTY SHALL BE CONSTRUED AS
OBLIGATING WEBER TO INCORPORATE SUCH DESIGN CHANGES INTO
PREVIOUSLY MANUFACTURED PRODUCTS, NOR SHALL SUCH CHANGES
BE CONSTRUED AS AN ADMISSION THAT PREVIOUS DESIGNS WERE
DEFECTIVE.
Weber-Stephen Products LLC
Customer Service Center
1415 S. Roselle Road
Palatine, IL 60067
U.S.A.
For replacement parts, call:
1-800-446-1071
The WEBER Promise
At WEBER, we pride ourselves on two things: making grills that last and
providing a lifetime of excellent customer service.
5
Getting Started
Important Information about
LPGas & Gas Connections
What Is LP Gas?
Liquefied petroleum gas, also called LP, LP gas, liquid
propane, or simply propane or butane, is the flammable,
petroleum-based product used to fuel your grill. It is
a gas at moderate temperatures and pressure when
it is not contained. But at moderate pressure inside a
container, such as a tank, LP is a liquid. As pressure is
released from the tank, the liquid readily vaporizes and
becomes gas.
Safe Handling Tips For LP Tanks
• A dented or rusty liquid propane tank may be
hazardous and should be checked by your liquid
propane supplier. Donot use a liquid propane tank
with a damaged valve.
• Although your liquid propane tank may appear to be
empty, gas may still be present, and the tank should be
transported and stored accordingly.
• The LP tank must be installed, transported, and stored
in an upright, secure position. LP tanks should not be
dropped or handled roughly.
• Never store or transport the LP tank where
temperatures can reach 125° F (51.7° C) (the tank will
become too hot to hold by hand).
• Place dust cap on cylinder valve outlet whenever the
cylinder is not in use. Only install the type of dust cap
on the cylinder valve outlet that is provided with the
cylinder valve. Other types of caps or plugs may result
in leakage of propane.
LP Tank Requirements
• The tank must be approximately 18¼inches (46.35
cm) high and 12¼ inches (31.1 cm) in diameter with a
marked 20 pound (9.07 kg) LPG capacity or 47.6 pound
(21.6 kg) water capacity as stated by the manufacturer.
Other tanks may be acceptable provided they are
compatible with the grill retention means (tank scale).
A
B
• The tank used must be constructed and marked
in accordance with the Specifications for LP gas
Cylinders of the U.S. Department of Transportation
(D.O.T.); or the Canadian Standard for Cylinders,
Spheres and Tubes for Transportation of Dangerous
Goods and Commission, CAN/CSA-B339, as applicable.
• Tanks must be provided with a listed OPD (Overfilling
Prevention Device) and a Type 1 (CGA 791) tank
connection. The tank connection must be compatible
with the grill connection.
• The tank must include a collar to protect the tank
valve.
• Tanks must have a D.O.T. certification (A), and a testing
date (B) that is within five years of current use.
What is a Regulator?
Your gas grill is equipped with a pressure regulator,
which is a device to control and maintain uniform gas
pressure as gas is released from the LP tank.
Regulator Requirements
• The regulator and hose assembly supplied with this
grill must be used. This regulator has a flow limiting
device built into the unit that will restrict the flow of
gas in the event that a leak is detected.
• Replacement regulator and hose assemblies must be
as specified by Weber-Stephen Products LLC (UL-listed
Type 1 (CGA 791) tank connection device as described
in the latest edition of ANSI Z21.81).
6
Getting Started
LP Tank Installation
The tank is hung onto the tank bracket which is located
on the right side of grill. The shape of the collar
assembly (the metal protective ring around the tank
valve) determines one of two directions in which the
tank will correctly hang on the tank scale (A).
Inspect the Tank
1) Confirm that the tank valve is fully closed. Close by
turning valve clockwise.
2) Confirm that the tank valve is the proper mating
type for the regulator (B).
3) Inspect the tank valve, including the internal rubber
seal for damage or debris (C). If damaged, return
tank to local retailer.
Install The Tank
1) Check that all burner control knobs are in the
o position. Check by pushing in and turning
knobs clockwise.
2) The tank is hung by the collar assembly (the metal
protective ring around the tank valve) onto the tank
bracket (D).
3) To make the tank connection: Pass the hose and
regulator through the hole on the right-side panel
(E). The hose must be secured with the retention
clip and attached to the side panel. Make sure the
full length of hose is pulled to the outside before
tightening the clip.
4) Screw the regulator coupling onto the tank valve,
turning clockwise (F). Hand-tighten only. Using a
wrench could damage the regulator coupling and
could cause a leak. Proceed to “CHECKING FOR
GASLEAKS.”
B
C
D
F
A
mDANGER: The hose must pass through the
opening on the right-side panel. The hose
must be secured to right side panel using
the hose retention clip. Failure to do so could
cause damage to the hose resulting in a fire
or explosion which can cause serious bodily
injury or death.
E
7
mDANGER: Do not use a flame to check for gas
leaks. Besure there are no sparks or open
flames in the area while you check for leaks.
mDANGER: Leaking gas may cause a fire or
explosion.
mDANGER: Do not operate the grill if there is a
gas leak present.
mDANGER: If you see, smell, or hear the hiss of
gas escaping from the liquid propane tank:
1) Move away from liquid propane tank.
2) Do not attempt to correct the problem
yourself.
3) Call your fire department.
mDANGER: Always close the tank valve before
disconnecting the regulator. Do not attempt
to disconnect the gas regulator and hose
assembly or any gas fitting while this grill is
in operation.
mDANGER: Do not store a spare LP tank under
or near this grill. Never fill the tank beyond
80% full. Failure to follow these statements
exactly may result in a fire causing death or
serious injury.
mWARNING: If the hose is found to be damaged
in any way, do not use the grill. Replace using
only WEBER authorized replacement hose.
B
C
D
E
LeakChecking
What is a Leak Check?
Once the LP tank is properly installed, it is necessary
to perform a leak check. A leak check is a reliable way
to verify that gas is not escaping after you connect the
tank. The fuel system in your grill features factory-
made connections that have been thoroughly checked
for gas leaks and the burners have been flame-tested.
WEBER recommends performing a thorough leak
check after assembly, as well as annually. The
following fittings should be tested:
• Where the regulator connects to the tank.
• Where the gas hose connects to the bulkhead.
• Where the bulkhead connects to the corrugated gas
line.
Checking for Gas Leaks
1) Wet fittings (A) with a soap and water solution,
using a spray bottle, brush, or rag. You can make
your own soap and water solution by mixing 20%
liquid soap with 80% water; or, you can purchase
leak check solution in the plumbing section of any
hardware store.
2) Slowly open gas supply by turning tank valve
counterclockwise while checking for bubbles.
3) If bubbles appear there is a leak:
a) If the leak is at the cylinder (B), turn o the gas.
DONOT OPERATE THE GRILL. Disconnect the
tank and return the tank to your local retailer.
b) If the leak is at the regulator (C), turn o the
gas (D). NEVER ATTEMPT TO TIGHTEN THE
REGULATOR WITH TANK VALVE OPEN. DO NOT
OPERATE THE GRILL. Contact the Customer
Service Representative in your area using the
contact information on our website.
4) If bubbles do not appear, leak checking is complete:
a) Turn the gas supply o at the tank and rinse
connections with water.
NOTE: Since some leak test solutions, including soap and
water, may be slightly corrosive, all connections should
be rinsed with water after checking for leaks.
Refilling or Replacing an LPTank
Removal of the LP Tank
1) Confirm that the tank valve is fully closed. Close by
turning the valve clockwise (D).
2) Unscrew regulator coupling by turning
counterclockwise by hand (E).
3) Lift the tank o of the tank bracket.
Additional Leak Check Precautions
The following fittings should be tested for gas leaks
each time a tank is refilled and reinstalled:
• Where the regulator connects to the tank (B) and at the
regulator (C).
Follow the instructions for "Checking for Gas Leaks".
A
Getting Started
8
mWARNING: The burner control knobs must be
in the OFF position before turning on the liquid
propane tank valve. If they are not in the OFF
position, when you turn on the LP tank valve,
the “excess gas flow control” feature will
activate, limiting the flow of gas from the LP
tank. If this should occur, turn o the LP tank
valve and burner control knobs. Start over.
mDANGER: When the “excess gas flow control”
feature is activated, a small amount of gas is
still flowing to the burners. After turning o
the tank and burner control knobs, wait at
least five minutes for the gas to clear before
attempting to light the grill. Failure to do so
may result in an explosive flare-up, which can
cause serious bodily injury or death.
mWARNING: Do not operate the grill with the
lid closed. The lid is to be used for storage
purposes only to protect the griddle.
mWARNING: Open lid during ignition. Failure to
open the lid while igniting the grill’s burners,
or not waiting five minutes to allow the gas to
clear if the grill does not light, may result in
an explosive flare-up which can cause serious
bodily injury or death.
mWARNING: Do not lean over open grill while
igniting or cooking.
mWARNING: Each burner must be ignited
individually using the snap ignition.
mWARNING: If ignition does not occur within
four seconds of attempting to light the first
burner, turn the burner control knob to the o
position and repeat the lighting procedure a
second time. If the burner still does not light,
turn the burner control knob to OFF and wait
five minutes to let the gas clear before you try
again or try to light with a match.
Igniting the Grill
Using the Snap Ignition System to Ignite the
Burners
Each control knob snap igniter creates a spark from
the igniter electrode to the burner lighting tube. You
generate the energy for the spark by pushing in the
control knob and turning it to the start/high position.
Each control knob operates an individual burner, and
each burner ignites independently. Ignite the burners
starting from left to right. All burners should be lit for
preheating, however, all burners do not have to be lit
while cooking.
1) Remove the protective hard cover (A).
mWARNING: Do not operate the grill with the hard
cover closed. The hard cover is to be used for
storage purposes only to protect the griddle.
2) Check that all burner control knobs are in the o
position. Check by pushing in and turning knobs
clockwise (B).
Note: It is important that all burner control knobs are
in the o position before turning on the LP tank.
If they are not, the flow limiting device built into the
regulator will activate, limiting the flow of gas from
the LP tank.
3) Turn the LP tank on by slowly turning the tank valve
counterclockwise; wait 60 seconds (C).
Note: It is important that the LP tank is turned on
slowly. Ifit is opened too quickly, the flow limiting
device built into the regulator will activate, limiting the
flow of gas from the LP tank.
4) Begin with the burner furthest to the left.
Push the burner control knob in (D) and turn it
counterclockwise to the start/high position until
you hear it snap (E). Continue to hold the control
knob in for two seconds after you hear the snap.
This action will spark the igniter within the burner
lighting tube, then light the main burner (F) (G) (H).
5) Check that the burner is lit by looking through the
space in between the cooking surface and the
control panel.
6) If the burner does not ignite, turn burner control
knob to the o position and repeat the lighting
procedure a second time. If the burner still does not
light, turn the burner control knob to OFF and wait
five minutes to let the gas clear before you try again
or try to light with a match.
7) If the burner ignites, repeat steps 4 through 6 to
light the remaining burners.
Should the burners fail to ignite using the electronic
ignition, refer to the TROUBLESHOOTING section in
this Owner's Guide. Thereyou will find instructions on
igniting the grill with a match to help determine the
exact problem.
To Extinguish Burners
1) Push each burner control knob in and then turn
clockwise all the way to the o position.
2) Turn gas supply o at the LP tank.
C
B
D
E
F
G
H
A
OFF
LOW
MEDIUM
START/HIGH
Operation
9
Operation
Before You Cook
Season the Cooking Surface
This process takes time, so give yourself a few hours to
complete it before you cook.
Tools Needed: Tongs, lint-free paper towels or cotton
cloth, neutral cooking oil.
Before your first cook, you will need to season your
Griddle. Seasoning creates a stick-resistant, protective
coating so you can make delicious eggs, pancakes,
burgers, and fajitas for years to come. A seasoned
griddle is darkened in appearance from edge to edge. To
achieve this, season your griddle at least 3 times before
use. Here's how:
1. Remove the protective hard cover.
mWARNING: Do not operate the grill with the hard
cover closed. The hard cover is to be used for
storage purposes only to protect the griddle.
2. The griddle has been coated with a food-grade oil for
protection. This oil is not to be used for seasoning.
CAUTION: Do not burn o the oil.
3. With the griddle in place on the grill, handwash the
griddle, rinse, and thoroughly dry.
NOTE: The griddle must be COMPLETELY dry before
continuing the seasoning process.
NOTE: This will be the ONLY TIME you use soapy water
on your griddle.
4. Pour ¼ cup of a neutral oil (i.e. canola oil, vegetable
oil, grapeseed oil) into a bowl.
5. Dip a paper towel or cotton cloth into the bowl (A),
squeezing o the excess oil. Wipe the griddle from
side to side, top to bottom as evenly as possible (B).
Be sure to get the interior and exterior sides of the
griddle as well. Wipe away any excess oil with a clean
paper towel or cotton cloth if necessary.
6. Light all of the burners and preheat your griddle
on the high temperature setting (C). The surface
will begin to smoke and darken (approximately 10
minutes). If any oil begins to bead on the surface,
use grill mitts and tongs to wipe the excess oil from
the griddle (D).
NOTE: By the end of the seasoning process, a well-
seasoned griddle will be dark from edge to edge.
7. The surface will darken and begin to smoke. When
the surface stops smoking (additional 20 minutes),
turn o the grill.
m IMPORTANT: Allow the griddle to cool completely,
approx. 30 minutes.
8. The griddle now has 1 coat of seasoning. Repeat
steps 4-7, two more times in order to build the
seasoning.
Scan this QR code for more
information on seasoning your
griddle:
C
SEASONING TROUBLESHOOTING
SYMPTOM
Uneven seasoned surface with thick, sticky patches of oil. Seasoning susceptible to chipping and flaking.
CAUSE SOLUTION
- Too much oil was applied and could not properly polymerize.
- Heat was turned o too soon.
Scrape o defective seasoning before cleaning,
drying thoroughly, and re-seasoning.
SYMPTOM
Corrosion/rust formation during non-use or storage.
CAUSE SOLUTION
For more information about caring for your griddle, scan the
QR code:
SYMPTOM
Griddle surface is not uniformly black after seasoning
CAUSE SOLUTION
The edges are not under direct heat, which makes it take longer
for seasoning to darken like the rest of the griddle top.
Apply a thin layer of oil after each cook to protect
and maintain the griddle surface. Over time the
seasoning will even out.
B
A
D
10
Tips For Cooking
Tame the Heat
Your WEBER Griddle’s cooking surface is fantastic at
generating heat – and maintaining that heat – even
when it’s loaded with food. Because it’s so good at
holding onto heat, it can take a while to cool down. So,
we suggest starting at lower temperatures when you’re
first getting used to cooking on the griddle. Getting your
grill hotter is easy, it’s getting it to cool down that takes
time.
Dial In The Perfect Temperature
LOW HEAT: If you want your food to cook through
without getting too crispy or browned, start with low
heat. It’s great for eggs, pancakes, and delicate seafood,
or for thicker cuts of meat that will take an extra-long
time to cook.
MEDIUM HEAT: Perfect for when you want to get that
perfect, golden-brown sear, but need a little extra time
to make sure your food is cooked all the way through.
Use medium heat on chicken breasts or thighs, thicker
steaks, seafood, or most vegetables.
HIGH HEAT: When you need that crispy browned crust
on your smashed burger, or you’re wowing the family
with your hibachi skills, you need to do it on high
heat. Use high heat on thinner cuts of meat that dry
out quickly but would benefit from seared flavor. It’s
great for fajitas, stir fries, thinner steaks, and smashed
burgers.
NOTE: You can use one or two burners, instead of all
burners simultaneously, to create dierent heat zones
on the griddle.
mDANGER: Do not line the slide-out grease tray or
cookbox with aluminum foil.
mDANGER: Check the slide-out grease tray and catch
pan for grease build-up before each use. Remove
excess grease to avoid a grease fire.
m WARNING: Objects placed near the griddle will
become hot.
m WARNING: Never apply large amounts of cold water
across the whole griddle surface at once. This may
cause griddle to warp.
m WARNING: Adding a large amount of cold or frozen
food (or food with significant water content) to a hot
griddle may cause griddle to warp
m WARNING: Keep paper towels away from direct
flames or extreme heat.
mWARNING: Use caution when removing catch pan
and disposing of hot grease.
mWARNING: Use heat-resistant barbecue mitts or
gloves when operating grill. Cooking surface can
become extremely hot.
mWARNING: Do not spray cold water on the cooking
surface while cooking.
mWARNING: Keep ventilation openings around tank
clear and free of debris.
m WARNING: DO NOT remove the griddle until the grill
is o and it is completely cool.
mWARNING: Use caution when turning or flipping food
while cooking to avoid splashing hot grease.
Temperature Setting Food
Low
Eggs - Sunny side up, over-easy, scrambled
Vegetables - Sautéing onions, peppers, garlic
Thicker Proteins - thicker steaks, rendering duck breast or
bacon fat
Breads - French toast, pancakes, crepes,grilled cheese
Medium
Proteins - Ground beef, chicken, pork chops, fish, steaks
Vegetables - Browning/Roasting brussel sprouts, zucchini,
squash, hasbrowns, corn
Breads - Baking flatbreads or naan, paninis
High Proteins - Searing steaks, smashed burgers, stir-fry shrimp,
fried rice, browning tofu
Vegetables - Charring/blistering peppers, broccoli,
mushrooms, stir-frying peppers, asparagus, onions
OFF
LOW
MEDIUM
START/HIGH
Operation