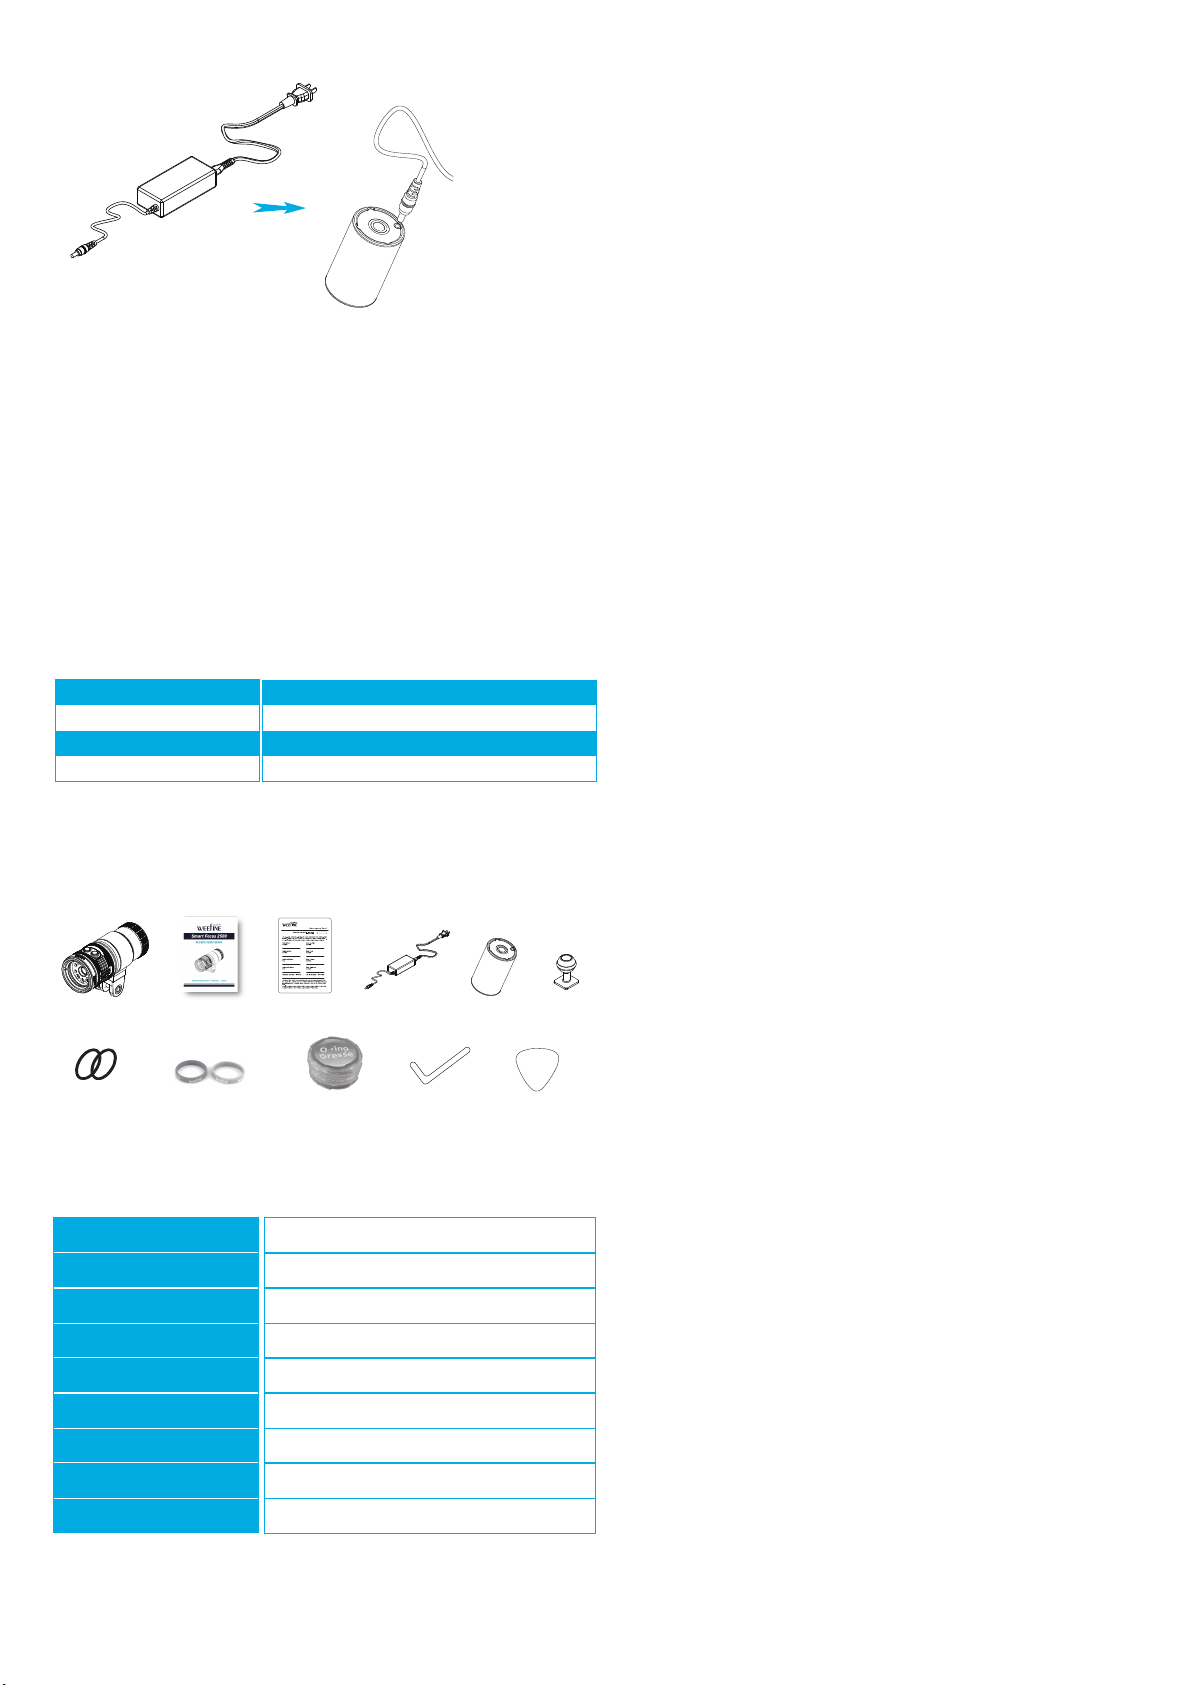
AC end
DC end
DC end of the charger
Specification
Packaging accessories
Hexagon wrench x1Silicon oil x1
Ball mount x1
Spare O-Ring x2 Fin x1
User Manual x1 Warranty card x1 Charger x1 Battery x1Smart Focus 2500 x1
Decorative rubber ring x2
Operating Instructions
Brightness
Depth Rating
Beam Angle
Color Temperature
Usage Time
Modes
White Light: 2500 lumens / Red Light: 10W / UV Light: 18W
100m / 330ft
100°
5000K (White Light)
60 minutes (at 100% white light)
White Light/Red Light/UV Light
WBL-31N 3x18650 Lithium Battery Pack (2900mAh/11.1V)
52(D) x 120(L)mm
Weight: 460g (on land), 210g (underwater)
Battery
Product Dimensions
Weight (including battery
Battery Level Indicator
3-color battery level indicator
Battery
When the battery level is low, the photography light will automatically lower
its brightness to conserve power. When the battery is fully depleted, the
photography light will power off.
Temperature Protection
If the temperature exceeds 50℃ during usage, the temperature protection
feature will be activated, automatically reducing the LED brightness to 20%
to minimize heat generation and protect the electronic components.
Low Battery Protection Mode
When the battery level is about to be depleted, the brightness of the
photography light automatically reduces to 20% . After 10 minutes, the
photography light will power off automatically. During this time, you cannot
switch modes or adjust brightness; only the power-off operation is
available.
Power On
Simultaneously press the left and right buttons for 0.5 seconds to
turn on the power. Short press the left button to enter white light
mode with 100% brightness.
Power Off
In any mode, at any brightness level, press and hold the left and right
buttons for more than 2 seconds to power off.
Mode Switching
Short press the left button to cycle through white light, red light, UV
light, and white light modes.
Brightness Adjustment
Brightness adjustment: Short press the right button
White Light (Four Levels): 100% → 50% → 25% → 300Lm → 100%
(cyclic).
Red Light (Three Levels): 100% → 50% → 25% → 100% (cyclic).
UV Light (One Level): 100% (brightness not adjustable).
Strobe Mode:
In the power-off state, press and hold the left and right buttons for
more than 2 seconds to enter the strobe mode. Short press the right
button to increase the flashing frequency (cycle), and short press the
left button to decrease the flashing frequency (cycle). There are a
total of 21 levels. Press and hold the left button for more than 2
seconds to power off.
Focus Mode
In the power-on state, in any mode and at any brightness level, press
and hold the right button for more than 2 seconds to enter the focus
mode (indicator light flashing). The focus function is not available
when the battery level is low.
Sleep Mode
In the power-on state, press and hold the left button for more than
2 seconds to enter (exit) sleep mode. Only the indicator light will be
illuminated.
Temperature Protection Function
When the temperature of the lamp head reaches 50-55℃, the
temperature protection function will be activated, and the white
light brightness will be reduced to 20% . When the temperature drops
below 40℃, the temperature protection function will be deactivated.
Blue light
Green light
Red light
Flashing red light
80~100%
30~80%
10~30%
<10%
Warranty
Weefine provides a warranty against manufacturer defects for 1 year
starting from the date of purchase. Manufacturer defects occuring within
15 days of the date of purchase will result in an exchange of product at
the vendor. All other manufacturer defects occuring within 1 year of the
purchase will be repaired at no cost. Proof of purchase is required for
warranty support. The warranty does not cover failures or defects
resulting from misuse (e.g.; modification; damage), natural disasters, or
battery issues, including incorrect battery installation.
Maintenance
1. Soak the machine in fresh water for 30 minutes after diving;
2. When the battery is not used for a long time, the best storage capacity
is 70% ;
3. The battery shall be charged and discharged once every 6 months at
most;
4. There are two waterproof O-rings on the lamp holder. Silicone oil should
be used to keep the O-ring well lubricated. If the O-ring is cracked,
hardened, damaged, deformed, etc., it should be replaced in time.
Note: Do not use sharp tools to remove the O-ring.
Warning
1. Do not open the tail cover when the photography lamp is in the water.
2. Do not direct the light into your eyes or others' eyes;
3. Do not touch the battery and charger with wet hands.
4. Only batteries and special chargers provided by the manufacturer can be
used;
5. If you do not use the photographic lamp for a long time, the battery
should be taken out and stored properly;
6, users do not disassemble or repair lamps, batteries, and special charger;
In case of failure, please contact local dealers;
Please follow the instructions, otherwise it may cause damage to the
camera lamp, personal injury, and failure of warranty.


