WEIHONG NC65C User manual

上海维宏电子科技股份有限公司
SHANGHAI WEIHONG ELECTRONIC TECHNOLOGY CO., LTD.
Phoenix Double-tool CNC System Users’
Manual
Version: 2019.5 1st Version
Author: Document Department
Weihong Corporation, All Rights Reserved
1Overview............................................................................................................................................1
1.1 NC65C Industrial Personal Computer........................................................................1
1.1.1 Layout ........................................................................................................................1
1.1.2 Mounting Dimension............................................................................................2
1.1.3 Performance ............................................................................................................2
1.2 Main Software Interface ..................................................................................................3
1.2.1 Operator Interface.................................................................................................4
1.2.2 Technician Interface.............................................................................................7
2Commissioning ............................................................................................................................. 10
2.1 Clear I/O Port Alarms.................................................................................................... 10
2.1.1 Clear the E-stop Alarm...................................................................................... 10
2.1.2 Clear the Limit Alarm........................................................................................ 10
2.1.3 Clear the Drive Alarm ....................................................................................... 11
2.2 Set Drive Parameters..................................................................................................... 11
2.3 Clear Drive Alarms.......................................................................................................... 12
2.4 Set Commissioning Parameters................................................................................. 12
2.5 Adjust the Axis Direction ............................................................................................. 14
2.6 Confirm Machine Coordinates of Double Tools................................................... 14
2.7 Execute Analog Machining .......................................................................................... 16
3Quick Start...................................................................................................................................... 17

上海维宏电子科技股份有限公司
SHANGHAI WEIHONG ELECTRONIC TECHNOLOGY CO., LTD.
3.1 Load a Tool Path.............................................................................................................. 17
3.2 Set the Workpiece Origin ............................................................................................. 17
3.2.1 Set X-axis Workpiece Origin........................................................................... 18
3.2.2 Set Y-axis Workpiece Origin........................................................................... 19
3.2.3 Set Z-axis Workpiece Origin ........................................................................... 19
3.3 Set Valve Control Process ............................................................................................ 20
3.4 Simulate Machining........................................................................................................ 21
3.5 Set the Loading Point for Robots .............................................................................. 21
3.6 Execute Automatic Machining.................................................................................... 22
3.6.1 Use the Standard Machining Mode .............................................................. 22
3.6.2 Use the Remote Machining Mode................................................................. 22
4Common Operations................................................................................................................... 24
4.1 Customize Common Parameters............................................................................... 24
4.2 Execute I/O Port Related Operations...................................................................... 25
4.3 Check System Logs ......................................................................................................... 26
4.4 Generate an Installation Package.............................................................................. 27
4.5 Select a System Language ............................................................................................ 27
5Special Operations....................................................................................................................... 28
5.1 Select the Tool(s) ............................................................................................................ 28
5.2 Measure Height................................................................................................................ 29
5.2.1 Manually Measure Height................................................................................ 30
5.2.2 Measure Height before Cutting ..................................................................... 30
5.3 Execute Jiggle.................................................................................................................... 30
5.4 Execute Y1Y2 Jiggle ........................................................................................................ 31
5.5 Set Safety Light Curtains .............................................................................................. 32
6FAQs.................................................................................................................................................. 33
6.1 Questions during Returning to the Machine Origin........................................... 33

上海维宏电子科技股份有限公司
SHANGHAI WEIHONG ELECTRONIC TECHNOLOGY CO., LTD.
6.1.1 Cannot Detect Origin Signal............................................................................ 33
6.1.2 Incorrect Axis Direction................................................................................... 34
6.1.3 Coarse Positioning Speed is Too Slow........................................................ 34
6.2 Questions about Warnings .......................................................................................... 34
6.2.1 Simulation Result Shows Running Range Exceeded Machine Stroke.
Switch to Log Window to Learn More ...................................................................... 34
6.2.2 Cannot Execute the Operation. The System has not Returned to the
Machine Origin................................................................................................................... 35
6.2.3 The Parser is Busy. Cannot Execute the Operation ............................... 35
6.3 Questions about Alarms ............................................................................................... 35
6.3.1 Limit Alarm ........................................................................................................... 35
6.3.2 Servo Alarm .......................................................................................................... 36
6.3.3 E-stop Alarm......................................................................................................... 36
6.3.4 Alarm of Terminal Board Disconnection................................................... 36

上海维宏电子科技股份有限公司
SHANGHAI WEIHONG ELECTRONIC TECHNOLOGY CO., LTD.
1/ 36
1Overview
Phoenix Double-tool CNC System (hereinafter referred to as Double-tool CNC
System) consists of hardware and software:
Hardware
•NC65C industrial personal computer
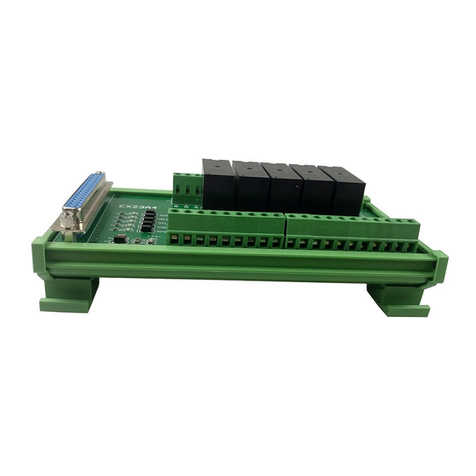
•Lambda 5M terminal board
•DB9M/F cables
Software
Phoenix double-tool software: see Main Software Interface for the introduction of its
main software interface.
1.1 NC65C Industrial Personal Computer
NC65C industrial personal computer, also called NC65C Controller (hereinafter
referred to as NC65C). Compared with NC65A and NC65B, NC65C has faster clock
frequency and memory rate and better antivirus capacity. Additionally, its
performance has improved about 40%, which leads to smoother operation.
NC65C is compatible with the board, FPGA firmware and the unit of NC65B. It can
be applied to various industries when mated with Lambda terminal board.
1.1.1 Layout
The interface layout of NC65C is as follows:

上海维宏电子科技股份有限公司
SHANGHAI WEIHONG ELECTRONIC TECHNOLOGY CO., LTD.
2/ 36
•LNE (interface of live wire, neutral wire and earth wire): used to connect to
220V power supply.
•USB: used to transmit data with a USB flash disk.
•LAN: transmission rate is 100Mbps.
•Display screen: used to connect to display screen.
•Lambda terminal board: used to connect to Lambda terminal board.
1.1.2 Mounting Dimension
Mounting dimension of NC65C is as follows:
1.1.3 Performance
Performance of NC65C is as follows:
1. Supporting upgrading FPGA program online via the upper control software.
2. Supporting backing up both firmware and program, amending FLASH data, and
verifying and protecting DNA.
3. Supporting Phoenix communication.
4. Supporting PCIE communication.

上海维宏电子科技股份有限公司
SHANGHAI WEIHONG ELECTRONIC TECHNOLOGY CO., LTD.
3/ 36
5. Strong suitability of hardware
You can select the suitable Lambda terminal board according to the following:
1. Axis number
2. Whether to enable encoder feedback
3. Whether to enable bus communication
6. Operating temperature: -10℃~ 50℃.
7. Powerful operating system:
1. Operating system: Win8.1-32bit
2. CPU: Celeron dual-core N2830, 2.17GHz
3. Memory: 2GB
4. SSD: 60G
1.2 Main Software Interface
According to the operational role and usage scenarios, the software interface can be
divided into the following:
•Operator interface(default interface)
It includes frequently used functions in machining for operators.
In Technician interface, to switch to Operator interface, click System →
Operator Interface.
•Technician interface
It includes rich functions and machine parameters for technicians to debug the
machine tool.
In Operator interface, to switch to Technician interface, click →
Technician.

上海维宏电子科技股份有限公司
SHANGHAI WEIHONG ELECTRONIC TECHNOLOGY CO., LTD.
4/ 36
1.2.1 Operator Interface
Operator interface is shown as follows:
1. Title bar
2. Axis coordinates display area
3. Tool selecting and machining mode display area
4. Axis direction and mode selecting area
5. Speed control area
6. Function control area
7. Operational buttons
8. Function window
9. CNC status bar
1.2.1.1 Title Bar
This bar consists of the system name, current configuration, current date and time,
and burger button .
Among them, burger button is used to do the following:
•Set parameters.
•Measure height.
•Control valve.
•Enter into NcCloud.

上海维宏电子科技股份有限公司
SHANGHAI WEIHONG ELECTRONIC TECHNOLOGY CO., LTD.
5/ 36
•Switch to Technician interface.
1.2.1.2 Tool Selecting and Machining Mode Display Area
This area consists of the following:
•Tool selecting area: used to select tools for machining.
See Select the Tool(s) for details.
•Machining mode display area: used to show current machining mode. See
Execute Automatic Machining for how to switch the machining mode.
1.2.1.3 Axis Direction and Mode Selecting Area
This area consists of the following:
•Axis direction buttons
Used to move each axis towards positive/negative direction:
–Press an axis direction button. The machine tool moves at jogging speed.
–Press Rapid and an axis direction at the same time. The machine tool
moves at rapid jogging speed.
–Press several axis direction buttons. The selected axes move at the same
time.
Note: The axis number controlled by axis direction buttons differs in the selected tool number.
•Mode buttons
Used to switch to the following modes:
–Jog: press an axis direction button. The machine tool keeps running until
you release the button.
–HW: the machine tool is controlled by the handwheel.
–Step: click an axis direction. The machine tool moves 0.01mm, 0.1mm,
1mm or customized step size.
The default customized step size is 5mm and the customized step should
not be too large to avoid damage due to misoperation.
Note: Please do not click the axis direction button too frequently because the system
needs a certain time to execute the command.

上海维宏电子科技股份有限公司
SHANGHAI WEIHONG ELECTRONIC TECHNOLOGY CO., LTD.
6/ 36
1.2.1.4 Speed Control Area
This area consists of the following:
•Current actual speed: used to show current actual speed.
•Feedrate override: used to adjust the feedrate override.
1.2.1.5 Function Control Area
This area is used to do the following:
•Execute common operations, including returning to the machine origin,
returning to the loading point and switching the station.
•Execute jiggle. See Execute Jiggle for details.
•Turn on/off common ports, including water valve, abrasive valve, oil pump,
high pressure valve and lube.
•Enable/disable analog. See Execute Analog Machining for details.
•Enable/disable simulation. See Simulate Machining for details.
1.2.1.6 Function Window
This area is used to show the machining track in real time during machining, analog
or simulation, so as to ensure the proper implementation of the tool path file.
1.2.1.7 CNC Status Bar
This bar is used to check the following:
•Current system status, including Idle, Run, etc.
•System prompts and alarms.
Double click the blank area. Log dialog box will pop up. You can check system
logs in it.
See Check System Logs for details.

上海维宏电子科技股份有限公司
SHANGHAI WEIHONG ELECTRONIC TECHNOLOGY CO., LTD.
7/ 36
1.2.2 Technician Interface
Technician interface is shown as follows:
1. Menu bar
2. CNC status bar
3. Machine control area
4. Mode control area
5. Function control area
6. Operational buttons
7. Function windows
1.2.2.1 CNC Status Bar
This bar is used to check the following:
•Current system status, including Idle, Run, etc.
•System prompts and alarms.
Double click the blank area. Log dialog box will pop up. You can check system
logs in it.
See Check System Logs for details.

上海维宏电子科技股份有限公司
SHANGHAI WEIHONG ELECTRONIC TECHNOLOGY CO., LTD.
8/ 36
1.2.2.2 Machine Control Area
This area consists of the following:
•Coordinate display area: used to show current active workpiece coordinate
system, workpiece coordinate and machine coordinate of each axis.
•Feed setting area: used to set feedrate override, modify setting speed and check
actual speed.
•Cycle setting area: used to set cycle times and interval, reset workpiece count
and check machining statistics.
•Tool and machining mode selecting area: used to select the tool(s), show and
reset the machining mode.
1.2.2.3 Mode Control Area
This area consists of the following modes:
•Auto mode
Used to show the loaded tool path file in details.
•Manual mode
Used to show axis direction buttons and mode buttons.
See Axis Direction and Mode Selecting Area for details.
•Reference mode
Used to execute the following operations related to returning to the machine
origin:
–Select whether to return to the machine origin when software starts.
–Set the direction during returning to the machine origin.
–Set the positioning speed during returning to the machine origin.
1.2.2.4 Function Control Area
This area is used to do the following:
•Execute common operations, including returning to the machine origin,
returning to the loading point and executing analog machining.
•Execute jiggle.
•Turn on/off common ports, including water valve, abrasive valve, oil pump,
high pressure valve and lube.
In Manual mode, there is no such area.

上海维宏电子科技股份有限公司
SHANGHAI WEIHONG ELECTRONIC TECHNOLOGY CO., LTD.
9/ 36
1.2.2.5 Function Windows
Function windows include the following:
•Track window: used to show the machining track in real time during
machining, analog or simulation.
•Offset window: used to set workpiece offset and public offset.
•Common window: used to check, modify and customize common parameters.
See Customize Common Parameters for details.
•Port window: used to check and modify the port polarity, conduct a simulation
test, and set filter.
See Execute I/O Port Related Operations for details.

上海维宏电子科技股份有限公司
SHANGHAI WEIHONG ELECTRONIC TECHNOLOGY CO., LTD.
10 / 36
2Commissioning
This section mainly introduces operations to quickly do commissioning for Double-
tool CNC System.
The process for commissioning is as follows:
1. Clear I/O port alarms
2. Set drive parameters
3. Clear drive alarms
4. Set commissioning parameters
5. Adjust the axis direction
6. Confirm machine coordinates of double tools
7. Execute analog machining
If there is no special instruction, the above operations are executed in Technician
interface, and manufacturer permission is required.
2.1 Clear I/O Port Alarms
This operation is used to clear I/O port alarm so as to establish good communication
between the system and the servo drive.
Common I/O port alarms are as follows:
•Clear the E-stop alarm
•Clear the limit alarm
•Clear the drive alarm
To modify port polarity, see Execute I/O Port Related Operations for details.
2.1.1 Clear the E-stop Alarm
To clear the E-stop alarm, check if E-stop button is pressed:
•If it is, release the button.
•If it is not, modify the polarity of port E-stop.
2.1.2 Clear the Limit Alarm
When the machine tool triggers the limit switch, the system will send a
positive/negative limit alarm.
To clear the limit alarm, move the machine tool towards the opposite direction of
the limit switch.

上海维宏电子科技股份有限公司
SHANGHAI WEIHONG ELECTRONIC TECHNOLOGY CO., LTD.
11 / 36
2.1.3 Clear the Drive Alarm
To clear the drive alarm, do the following:
1. Check if the wiring of the drive is connected correctly and securely:
–If it is, proceed to the next step.
–If it is not, correct and tighten the wiring.
2. Check if the setting value of parameter Drive Station Address is the same as
the drive station address of the machine tool:
–If it is, proceed to the next step.
–If it is not, modify the setting value of the parameter according to the
drive station address of the machine tool.
3. Check if the polarity of port Servo Alarm is in NC status:
If it is not, modify the port polarity to NC status.
2.2 Set Drive Parameters
This operation is used to set drive parameters via the software after the system is
well connected to the servo drive.
Before setting drive parameters, ensure the system has been connected to the
hardware correctly.
To set drive parameters, do the following:
1. Click System → Drive Param. Drive Param dialog box pops up:

上海维宏电子科技股份有限公司
SHANGHAI WEIHONG ELECTRONIC TECHNOLOGY CO., LTD.
12 / 36
2. Select the target axis.
3. Double click the target parameter, and enter the value.
According to the machine tool structure, you can do the following in Drive Param
dialog box:
•To import drive parameters that have been set before, click Import.
•To export drive parameters, click Export.
•To show common/all drive parameters, select Show Common / Show All.
•To initialize drive parameters, click Factory Reset.
2.3 Clear Drive Alarms
This operation is used to clear common drive alarms so as to avoid adjusting the
drive manually and improve adjustment efficiency.
To clear the drive alarm, click Machine Tool → Clear Servo Alarm.
2.4 Set Commissioning Parameters
This operation is used to set parameters for commissioning in bus control system.
To set commissioning parameters, do the following:
1. Click System → Global Param. Parameter dialog box pops up:

上海维宏电子科技股份有限公司
SHANGHAI WEIHONG ELECTRONIC TECHNOLOGY CO., LTD.
13 / 36
2. Select Manufacturer permission, search and set the following parameters:
Screw Pitch
It refers to the axial distance between the corresponding points of two adjacent
teeth on the threads.
Its setting should match the actual condition.
Mechanical Reducer Ratio
It refers to the ratio of reducer input speed to output speed.
It consists of parameter Numerator of Mechanical Reducer Ratio and
parameter Denominator of Mechanical Reducer Ratio.
Its setting should match the actual situation.
Mechanical Reducer Ratio
= Reducer Input Speed / Reducer Output Speed
= Teeth No. of Drive Wheel / Teeth No. of Driving Wheel
= Motor Rotational Speed / Screw Rotational Speed
Encoder Digit
Its setting should match the actual situation.
Electronic Gear Ratio
It consists of parameter Numerator of Electronic Gear Ratio and parameter
Denominator of Electronic Gear Ratio.
It refers to the ratio that the servo enlarges or shrinks the received pulse
frequency. If it is greater than 1, the servo enlarges the received pulse
frequency; if it is less than 1, the servo shrinks the received pulse frequency.
Its setting should match the actual situation.
It is set to 1:1 by default.

上海维宏电子科技股份有限公司
SHANGHAI WEIHONG ELECTRONIC TECHNOLOGY CO., LTD.
14 / 36
2.5 Adjust the Axis Direction
This operation is used to check if the positive direction of each axis is the same with
the direction stipulated by Right Hand Rule, so as to avoid damage to the machine
tool due to incorrect direction.
Taking X-axis as an example, to adjust the axis direction, do the following:
1. Click System → Global Param, select Manufacturer permission and check
current setting value of parameter Axis Direction (X).
2. Judge the positive direction of X-axis according to the Right Hand Rule.
3. Switch to Manual mode, click X+ or X- button to move X-axis and observe its
moving direction.
4. Optional: If the actual moving direction is opposite to the judged direction,
change the setting value to the opposite value.
Example
Current setting value of parameter Axis Direction (X) is 1. Manually move X-axis
towards the positive direction judged by the Right Hand Rule, and find X-axis
moves towards the negative direction.
Then, you need to change the setting value of parameter Axis Direction (X) to -1.
2.6 Confirm Machine Coordinates of Double Tools
This operation is used to return to the machine origin, confirm the distance between
double tools, and set datum when you use the system at the first time, so as to adjust
coordinate position before machining.
During setting datum, there is no need to set returning order for all axes in datum
setting process, and no need to set datum again after recovering from power
interruption and E-stop because the system will automatically read datum
information.
The double tools share one machine coordinate system.

上海维宏电子科技股份有限公司
SHANGHAI WEIHONG ELECTRONIC TECHNOLOGY CO., LTD.
15 / 36
To confirm the machine coordinates of double tools, do the following:
1. Switch to Operator interface, and click . Homing dialog box pops up:
If The dialog box pops up when software starts is checked, the dialog box
will pop up automatically when software starts.
2. Optional: If the switch position of the machine origin changes, click Clear
Average to clear history average.
If history average is not cleared, an error prompt will pop up: Distance between
coarse and fine positioning signals is out of tolerance compared to the average
value in the past. Failed to return to machine origin.
3. Do one of the following:
–Click All Axes. The system returns to the machine origin in the order of
Z1-axis, Z2-axis, X1-axis, X2-axis and Y-axis.
–Specify an axis. The specified axis returns to the machine origin.
For safety, it is suggested to firstly return Z1-axis and Z2-axis.

上海维宏电子科技股份有限公司
SHANGHAI WEIHONG ELECTRONIC TECHNOLOGY CO., LTD.
16 / 36
4. Measure the distance between tools of X1-axis and X2-axis, and set the
measured value as the value of parameter Machine Origin Position(X2).
Note: Parameter Machine Origin Position(X1) and parameter Machine Origin Position(X2) should
be modified synchronously to confirm that the difference between machine origin of X1-axis and
X2-axis keeps the measured value.
5. Switch to Technician interface, and switch to Reference mode.
6. To set datum for the axis that has returned to the machine origin, click
Machine Tool → Datum Setting.
After setting datum, the sign appears before the related axis.
2.7 Execute Analog Machining
This operation is used to know the running area and the speed steadiness of the
machine tool before machining. During executing analog machining, the machine
tool moves like normal machining without turning on/off valves.
To execute analog machining, click Analog in the function control area.

上海维宏电子科技股份有限公司
SHANGHAI WEIHONG ELECTRONIC TECHNOLOGY CO., LTD.
17 / 36
3Quick Start
This section mainly introduces the operations to quickly use Double-tool CNC
System for machining.
The process for quick start is as follows:
1. Load a tool path
2. Set the workpiece origin
3. Set valve control process
4. Simulate machining
5. Set the loading point for robots
6. Execute automatic machining
If there is no special instruction, the above operations are executed in Operator
interface.
3.1 Load a Tool Path
This operation is used to load a tool path for machining.
Before loading a tool path, prepare a tool path file.
To load a tool path, click and select the target tool path file.
The loaded tool path shows in the function window.
3.2 Set the Workpiece Origin
This operation is used to set the origin of the workpiece coordinate system by
clearing workpiece coordinates of each axis, so as to define the coordinate origin in
the tool path file before machining.
To set the workpiece origin, do the following:
1. Optional: If the target station is not the default one, click Station in the
function control area to switch to the target station.
The system supports station G54 and station G55. The default station is G54.
2. Set X-axis workpiece origin.
3. Set Y-axis workpiece origin.
4. Set Z-axis workpiece origin.
Table of contents
Other WEIHONG Control System manuals

WEIHONG
WEIHONG 200 Series User manual

WEIHONG
WEIHONG NcEditor V12 User manual

WEIHONG
WEIHONG PM53B User manual

WEIHONG
WEIHONG LS1500 User manual

WEIHONG
WEIHONG NK300CX User manual

WEIHONG
WEIHONG NK280B User manual

WEIHONG
WEIHONG NCStudio V12 User manual

WEIHONG
WEIHONG NK105 User manual

WEIHONG
WEIHONG NK300CX User manual

WEIHONG
WEIHONG Ncstudio V15 User manual