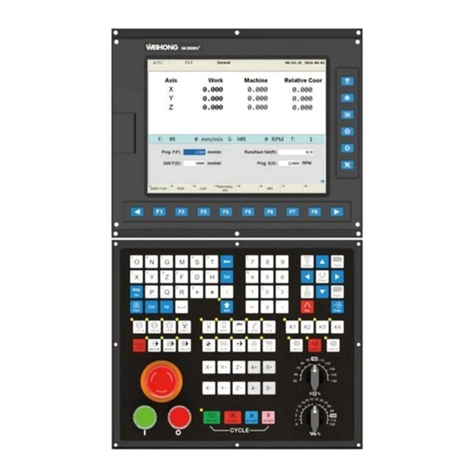
WEIHONG 200 Series User manual

上海维宏电子科技股份有限公司
SHANGHAI WEIHONG ELECTRONIC TECHNOLOGY CO., LTD
1/ 52
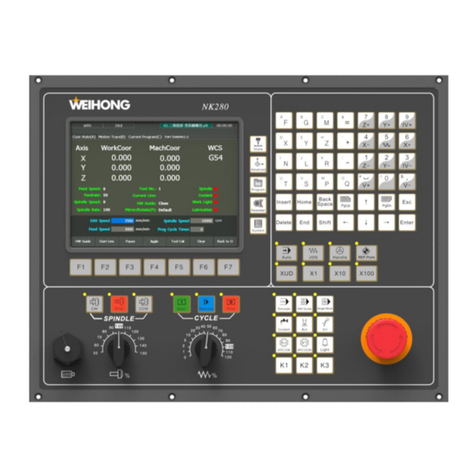
200 Series CNC Integrated System
Manufacturers' Manual
Version: 2019.03 1st Version
Author: Document Department
Weihong Corporation, All Rights Reserved
1 Overview............................................................................................................................................3
1.1 Model Selection...................................................................................................................4
1.2 Host .........................................................................................................................................5
1.3 Main Software Interface ............................................................................................... 10
2 Basic Commissioning ................................................................................................................. 11
2.1 Switch the System Configuration.............................................................................. 11
2.2 Adjust I/O Port Polarity................................................................................................ 12
2.3 Set Commissioning Parameters................................................................................. 13
2.4 Check the Axis Direction .............................................................................................. 15
2.5 Return to the Machine Origin..................................................................................... 16
2.6 Set Speed Parameters.................................................................................................... 17
3 Quick Start...................................................................................................................................... 20
3.1 Return to the Machine Origin..................................................................................... 20
3.2 Load a Program File ....................................................................................................... 20
3.3 Execute Fixed Calibration ............................................................................................ 22
3.4 Set the Workpiece Origin ............................................................................................. 23
3.5 Execute Machining.......................................................................................................... 27
4 Machining Operations................................................................................................................ 28
4.1 Execute Selective Machining....................................................................................... 28
4.2 Generate a Wizard File.................................................................................................. 29
上海维宏电子科技股份有限公司
SHANGHAI WEIHONG ELECTRONIC TECHNOLOGY CO., LTD
2/ 52
4.3 Execute Cycle Machining.............................................................................................. 30
4.4 Execute Array Machining............................................................................................. 30
4.5 Execute the Program Task........................................................................................... 32
4.6 Simulate Machining........................................................................................................ 34
4.7 Execute MDI ...................................................................................................................... 35
4.8 Guide Machining by the Handwheel........................................................................ 36
5 Common Operations................................................................................................................... 37
5.1 Conduct a Simulation Test on Ports......................................................................... 37
5.2 Modify System Parameters ......................................................................................... 38
5.3 Back up System Parameters ....................................................................................... 39
5.4 Check System Logs ......................................................................................................... 41
5.5 Save and Recover Coordinates................................................................................... 42
5.6 Check Machining Statistics .......................................................................................... 44
5.7 Compensate the Tool..................................................................................................... 45
5.8 Compensate Screw Error ............................................................................................. 46
5.9 Execute Instant Calibration......................................................................................... 48
6 System Management .................................................................................................................. 49
6.1 Register the System........................................................................................................ 50
6.2 Switch the System Language ...................................................................................... 50
6.3 Maintain the System ...................................................................................................... 51
6.4 Use NcCloud Assistant................................................................................................... 51
6.5 Set the Network ............................................................................................................... 51
7 Advanced Operations................................................................................................................. 52

上海维宏电子科技股份有限公司
SHANGHAI WEIHONG ELECTRONIC TECHNOLOGY CO., LTD
3/ 52
1Overview
Through this section, you can quickly know components of 200 Series.
200 Series include the following models:
•NK260 integrated CNC system (hereinafter referred to as NK260)
•NK280 integrated CNC system (hereinafter referred to as NK280)
•NK280B integrated CNC system (hereinafter referred to as NK280B)
You can see Model Selection for how to select the desired one among them.
All of them consist of hardware and software:
Hardware
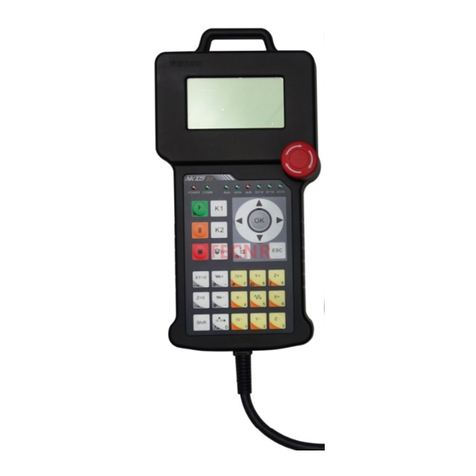
•NK260 / NK280 / NK280B host
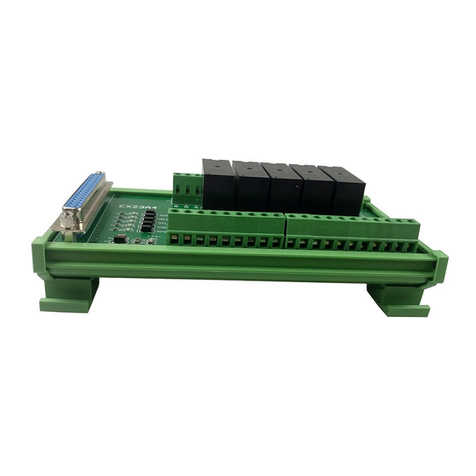
•PCBA EX9A terminal board
•DB9M/F cables
Note: For NK280B, the used terminal board is Lambda 5M RJ45.
Software
NK260 / NK280 / NK280B software
See Main Software Interface for the introduction to the main interface of the
software.

上海维宏电子科技股份有限公司
SHANGHAI WEIHONG ELECTRONIC TECHNOLOGY CO., LTD
4/ 52
1.1Model Selection
You can select the desired integrated CNC system that matches with the structure of
your machine tool and machining demands according to its application:
•NK260
Three-axis engraving machine
•NK280
–Three + one axis (double Y / single Y + single servo magazine)
–Four-axis simultaneous movement, double Z engraving, three + two axis
(single Y + double servo magazine, double Y + single servo magazine,
double Y + double servo magazine)
–Five-axis (four + one) engraving machine
•NK280B
–Three-axis bilateral milling machine
–Three-axis bus control, three + one axis (double Y / single Y + single
servo magazine)
–Bus control four-axis simultaneous movement, double Z engraving,
three + two axis (single Y + double servo magazine, double Y + single
servo magazine, double Y + double servo magazine)

上海维宏电子科技股份有限公司
SHANGHAI WEIHONG ELECTRONIC TECHNOLOGY CO., LTD
5/ 52
1.2Host
This section mainly takes NK260 host as an example, and explains the differences
among these CNC integrated systems separately as well.
1.2.1 Front View
Front view of the host is as follows:
1. Display screen
2. Main function buttons
3. Alpha-numeric keypad
4. Mode buttons
5. E-stop button
6. Auxiliary function buttons
7. Override switches
8. USB interface
9. Movement control buttons
10. Operational buttons

上海维宏电子科技股份有限公司
SHANGHAI WEIHONG ELECTRONIC TECHNOLOGY CO., LTD
6/ 52
1.2.1.1 Main Function Buttons
They are used to switch to the following functional areas:
•: to enter into State functional area.
•: to enter into Advanced functional area.
•: to enter into Program functional area.
•: to enter into Parameter functional area.
•: to enter into System functional area.
1.2.1.2 Alpha-numeric Keypad
It consists of the set of keys for operating the integrated CNC system. And its use is
generally the same with that of the computer keyboard, except the following:
•Enter an alphabet
–For NK260, directly press the button to enter the alphabet on the left-
upper part, and press Shift and an alphabet key to enter the alphabet on
the right-lower part.
–For NK280 / NK280B, the opposite is true.
•Numeric keys are used as axis direction keys in Manual mode.
–Only press the axis direction key to move the axis at jog speed.
–Press the axis direction key and numeric key 5together to move the axis
at rapid jog speed.

上海维宏电子科技股份有限公司
SHANGHAI WEIHONG ELECTRONIC TECHNOLOGY CO., LTD
7/ 52
1.2.1.3 Mode Buttons
They are used to switch among the following modes:
•: in this mode, the machine tool will automatically run the program
file.
•: in this mode, it is convenient to return to the machine origin or set
datum.
•: in this mode, the machine tool will keep running until you release the
button.
•: in this mode, the machine tool will be controlled by handwheel.
•: in this mode, the machine tool only will move 0.001(mm), 0.01(mm),
0.1(mm) or a customized step size.
The last three modes are referred as Manual mode.
1.2.1.4 E-stop Button
It is used to stop the machine tool completely when it is in danger by triggering the
emergency alarm.
When the danger is cleared, you can remove the alarm by rotating the button in the
clockwise direction.
1.2.1.5 Auxiliary Function Buttons
They are used to turn on or off the following frequently used ports:
•: used to turn on/off blowing.

上海维宏电子科技股份有限公司
SHANGHAI WEIHONG ELECTRONIC TECHNOLOGY CO., LTD
8/ 52
•: used to turn on/off the lubricant.
•: used to turn on/off the light.
•: used to turn on/off the coolant.
•: not customized yet.
•~ : used to customize function.
1.2.1.6 Override Switches
They include the following switches:
•: used to adjust the spindle override form 50% ~ 150%.
•: used to adjust the feed override from 0% ~ 120%.
1.2.1.7 Movement Control Buttons
They are used to control the movement of the machine tool:
•/ : used to start / stop the rotation of the spindle.
•/ / : used to control machining.
See Execute machining for details.

上海维宏电子科技股份有限公司
SHANGHAI WEIHONG ELECTRONIC TECHNOLOGY CO., LTD
9/ 52
1.2.1.8 Operational Buttons
They are used to execute the corresponding operation in the display screen.
~
1.2.2 Rear View
The rear view of NK260, NK280 and NK280B differs:
•NK260
•NK280
•NK280B

上海维宏电子科技股份有限公司
SHANGHAI WEIHONG ELECTRONIC TECHNOLOGY CO., LTD
10 / 52
1.3Main Software Interface
The interactive operational interface of NK260, NK280 and NK280B are almost the
same:
1. Show the current mode, including AUTO, JOG, etc.
2. Show the current status of the machine tool, including IDLE, RUNNING, etc.
3. Show the name of the currently loaded program file or the currently loaded
program task.
4. Show the machining time.
5. Show information such as working process or alarms.
6. Show the name of the current functional button.
7. Show child interfaces corresponding to each main function button.
8. Show commands corresponding to F1 ~ F7 on different operational interface.

上海维宏电子科技股份有限公司
SHANGHAI WEIHONG ELECTRONIC TECHNOLOGY CO., LTD
11 / 52
2Basic Commissioning
Through this section, you can quickly get familiar with the commissioning process
about NK260/NK280/NK280B:
1. Switch the system configuration.
2. Adjust I/O port polarity.
3. Set commissioning parameters.
4. Check the axis direction.
5. Return to the machine origin.
6. Set speed parameters.
2.1Switch the System Configuration
This operation is used to check if the default system configuration is what you need
and change it according to the structure of the machine tool if not when the system
is installed at the first time.
To switch the system configuration, do the following:
1. To enter into System Info interface, press → C.
2. Press F4, and enter the manufacturer password. Switch Config dialog box pops
up:
The current system configuration is shown in grey at the bottom of the dialog
box.

上海维宏电子科技股份有限公司
SHANGHAI WEIHONG ELECTRONIC TECHNOLOGY CO., LTD
12 / 52
3. Optional: If the current system configuration is not what you need, press ↑/ ↓
to move the cursor to the desired one, and press Enter.
Restart the software to validate the modification.
2.2Adjust I/O Port Polarity
This operation is used to adjust polarities of input / output ports in the software in
terms of the switch type, and clear alarms of I/O ports, so as to establish correct
communication between the system and the drive:
•The polarity of normally closed switches should be N.
•The polarity of normally open switches should be P.
Except special customization, the polarities of output ports are Nin general.
Before checking I/O ports, ensure the machine tool is connected well and powered
on.
To adjust I/O port polarity, do the following:
1. To enter into Port interface, press → A.
2. If the status of the following ports is different from the actual status of the
machine tool, check the connection:
–ESTOP
–Servo Alarm
–Tool Calibration Signal of Z-axis
–Mechanical Zero
–Cycle Start
–Cycle Stop
If the connection is not correct, tighten the connection; if it is, proceed to the
next step.
3. Press ↑/ ↓to select the target port, enter the manufacturer password, and click
Modify Polarity to convert its polarity.
Restart the software to validate the modification.
In Port interface, you can also execute other operations about port. See Conduct a
Simulation Test on Ports for details.

上海维宏电子科技股份有限公司
SHANGHAI WEIHONG ELECTRONIC TECHNOLOGY CO., LTD
13 / 52
2.3Set Commissioning Parameters
This operation is used to set parameters for commissioning, to avoid damage to the
machine tool during its movement.
According to the type of control systems, it can be divided into the following:
•Set commissioning parameters for bus control system. (Exclusive to NK280B)
•Set commissioning parameters for non-bus control system.
2.3.1 Set Commissioning Parameters for Bus Control System
Before setting commissioning parameters for bus control system, ensure the
following:
•Parameter Control System Type is set to 1.
•The used terminal board is Lambda 5M.
To set commissioning parameters for bus control system, do the following:
1. To enter into Machine Param interface, press → A.
2. To check manufacturer’s parameters, press F2, and input the manufacturer
password.
3. Find and set the following parameters:
Drive Station Address
It should match with toggle switch setting of the driver station address.
Number of each drive station address should be unique, such as X-axis is set 1,
Y-axis is set to 2, and Z-axis is set to 3…
0 is invalid.
Encoder Digit
The encoder digit of a servo motor.
Lead Screw Pitch
It refers to the axial distance between the corresponding points of two adjacent
teeth on the threads.
TravelLimits-Positive / TravelLimits-Negative
The movement range of each axis in X-axis, Y-axis and Z-axis direction.
The system will carry out soft limit in terms of this range in order to protect the
machine tool.

上海维宏电子科技股份有限公司
SHANGHAI WEIHONG ELECTRONIC TECHNOLOGY CO., LTD
14 / 52
Electronic Gear Ratio
It refers to the ratio that the servo enlarges or shrinks the received pulse
frequency.
It consists of parameter Numerator of Electronic Gear Ratio and
Denominator of Electronic Gear Ratio.
B represents its numerator, while A represents its denominator.
If it is greater than 1, the servo enlarges the received pulse frequency; if it is
less than 1, the servo shrinks the received pulse frequency.
It setting should match with the value of drive parameter Electronic Gear
Ratio.
It is 1:1 by default.
F stands for encoder resolution; p stands for pulse equivalent; d stands for
pitch; m/n stands for mechanical reducer ratio.
2.3.2 Set Commissioning Parameters for Non-bus Control System
For NK280B, before setting commissioning parameters for non-bus control system,
ensure the following:
•Parameter Control System Type is set to 0.
•Parameter Encoder Type is set to 0.
To set commissioning parameters for non-bus control system, do the following:
1. To enter into Machine Param interface, press → A.
2. To check manufacturer’s parameters, press F2, and input manufacturer
password.
3. Press F2, find and set the following axis parameters according to the actual
situation:
Pulse Equivalent
It refers to the moving distance of screw or rotation degree of the rotary axis
per pulse sent by the system, the minimum available distance controlled by the
system as well.
Smaller value gets higher machining precision and surface quality; while larger
value gets faster maximum feedrate.
TravelLimits-Positive / TravelLimits-Negative
The movement range of each axis in X-axis, Y-axis and Z-axis direction.
The system will carry out soft limit in terms of this range in order to protect the
machine tool.

上海维宏电子科技股份有限公司
SHANGHAI WEIHONG ELECTRONIC TECHNOLOGY CO., LTD
15 / 52
4. Press F4, find and set the following origin parameters according to the actual
situation:
Motor Type
The motor type.
1: Stepping motor. 2: Servo motor.
REF Switch Positioning Direction
In REF switch positioning phase, the moving direction of each axis during
returning to the machine origin.
REF Switch Positioning Speed
In REF switch positioning phase, the feedrate of each axis during returning to
the machine origin.
REF Encoder Positioning Speed
In encoder positioning phase, the feedrate of {AXIS}-axis during returning to
the machine origin.
Lead Screw Pitch
It refers to the axial distance between the corresponding points of two adjacent
teeth on the threads.
Back Distance
After fine positioning stage of returning to the machine origin, the additional
displacement of each axis.
+: Positive direction; -: Negative direction.
Coarse/Fine_Switches_Min_Dist
Used to see if coarse and fine switches are too close.
Valid range: [0, thread pitch/2].
2.4Check the Axis Direction
This operation is used to ensure that the axis direction is the same with the
direction stipulated by Right Hand Rule, to avoid damage to the machine tool due
to incorrect direction.
Taking X-axis as an example, to check the axis direction, do the following:
1. Judge the positive direction of X-axis according to the Right Hand Rule.
2. To switch to Manual mode, press / / .
3. Press 4/ 6or control the handwheel to move X-axis, and observe its moving
direction.

上海维宏电子科技股份有限公司
SHANGHAI WEIHONG ELECTRONIC TECHNOLOGY CO., LTD
16 / 52
4. Optional: If the moving direction is opposite to the judged direction, modify
the setting value of parameter Axis Direction(X) to the opposite value.
2.5Return to the Machine Origin
According to the encoder type, this operation can be divided into:
•Set Datum with an absolute encoder.
•Return to the machine origin with an incremental encoder.
2.5.1 Set Datum with an Absolute Encoder
This operation is used to return to the machine origin with an absolute encoder by
directly setting datum when it is your first time to use the system. And it owns the
following advantages compared to returning to the machine origin with an
incremental encoder:
•No need to set returning orders for all axes in datum setting process.
•No need to set datum again after restarting the system, recovering from power
interruption and E-stop because the system will automatically read the datum
information.
Note: You need to set datum again when the absolute encoder is out of battery.
Before setting datum, ensure the following:
•Hardware devices have been well connected.
•The axis direction is correct. See Check the Axis Direction for details.
•Parameter Enable Encoder Feedback is set to Yes.
•Parameter Encoder Type is set to 1.
Taking X-axis as an example, to set datum with an absolute encoder, do the
following:
1. To enter into BACKREF mode, press .
2. To enter into Coor-Reference interface, press → A.
3. To enter into Datum Setting page, press F5.
4. Press 4/ 6, and move X-axis to a fixed position.
5. Press F1. The system automatically reads X-axis position and sets it as X-axis
datum.

上海维宏电子科技股份有限公司
SHANGHAI WEIHONG ELECTRONIC TECHNOLOGY CO., LTD
17 / 52
After setting datum successfully, the sign appears in front of X-axis in coordinate
display area.
Repeat the above steps, set datum for other axes, and restart the software to
validate the setting.
After setting datum for all axes, to avoid datum loses after updating the software or
during transporting machine tools, press F6 to export datum to a USB flash disk for
later use.
2.5.2 Return to the Machine Origin with an Incremental Encoder
Origin of Machine Coordinate System (MCS), also called machine origin, and home, is
a fixed point assigned by design, manufacturing and debugging before the machine
tool leaves factory. This operation is used to return to the point.
This operation is required each time you restart the system.
Before returning to the machine origin with an incremental encoder, ensure the
following:
•Hardware devices have been well connected.
•The axis direction is correct. See Check the Axis Direction for details.
To return to the machine origin with an incremental encoder, do the following:
1. To enter into BACKREF mode, press .
2. To enter into Coor-Reference mode, press → A.
3. Do one of the following:
–Press F7. Z-axis returns to the machine origin firstly, then other axes
return.
–Press F1 / F2 / F3. The specified axis returns to the machine origin.
For safety, it is suggested that Z-axis returns to the machine origin firstly.
After returning, the sign appears in front of related axes in coordinate display
area.
2.6Set Speed Parameters
This operation is used to set parameters about speed for commissioning to get a
good machining effect.

上海维宏电子科技股份有限公司
SHANGHAI WEIHONG ELECTRONIC TECHNOLOGY CO., LTD
18 / 52
To set speed parameters, do the following:
1. To enter into Machine Param interface, press → A.
2. Press F2, and input the manufacturer password.
3. Press F1, find and set the following operation parameters:
JOG Jerk
Jerk under rapid-jog mode.
JOG Feedrate before Ref.
The default maximum feedrate in jog mode before returning to the machine
origin.
Manual High
The speed under rapid-jog mode.
Manual Low
The default speed under jog mode.
Max Spindle Speed
The maximum rotational speed of spindle.
It should be consistent with the settings of inverter.
Handwheel Acceleration
Handwheel acceleration.
Smaller value gets smoother handwheel movements.
4. Press F3, find and set the following program parameters:
Feedrate
The default feedrate during machining.
Machining Acceleration
The maximum acceleration for machining.
Max Speed of Ref. Circle
The maximal allowable speed of reference circle with 10mm diameter.
Max Acceleration at Corners
The maximum acceleration at corners.
Machining Jerk
Machining Jerk.
It is only valid on GXX.

上海维宏电子科技股份有限公司
SHANGHAI WEIHONG ELECTRONIC TECHNOLOGY CO., LTD
19 / 52
Maximum Axial Feedrate
The default maximum feedrate of each axis during machining
Maximum Axial Rapid Traverse Speed
The maximum speed of each axis during positioning.
Max Axial Speed
The maximum speed of each axis.
Max Axial Machining Acceleration
The maximum acceleration of each axis during machining.
Max Axial Rapid Traverse Acceleration
The maximum acceleration of each axis during positioning.
Max Axial Jerk
The maximum axial jerk.
Startup Speed
The initial also the minimum speed during machining.
Circular Processing Min Speed
The minimum speed during machining an arc.
Max Acceleration at Feed Override Change
When feed override changes, smaller max acceleration gets smoother
movements.
Approaching F
During rapid positioning, the feedrate when the tool is approaching the
workpiece.
5. Press F5, find and set the following parameters about tool change:
Rapid Traverse Speed in Tool Change
The rapid traverse speed during tool change.
Z-axis Speed in Tool Change
The default speed at upper and lower position of Z-axis during tool change.
Horizontal Speed when Tool In/Out Tool Mag.
The default speed of Z-axis moving into/out of tool magazine during tool
change.

上海维宏电子科技股份有限公司
SHANGHAI WEIHONG ELECTRONIC TECHNOLOGY CO., LTD
20 / 52
3Quick Start
Through this section, you can quickly know how to use NK260/NK280/NK280B.
Machining processes include the following:
1. Return to the machine origin.
2. Load a program file.
3. Execute fixed calibration.
4. Set the workpiece origin.
5. Execute machining.
3.1Return to the Machine Origin
This operation is used to adjust the coordinate system before machining.
To return to the machine origin, do one of the following:
•For an absolute encoder, skip the operation.
See Set Datum with an Absolute Encoder for the reason.
•For an incremental encoder, return to the machine origin with an incremental
encoder.
See Return to the Machine Origin with an Incremental Encoder for details.
3.2Load a Program File
This operation is used to load a program file stored in the host or a USB flash disk
for machining.
Before loading a program file, do one of the following to prepare a program file:
•Put a program file in the host or a USB flash disk.
•Press F7 in Local File interface, create a program file, and press F1 to save it.
This manual suits for next models
3
Table of contents
Other WEIHONG Control System manuals

WEIHONG
WEIHONG NK200 User manual

WEIHONG
WEIHONG NcEditor V12 User manual

WEIHONG
WEIHONG LS1500 User manual

WEIHONG
WEIHONG NK300CX User manual

WEIHONG
WEIHONG NC65C User manual

WEIHONG
WEIHONG NCStudio V12 User manual

WEIHONG
WEIHONG NK280 User manual

WEIHONG
WEIHONG PM53B User manual

WEIHONG
WEIHONG NcEditor V12 User manual

WEIHONG
WEIHONG NK105 G2F User manual