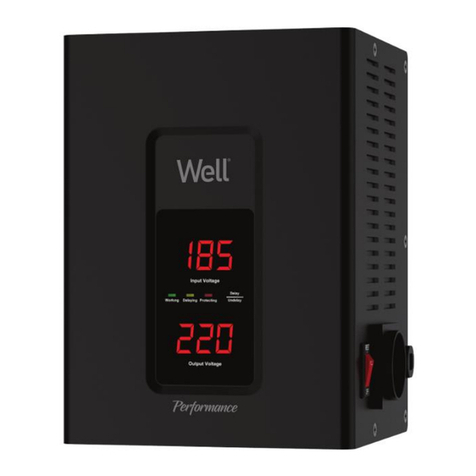
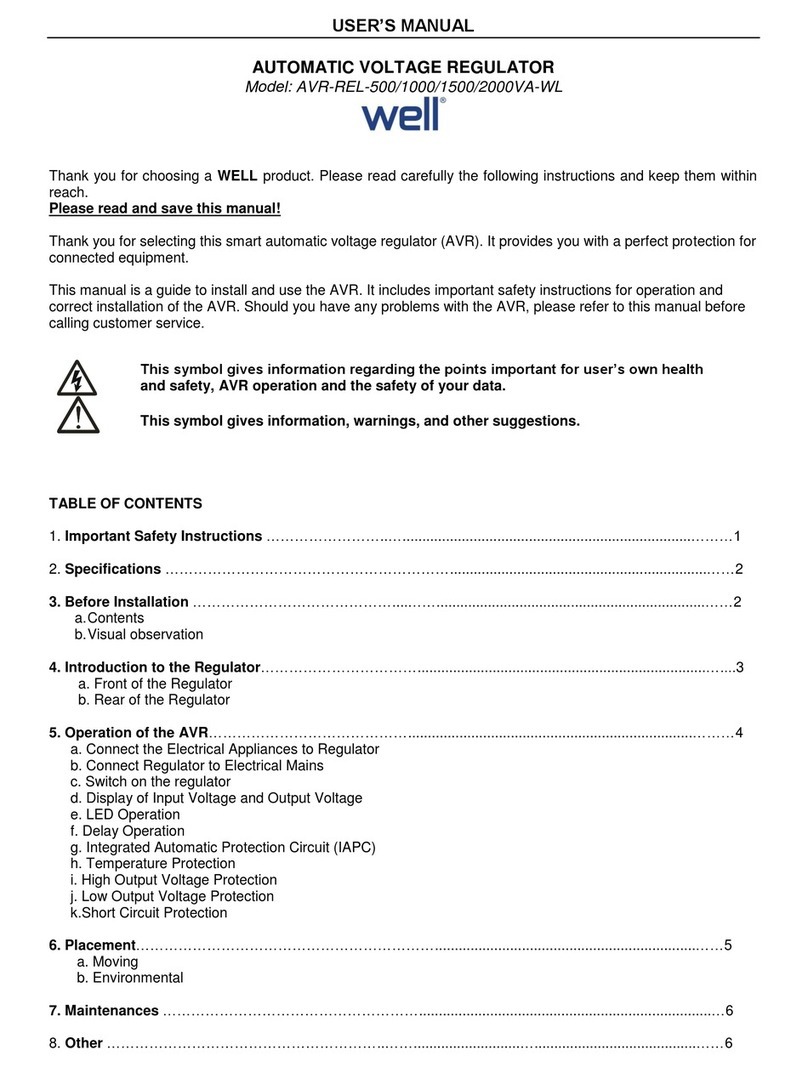
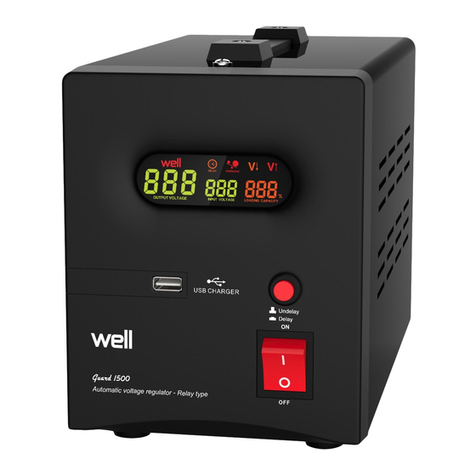
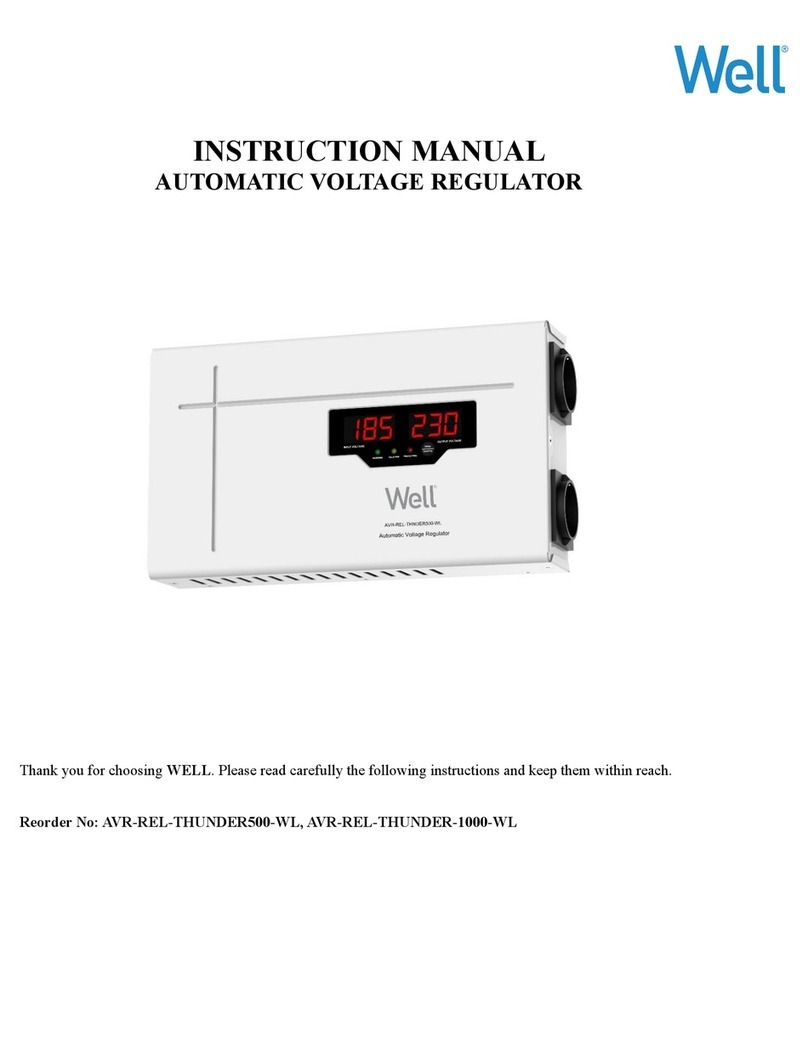
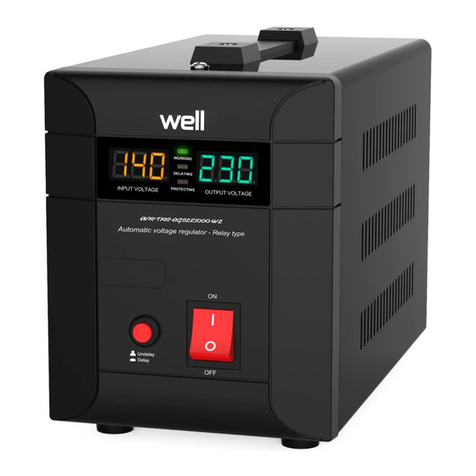
Well AVR-REL-SLIMPOWER500-WL User manual

USER’S MANUAL - AUTOMATIC VOLTAGE REGULATOR
USER’S MANUAL
Automatic voltage regulator
AVR-REL-SLIMPOWER500/1000/1500/2000-WL

USER’S MANUAL - AUTOMATIC VOLTAGE REGULATOR
Thank you for choosing a WELL product. Please read carefully the following instructions and keep them within
reach.
Please read and save this manual!
Thank you for selecting this smart automatic voltage regulator (AVR). It provides you with a perfect protection for
connected equipments.
This manual is a guide to install and use the AVR. It includes important safety instructions for operation and
correct installation of the AVR. Should you have any problems with the AVR, please refer to this manual before
calling customer service.
TABLE OF CONTENTS
1. Important Safety Instructions ……………………..….........................................................................……P1
2. Specifications …………………………………………………….................................................................…P2
3. Unpack and Check ……………………………………....……..................................................................….P2
A. Content
B. Visual observation
4. Introduction to the AVR……………………………..............................................................................…..P3-4
A. Front of the AVR
B. Rear of the AVR
C. Side of the AVR
D. Display Content
5. Installation of the AVR…………………………...........................................................................................P5
A. Dimension of Hanging Holes
B. Size of Screws
6. Operation of the AVR…………………………………….....................................................................…P5-P7
A. Connect the Electrical Appliances to the AVR
B. Connect the AVR to Mains Power
C. Switch on the AVR
D. Display of Input Voltage and Output Voltage
E. Overheat Protection
F. Output Over Voltage Protection
G. Output Under Voltage Protection
H. Short Circuit Protection
I. Delay Operation
7. Maintenances ………………………………………………........................................................................…P7
8. Others …………………………………………………..……...........................….........................................…P7
This symbol gives information regarding the points important for user’s own health
and safety, AVR operation and the safety of your data.
This symbol gives information, warnings, and other suggestions.

USER’S MANUAL - AUTOMATIC VOLTAGE REGULATOR
1
1. Important Safety Instructions
This AVR provides all the necessary safety conditions to protect the home and office electrical appliances
including information systems. In case of any questions, refer to your authorized technical service
representative.
-- In order to avoid any damage to the AVR, it is advised to transport it in its own packing.
-- In the event of sudden temperature changes such as from cold to the normal working temperature, mist
can form inside the AVR. It is absolutely essential that the AVR be dry before switching it on. Due to this
reason wait for at least 2 hours before operating it.
-- Once it’s dry, make sure you observe all the conditions in the environment section of the technical
specifications table, before introducing it into the circuit.
Earth cable should be chosen concerning the current capacity. All units’ earth
connections, which are connected to AVR, should be done with this earth cable. Without
earth connection or unproved earth connected units are dangerous for user health and
have high risk of electronic circuit board faults. Using earth cable with improper diameter
can be dangerous for user’s health and safety of the unit.
-- Place all the cables in a proper place so that they are not stepped on or get caught into people’s feet.
Before connecting the AVR to the mains power, make sure you carefully read all the instructions
and warnings in the “Installation of the AVR” section of this manual.
--Don’t drop any foreign materials (like clips, nails etc...) into the equipment.
-- In emergencies (damage to the cabinet, front panel, or mains connections, splashing of liquid dropping
of any foreign materials into the equipment) switch-off the AVR, pull out the plug and inform the
authorized service center.
-- Do not connect any loads to the AVR, which exceed its power range.
-- When input distortion or resistance is too high, AVR may not work properly.
-- Wiring must be tight, to prevent falling off and oxidation.
The AVR can only be repaired by the authorized technical service personnel. Any attempt
to open and to repair by the user on his own could prove to be dangerous.
Placing magnetic storage media on top of the AVR may result in data corruption.
Special Precautions: When the AVR input comes from a generator:
a. Output power capacity must be higher than the AVR rating, or the AVR and generator may not work
properly;
b. Output frequency of generator must be in range of 45 to 65Hz, and wave form must be sine wave,
otherwise the AVR and generator may not work properly.

USER’S MANUAL - AUTOMATIC VOLTAGE REGULATOR
2
2. Specifications
Model No. Power
Capacity
Output
Socket
Machine Size
(DxWxH) Circuit Protection
AVR-REL-SLIMPOWER 500-WL 500VA/300W 1 x schuko 320x160x60mm Resettable Power Switch ,
(4A,250V)
AVR-REL-SLIMPOWER 1000-WL 1000VA/600W 1 x schuko 320x160x60mm
AVR-REL-SLIMPOWER 1500WL 1500VA/900W 2 x schuko 360x200x60mm Resettable Power Switch ,
Output Fuse (10A, 250V)
AVR-REL-SLIMPOWER 2000-WL 2000VA/1200W 2 x schuko 360x200x60mm Resettable Power Switch ,
AC Input Voltage
Input Frequency
45Hz~65Hz
AC Output Voltage
Output Frequency
Synchronized with mains frequency
Output Precision
Distortion
<3% (compare to input wave form)
Power Factor
0.6
Digital Display
LED
Efficiency
>0.95
Operating Temperature
-10˚C~40˚C
Operating Humidity
0~90%(Non-condensing)
Noise
≤56dB (full load, distance at 1 meter)
Delay Time
6/180 seconds selectable
Protection
Under Voltage, Over Voltage, Overheat, Short Circuit.
Certification
CE (EMC+LVD)
IP Class
IP20
Protection Class
I
Cable Length
1.35m
3. Unpack and Check
Each AVR was tested 100% before shipment, check if the AVR has been subjected to any damage after
unpacking it according to the following steps:
A. Contents
Delivered pack includes:
AVR 1 piece
User’s manual 1 piece
Warranty card 1 piece
B. Visual observation
a. Check the name plate to verify the rated capacity is according to your purchase order.
b. Make sure appearance of the AVR is not damaged. If you notice any damage, contact the transport
firm and the authorized dealer.
+4%, -8% (without load) ±3V
Resettable Power Switch,
Output Fuse (7A, 250V)
Output Fuse (12A, 250V)
150V~260V
230V

USER’S MANUAL - AUTOMATIC VOLTAGE REGULATOR
3
4. Introduction to the AVR
Familiarize yourself with the various features and facilities by studying the following diagrams to obtain
maximum benefit from the AVR.
①: HANGING HOLE
②: AC INPUT CABE
③: POWER SWITCH
④: DELAY AND UNDELAY BUTTON
⑤: OUTPUT SOCKET
A. Front of the AVR (500/1000/1500/2000VA)
B. Rear of the AVR (500/1000/1500/2000VA)
⑥: OUTPUT FUSE
ities by studying the following diagrams to obtain
C. Side of the AVR
(500VA)
C. Side of the AVR
C. Side of the AVR
⑥⑥
(1000VA)
⑥
(1500/2000VA)

USER’S MANUAL - AUTOMATIC VOLTAGE REGULATOR
4
D. Display Content
1.”OUTPUT VOLTAGE” Indicator
2.“DELAY”Indicator
3.“LOW VOLTAGE PROTECTION” Indicator
4.“HIGH VOLTAGE PROTECTION” Indicator
5.”INTPUT VOLTAGE” Indicator
LED DISPLAY IN DIFFERENT STATUS
Status
Normal
Undelay (6s)
Delay (3min)
OUTPUT
VOLTAGE
DISPLAY
Output Voltage
Count Down
Count Down
INPUT
VOLTAGE
DISPLAY
Input Voltage
Input Voltage
Input Voltage
DELAY
INDICATOR
Off
Flash
Flash
PROTECT
INDICATOR
Off
Off
Off
Status
Low
Voltage
High
Voltage
Overload
(output not cut off)
Overload
(output cut off)
OUTPUT
VOLTAGE
DISPLAY
Output Voltage
INPUT
VOLTAGE
DISPLAY
Input Voltage
Input Voltage
Input Voltage
Input Voltage
DELAY
INDICATOR
Off
Off
Off
Off
PROTECT
INDICATOR
On
On
Off
Off

USER’S MANUAL - AUTOMATIC VOLTAGE REGULATOR
5
5. Installation of the AVR
Install the AVR in a cool, dry, clean place – away from windows, dust, moisture and
cold to prevent fire or electrical shock, do not expose the AVR to rain or water.
For better performance and longer lifespan, this AVR must be installed on a wall!
a. Install the AVR in a place where the children can’t reach for.
b. Do not install the AVR in or near water.
c. Do not place AVR on an unstable cart, stand or table.
d. Do not place AVR under direct sunlight,excessive humidity.
e. Keep away from fire, heat sources.
f. Keep away from corrosive gas or fluid.
g. Do not place AVR power cord in any area where it may get damaged by heavy objects.
The AVR must be installed on a firm wall, other than other places.!
A. Dimension of Hanging Holes
500VA/1000VA Models 1500VA/2000VA Models
B. Size of Screws
It’s strongly recommended to use the SLEEVE ANCHOR BOLTS instead of the normal screws.
The head of Anchor Bolt / Screw should be within 6mm~9mm in diameter.
Make sure all the Anchor Bolts/Screws are tightly fastened on the wall!
Make sure the four hanging holes of the AVR are tightly fastened with the Anchor Bolts!
6. Operation of the AVR
A. Connect the Electrical Appliances to the AVR
• Make sure all appliances are turned "OFF", and put the POWER SWITCH of AVR to “OFF” position.
• Plug the appliances into the output sockets of the AVR, ensuring that the total starting power does not
exceed the rated maximum power capacity of the AVR.
B. Connect the AVR to Mains Power
•Plug the AC INPUT CABLE into wall mains socket.

USER’S MANUAL - AUTOMATIC VOLTAGE REGULATOR
6
C. Switch on the AVR
•Put the POWER SWITCH to "RESET" position, the LED DISPLAY will light, the DELAYING LED will
light and blink . At the same time, the digital display will show the elapsing delay time. Generally delay
time is set at 6 seconds.
•When the delay is finished, the DELAYING LED lights off, and the LED DISPLAY will show output
voltage supplying to appliances connected to the AVR.
•Switch "ON" the appliances one by one.
In Case of Power Failure:
•Switch "OFF" the AVR and all the appliances.
•Repeat above steps when power is restored.
D. Display of Input Voltage and Output Voltage
•The input voltage and output voltage will show in the LED DISPLAY after switch it on.
E. Overheat Protection
•This AVR is equipped with a unique TEMPERATURE PROTECTION CIRCUIT designed to protect the
transformer, giving you longer and satisfactory use of the AVR.
•If the internal temperature of the windings of transformer reaches the limit or above, the output will be
cut "OFF" automatically, and the OUTPUT LED DISPLAY will show "C".
•When the internal temperature returns to normal range, output power will be restored. After the delay
time, the display will indicate output voltage.
F. Output Over Voltage Protection
•This AVR is built in with a very specialized feature called OVER VOLTAGE PROTECTION CIRCUIT.
•This special and unique circuitry is designed to protect connected appliances whenever the output
voltage is higher than the normal range.
•If the output voltage is over the normal range, the output will be cut "OFF" automatically and the LED
DISPLAY will show “V↑”.
•Once the input mains power returns to normal range, the AVR will restore the output automatically.
G. Output Under Voltage Protection
•When the output voltage is below the normal range, the output will be cut “OFF” automatically and the
LED DISPLAY will show “V↓”.
•Once the input mains power returns to normal range, the AVR will restore the output automatically.
I. Delay Operation
•This model is designed with a delay feature to protect appliances especially the appliances with
compressors(like air-conditioner, fridge, motor, pump,and etc). which should not be switched on
immediately after being switched off.
•The delay time is generally set at 6/180 seconds selectable. Select delay or undelay before switch on
the AVR.
•Press down the delay button, then you select the delay, the delay time will be 180 seconds. After switch
on the AVR, wait for 180 seconds, then the AVR delivers output; Press up the delay, it means undelay,
under "undelay" status, the delay time is 6 seconds.
If you connect the appliances with compressors, we suggest that you select "delay" before
switch on the AVR.
H. Short Circuit Protection.
In case of a short circuit or overload, the POWER SWITCH (integrated with a resettable fuse
function) or OUTPUT FUSE will trip off to cut of the input power supply. The OUTPUT FUSE
should be replaced in case if will burn out. The Power Switch with the resettable fuse function
must be resettled on the initial position.
• Check if the AVR is overloaded, if so, please remove some loads.
• Check if the appliances are short circuit, if so, please disconnect the appliances.

USER’S MANUAL - AUTOMATIC VOLTAGE REGULATOR
7
•The delay time will show in the display after switch on the AVR. When delay time has elapsed, delay
LED will switch "OFF" and display will indicate the AC output voltage.
7. Maintenances
This AVR is basically maintenance free! But regular maintenance can extend the lifespan of the AVR by
the following steps:
Regular inspection
Disconnect the AVR from the mains power completely.
Use cotton cloth and detergent to clean the body and ventilation holes.
Check all the terminals, replace the abnormal one with that of the same specification.
Extraordinary inspection
When malfunction occurs, or the AVR is abnormal, please measure and check the parameters, refer to
the authorized dealer if needed.
In thunder and lightning or rainy season, Extraordinary Inspection should be executed to prevent
malfunction.
Maintenance should not be operated when AVR is working.
8. Others
This AVR is designed and made by strict standards and quality control system for common use, but if
apply to purposes may cause any dangerous to human or other lives, include but not limited to the
following case, please refer to our company.
a. Apply to traffic system;
b. Apply to medical purpose;
c. Apply to nuclear, power system;
d. Apply to aviation and aerospace;
e. Apply to all kinds of safety devices;
f. Other special usages.
Ecological information:
Waste electrical and electronic equipment are a special waste category, collection , storage, transport , treatment and
recycling are important because they can avoid environmental pollution and are harmful to health
Submitting waste electrical and electronic equipment to special collection centers makes the waste to be recycled
properly and protecting the environment. Do not forget !Each electric appliance that arrive at the landfill, the field ,
pollutethe environment!
Importer & distributor:
SC VITACOM ELECTRONICS SRL
CIF: RO 214527
Tel. 0264-438401*
sales@vitacom.ro
www.vitacom.ro

MANUAL DE INSTRUCTIUNI
Stabilizator automat de tensiune
AVR-REL-SLIMPOWER500/1000/1500/2000-WL

MANUALUL UTILIZATORULUI
REGULATOR AUTOMAT DE TENSIUNE ELECTRICĂ (RAT)
Vă multumim că ati ales un produs WELL. Vă rugăm să cititi cu atentie și păstrati la îndemână instructiunile
următoare.
Vă rugăm să cititi și să păstrati acest manual!
Vă multumim că ati ales acest regulator automat de tensiune electrică (RAT). Acest aparat vă oferă o protectie
perfectă a echipamentului conectat.
Acest manual este un ghid de instalare și utilizare a RAT. În cazul în care ati avea orice probleme cu RAT, vă
rugăm studiati manualul înainte de a suna la service-ul pentru clienti.
CONTINUT
1. Instructiuni importante pentru sigurantă …..….........................................................................……P1
2. Specificatii …………………………………………………….................................................................…P2
3. Despachetare și verificare …………………………....……................................................................…P2
A. Continut
B. Observare vizuală
4. Prezentarea RAT ……………………………....................................................................................…....P3
A. Fata frontală RAT
B. Spatele RAT
C. Părtile Laterale RAT
D. Afișaj
5. Instalarea RAT…………………………...................................................................................................P4
A. Dimensiunea găurilor de atârnare
B. Dimensiunea șuruburilor
6. Functionarea RAT …………………………………….....................................................................…P4-P5
A. Conectarea aparatelor electrice la RAT
B. Conectarea regulatorul la priza de sursă
C. Pornirea RAT
D. Afișare tensiune de intrare și tensiune de ieșire
E. Protectie la supraîncălzire
F. Protectie la supratensiune ieșire
G. Protectie subtensiune ieșire
H. Protectie la scurt-circuit
I. Decalaj pornire
7. Întretinere ………………………………………………............................................................................…P6
8. Diverse …………………………………………………..……...........................….....................................…P7
Acest simbol vă oferă informatii privitor la punctele importante pentru sănătatea și
siguranta utilizatorului, a functionării RAT și siguranta datelor dvs..
Acest simbol oferă informatii, avertizări și alte sugestii.

STABILIZATOR AUTOMAT DE TENSIUNE - MANUAL DE INSTRUCTIUNI
1. Instructiuni importante de sigurantă
Acest RAT asigură protectia aparatelor si echipamentelor electrice si de birou, inclusiv a sistemelor
informatice. Pentru orice întrebări adresati-vă reprezentantului tehnic autorizat pentru service.
-- Pentru evitarea oricăror deteriorări ale RAT, este indicat să fie transportat în ambalajul său original.
-- În cazul schimbărilor bruște de temperatură cum ar fi trecerea de la frig la temperatura normală de
lucru, în interiorul RAT se pot forma aburi datorită condensului. Este absolut esential ca RAT să fie
uscat înainte de a fi pornit. Pentru aceasta așteptati cel putin 2 ore înainte de a-l pune în functiune.
-- După ce s-a uscat asigurati-vă că sunt îndeplinite toate conditiile din partea de mediu a specificatiilor
tehnice, înainte de a-l conecta la circuit.
Cablul de pământare trebuie ales în functie de puterea instalată. Pământările tuturor
aparatelor conectate la RAT trebuie realizate cu acest cablu de pământare. Fără pământare
sau pământare nesigură, aparatele conectate sunt periculoase pentru sănătatea
utilizatorilor
ș
i aduc un risc ridicat de defectare a circuitelor electronice. La instalarea RAT
folosirea unui cablu de diametru necorespunzător poate fi periculoasă pentru sănătatea
utilizatorului
ș
i siguranta aparatului.
-- Plasati toate cablurile în locuri corespunzătoare, astfel ca să nu se calce pe ele și nimeni să nu se
împiedice de ele. Înainte de conectarea RAT la sursa de curent, asigurati-vă că ati citit cu grijă
instructiunile și atentionările din capitolul ”Instalarea RAT” din acest manual.
--Nu aruncati materiale străine de niciun fel (cum ar fi cleme, cuie etc...) în aparat.
-- În caz de urgente (deteriorări ale carcasei, panoului frontal sau conexiuni principale, stropiri cu lichide
sau căderea de orice materiale străine în aparat) opriti RAT, scoateti-l din priză și informati centrul de
service autorizat.
-- Nu cuplati la RAT sarcini care depășesc limita de putere al regulatorului,
-- Dacă distorsiunile sau rezistenta de intrare sunt prea mari, este posibil ca RAT să nu functioneze bine.
-- Contactele cablajelor trebuie să fie strânse pentru evitarea căderii sau oxidării.
RAT poate fi reparat numai de către personalul unui service tehnic autorizat. Orice
încercare de deschidere sau reparare de către utilizator se poate dovedi periculoasă.
Nu puneti suporturi magnetice de date pe RAT deoarece datele pot fi deteriorate.
Măsuri speciale de precautie: Dacă alimentarea RAT se face de la un generator:
a. Puterea de ieșire trebuie să fie mai mare decât puterea instalată a RAT, altfel RAT și generatorul ar
putea să nu functioneze corespunzător;
b. Frecventa de ieșire al generatorului trebuie să fie între 45 și 65 de Hz, iar forma de undă a curentul
alternativ trebuie să fie sinusoidal, altfel RAT și generatorul ar putea să nu functioneze corespunzător.

STABILIZATOR AUTOMAT DE TENSIUNE - MANUAL DE INSTRUCTIUNI
2. Specificări
Model No. Putere Priză
ieșire
Dimensiuni
aparat
(LxLxÎ)
Protectie circuit
AVR-REL-SLIMPOWER 500-WL 500VA/ 300W 1 x schuko 320x160x60mm
AVR-REL-SLIMPOWER 1000-WL 1000VA/600W 1 x schuko 320x160x60mm
AVR-REL-SLIMPOWER 1500WL 1500VA/900W 2 x schuko 360x200x60mm
AVR-REL-SLIMPOWER 2000-WL 2000VA/ 1200W 2 x schuko 360x200x60mm
Tensiune de alimentare AC
150V~260V
Frecventa de alimentare
45Hz~65Hz
Tensiunea de ieșire AC
230V
Frecventa de ieșire
Sincronizat cu reteaua
Precizia de ieșire
(fărăsarcină
)
Distorsiuni
<3% (în comparatie cu forma undei de intrare)
Factor de putere
0.6
Randament
>0.95
Afișaj
Cu LED-uri
Temperatura de functionare
-10˚C~40˚C
Umiditate de functionare
0~90%(Non-condens)
Nivel de zgomot
≤56dB (sarcinămaximă, distantăde 1 metru)
Timp de decalaj
6/180 secunde, selectabil
Protectie
La subtensiune de ieșire, Supratensiune de ieșire, Supraîncălzire, Scurt-
circuit.
Certificat
CE (EMC+LVD)
Clasa IP
IP20
Clasa de protectie
I
Lungime cablu
1.35m
3. Despachetare și verificare
Fiecare RAT a fost testat 100% înainte de transport, verificati dacăRAT a suferit vreo deteriorare după
despachetare conform pașilor următori:
A. Continut
Pachetul livrat contine:
AVR 1 buc.
Manualul utilizatorului 1 buc.
Certificat de garantie 1 buc.
B. Verificare vizuală
a. Controlati eticheta de denumire săverificati dacăputerea instalatăcorespunde comenzii dvs. de
achizitie.
b. Asigurată-văcăRAT nu are exteriorul deteriorat. Dacănu observati deteriorări, contactati firma de
transport și distribuitorul autorizat.
4. Prezentarea RAT
Familiarizati-văcu diversele caracteristici și facilităti studiind schitele următoare ca săputeti obtine
beneficii maxime cu RAT.
+4%, -8% ±3V
Întrerupător resetabil de
alimentare (4A, 250V)
Întrerupător resetabil de alimentare
Siguranță (7A, 250V)
Întrerupător resetabil de alimentare
Siguranță (10A, 250V)
Întrerupător resetabil de alimentare
Siguranță (12A, 250V)

STABILIZATOR AUTOMAT DE TENSIUNE - MANUAL DE INSTRUCTIUNI
A. Panou frontal RAT (500/1000/1500/2000VA)
B. Spate RAT (500/1000/1500/2000VA)
1: GĂURI ATÂRNARE
2: CABLU ALIMENTARE AC
3: ÎNTRERUPĂTOR PRINCIPAL (cu functie de “sigurantăresetabilă”)
4: BUTON INTARZIERE
5: PRIZĂIEȘIRE
C. Lateral RAT
(1500/2000VA)
⑥
6: SIGURANȚĂ
C. Lateral RAT
⑥
(1000VA)
(500VA)

STABILIZATOR AUTOMAT DE TENSIUNE - MANUAL DE INSTRUCTIUNI
D. AFIȘAJ
1. Indicator TENSIUNE IEȘIRE
2. Indicator FUNCTIE DECALAJ
3. Indicator PROTECTIE TENSIUNE SCĂZUTĂ
4. Indicator PROTECTIE SUPRATENSIUNE
5. Indicator TENSIUNE INTRARE
MESAJE AFIȘAJ
Status
Normal
Decalaj (6s)
Decalaj (3min)
INDICATOR TENSIUNE
IE
Ș
IRE
Tensiune Ie
ș
ire
Numărătoarea
inversă
Numărătoarea
inversă
INDICATOR TENSIUNE
INTRARE
Tensiune Intrare
Tensiune Intrare
Tensiune Intrare
INDICATOR
DECALAJ
Oprit
Intermitent
Intermitent
INDICATOR
PROTECTIE
Oprit
Oprit
Oprit
Status
Tensiune
Scăzută
Supratensiune
Suprasarcină
(cu tensiune de
ieșire)
Suprasarcină
(fără tensiune de
ieșire)
INDICATOR
TENSIUNE
IE
Ș
IRE
Tensiune Ie
ș
ire
INDICATOR
TENSIUNE
INTRARE
Tensiune Intrare
Tensiune Intrare
Tensiune Intrare
Tensiune Intrare
INDICATOR
DECALAJ
Oprit
Oprit
Oprit
Oprit
INDICATOR
PROTECTIE
Pornit
Pornit
Oprit
Oprit

STABILIZATOR AUTOMAT DE TENSIUNE - MANUAL DE INSTRUCTIUNI
5. Instalarea RAT
Instalati RAT într-un loc răcoros, uscat, curat – departe de geamuri, praf, umiditate
ș
i
frig pentru a preveni focul sau curentarea, nu expuneti RAT la ploaie sau apă.
Pentru o performantă mai bună
ș
i o durată de viată mai lungă, acest RAT se va monta
pe un perete!
a. Instalati RAT într-un loc unde nu este accesibil pentru copii.
b. Nu montati RAT în sau lângă apă.
c. Nu plasati RAT pe o suprafată instabilă, suport sau masă.
d. Nu plasati RAT expus direct la soare, la umiditate excesivă.
e. A se feri de foc, de surse de căldură.
f. A se feri de gaze sau fluide corozive.
g. Nu plasati cablul de alimentare al RAT în locuri unde ar putea fi deteriorat de obiecte grele.
RAT trebuie montat pe un perete stabil, aparte de alte locuri!
A. Dimensiunea găurilor de atârnare
Modelele 500VA/1000VA Modelele 1500VA/2000VA
B. Dimensiunea șuruburilor
Se recomandă utilizarea de ȘURUBURI DE ANCORARE CU ȘAIBĂ în loc de șuruburi normale.
Capul șurubului cu manșon trebuie să aibă un diametru de 6mm~9 mm.
Asigurati-vă că
ș
uruburile cu man
ș
on sunt bine fixate în perete!
Asigurati-vă că cele patru găuri de atârnare ale RAT se potrivesc strâns pe
ș
uruburile
de ancorare!
6. Functionarea RAT
A. Conectati aparatele electrice la RAT
• Asigurati-vă că aparatele sunt oprite și ÎNTRERUPĂTORUL PRINCIPAL al RAT este în pozitia oprit.
• Conectati aparatele la prizele de ieșire ale RAT asigurându-vă că puterea totală de start nu depășește
puterea maximă a RAT.
B. Conectati RAT la sursa principală de alimentare de la retea
•cuplati CABLUL DE ALIMENTARE AC la priza din perete.

STABILIZATOR AUTOMAT DE TENSIUNE-MANUAL DE INSTRUCTIUNI
C. Cuplati RAT
•Puneti ÎNTRERUPĂTORUL PRINCIPAL în pozitia "RESET",AFIȘAJUL DIGITAL va lumina, apoi va
lumina intermitent INDICATORUL DECALJ, În același timp afișajul digital va arăta trecerea decalajului
de timp. În general decalajul de timp este reglat la 6 secunde.
•Dupăexpirarea decalajului INDICATORUL DECALAJ se stinge, iar AFIȘAJUL DIGITAL va arăta
tensiunea de alimentare furnizatăaparatelor conectate la RAT.
•Porniti una câte una aparatele.
În caz de panăde curent:
•Opriti RAT și toate aparatele.
•Repetati pașii de mai sus dupăce revine curentul.
D. Afișaj de tensiune de intrare și tensiune de ieșire
•Tensiunea de intrare și ieșire va fi arătatăpe AFIȘAJUL DIGITAL dupăcuplare.
E. Protectie la supraîncălzire
•Acest RAT este echipat cu un CIRCUIT DE PROTECTIE LA TEMPERATURĂunic în felul său, proiectat
săprotejeze transformatorul, oferindu-văo utilizare mai lungăși multumitoare a RAT.
•Dacătemperatura internăa spirelor transformatorului atinge sau depășește limita, tensiunea de ieșire
este decuplatăautomat, iar afișajul digital va arăta ”C"
•Când temperatura internăse întoarce la limitele normale, se reconecteazăcurentul de ieșire. După
decalajul de timp, afișajul va indica tensiunea de ieșire.
F. Protectia la supratensiune ieșire
•Acest RAT are încorporat un CIRCUIT DE PROTECTIE LA SUPRATENSIUNE foarte specializat.
•Circuitul acesta special și unic în felul său este proiectat săprotejeze aparatele conectate în cazul în
care tensiunea de ieșire este mai mare decât ar fi normal.
•Dacătensiunea de ieșire depășește limita normală, ieșirea va fi decuplatăautomat, iar AFIȘAJUL
DIGITAL va indica “V↑”.
•În momentul în care curentul de alimentare se întoarce la limitele normale, RAT va reface ieșirea.
G. Protectie de subtensiune la ieșire
•Când tensiunea de ieșire este sub limitele normale, ieșirea va fi decuplatăautomat, iar AFIȘAJUL
DIGITAL va indica “V↓”.
•În momentul în care curentul de alimentare se întoarce la limitele normale, RAT reface ieșirea către
consumatori.
I.Functia Decalaj
•Acest model este proiectat cu o functie de decalaj (intârziere) la pornire pentru a proteja aparatele, mai
ales acele aparate care au compresor, (cum ar fi aparatele de aer conditionat, frigidere, motoare, pompe,
etc) care nu sunt recomandate a fi pornite imediat dupăoprire.
•Timpul de întârziere este de obicei 6/180 secunde, selectabil. Selectati functia de decalaj sau fără
decalaj (“delay” sau “underlay” ) înainte de pornirea RAT.
•Apăsati butonul “delay“ ( mod de intârziere) , apoi selectati întârzierea, timpul de intârziere va fi 180 de
secunde. Dupăpornirea AVR-ului, se va astepta 180 secunde, dupa care AVR-ul va incepe functionarea.
Apasati din nou “delay” pt. a comuta AVR-ul in functia de “underlay”(mod fărăîntârziere) , iar sub
statusul “undelay” timpul de intârziere este de 6 secunde
H. Protectia la scurt-circuit.
În cazul unui scurt-circuit sau al unei suprasarcini, ÎNTRERUPĂTORUL (cu functie integrată de
sigurantă automatăresetabilă) sau SIGURANȚA se va declanșa și va întrerupe alimentarea cu
electricitate.
SIGURANȚA arsă trebuie înlocuită , iar ÎNTRERUPĂTORUL (cu functie integrată de sigurantă
automatăresetabilă) trebuie readus în poziția inițială,
• Verificati dacă RAT este supraîncărcat, dacăeste, atunci deconectati câtiva consumatori.
• Verificati dacă aparatele au scurt-circuit, dacă da, atunci deconectati aparatele.
Este recomandat folosirea functiei decalaj înainte de pornirea RAT în cazul în care aceasta
este folosităîmpreunăcu aparate cu compresoare.
•Dupăpornirea AVR-ului pe ecran se va afișa timpul de intârziere. Când timpul de întârziere s-a scurs,
LED-ul de delay se va stinge și afișajul va indica tensiunea AC de ieșire

STABILIZATOR AUTOMAT DE TENSIUNE-MANUAL DE INSTRUCTIUNI
7. Întretinere
Acest RAT de fapt nu necesităîntretinere specială! Totuși întretinerea regulatăpoate mări durata de viată
a RAT prin următorii pași:
Verificare regulată
Deconectati RAT complet de la sursă.
Folositi o lavetăde bumbac și detergent pentru curătarea carcasei și găurilor de ventilatie.
Verificati toate terminalele, înlocuiti-l pe cel anormal cu altul, având aceleași specificatii.
Verificare extraordinară
Dacăapare vreo defectiune sau RAT nu se comportănormal, vărugăm măsurati și verificati parametrii și
dacăeste nevoie adresati-vădistribuitorului autorizat.
Pe vreme de tunete și fulgere sau pe vreme ploioasătrebuie efectuatăo verificare extraordinarăpentru
prevenirea functionării defectuoase.
Nu se fac lucrări de întretinere cu RAT în functiune.
8. Diverse
Acest RAT este proiectat și produs pe baza unor standarde și sistem de control de calitate pentru uz
general stricte, însădacăeste folosit în orice scop care ar putea reprezenta orice fel de pericol pentru
oameni, vărugăm contactati compania noastră. Folosirea RAT-lui nu este recomandat pentru domeniile
mai jos mentionate. Asemenea cazuri pot fi, fărăa fi limitate la acestea:
a. Utilizarea într-un sistem de circulatie;
b. Utilizarea în scopuri medicale;
c. Utilizarea la un sistem nuclear, sistem energetic;
d. Utilizarea în aeronauticăși aerospatiale;
e. Utilizarea la orice fel de dispozitive de sigurantă;
f. Alte utilizări speciale.
Informatii ecologice:
Deseurile de echipamente electrice si electronice sunt o categorie speciala de deseuri , colectarea , depozitarea ,
tratarea si reciclarea sunt importante deoarece se pot evita poluari ale mediului cu gaze de efect de sera sau metale
grele,si care pot fi daunatoare sanatatii.Depunand la centrele speciale de colectare a DEEE, va debarasati
responsabil de aceste deseuri, va asigurati ca acestea ajung sa fie reciclate corect si totodata protejati natura.Nu
uitati! Fiecare aparat electric ajuns la groapa de gunoi , pe camp sau pe malul apei polueaza! Simbolul ( pubela
taiata cu un X ) reprezinta obiectul unei colectari separate a DEEE:
Importator si distribuitor:
SC VITACOM ELECTRONICS SRL
CIF: RO 214527
Tel. 0264-438401*
suport@vitacom.ro
www.vitacom.ro

FELHASZNÁLÓI KÉZIKÖNYV
Automata áramfeszültség szabályzó
AVR-REL-SLIMPOWER500/1000/1500/2000-WL

Köszönjük, hogy egy WELL terméket választott. Kérjük, olvassa el figyelmesen és tartsa kézügyben a
következő útmutatásokat.
Kérjük, olvassa el és tartsa meg ezt a kézikönyvet!
Köszönjük, hogy ezt az automata elektromos feszültségszabályozót (AFS) választotta. A készülék tökéletes
védelmet nyújt a rácsatlakoztatott szerkezeteknek.
Ez a kézikönyv az AFS felszerelési és használati útmutatója. Fontos használati biztonsági útmutatásokat és az
AFS helyes felszerelési útmutatásait tartalmazza. Ha bármiféle problémája adódna az AFS használatával, kérjük
tanulmányozza a kézikönyvet, mielőtt az ügyfélszolgálathoz fordulna.
TARTALOMJEGYZÉK
1. Fontos biztonsági útmutatások ……………………..….........................................................................……P1
2. Leírások …………………………………………………….................................................................…………..P2
3. Kicsomagolás és ellenőrzés ………………………....……....................................................................……P2
A. Tartalom
B. Vizuális ellenőrzés
4. Az AFS bemutatása ……………………………...........................................................................................P2-4
A. Az AFS előlapja
B. Az AFS hátlapja
C. Az AFS oldala
D. Digitális kijelző
5. Az AFS felszerelése …………………………..................................................................................................P5
A. Rögzítő lyukak mérete
B. Csavarok mérete
6. Az AFS működtetése ……………………………………..........................................................................…P5-6
A. Csatlakoztassa az elektromos felhasználókat az AFS-hez
B. Csatlakoztassa a szabályozót az elektromos hálózatra
C. Kapcsolja be az AFS-t
D. Bemenő és kimenő feszültség kijelző
E. Túlmelegedési védelem
F. Kimenő feszültségtúllépési védelem
G. Kimenő feszültségelégtelenségi védelem
H. Rövidzárlati védelem
I. Késleltetési működés
7. Karbantartás………………………………………………............................................................................…P7
8. Egyebek ………………………………………….........…..……...........................….....................................…P7
Ezzel a szimbólummal jelölt rész információt nyújt a felhasználó egészségi és
biztonsági előirasokra vonatkozó szabályokat illetőleg, az AFS működését és az Ön
adatai biztonságát illetően.
Ez a szimbólum információt, figyelmeztetést vagy egyéb javaslatot jelöl.
This manual suits for next models
3
Table of contents
Languages:
Other Well Controllers manuals

Well
Well AVR-SRV-PERF1000WE-WL User manual

Well
Well AVR-SRV-XTREME 500-WL User manual

Well
Well AVR-REL-500-WL User manual

Well
Well AVR-TRC-AGILE-1000-WL User manual

Well
Well AVR-REL-THUNDER500-WL User manual

Well
Well AVR-SRV-SPRY500BK-WL User manual

Well
Well AVR-REL-POWERUP500-WL User manual

Well
Well AVR-REL-GUARD1000-WL User manual

Well
Well RC-AC-HOMY-WL User manual