manuals.online logo
Brands
  1. Home
  2. •
  3. Brands
  4. •
  5. Westfalia
  6. •
  7. Drill
  8. •
  9. Westfalia DD-HT33/18 User manual

Westfalia DD-HT33/18 User manual

Westfalia Bedienungsanleitung
Nr. 106227
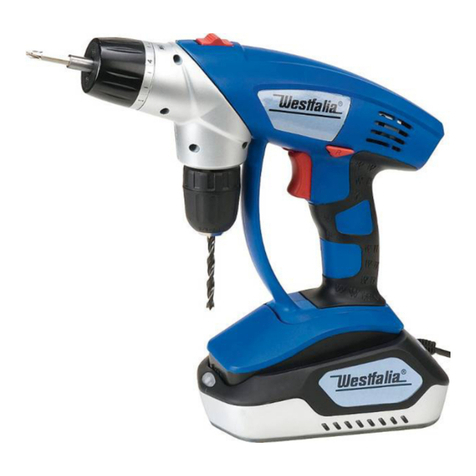
18 V Cordless Driver Drill
Item No. 26 16 44
1
EC Compliance Statement
It is hereby confirmed that the following product:
18 V Cordless Driver Drill
DD-HT33/18
meets the requirements of the following directives:
89/336/EEC:
Directives of the Council for the Harmonization of Legal Provisions of
Member States on Electromagnetic Compatibility. Amended by
RL91/263/EEC, RL92/31/EEC and RL93/68/EEC of the Council
98/37/EEC:
Directives of the Council for the Harmonization of Legal Provisions of
Member States on Mechanical Equipment. Amended by RL 98/79/EEC
This Statement is submitted on behalf of the Importer
Westfalia Werkzeugcompany GmbH
Address:
Werkzeugstr. 1
D-58093 Hagen
by Seplin, Zafer, Management
(Name, First Name, Position)
Place: Hagen
Date: 23 May 2000
Legally binding signature: ________________
2
User Manual
General Safety Precautions
Caution! Positively observe the following fundamental Safety
Precautions when using electric power tools to protect from the risk of
electric shock, injury and fire. Read and observe these instructions
before operating the tool.
- Keep your work area clean.
Cluttered workspaces invite accidents.
- Be aware of your environment.
Do not expose your power tool to rain. Do not use power tools in wet or
moist places. Do not use power tools near combustible fluids or gases.
- Protect from electric shock.
Avoid physical contact with grounded parts, e.g. with pipes, radiators,
kitchen ranges or refrigerators.
- Keep the tool out of reach of children.
Do not allow bystanders, in particular children, to touch the tool or
cable and keep them away from your workspace.
- Store the tool in a safe place.
Store unused tools in a dry and locked place out of reach of children.
- Do not force your tool.
Do not use under-strength tools or attachments for heavy work. Do
not use your tool for works or purposes for which it was not designed.
- Wear suitable work clothes.
Do not wear loose clothing or jewellery. These could be caught by
moving parts. When working outdoors, gloves and skid-proof footwear is
recommended. Wear a hair net if you have long hair.
- Wear goggles.
Use a breathing mask during dust-releasing works.
- Do not abuse the cable.
Do not carry the tool by the cable and do not use the cable to pull out
the plug from the power outlet.. Protect the cable from heat, oil and sharp
edges.
- Secure your workpieces.
Use a clamping device or vice to keep the workpiece in place. This is
safer than using your hand and allows operating the tool with both hands.
3
- Do not overreach.
Avoid an abnormal body posture. Ensure proper footing and keep your
balance at all times.
- Maintain your tool with care.
Keep cutting edges sharp and clean to ensure safe operation.
Follow maintenance instructions and notes on tool changes. Check
plug and cable periodically and have them replaced by approved service
personnel if damaged. Check extension cable periodically and replace
damaged cables. Keep grip dry and free from oil and grease.
- Unplug charger from outlet when tool is not in use.
Unplug the charger when tool is not in use, during maintenance and
when changing tools.
- Do not leave setting keys inserted.
Check before switching the tool on that all keys and setting tools have
been removed.
- Avoid accidental tool starts.
Do not carry the tool plugged into a power outlet with your finger on
the switch trigger. Make sure the power switch is off when connecting the
tool to a power outlet.
- Only use approved and properly marked extension cables outdoors.
- Stay alert at all times.
Be aware of what you are doing. Use common sense. Do not work with
the tool when tired or lacking concentration.
- Check the tool for damage.
Inspect the protection devices or any slightly damaged parts for
flawless and proper functioning before continuing to use the tool. Check
that all moving parts are in working order, do not jam and are undamaged.
All parts must be properly mounted and meet all conditions to ensure
troublefree operation.
[Symbol]
Switch off the tool immediately in the event of any malfunction of
power cable, plug or fuse, if the switch malfunctions or if you notice
fumes or the smell of burning insulant. Also switch the tool off if you
hear any unusual noises.
Special Cautions for Cordless Driver Drills
The driver drill is operated with a battery cartridge. Treat a defective or no
longer chargeable cartridge as special waste. Return it to your dealer for
4
professional disposal or deposit it at a public waste disposal station. Do not
dispose the battery cartridge as normal household waste, in water or fire.
Risk of explosion!
Disconnect the cartridge when the tool is not in use, before maintenance or
when changing tools as e.g. clamping chucks or drill bits.
When working on walls, ceilings, floors etc., make sure that no energy
supply lines (electricity, water or gas pipings) run nearby. Use a suitable
instrument (e.g. metal detector) for this purpose.
Tool and workpiece may become very hot during use. Wait for the tool to cool
down before continuing.
Safety Precautions for Charger and Battery Cartridge
- Only use the charger and battery cartridge supplied by the
manufacturer to prevent the risk of an accident.
- Protect charger, cartridge and driver drill from moisture and humidity,
such as rain or snow.
- Prior to using the charger, ensure that all cables are correctly
connected.
- If damage to cable is found, discontinue use of the charger. Have the
damaged cable replaced by a service centre.
- When the charger is not in use, unplug the charger plug from the
power outlet. Do not pull the plug by the cable.
- If the charger was dropped or subject to other high mechanical stress,
have it checked for damage by an approved service centre before continuing
its use. Any damaged parts must be repaired.
- Treat the battery cartridge with care. Do not drop it or subject to rough
handling.
- Never attempt to repair the charger or battery cartridge yourself. Have
all repairs performed only by an approved service centre to avoid the risk of
an accident.
- Be sure to disconnect the power prior to cleaning or servicing the
charger or battery cartridge.
- Never recharge the cartridge at ambient temperatures below 10°C or
above 40°C.
5
- Do not shortcircuit the cartridge. During a shortcircuit, high-voltage
currents are generated causing the cartridge to overheat, catch fire or burst
with the risk of injury to the user. For this reason, never connect any cables
to the terminals of the battery cartridge. Keep all metal objects (nails, paper
clips, coins etc.) away from the battery terminals. Protect the cartridge from
water or rain at all times.
A damaged and no longer rechargeable battery cartridge should be returned
to your dealer for safe disposal or must be disposed as special waste. Do not
dispose as household rubbish.
- Never throw the battery cartridge into fire or water. Risk of explosion!
Technical Data
Model DD-HT33/18
Nominal Voltage 18V=
Idling Speed 0-550min-1
Chuck Width 1.5 - 10mm
Max. bit diam. 10mm
Noise Level 68dB(A) when idling
Vibration < 2.5 m/s2
Weight 1.8 kg
AC Adapter
Model TH-22-400
Nom. Voltage 230V~50Hz
Nom. Power (primary) 14VA
Nom. Output Voltage 22V
Charging Current 400mA
Charging Time 5 – 7 hours
Thermal Fuse 115°C
Protection Class II
Westfalia reserves the right to make technical and dsign changes without
prior notice as part of product development. All dimensions, instructions and
data in this User Manual are given without guarantee. No legal claims citing
this User Manual will be entertained.
Insertion and Removal of Battery Cartridge
Before removing the battery cartridge from the charger, be sure to unplug
the AC adaptor from the outlet.
To insert the battery cartridge, align the strap on the battery cartridge with
the groove in the housing of the driver drill. The cartridge must slide in
easily. Do not force when inserting the battery cartridge as this indicates
incorrect insertion. Check after assembly that the mounting straps have
clicked into place and the charger is firmly locked into the tool.
6
To remove, press the mounting straps on both sides of the cartridge. Then
remove the cartridge from the tool.
Charging
Before inserting the cartridge into the charger, be sure to unplug the AC
adaptor from the power outlet.
Insert the cartridge firmly into the charger. Connect the power cable to the
charger. Insert the AC adaptor into the power outlet. The charging light
indicates the start of charging. The cartridge is recharged after about 5 to 7
hours.
Before removing the cartridge from the charger, unplug the AC adaptor from
the power source.
Caution! New cartridges are not yet charged and must be charged prior to
use. Never charge the cartridge several times in succession without using
and fully discharging it first. Doing so entails the risk of overloading the
cartridge. This substantially reduces the service life of battery cartridge and
charger.
On completion of charging, never use the charger immediately to charge a
second cartridge. Switch the charger off for 15 min to avoid overheating.
Additional cartridges can be purchased from Westfalia under Item No.
134882.
Description
[Clockwise from top]
1 Driver Bits
2 Mounting Strip
3 Cartridge
4 Trigger Switch
5 Reversing Switch Lever
6 Torque Adjusting Ring
7 High-Speed Clamping Chuck
Insertion of Driver Bits and Drill Bits
Caution! Before replacing driver bits or drill bits, unplug the charger from
the tool to prevent unintended tool starts.
7
The driver drill is equipped with a high-speed clamping chuck for which no
setting key is required. Make sure that driver bits or drill bits are inserted
straight.
To insert driver or drill bits, hold the lower ring of the clamping chuck in
place and turn the sleeve counterclockwise. Open the chuck as far as needed
to insert the bit. Insert the bit shaft fully, then turn the sleeve clockwise to
tighten the chuck.
[Illustration, clockwise from top]
1 To Tighten Chuck
2 Sleeve
3 Ring
To remove the bit from the clamping chuck, hold the lower ring of the chuck
in place and turn the sleeve counterclockwise. Open the chuck until the bit
can be extracted.
Operation
1 Trigger Switch
To switch tool on, press the trigger switch and keep it depressed. Tool speed
can be adjusted by increasing (for higher speed) or decreasing (for lower
speed) the pressure on the switch trigger.
Release the switch trigger to stop.
2 Reversing Switch
Caution! Use the reversing switch only after the tool comes to a complete
stop or tool damage may result.
The reversing switch allows changing the rotation of the tool. For counter-
clockwise rotation, press the lever all the way to the right. For clockwise
rotation, press the lever all the way to the left. When the reversing switch is
in neutral position, the switch trigger cannot be pulled. Use this switch
setting to prevent unintended tool starts.
Adjusting the Fastening Torque
Use the adjusting ring to set the desired maximum torque.
Caution! Be sure to let the tool come to a complete stop before adjusting the
torque or tool damage may result.
8
The fastening torque is at a minimum when the number 1 is aligned with the
pointer. In this setting, the torque clutch will slip already at a very low
torque.
The higher the selected number on the setting ring, the larger the highest
selected torque.
The maximum torque is reached when the pointer is aligned with the drill
symbol. In this setting, the torque clutch does not slip.
[Illustration]
Adjusting Ring
Pointer
Select a lower torque for screwing to avoid damaging the screw or the
workpiece, in particular wood. To drill select a higher torque. Before actual
operation, drive a pilot screw into the workpiece and set the required torque
level accordingly.
Operation
Only use bits that can be clamped firmly into the chuck.
1 Drilling
When working on walls, ceiling, floors or similar, make sure no energy lines
(power, water or gas pipes) run nearby. Use a suitable instrument (e.g. a
metal detector) for detection.
Check that the drill bit is properly inserted before operation. Keep the drill
bit sharp. Use lower rotation speeds for trial drilling. Pre-drill large boreholes
using a small drill bit.
2 Drilling in Wood
Use a wood drill when working on wood. Clamp or fasten the workpiece into
a suitable clamping device. Mark the drill points with a prick punch or nail.
Do not press the tool excessively.
3 Drilling in Metal
To drill metal, use a steel bit. Ensure adequate cooling using a suitable
lubricant. Secure or fasten the workpiece in a suitable clamping device.
Ensure that the workpiece rests smoothly on the bench. Mark the drill point
with a prick punch. Do not press on the tool excessively during drilling; let
the drill speed do the work.
9
Caution! Select a lower speed at the start of the work to prevent slipping.
When the borehole becomes deeper, the drill bit may get stuck. In such a
case, the drilling or the tool may be subject to a large torque. Be sure to hold
the tool firmly and release the trigger switch if the bit is stuck. Set the
reversing switch to reverse rotation to clear a stuck bit.
4 Drilling in Plastic
To drill in plastic, use a steel bit. Proceed as with drilling into wood.
5 Drilling in Rocks, Tiles etc.
Use a stone drill to drill into walls, rocks etc. Do not apply undue pressure
on the tool. See notes on Drilling in Metal.
6 Screwing
Check that screw bits are properly inserted before operation. Do not tighten
screws excessively. Screws could be subject to excessive torque and tear.
7 Screw Insertion
Use the reversing switch to set the direction of rotation to clockwise
direction. To avoid damaging the screw or screw bit, align the screw bit with
the slot of the screw. Apply steadily increasing pressure on the screw while
screwing.
When the screw is fully screwed in, release the switch trigger to avoid
damaging the screw or screw bit. In such a case, a large torque may bear on
the screw bit. Be sure to hold the tool firmly.
8 Unscrewing
Use the reversing switch to set the direction of rotation to counterclockwise
direction. To avoid damaging the screw or screw bit, align the screw bit with
the slot of the screw.
Cleaning and Maintenance
Be sure to disconnect the battery cartridge before working on the tool.
Clean the tool periodically, ideally immediately after finishing the work. Do
not use sharp objects for cleaning. Clean the tool with a dry or slightly moist
cloth. Do not use cleaning agents containing aggressive chemicals. These
could damage the plastic components. Never use kerosene, turpentine,
thinner or similar products.
10
Make sure no fluid enters the tool. Never immerse the tool or parts of it into
a fluid.
Ensure that the ventilation slots are clean and unobstructed at all times.
11
Parts List
1 Screw 15 Screw M5 x 25
2 Screw 16 Combination Switch
3 Right Grip Panel 17 Stranded Cable
6 Motor Cover 18 Left Grip Panel
7 Heat Dissipator 19 Rating Plate
8 MOSFET BUK454 20 Clip
9 Screw M3 21 Screw Bit
10 Spacer 22 Plastic Holder
11 Button for Reversing Switch 23 Battery Terminal
12 Plastic Holder 24 Battery Cartridge
13 Gear/Motor 25 Plastic Insert
14 Clamping Chuck 1.5 – 10mm
12
Westfalia User Manual
13

Other manuals for DD-HT33/18

1

Other Westfalia Drill manuals

Westfalia 77 49 01 User manual

Westfalia

Westfalia 77 49 01 User manual

Westfalia 81 84 55 User manual

Westfalia

Westfalia 81 84 55 User manual

Westfalia PBH 800 User guide

Westfalia

Westfalia PBH 800 User guide

Westfalia 85 93 08 User manual

Westfalia

Westfalia 85 93 08 User manual

Westfalia CT 2408 User manual

Westfalia

Westfalia CT 2408 User manual

Westfalia SBMB 910 User manual

Westfalia

Westfalia SBMB 910 User manual

Westfalia WSB750 User manual

Westfalia

Westfalia WSB750 User manual

Westfalia ASBS 18 User manual

Westfalia

Westfalia ASBS 18 User manual

Westfalia 77 49 01 User manual

Westfalia

Westfalia 77 49 01 User manual

Westfalia WBS300 User manual

Westfalia

Westfalia WBS300 User manual

Westfalia WASB18BL User manual

Westfalia

Westfalia WASB18BL User manual

Westfalia 28 31 19 User manual

Westfalia

Westfalia 28 31 19 User manual

Westfalia BMH 900 User guide

Westfalia

Westfalia BMH 900 User guide
Westfalia 41 32 45 User manual

Westfalia

Westfalia 41 32 45 User manual

Westfalia SN-2010 User manual

Westfalia

Westfalia SN-2010 User manual

Westfalia TMK 008 User manual

Westfalia

Westfalia TMK 008 User manual

Westfalia 93 56 33 User manual

Westfalia

Westfalia 93 56 33 User manual

Westfalia 87 51 61 User manual

Westfalia

Westfalia 87 51 61 User manual

Westfalia SI-92 User manual

Westfalia

Westfalia SI-92 User manual

Westfalia 80 32 99 User manual

Westfalia

Westfalia 80 32 99 User manual

Westfalia 99 20 18 User manual

Westfalia

Westfalia 99 20 18 User manual

Westfalia 88 35 80 User manual

Westfalia

Westfalia 88 35 80 User manual

Westfalia 85 93 09 User manual

Westfalia

Westfalia 85 93 09 User manual

Westfalia 83 72 29 User manual

Westfalia

Westfalia 83 72 29 User manual

Popular Drill manuals by other brands

Hougen HMD918 Series Operator's manual

Hougen

Hougen HMD918 Series Operator's manual

Worx WU152 manual

Worx

Worx WU152 manual

Steelmaster TAP 50 Operator's manual

Steelmaster

Steelmaster TAP 50 Operator's manual

Draper CDH18VLI instructions

Draper

Draper CDH18VLI instructions

Global G3810 Operating Instructions, Parts List, Warranty, & Warranty Repair Center

Global

Global G3810 Operating Instructions, Parts List, Warranty, & Warranty Repair Center

Atlas Copco Secoroc YT29SA Operator instructions

Atlas Copco

Atlas Copco Secoroc YT29SA Operator instructions

Shop fox M1007 instruction manual

Shop fox

Shop fox M1007 instruction manual

Makita 6390DWPE parts list

Makita

Makita 6390DWPE parts list

DeWalt DWD024 instruction manual

DeWalt

DeWalt DWD024 instruction manual

Makita DDF481Z instruction manual

Makita

Makita DDF481Z instruction manual

SteelMax D1 AUTO Operator's manual

SteelMax

SteelMax D1 AUTO Operator's manual

RED ROOSTER RR-13DP manual

RED ROOSTER

RED ROOSTER RR-13DP manual

Ferm FDCD-1440LK user manual

Ferm

Ferm FDCD-1440LK user manual

Teknatool NOVA Voyager instruction manual

Teknatool

Teknatool NOVA Voyager instruction manual

YATO YT-82036 manual

YATO

YATO YT-82036 manual

Hitachi DS 14DSL Handling instructions

Hitachi

Hitachi DS 14DSL Handling instructions

Craftsman 113.213170 owner's manual

Craftsman

Craftsman 113.213170 owner's manual

Ozito PXBRHS-200 instruction manual

Ozito

Ozito PXBRHS-200 instruction manual

manuals.online logo
manuals.online logoBrands
  • About & Mission
  • Contact us
  • Privacy Policy
  • Terms and Conditions

Copyright 2025 Manuals.Online. All Rights Reserved.