manuals.online logo
Brands
  1. Home
  2. •
  3. Brands
  4. •
  5. Wetif
  6. •
  7. Tablet
  8. •
  9. Wetif DT 362 Assembly instructions

Wetif DT 362 Assembly instructions

ENGLISH
THE DT 362
ENGLISH 8
BASIC OPERATION GUIDE
DT 362
signage dtri com
Mobile Tablet
INTRODUCTION
Thank you for acquiring the latest addition to
our line of tablet devices— the DT 362.
Featuring a slim yet robust enclosure, the two-pound
DT 362 with 8.4” TFT display is powered by the Intel®Atom™ processor,
offering optimal combinations of performance and power savings. An external
battery expansion option provides approximately 3-4 hours of additional battery
operation for up to six hours of mobile usage.
The DT 362 is available in Windows®CE, Windows®XP Embedded, Windows®
XP Professional or Linux operating systems. Each software operating system
features web browser, client/ server computing software, media player,
accessories, and applications support.
PACKAGE CONTENTS
One DT 362 with Internal Battery Pack (2200mAh), Stylus, Grips and Screen•
Cover
AC-DC Power Adapter with Power Cord•
Basic Operation Guide•
Major options, depending on conguration:
SPECIFICATIONS
System
Display 8.4” (diag.) TFT LCD with Resistive Touch;
outdoor-viewable option
Display Resolution 800 x 600 (SVGA)
Processor Intel®Atom™ processor Z530 1.6GHz
Memory (RAM) 1GB DDR2 533MHZ
Storage 1GB to 16GB Internal Flash Module,
32GB to 64GB SSD
Software
Operating Systems
Microsoft®Windows®CE;
Windows®XP Embedded;
Windows®XP Pro for Embedded Systems;
Windows®XP Professional or Linux
Network Interface WiFi 802.11a/g/n, Bluetooth 2.0
Input and Control
Buttons
1 Power button, 7 Front buttons and
1 Trigger button
Indicator 1 Power/ Battery status LED and 1 WLAN active LED
Input/Output Ports 1 DC-in Jack; 1 Microphone-in and
1 Headphone-out Jacks; 1 USB 2.0 ports
Audio Built-in speakers
Security
WPA-Personal, WPA2-Personal, WPA-Enterprise,
WPA2-Enterprise, AES-CCMP 128-bit, WEP 128-bit
and 64-bit; 802.1X: EAP-SIM, LEAP, PEAP, TKIP,
EAP-FAST, EAPTLS, EAP-TTLS
Mechanical
Enclosure ABS + PC Plastic and Magnesium-aluminum alloy
Protective Grips Rubber with handstrap
Dimensions
(H x W x D)
7.9 x 9.6 x 0.8 (in);
200 x 240 x 18 (mm)
Weight 1.9 lbs (0.86 kg)
Battery Pack
Internal (2S2P; 7.4V, 2200mAh) or
(2S2P; 7.4V, 3760mAh)
Optional: External (2S2P; 7.4V, 3760mAh)
AC/DC Adapter Input: 100 – 240VAC
Output: [email protected]
Power Cords North America, EU, UK, China and Japan
Stylus Non-electronic tip
Environmental
Regulatory FCC Class B, CE, C-Tick, RoHS compliant
Operating
Temperature
Operation: 0°C - 40°C
Storage: 0°C - 60°C
Humidity 0% - 90% non-condensing
* If your DT 362 contains MSR, camera or scanner module, please refer to
the POS module operation guide for detailed operation.
BOG112509DT362ENG
Desktop Charging Cradle with DC-in•
Power Jack and Ethernet, USB and
optional VGA Ports
External Battery Pack•
Internal High Capacity Battery (3760mAh)• External Battery Charger Kit•
THE DT 362
ENGLISH 23ENGLISH
Button Functions (with Windows XP Operating System)
BUTTON ACTION
Programmable
Programmable, launch soft (on-screen) keyboard (default)
Launch SAS (Secure Attention Sequence)
GenerateCtrl+Alt+Delkeystoinvokethesecuritywindowsdened
under Windows XP
Programmable,
Change display orientation (portrait/ landscape) (default)
Programmable, system utility menu (default)
Programmable,
As scanner trigger when equipping with the scanner module
Push/release typically enters Standby mode, or Push/release exits
Standby mode or restarts device (software dependent)
Push and hold (over 4 seconds) invokes hardware shutdown
The DT 362 (with Windows XP)
Battery/Power LED
Wireless LED
Stylus
For locking the MSR module
Button ManagementWireless Network Settings
Calibration
Internal Battery Switch
(back panel)
Power/Battery LED Status:
Blue indicates the battery is 25% to 100% charged•
Blinking blue indicates the battery is charging•
Orange indicates that the battery is between 11% to 25%•
Blinking Orange indicates that the battery is below 10%•
Precautions
Always exercise care when operating and handling the DT 362.
•
Do NOT apply excessive pressure to the display screen.
•
We recommend using the Stylus provided to keep the screen clean.
•
Avoid prolonged exposure of the display panel to any strong heat source.
•
Wherever possible, the DT 362 should face away from direct light to
reduce glare.
If the AC-DC power adapter is used to recharge or power the device, do
•
NOT use any AC-DC adapter other than the one provided with the device
or acquired from the manufacturer or its partners.
In the unlikely event that smoke, abnormal noise, or strange odor is present,
•
immediately power off the DT 362 and disconnect all power sources.
Report the problem to your device provider immediately.
Never attempt to disassemble the DT 362, as this will void the warranty.
•
THE DT 362
Basic Features
The DT 362 wireless tablet integrates a bright and responsive touch display,
two USB ports, and embedded networking elements such as wireless LAN and
Bluetooth. The primary device is complemented by a suite of accessories,
including battery expansion, docking cradles, and carrying cases, for a
comprehensive user experience.
A DT 362 typically integrates an 802.11a/g/n wireless LAN (WLAN) adapter
that may connect to other wireless devices or access points. If your DT 362
does not come with such a network adapter, please consult your device provider
to establish the desired network connectivity.
1
8
9
2 3
4
5
6
8
9
7
Input/ Output Ports
USB Ports
Headphone Jack
Microphone Jack
DC Power Input
A
G
C
B
A
B
C
D
1234567
Battery and Power Meter
THE DT 362
ENGLISH 45ENGLISH
OPERATION
Internal Battery Switch
To prevent battery drain during shipping and extended storage, the internal
battery may be turned off. To turn on the internal battery, push the battery
button switch (on the back panel) to the “up” position (see page 2 for photo).
The internal battery pack has to be turned on for it to operate, be charged,
and for the optional external battery pack to function.
Powering ON and OFF
To activate the DT 362, push and quickly release the Power Button to the
left of the front bezel. The display will come on in a few seconds. To put the
DT 362 in Standby mode, push and quickly release the Power Button. To
turn the DT 362 off for extended storage, power off the device safely using
any software function that “shuts down computer” provided in the software
operating system.
NOTE: The battery packs shipped with your device may be low in
power—please use the AC-DC adapter with the DT 362 when setting up
thedeviceforthersttimetofullychargetheinternalbatterypack.Youmay
charge the external battery pack with it attached to the DT 362, or with
the optional external battery charger kit.
NOTE: When the battery pack(s) is (are) charging, the blue-colored Battery
LED should blink slowly. If plugging in the AC-DC adapter does not trigger this
blinking activity and the LED stays dark, the battery pack(s) may have been
drained substantially. Try unplugging/ replugging the AC-DC adapter to the
DT 362 a few times to activate the charging process.
NOTE: To conserve power, use (push and quick release) the Power Button to
putthedevicein“Standby”modewhilenotinuse.Pushingbrieyonthesame
button will wake up the system within seconds.
NOTE: Avoid using the Power Button (“hold 4+ seconds” feature) to turn off
the device—this form of hardware shutdown is intended to be a means of
recovery from device lockups, and not as normal operation.
Start Up
If the power up (from Standby or otherwise) is successful, the appropriate
interface will be displayed after a launch sequence of several seconds. The
wireless LAN connection may take 10-15 seconds to be established.
Conguring the DT 362
Thedevicemaybeconguredusingtheutilitiesandmethodsdictatedby
thesoftwareoperatingsystem.TheDT362shouldbecongurablefor
variouspropertiessuchasuserproles,networkfeatures,andseveralsystem
elements.
Calibration
The touch display for the DT 362 is calibrated before shipping. In the
eventthatthecalibrationhasbeenmodiedorisunsatisfactory,therespec-
tive calibration routines (e.g., PenMount (PM) for Windows XP) to calibrate
the touch interface may be used. Such applications are typically executed
through touch input via Stylus or through mouse click via a USB mouse.
Wireless Networking
Wireless LAN
The DT 362 is often delivered with an embedded (user-inaccessible)
802.11a/g/n WLAN adapter equipped with a hidden custom antenna.
T
• hrough the support of typical WLAN adapters, the DT 362 should be
able to detect all 802.11 access points in the vicinity for you to select the
access point of your choice for connection.
T
• he SSID and WEP/WPA/WPA2 (if enabled) parameters on the DT 362
and the access points have to match. The SSID is case-sensitive and it is
recommended that you enable WEP/WPA/WPA2 encryption (or advanced
alternatives) for secure access.
W
• hen WEP/WPA/WPA2 is enabled, you may need to consult your network
administratororyournetworkingequipmentliteraturetoproperlycongure
associated settings such as Authentication mode, etc.
R
• efer to the access point operating manuals for setting up the 802.11
access points.
THE DT 362
ENGLISH 67ENGLISH
Bluetooth
The DT 362 features a built-in Bluetooth adapter that operates on the
MicrosoftWindowsBluetoothprotocol.TheBluetoothcongurationapplication
is invoked from the System Tray or from the Control Panel for Windows XP.
Under Windows CE, it can be executed from the Control Panel. Follow the
instructionsandoptionsprovidedwithintheapplicationtocongureand
invoke Bluetooth connectivity with the corresponding peripherals.
NOTE: Bluetooth devices or accessories that are not compatible with the
Microsoft Windows Bluetooth protocol may not work with the DT 362.
Button Management
Where supported by software, many of the hard buttons on the DT 362
are programmable to perform a function of the user’s choice. The exception
is the Power Button and the SAS Button. To activate the button re-assignment
application, invoke the Button Agent application, e.g., in Windows XP
Embedded .
Brightness Control
Wheresupportedbydevicermwareandsoftware,ahardbuttonmaybe
engaged to manipulate the display brightness. Press the System Menu button
(Button 7) on the front of the DT 362. The System screen will display a
Brightness control section with up and down arrows that can be activated
with the stylus.
Battery and Power Management
The DT 362 is equipped with an internal 2200mAh Li-Ion battery pack that
is capable of supporting approximately 1.5–2 hours of continuous operation.
With the optional internal 3760mAh battery and an external battery pack that
clips (hot-pluggable) onto the back of the device, the maximum period of
continuous operation will be approximately 3–4 hours. The period between
batteryrechargescanbesignicantlylengthenedbyputtingthedevice
into Standby mode through the Power Button (see Buttons Function Table)
whenever the device is not in use. Depending on the operating software, the
DT362mayalsobeconguredtoentervariouspower-savingmodesvia
the Power Button or through timed entry.
Desktop Cradle
The DT 362 is complemented by an optional Desktop Cradle for support,
pass-through charging, and connection to a range of USB peripherals,
including keyboard and mouse. The Cradle offers the following interfaces: a
DC-in port for the AC-DC adapter, an Ethernet port, a VGA port (optional),
and USB ports. Always seat the DT 362 securely onto the cradle. The
cradle must be powered by the AC-DC adapter for the Ethernet and USB
ports to function. The battery packs on the DT 362 may be recharged by
connecting the AC-DC adapter directly to the DC-in port on the DT 362 or
through the DC-in port on the Desktop Cradle while the DT 362 is docked
to the Cradle.
USING THE DT 362
Memory conguration
TheDT362isavailableinvariousmemorycongurations.Theycurrently
rangefrom:1GBto16GBofashmemoryand1GBofRAM.
Peripherals Support
Through its USB ports, the DT 362 supports a wide range of USB-based
peripherals. These peripherals are applicable for software installation,
applications storage, data storage, and system software recovery and
updates. The DT 362 is also compatible with custom mountable cradle
options. These securable and mountable cradles provide an interface to VESA
mounts and arms, and to ports that may include USB, Ethernet and pass-
through power.
Remote Management
Dependingonsoftwareconguration,theDT362canbecentrally
managed for asset monitoring and for software control. Please consult your
device provider.
WETIF Industrie EDV Telefon DE +49 8142 448976-0
Senserstraße 3 Telefon AT +43 664 28 68 223
D - 82140 Olching [email protected] www.wetif.com
Techn. Änderungen ohne Vorankündigung und Irrtum vorbehalten. Alle Rechte geschützt.

Other Wetif Tablet manuals

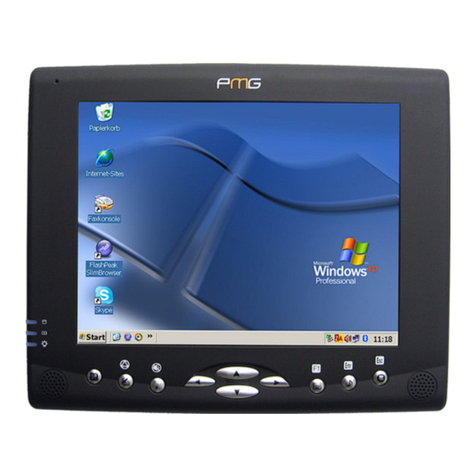
Wetif TE80 User manual

Wetif

Wetif TE80 User manual

Wetif XT1100 User manual

Wetif

Wetif XT1100 User manual

Wetif IM133 Installation and operation manual

Wetif

Wetif IM133 Installation and operation manual

Wetif IA812 User manual

Wetif

Wetif IA812 User manual

Wetif DT 392i Assembly instructions

Wetif

Wetif DT 392i Assembly instructions

Wetif PMG102 User manual

Wetif

Wetif PMG102 User manual

Wetif DT 312 Assembly instructions

Wetif

Wetif DT 312 Assembly instructions

Wetif DT313H User manual

Wetif

Wetif DT313H User manual

Wetif DT313Y Assembly instructions

Wetif

Wetif DT313Y Assembly instructions

Wetif RMI80-D User manual

Wetif

Wetif RMI80-D User manual

Wetif ID97 User manual

Wetif

Wetif ID97 User manual

Wetif TIG97 User manual

Wetif

Wetif TIG97 User manual

Wetif PMG84 User manual

Wetif

Wetif PMG84 User manual

Wetif PMA10 User manual

Wetif

Wetif PMA10 User manual

Wetif RT-101 User manual

Wetif

Wetif RT-101 User manual

Wetif DT301Y Assembly instructions

Wetif

Wetif DT301Y Assembly instructions

Wetif FTP84 User manual

Wetif

Wetif FTP84 User manual

Wetif R10ID8M-RTXX User manual

Wetif

Wetif R10ID8M-RTXX User manual

Wetif TE101 User manual

Wetif

Wetif TE101 User manual

Popular Tablet manuals by other brands

Mason F07 quick start guide

Mason

Mason F07 quick start guide

RCA W122SC24 quick start guide

RCA

RCA W122SC24 quick start guide

ViewSonic ViewPad 7x Specifications

ViewSonic

ViewSonic ViewPad 7x Specifications

Siemens SIPIX SD100 operating manual

Siemens

Siemens SIPIX SD100 operating manual

TrekStor PRIMETAB P10 operating instructions

TrekStor

TrekStor PRIMETAB P10 operating instructions

i-onik mobile TP8-1200QC quick start guide

i-onik mobile

i-onik mobile TP8-1200QC quick start guide

Nevir NVR-TAB9 S2 user manual

Nevir

Nevir NVR-TAB9 S2 user manual

ViewSonic V1100 - Tablet PC Travel Bundle user guide

ViewSonic

ViewSonic V1100 - Tablet PC Travel Bundle user guide

Medion LIFETAB E731x overview

Medion

Medion LIFETAB E731x overview

Overmax qualcore 1020 3G user manual

Overmax

Overmax qualcore 1020 3G user manual

Lenovo TAB S8-50 Safety, warranty & quick start guide

Lenovo

Lenovo TAB S8-50 Safety, warranty & quick start guide

Samsung Galaxy Tab 10.1 user manual

Samsung

Samsung Galaxy Tab 10.1 user manual

Zte V72M Quick user guide

Zte

Zte V72M Quick user guide

Amica PBseries5VI503FTB5SRC Information manual

Amica

Amica PBseries5VI503FTB5SRC Information manual

Gigabyte S1185 user manual

Gigabyte

Gigabyte S1185 user manual

Asus TF502T user manual

Asus

Asus TF502T user manual

NOOK HD+ Quick start quide

NOOK

NOOK HD+ Quick start quide

HP Pro Tablet 610 Maintenance and service guide

HP

HP Pro Tablet 610 Maintenance and service guide

manuals.online logo
manuals.online logoBrands
  • About & Mission
  • Contact us
  • Privacy Policy
  • Terms and Conditions

Copyright 2025 Manuals.Online. All Rights Reserved.