WHD MP 55 L User manual

E-Mail: [email protected]
Web: www.whd.de
Bedienungsanleitung
Passend zu MP 55 L
Art.Nr.:
103-016-03-001-00
WHD - Wilhelm Huber+Söhne mbH+Co.K
Bismarckstr. 19
78652 Deißlingen
Tel. Zentrale 0 74 20 / 8 89-0
Fax Zentrale 0 74 20 / 8 89-51
Dieses WHD-Produkt erfüllt die
CE-Kennzeichnungs-kriterien. Die
Konformitätserklärung kann beim
Hersteller angefordert werden.
Wir nehmen am INTERSERO -Verbund teil.
Die Gerätekomponenten können zur Entsorgung der
Kunststoff- und Metallwiederverwertung sowie dem
Recycling von Elektronikteilen zugeführt werden.
Ausgabe des Dokuments
(Technische & optische
Änderungen vorbehalten)
06.11..2017
Sicherheits-
Informationen
Bei unsachgemäßer Behandlung
entfällt die Garantie!
Beachten Sie zusätzlich zu den Hin-
weisen dieser Anleitung die landes-
spezifischen Sicherheitsvorschriften.
Verwendung:
Im Innenbereich.
Einsatztemperatur: +5 bis + 30°C.
Das Gerät ist nicht geeignet zum
Betrieb im Außenbereich.
inweis:
Fehlermeldung beim Einstecken des
iPhone
Bitte installieren Sie an Ihrem erät
die Betriebssystem-Software iOS 5.1
oder höher.
! Tragen Sie Sorge dafür, dass Ihr
erät immer auf dem aktuellsten
Software-Stand ist.
Führen Sie bei Bedarf ein Update
durch.
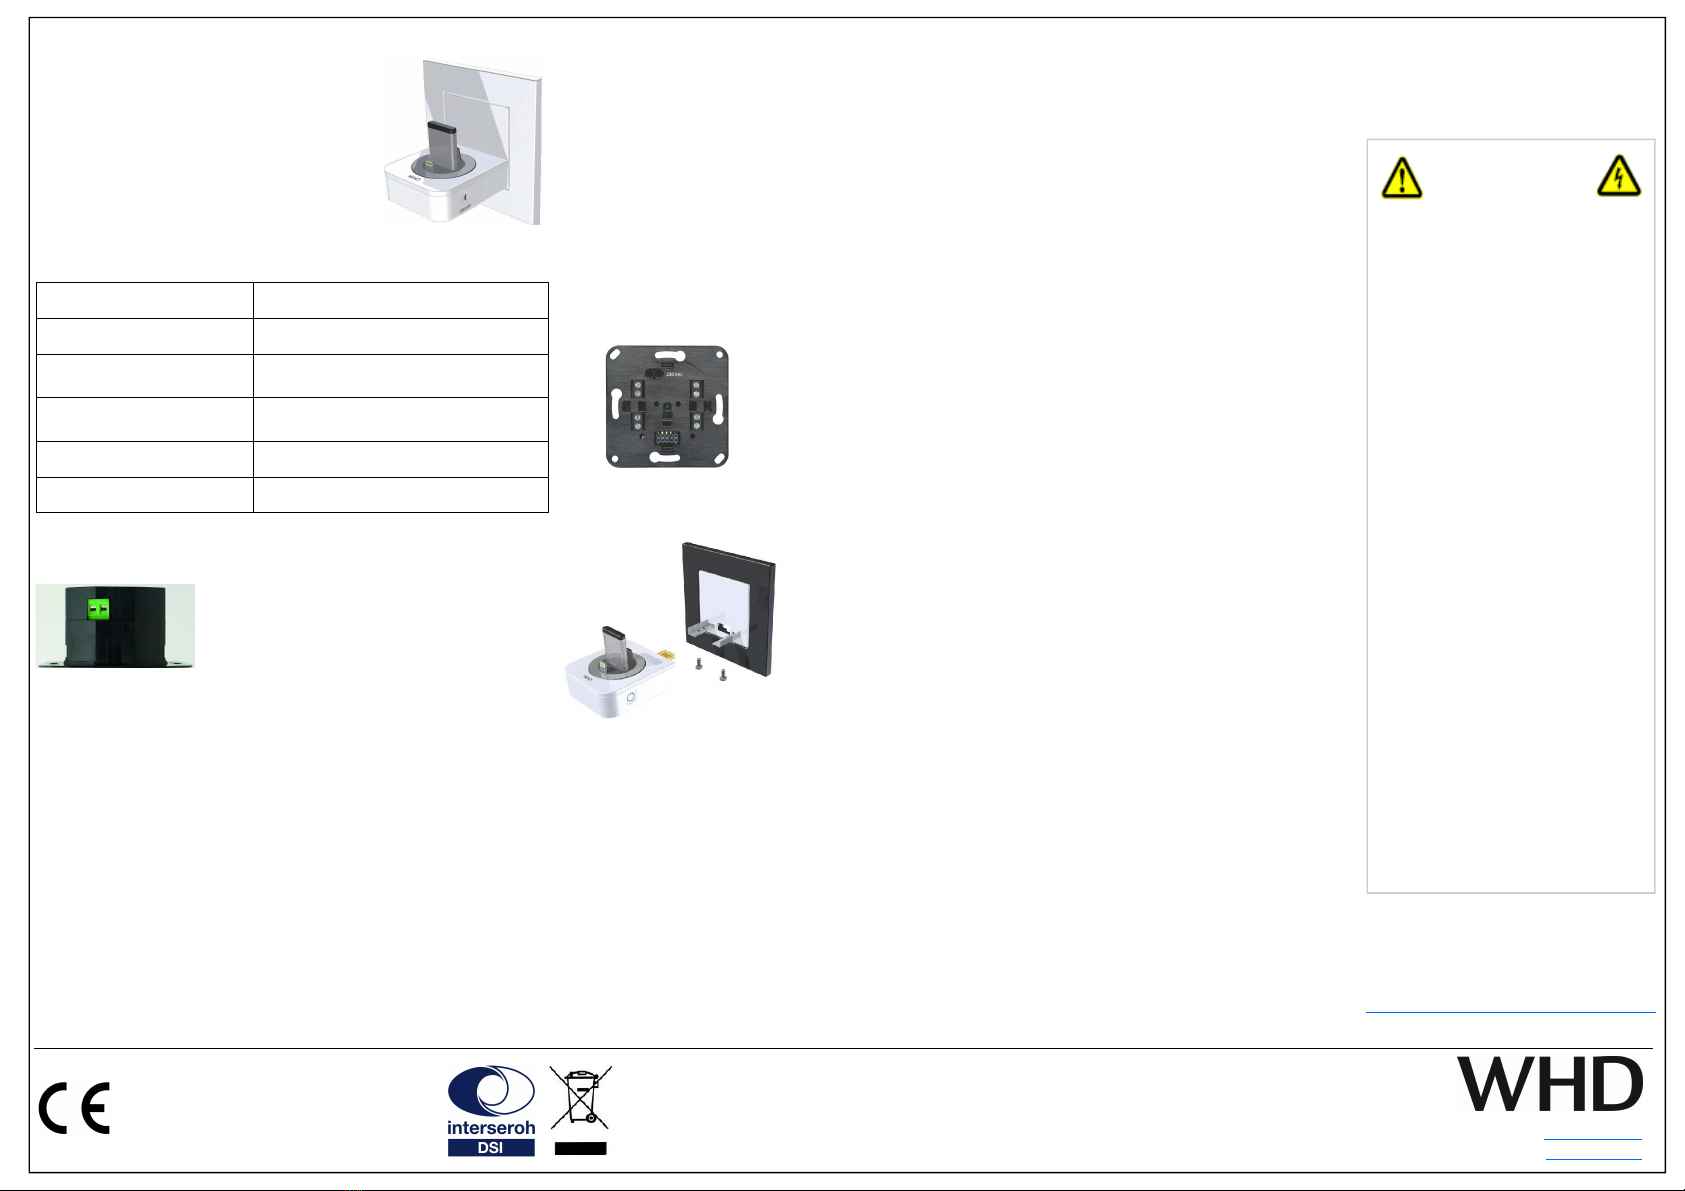
Montage in Schalterprogramm
Der MP 55 L wird in UP-Dosen mit 68 mm Durchmesser und einer Tiefe
von 63 mm montiert. Dazu liegen vier PT Schrauben 3 x 14 bei.
Schrauben Sie die UP-Einheit des MP 55 L mit den beiliegenden PT-
Schrauben in die UP-Dose.
Nachdem die UP-Einheit montiert ist, werden der Rahmen und die mitge-
lieferte Frontplatte aufgesteckt.
! Höhendifferenzen zwischen Frontplatte und Rahmen können durch mit-
gelieferte Ausgleichsrahmen ausgeglichen werden. Die Abmessungen der
Frontplatte sind 55 x 55 mm.
Schieben Sie den Ausleger vorsichtig in die dafür vorgesehene Halterung. Es
ist darauf zu achten, dass der 10-polige Stecker nicht verbogen wird.
Schrauben Sie dann den Ausleger mit den 2 mitgelieferten Schrauben M3
an der Unterseite fest.
inweis:
Die Rahmen sind nicht Bestandteil des eräts. Sie müssen je nach gewähl-
tem Schalterprogramm beim Elektro- roßhändler bestellt werden.
Betrieb & Bedienung
Vielen Dank für den Kauf unseres unter-Putz-Ladegerätes für Smartphones.
Nehmen Sie sich bitte einen Moment Zeit für diese kurze technische Information.
Allgemeine inweise:
Produktregistrierung und erweiterte
ewährleistung unter:
www.whd.de/Produktregistrierung
Technische Daten MP 55 L
Versorgungsspannung : 230 VAC
Ladefunktion für : USB
Apple Lightning Connector
AC Leistungsaufnahme : < 0,5 VA Standby
6 VA bei Nennleistung
Abmessungen : 71mm(H) x 71mm(B) x 50mm(T)
ewicht : 0,15 kg
Anschluß der Stromversorgung
Schließen Sie die 230 V-Stromversorgung an.
Stecken Sie dazu das Kabel in die Klemmen
und schrauben es mit den an der Frontseite
zugänglichen Schrauben fest.
inweis:
Zur zusätzlichen Isolation liegt der Silikonschlauch bei. Schneiden
Sie diesen in zwei gleichlange Stücke.
Führen Sie nun die Adern (L) und (N) des 230V-Kabels durch den
vorgesehenen Schutzschlauch hindurch.
Legen Sie dann die Adern auf die Anschlussklemme auf.
Führen Sie den Silikonschlauch so weit als möglich an die Klemmen
heran.
Achtung:
Beim Anschluss der Versorgungsspannung (230 VAC/50Hz) ist die
elektrische Anlage stromlos zu schalten.
! Die Versorgungsleitung muss mit Sicherungsautomat (max. 16A)
abgesichert sein.(c).
Betrieb & Bedienung
Der MP 55 L ist nach Anschluss der Versorgungsspannung ständig zur Ladung externer eräte be-
triebsbereit.
Es gibt zwei Möglichkeiten, ein Mobilgerät zu laden:
- Über den Lightning-Stecker für iPhones
- Über den USB-Anschluss für Smartphones anderer Hersteller
Drehen Sie den Drehteller an der Stütze bis der jeweils erforderliche Stecker vorne steht.
Entfernen Sie die Schutzhülle von Ihrem Smartphone und stecken Sie das erät auf.
Montagezubehör: - 4 x PT-Schraube 3x16
- Silikonschlauch (Länge: 250 mm)
- 4 x Papp-Abstandsring
- 2 Schrauben M3 zur Befestigung des Auslegers

WHD - Wilhelm Huber+Söhne mbH+Co.K
Bismarckstr. 19
D-78652 Deißlingen
Tel. Zentrale +49 74 20 / 8 89-0
Fax Zentrale +49 74 20 / 8 89-51 E-Mail: [email protected]
Web: www.whd.de
This product supports all CE-
marking criteria. The declaration of
conformity certificate can be ob-
tained from WHD.
W D are members of the INTERSERO association.
We participate in the dual system as well as other
industry-specific solutions. Therefore, plastic, metal
and electronic parts can all be recycled.
Manual applicable for
MP 55 L
Product-No.:
103-016-03-001-00
Version
(Technical and optical
modifications reserved)
06.11.2017
Safety & Security
Informations
Improper handling may void war-
ranty.
In addition to this guidance please
comply with your own country-
specific safety & security regulations.
Intended Use:
Indoors, ceiling or wall mounting
Operating temperature:
+5 ... + 30 °C.
The device is not suitable for out-
door operation.
Note:
Error message when plugging the
iPhone:
Please install to your device's opera-
ting system software iOS 5.1 or la-
ter.
Make sure that your device is always
on the latest software version.
If necessary, run an update.
Operation
Thank you for buying our compact in-wall mounted charger for smartphones.
Please read this manual carefully, especially the safety and security information.
Note:
Product registration and extended war-
ranty at:
www.whd.de/Produktregistrierung
Specifications MP 55 L
Supply Voltage : 230 VAC
Connection via : USB
Apple Lightning Connector
AC Power : < 0,5 VA Standby
6 VA rated power
Dimensions : 71mm(H) x 71mm(B) x 50mm(T)
Weight : 0,15 kg
Connecting power supply
Connecting the 230V AC cable:
Plug the cable into the terminal and screw it
firmly with the screws on the front.
Note:
To protect the device against electromagnetic interference there is
the silicone tube.
Cut it into 2 pieces and run the wires (L) and (N) of the 230V cable
through the tubes before connecting them to the terminal.
Push the silicone tube as far as possible onto the terminal.
Attention:
When connecting the supply voltage (230V ~ / 50Hz), the electrical
system must be voltage free.
! The supply line must be protected with circuit breaker (max. 16A).
Mounting
The MP 55 L is mounted in a wall-box with 68 mm diameter and depth of
63 mm. Four PT screws, 3 x 16 are included.
Screw the UP unit of the MP 55 BTL supplied with the PT-screws into the
wall outlets.
After the flush-mounted unit has been installed, the frame and the supplied
front panel can be clipped-on.
! Height differences between the front panel and frame can be offset by a
compensation frame. The dimensions of the front panel are 55 x 55 mm.
Now the cantilever must be slipped-in carefully. Ensure that the 10-pin
connector is not stressed or bent.
The cantilever must now be fixed with the two M3 screws at the bottom.
Note:
The frame is not part of the device. It must be ordered according to the
chosen program switches from the switch manufacturer.
Operation
By connecting the MP 55 L to the power supply the device is now ready for operation.
There are two possibilities to connect a mobile device:
- with Lightning connector for iPhones
- with USB connector for Smartphone’s of other manufacturers
Adjust the turntable on the support device until the required connector is in front.
Remove the protective cover from the phone and plug it on.
Mounting Accessories: - 4 pieces. PT screws 3x16
- Silicone tube (length: 250 mm)
- 4 pieces. cardboard distance rings
- 2 screws M3 for fixing the cantilever
This manual suits for next models
1
Table of contents
Languages:
Popular Batteries Charger manuals by other brands

MINN KOTA
MINN KOTA MK 230PCL owner's manual

Ecotap
Ecotap DC 30 manual

Quick Charge
Quick Charge QPA operating instructions

Anton/Bauer
Anton/Bauer Interactive 2000 PowerCharger owner's manual

Freeloader
Freeloader SIXER FL5060 user manual

GSL electronics
GSL electronics VDBC1224-20-NG-2 operating instructions