manuals.online logo
Brands
  1. Home
  2. •
  3. Brands
  4. •
  5. Whittier Wood
  6. •
  7. Indoor Furnishing
  8. •
  9. Whittier Wood 1525 User manual

Whittier Wood 1525 User manual

P.O. Box 2827
Eugene, OR 97402 USA
Production Code:
9/20
1525bModel #
Model #
Model #
1535b
1545b1547b
1537b
1527b
24" Wide
30" Wide
36" Wide
36" x 72"
36" x 84"
30" x 72"
30" x 84"
24" x 72"
24" x 84"
•Before you begin your project, completely read the Assembly Instructions.
•Periodically inspect your furniture for any loose glue joints, screws or
any other problem that might affect the stability of your furniture.
Tighten or repair as needed.
DESIGN SUBJECT TO CHANGE WITHOUT NOTICE.
IMPORTANT NOTES:
•For
•This assembly requires two people.
normal household use only. Not recommended for commercial use.
•Do not climb, sit or stand on this piece of furniture.
•Do not overload the shelves.
•Unload items before you move this unit.
•Before you load or move this unit, tighten all screws and supports.
•For maximum stability, attach unit to the wall using the enclosed
hardware as per instructions and supports.
WARNING
Drilling, sawing, sanding or machining wood products can expose you to
wood dust, a substance known to the state of California to cause cancer.
Avoid inhaling wood dust or use a dust mask or other safeguards for
personal protection.
For more information go to: www.p65warnings.ca.gov/wood
This product can expose you to chemicals, including formaldehyde,
which are known to the State of California to cause cancer.
For more information go to: www.p65warnings.ca.gov/furniture
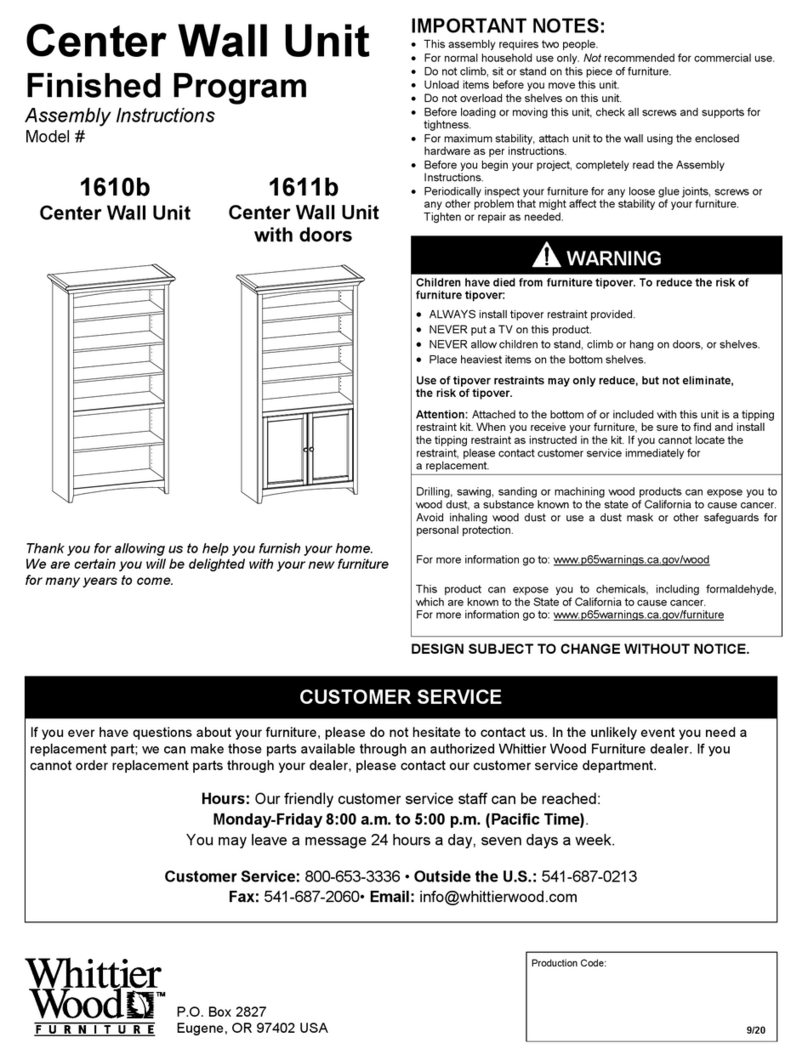
Thank you for allowing us to help you furnish your
home. We are certain you will be delighted with
your new furniture for many years to come.
CUSTOMER SERVICE
If you ever have questions about your furniture, please do not hesitate to contact us. In the unlikely event you need a
replacement part; we can make those parts available through an authorized Whittier Wood Furniture dealer. If you
cannot order replacement parts through your dealer, please contact our customer service department.
Hours: Our friendly customer service staff can be reached:
Monday-Friday 8:00 a.m. to 5:00 p.m. (Pacific Time).
You may leave a message 24 hours a day, seven days a week.
Customer Service: 800-653-3336 • Outside the U.S.: 541-687-0213
Fax: 541-687-2060 • Email: info@whittierwood.com
Assembly Instructions
24"- 36"W McKenzie Alder Bookcases
with Doors: 72"+ 84"H
Finished Program
Children have died from furniture tipover. To reduce the risk of
furniture tipover:
• ALWAYS install tipover restraint provided.
• NEVER put a TV on this product.
• NEVER allow children to stand, climb or hang on doors, or shelves.
• Place heaviest items on the bottom shelves.
Use of tipover restraints may only reduce, but not eliminate,
the risk of tipover.
Attention: Attached to the bottom of or included with this unit is a tipping
restraint kit. When you receive your furniture, be sure to find and install
the tipping restraint as instructed in the kit. If you cannot locate the
restraint, please contact customer service immediately for a replacement.
Page 2 — 24-36W_72-84H-w/Doors_Finished — 9/20
Before you begin to assemble this unit, identify each part and
make sure the quantities received match what is on this list.
Bookcase Finish
Please note the finish of the bookcase for replacement part orders.
Bookcase finish options are subject to change.
Glazed
Antique
Cherry
Hazelnut
Paint
Two-Tone
Stain Natural
Alder
Snowbound
SW 7004
Snowbound
SW 7004
Natural Alder
Fieldstone
Aged White
SW 9180
Aged White
SW 9180
Natural Alder
Silverplate
SW 7649
Silverplate
SW 7649
Natural Alder
Tricorn Black
SW 6258
Tricorn Black
SW 6258
Natural Alder
GAC CAF FST HAZ
SN AW SL TB
SNN AWN SLN TBN
NA
McKenzie Alder Bookcase with Doors Program — Parts List
Part Description
Quantity (by Model #)
1525b 1535b 1545b 1527b 1537b 1547b
A 4
16
16
5
B
C
D
G
H
J
K
L
M
Na
O
TB
Adjustable Shelf
20
Shelf Bracket
20
8 8 8 8 1010
#6 x 1/2" Undercut Screw
Top Assembly (attached) 1
#8 x 1" Pan Head Screw (inserted)
Nylon Insert (inserted) 4
Door (installed) 2
Hinge (installed) 4
Base Plate (installed) 4
Knob (installed) 2
#8 x 1-1/2" Machine Screw
Tuscan (installed)
#8 x 1-1/4" Pan Head
Screw (inserted)
2
22
Bookcase Tipping Restraint (attached) 1
USlotted Leveler (inserted)
Ua Leveler Adjustment Key
(attached to Owner’s Manual)
4
1
Tools Required: Phillips Screwdriver, Rubber Mallet or Padded Hammer and a Pencil
Tools Provided: Leveler Adjustment Key in the Zip bag taped to the Owner’s Manual and Safety Guide
Page 3 — 24-36W_72-84H-w/Doors_Finished — 9/20
McKenzie Alder Bookcase with Doors
Assembly Instructions
1525 (Shown) A
D
A
A
J
Fig. 1
Fig. 1a
B
C
Fig. 3
Continued on Page 4
1.
To install the adjustable shelves. See Figure 1a:
2. Place the bookcase at its final destination. Use the Leveler Adjustment
Key (Ua), found in the Zip bag taped to the Owner’s Manual and
Safety Guide to rotate the Slotted Levelers (U) on the bottoms of the
legs until the unit is level. See Figures 1 and 2.
Determine where you want to place the Adjustable Shelves (A).To support each shelf, tap the Shelf
Brackets (B) into the four holes with the flat side down and install the shelf. You may secure the
bracket to the shelf by inserting #6 x 1/2" Undercut Screws (C). Repeat for each shelf.
If there is a problem with a Hinge (K), do not attempt to remove it. Contact Customer Service first.
Side adjustment
To move the door towards the side panel, rotate screw '2'
counter-clockwise. To move it away, rotate screw
'2' clockwise.
Depth Adjustment
Loosen screw '1' and adjust door. Re-tighten screw.
Height Adjustment
Loosen screws '3' and adjust door. Re-tighten screw.
3. The door may need to be adjusted so that all the spaces between the doors and unit sides are
equal. To make those adjustments, follow the instructions in Figure 3.
3
1
2
3
UU
Fig. 2
Loose
Tight
Ua
U
Page 4 — 24-36W_72-84H-w/Doors_Finished — 9/20
Bookcase Tipping Restraint Instructions
Before you begin this assembly, identify each part and make sure the quantities received match what is on this
list. If you need to replace a part, contact Whittier Wood Furniture customer service and refer to the following
list for its name and letter code.
Part Description Quantity
A Cam Buckle and Short Strap (installed) 1
BPlastic Bracket (installed) 1
C 1" x 1000mm Long Strap (installed) 1
D#8 x 3" Pan Head Screw 2
F Washer (installed) 1
G#8 x 5/8" Pan Head Screw
2
(1 inserted)
H#8 x 1-1/4" Pan Head Screw 1
I“L” Angle Bracket 1
If you have a stone or tile floor or do not wish to drive screws into the corner of the baseboard
and floor see the instruction included inside the tipping restraint kit for an alternate installation.
4.
Fig. 4
D x 2
Fig. 4a Wall
Floor
D
Floor
Baseboard
Decide where you want to place the bookcase in your room. Mark the baseboard with a pencil
mark directly behind the location where the tipping restraint is attached to your item. Move the
item away from the wall far enough to allow you to access the spot where the baseboard meets
the floor. Position the straps and Plastic Bracket (B) as shown in Figures 4 and 4a with the
angled corners of the Plastic Bracket (B) firmly placed against the seam of the baseboard and
floor. Attach by driving #8 x 3" Pan Head Screws (D) through the holes in the Plastic Bracket (B)
into the seam below the baseboard where it meets the floor. See Figures 4 and 4a.
Page 5 — 24-36W_72-84H-w/Doors_Finished — 9/20
Move the item back into position against the wall and reach underneath the bookcase to grasp
the loop in the free end of the strap. Pull the free end of the strap until portion between the Cam
Buckle (A) and the bottom of the item is tight. See Figures 5 and 5a. If you need to move the
bookcase reach beneath and locate the buckle which connects the two sections of the strap and
depress the release lever, then pull on the section of strap that is between the buckle and the
bottom of the furniture until there is enough slack to allow you to pull the item away from the wall.
5.
Fig. 5a
Fig. 5
C
Wall
Floor

This manual suits for next models

5

Other Whittier Wood Indoor Furnishing manuals

Whittier Wood 2075AFGACc User manual

Whittier Wood

Whittier Wood 2075AFGACc User manual

Whittier Wood 2072AEGSP User manual

Whittier Wood

Whittier Wood 2072AEGSP User manual

Whittier Wood McKenzie 1113GACa User manual

Whittier Wood

Whittier Wood McKenzie 1113GACa User manual

Whittier Wood 1191RGBa User manual

Whittier Wood

Whittier Wood 1191RGBa User manual

Whittier Wood McKenzie Alder 1614aAUF User manual

Whittier Wood

Whittier Wood McKenzie Alder 1614aAUF User manual

Whittier Wood 4519AFDH User manual

Whittier Wood

Whittier Wood 4519AFDH User manual

Whittier Wood 2657AFGAC User manual

Whittier Wood

Whittier Wood 2657AFGAC User manual

Whittier Wood 1121GACe User manual

Whittier Wood

Whittier Wood 1121GACe User manual

Whittier Wood 1221AFLSOc User manual

Whittier Wood

Whittier Wood 1221AFLSOc User manual

Whittier Wood 1501GSPb User manual

Whittier Wood

Whittier Wood 1501GSPb User manual

Whittier Wood 3816DUET User manual

Whittier Wood

Whittier Wood 3816DUET User manual

Whittier Wood 1262AFLSOa User manual

Whittier Wood

Whittier Wood 1262AFLSOa User manual

Whittier Wood 1306CAFd User manual

Whittier Wood

Whittier Wood 1306CAFd User manual

Whittier Wood 1554AEGAC User manual

Whittier Wood

Whittier Wood 1554AEGAC User manual

Whittier Wood 1116DUETc User manual

Whittier Wood

Whittier Wood 1116DUETc User manual

Whittier Wood 2901AFGAC User manual

Whittier Wood

Whittier Wood 2901AFGAC User manual

Whittier Wood 1610AFCAF User manual

Whittier Wood

Whittier Wood 1610AFCAF User manual

Whittier Wood 7008GDRC User manual

Whittier Wood

Whittier Wood 7008GDRC User manual

Whittier Wood Pacific 1448AFGSPa User manual

Whittier Wood

Whittier Wood Pacific 1448AFGSPa User manual

Whittier Wood 1137GSPf User manual

Whittier Wood

Whittier Wood 1137GSPf User manual

Whittier Wood 2074AUF User manual

Whittier Wood

Whittier Wood 2074AUF User manual

Whittier Wood 5196AFGMS User manual

Whittier Wood

Whittier Wood 5196AFGMS User manual

Whittier Wood 3506AFGACa User manual

Whittier Wood

Whittier Wood 3506AFGACa User manual

Whittier Wood 1164RGBc User manual

Whittier Wood

Whittier Wood 1164RGBc User manual

Popular Indoor Furnishing manuals by other brands

SUNVILLA Palmetto Assembly / care & use instructions

SUNVILLA

SUNVILLA Palmetto Assembly / care & use instructions

Romina 315 TF Assembly instructions

Romina

Romina 315 TF Assembly instructions

VINNOVA 703230 manual

VINNOVA

VINNOVA 703230 manual

OSP furniture DESIGNlab RLDP60 Assembly instruction

OSP furniture

OSP furniture DESIGNlab RLDP60 Assembly instruction

IKEA TOMBACK manual

IKEA

IKEA TOMBACK manual

Hugs Factory MANHATTAN Assembly instructions

Hugs Factory

Hugs Factory MANHATTAN Assembly instructions

Whalen Furniture PROL-37 manual

Whalen Furniture

Whalen Furniture PROL-37 manual

VISIONARY DESIGNS Hybrid Inline VK-1100 Setup instructions

VISIONARY DESIGNS

VISIONARY DESIGNS Hybrid Inline VK-1100 Setup instructions

Songmics VASAGLE LBS74/074 manual

Songmics

Songmics VASAGLE LBS74/074 manual

ROUILLARD 15L installation guide

ROUILLARD

ROUILLARD 15L installation guide

Smart Comfort 1752 Assembly instructions

Smart Comfort

Smart Comfort 1752 Assembly instructions

Amart Furniture MARGOT 71578 Assembly instruction

Amart Furniture

Amart Furniture MARGOT 71578 Assembly instruction

BiGDUG 200D Guide to Assembly & Usage

BiGDUG

BiGDUG 200D Guide to Assembly & Usage

Niche HBTOTEWNT Assembly instructions

Niche

Niche HBTOTEWNT Assembly instructions

Forte KSMB01 Assembling Instruction

Forte

Forte KSMB01 Assembling Instruction

Multistore EXC-ST Assembly instructions

Multistore

Multistore EXC-ST Assembly instructions

BROSA Bristol Sideboard Assembly guide

BROSA

BROSA Bristol Sideboard Assembly guide

FIAM. PLIE glass PT/2010XS Product information

FIAM.

FIAM. PLIE glass PT/2010XS Product information

manuals.online logo
manuals.online logoBrands
  • About & Mission
  • Contact us
  • Privacy Policy
  • Terms and Conditions

Copyright 2025 Manuals.Online. All Rights Reserved.