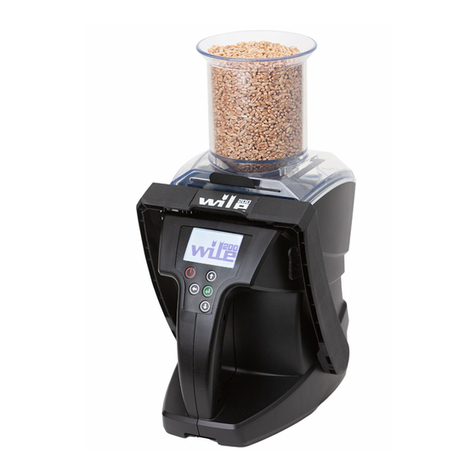
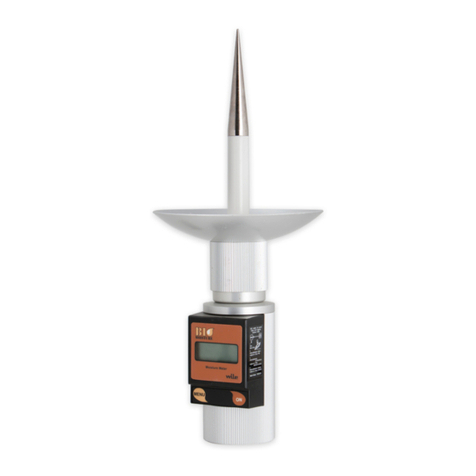
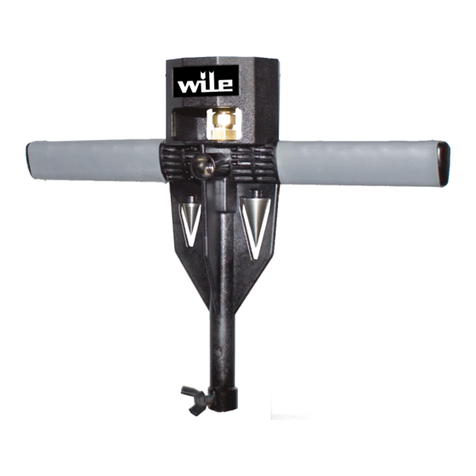
Wile 55 User manual

EN Operating Instructions
RU Руководство по эксплуатации
Coffee & Cocoa Moisture meter
Влагомер кофе и какао-бобов

Sisällys
1. Box Contents ...................................... 4
2. Usage.................................................. 4
2.1. Preparation for the measurement..... 4
2.2. Taking the sample............................ 4
2.3. Filling the measuring cup................. 5
2.4. Measurement step by step............... 5
2.5. Scales.............................................. 6
3. Processing the result .......................... 6
3.1. Average calculation.......................... 6
3.2. Adjusting the result........................... 7
3.3. Display the scale adjustment ........... 8
3.4. Erasing the scale adjustment........... 9
3.5. Exceptional result............................. 9
4. Properties of scales ............................ 9
5. Battery............................................... 10
6. Technical features of the meter......... 10
7. Warranty and the maintenance..........11

Cодержание
1. Комплект поставки .......................... 13
2. Назначение, описание и устройство
влагомера Wile Coffee........................ 13
3. Основные технические
характеристики влагомера Wile Coffee
.............................................................. 14
4. Использование влагомера.............. 15
5. Обработка результата..................... 20
6. Внедиапазонное значение влажности
.............................................................. 24
7. Выключение влагомера .................. 25
8. Особенности шкал .......................... 25
9. Элемент питания (батарея). Замена
элемента питания................................ 26
10. Текущий ремонт............................. 26
11. Маркировка .................................... 27
12. Тара и упаковка ............................. 27
13. Правила хранения и
транспортировки влагомера ............... 27
14. Гарантийные обязательства ......... 28
15. Утилизация .................................... 29
16. Сведения о рекламациях.............. 29

EN
4
Coffee & Cocoa Moisture meter
1. Box Contents
- Wile Coffee - moisture meter
- carrying case
- carrying strap
- operating instructions
- 9 V battery (installed).
2. Usage
2.1. Preparation for the measurement
Important: The scales of Wile- moisture
meter are developed to measure the
quality of standard beans. Exceptional
growth conditions and new sorts can
considerably affect beans' features.
Therefore, before the new harvest season
we recommend to check the readings of
your meter against an oven dried sample.
Always take measurements of several
samples and calculate the moisture
content of the load by calculating the
average of those measurements. If the
measurement result is different, adjust the
result according to the instructions in
paragraph 3.2.
If the meter has not been used for some
time, follow these steps:
- replace the battery
- read the operating instructions
- make sure that the measuring cup is
empty and clean
2.2. Taking the sample
- Always take the samples from different
places of the load. We recommend taking
at least five samples. Define the moisture

EN
5
content of the load by calculating the
average value of those five
measurements.
- Remove scrap and other exceptional
beans from the samples.
- When taking the sample directly from the
dryer wait until the temperature of sample
is near meters temperature.
2.3. Filling the measuring cup
- fill the measuring cup one quarter
with beans (1)
- gently shake the meter (beans will
settle tighter in the measuring cup) (2)
- fill the measuring cup to the brim (3)
- wipe off excess beans (4)
- twist and tighten the cap until the
center of the cap is on the same level
with the cap's surface (5,6).
2.4. Measurement step by step
Switch on the meter with a single press on
the P-button. The number of the selected
scale (see scales from side sticker) will
appear on the display, for example -1-.
Change the scale with F-button if needed,
when the number of the scale is
displayed.

EN
6
The meter will automatically do
measurement. During the measurement
you will see run and then the moisture
content in weight percent, for example
13.8.
After the measurement the meter will
automatically turn off and will be ready for
a new measurement.
You can ensure that the result represents
the average quality of the entire beans
load by taking the measurements from
several different places of the load.
2.5. Scales
The complete list of scales can be found
on the side sticker of the meter. There is
an additional -0- scale, which can be used
together with conversion charts. In this
case you make the measurement using -
0- scale and find the corresponding
moisture value from the chart. Scale is
also used by Wile service department to
calibrate the meters.
3. Processing the result
3.1. Average calculation
The meter can calculate the average
value of several measurements. After you
have made a measurement, the result can
be included for the average calculation by

EN
7
pressing F-button once while the result is
shown on the screen.
The average calculation is ready when
two numbers, for example A05 and 13,8
appear alternating on the display.
The values used in the example mean:
- A05 - the number of measurement
results included into the average value
is 5
- 13,8 - the average value of those 5
measurements.
To erase average calculation memory just
press and hold the F- button and switch
on the meter with a single press on the P-
button. When you see Aon the display,
release the F- button. Then erase the
average value by pressing and holding
down the F- button. The memory is erased
when 0 and A00 appears on the display.
Before calculating the average value of
every new load of material, make sure
that average calculation memory is
empty and erase it if required.
Average calculation memory can
accommodate a maximum of 99 results. If
no more results can be added to the
memory, the number on the display will
start blinking.
3.2. Adjusting the result
If the quality of the measured material is
different from normal, the result can be

EN
8
incorrect. You can adjust the result shown
by the meter to conform to a reference
value.
Adjusting the value upwards
When the measurement result is
displayed press twice the F- button. Three
bars will appear on the upper edge of the
display. Wait for a moment and the result
appears on the display again. Now each
time you press the F- button, 0,1 moisture
% will be added to the result.
Adjusting the value downwards
When the measurement result is
displayed, press the F- button three times.
Three bars will appear on the lower edge
of the display. Wait for a moment and the
result appears on the display again. Now
each time you press the F- button, 0,1
moisture % will be reduced from the
result.
Note! This adjustment is specific to the
used scale. In other words there can be
defined own adjustment for each scale.
3.3. Display the scale adjustment
If the selected scale has been adjusted,
you will see the adjustment displayed after
run- text. Each scale can be adjusted for
+/- 4 moisture percent. The value
displayed may be for example “-.5”. This
value means that the scale was adjusted
downwards for 0,5 moisture percent.

EN
9
3.4. Erasing the scale adjustment
When the moisture content result is
displayed, you can erase the adjustment.
To do that press and hold F- button for
about 6 seconds.
3.5. Exceptional result
If the measurement result exceeds the
upper limit of the measurement range, you
will see HI on the display and if lower limit
is reached you will see LO.
If you get HI or LO as a measurement
result check if the correct scale is used.
4. Properties of scales
The scales of Wile Coffee - moisture
meter are developed in accordance with
the official methods of definition of
moisture content. To develop the scales
we use the samples which represent
mostly cultivated varieties in standard
growth conditions.
Exceptional growth conditions can affect
the quality and electrical properties of
beans.
Therefore, before the new harvest season
we recommend to check that the readings
of your meter conform to the result of oven
drying. If the measurement result is
different, adjust the result according to the
instructions in paragraph 3.2. This is
especially important when you handle a lot
of beans or when you suspect that the
quality of beans you handle is different

EN
10
from normal.
5. Battery
The meter runs on 9V battery of the type
6F22 or a similar alkaline battery. The
battery is included in a new meter and is
ready for use.
The meter gives a warning about the low
battery voltage with LOBAT-text in the
upper left part of the display.
If the battery is almost empty, the display
will show some random marks and
LOBAT- text can fade.
Remove the battery from the meter, if it is
not used for a long period of time. If you
suspect a fault in the meter, always test
the battery first. Please note, that a
battery slowly discharges itself even if the
meter is not used.
6. Technical features of the meter
Wile Coffee moisture meter shows the
moisture content of the material in weight
percent. Measurement method is based
on the capacitance measurement of the
material. The repeatability of the
measurement is +/- 0,5 moisture percent
or better
- average calculation
- opportunity to adjust the
measurement result to conform to the
result of oven drying.
Method of moisture content definition is
based on the technical specification ISO
6673.

EN
11
Our method to sample the beans is based
on ISO 950 standard and while handling
the samples we follow ISO 7700/1 and
ISO 7700/2 standards. ISO = International
Organization for Standardization.
7. Warranty and the maintenance
All Wile products carry a 12 month
manufacturer warranty for materials and
workmanship. The warranty is valid for 12
months from the date of purchase on the
receipt. To claim the warranty, the
customer should return the defect product
to the Manufacturer, reseller, or the
nearest Wile Service Partner. The
warranty claim must be accompanied by
the description of the fault, copy of sales
receipt and customer's contact
information. The manufacturer / Wile
service partner will repair or replace the
defective product and return it as soon as
possible. The liability of Farmcomp is
limited to the price of the product in
maximum. The warranty does not cover
any damage that is caused by incorrect or
careless use of the product, dropping the
product or damage that is caused by
repairs that are carried out by non-
authorized personnel. Farmcomp does not
accept any responsibility for any direct,
indirect or consequential damages that
are caused by the use of the product or
the fact that the product could not be
used.
The meter can be cleaned with wet or dry
fabric. Do not use any detergents or other
strong cleaning substances. Do not put
any liquids inside the meter. Keep the
meter in warm and dry place.
If you suspect a fault in the meter,

EN
12
please always test the battery first. If
the meter requires repair, contact your
local Wile retailer for assistance. Wile
moisture meters can be repaired only
by authorized Wile service.

RU
13
Влагомер кофе и какао-бобов
Данное руководство по эксплуатации
описывает состав, принцип действия и
конструктивные особенности влагомера
Wile Coffee, а также содержит сведения
о его правильной эксплуатации и
техническом обслуживании.
1. Комплект поставки
Комплект поставки включает составные
части и документацию в соответствии с
таблицей 1.
Таблица 1
Наименование
Кол-во
Влагомер Wile Coffee в сборе
1
Мерная чашка для отбора проб
1
Футляр с ремешком
1
Элемент питания (батарея)
1
Руководство по эксплуатации
1
Коробка (транспортная
упаковка)
1
2. Назначение, описание и
устройство влагомера Wile Coffee
2.1. Назначение
Влагомер Wile Coffee предназначен для
измерения влажности кофе сортов
«робуста» и «арабика», зеленого кофе,
обжаренных кофейных бобов,
неочищенных кофейных бобов, а также
какао-бобов.
2.2. Описание
Влагомер представляет собой
микропроцессорный электронный

RU
14
прибор, обеспечивающий
непосредственный вывод процентного
содержания влаги на электронный
цифровой дисплей.
Влагомер Wile Coffee оснащен
следующими функциями:
- автоматическая компенсация разницы
температур влагомера и окружающей
среды
- автоматическое усреднение
результатов измерений
- возможность внесения поправки к
шкале измерения с учетом результата,
полученного методом печной сушки
2.3. Устройство
Конструктивно влагомер выполнен в
виде портативного моноблока со
встроенным датчиком. Датчик
представляет собой измерительный
цилиндр с закручивающейся крышкой.
На передней панели расположены
электронный цифровой дисплей, кнопка
включения устройства и кнопки выбора
команд.
3. Основные технические
характеристики влагомера Wile
Coffee
Влагомер Wile Coffee предназначен для
измерения влажности цельных кофе- и
какао-бобов. Содержание влаги в
измеряемой массе отображается на
дисплее в процентах веса. Процесс
измерения основывается на измерении
емкостного сопротивления измеряемого
материала.
- Точность: +/- 0,5 % или выше (при

RU
15
стандартном качестве зерен)
- Диапазон измерения влажности: 1-
38% (в зависимости от типа зерен)
- Время единичного измерения, не
более: 50 сек
- Электропитание (батарея): 9 В
- Напряжение включения
сигнализации о замене элемента
питания: 6,9±0,1 В
- Рабочие условия эксплуатации: от
+5 до +40 °С.
- Размеры влагомера (высота,
длина, ширина): 180х80х65 мм
- Масса влагомера: 0,750 кг
Список измеряемых культур и
соответствующие им номера шкал
измерения расположены на наклейке
сбоку прибора.
Метод определения содержания влаги
соответствует нормам ISO 6673
При отборе и обработке проб мы
соблюдаем следующие стандарты: ISO
950 (при отборе проб), ISO 7700/1 и
ISO 7700/2 (при обработке проб).
(ISO = International Organization for
Standardization)
4. Использование влагомера
4.1. Важные рекомендации
Важно! Шкалы измерения влагомеров
Wile разработаны в соответствии со
стандартным качеством кофе- и какао-
бобов. Особенности измеряемых зерен
могут существенно различаться в
зависимости от условий произрастания
и наличия новых сортов. По этой
причине перед началом нового сезона
мы рекомендуем проверить, чтобы
показания влагомера соответствовали
показаниям сушильного шкафа.

RU
16
Рекомендуется проводить измерение
как минимум пяти (5) проб и в качестве
результата измерения влажности всей
массы использовать среднее значение
измерений этих пяти проб. Если
показания влагомера отличаются от
показаний сушильного шкафа,
сделайте поправку к шкале измерения
в соответствии с пунктом «Введение
поправки к шкале измерения» данного
руководства. Данный момент особенно
важно учесть при измерении влажности
большой массы бобов и в том случае,
если Вы предполагаете, что качество
материала отличается от обычного.
4.2. Подготовка к измерениям
Если с того времени, как Вы последний
раз пользовались прибором прошло
некоторое время:
- замените батарейку (подробнее
смотрите пункт «Элемент питания
(батарея)»)
- прочтите руководство по
эксплуатации
- убедитесь, что измерительный
цилиндр пуст и очищен
- при необходимости очистите
измерительный цилиндр
деревянной палочкой или жесткой
щеточкой
- проверьте влагомер Wile Coffee на
отсутствие внешних повреждений
Запрещается дуть в цилиндр, т. к.
влага, присутствующая в дыхании,
может внести искажение в
последующие измерения.
4.3. Отбор и подготовка пробы
Для получения достоверного результата
измерений необходимо, чтобы проба
максимально хорошо отражала

RU
17
качество всей измеряемой массы.
Пробы необходимо отбирать из разных
мест измеряемой массы.
- Всегда отбирайте несколько проб (как
минимум 5) и в качестве результата
измерения используйте среднее
значение измерений этих пяти проб
- Удалите из пробы сор и зерна,
отличающиеся по качеству от общей
массы.
- Если необходимо взять пробу
непосредственно из сушилки,
дождитесь, пока зерна остынут и
температура зерен и влагомера станет
примерно одинаковой.
4.4. Заполнение измерительного
цилиндра
- заполните измерительный цилиндр
влагомера на одну четверть (рис. 1)
- слегка встряхните влагомер (зерна
плотнее распределятся вокруг
центрального сектора, рис. 2)
- наполните измерительный
цилиндр до краев (рис. 3)
- удалите излишки зерен (рис. 4)
- установите крышку влагомера на
резьбу измерительного цилиндра

RU
18
(рис. 5)
- вращайте ее по часовой стрелке
до тех пор, пока центральная
металлическая часть крышки не
установится вровень с остальной
поверхностью (рис. 6)
4.5. Краткий инструктаж по
проведению измерения
Включите влагомер одним нажатием на
кнопку Р. На дисплее высветится
номер используемой шкалы измерения
(номер культуры). Затем автоматически
будет произведено измерение и на
дисплее появится результат – процент
содержания влаги в измеряемом
образце. Влагомер автоматически учтет
влияние температур влагомера и
образца на результат измерения. Затем
влагомер автоматически выключится и
будет готов к очередному измерению.
4.6. Проведение измерения
Включите влагомер одним нажатием на
кнопку Р. Осуществится стартовый
самоконтроль влагомера и на дисплее
высветятся все используемые знаки.
Затем на дисплее появится номер
шкалы измерения, которой Вы
пользовались в последний раз,
например -1-.
Измерение будет произведено
автоматически. Во время измерения на

RU
19
дисплее высветится надпись run. Затем
на дисплее появится результат —
процент содержания влаги в
измеряемом образце, например 13, 8.
После завершения измерения влагомер
автоматически выключится и будет
готов к очередному измерению. Чтобы
убедиться, что полученный результат
измерения максимально хорошо
представляет среднее качество всей
массы, проводите измерения в разных
местах материала.
4.7. Проверка и выбор шкалы
измерения
Перед проведением измерения
убедитесь, что используется
правильная шкала. Список шкал
измерения представлен на наклейке
сбоку прибора. В настройках прибора
заложена также шкала -0-, которую
отдел технического обслуживания Wile
использует для калибровки.
Шкала -0- является также базовой
шкалой и предназначена для
использования с таблицами перехода.
В данном случае проведите измерение
на шкале -0- и найдите в таблице
значение влажности, соответствующее
показанию прибора. Таблицы перехода
можно заказать у поставщика.
4.7.1. Проверка шкалы измерения
Включите влагомер одним нажатием на
кнопку Р. Дождитесь, пока на дисплее
высветится номер используемой шкалы
измерения, например -1-. Если
высветился номер необходимой шкалы,

RU
20
не предпринимайте никаких действий.
На дисплее высветится надпись run и
через некоторое время влагомер
автоматически выключится.
4.7.2. Выбор шкалы измерения
Включите влагомер одним нажатием на
кнопку Р.Дождитесь, пока на дисплее
высветится номер используемой шкалы
измерения, например -1-.
Если шкалу измерения необходимо
поменять, действуйте следующим
образом:
Когда номер используемой шкалы
измерения отображен на дисплее,
нажимайте на кнопку F до тех пор, пока
на дисплее не появится номер
необходимой шкалы. Когда номер
необходимой шкалы высветится на
дисплее, не предпринимайте никаких
действий. На дисплее высветится
надпись run и через некоторое время
влагомер автоматически выключится.
4.8. Отображение значения поправки
к шкале измерения
Если Вы хотите сделать поправку к
шкале измерения или если к
используемой шкале измерения уже
была сделана поправка, см. пункты
«Введение поправки к шкале
измерения» и «Отображение
значения поправки к шкале
измерения» данного руководства.
5. Обработка результата
This manual suits for next models
1
Table of contents
Languages:
Other Wile Measuring Instrument manuals
Popular Measuring Instrument manuals by other brands

Knick
Knick Protos II 4400(X) user manual

Emerson
Emerson FB1100 Replacement guide

PCB Piezotronics
PCB Piezotronics 3501A1320KG Installation and operating manual

PCE Instruments
PCE Instruments PCE-228 manual

Hanna Instruments
Hanna Instruments HI 83748 instruction manual

Eurotops
Eurotops 29958 instruction manual