Storage
When the heater is not used for an extended period of time, it must be properly covered and
stored in order to avoid damage.
You should therefore:
•Unplug the appliance from the power outlet.
•Choose a dust-free storage location and cover the appliance.
•Store the appliance in a dry place and prevent moisture from entering the appliance.
•Store the appliance at all times protected from lightning and other unpredictable atmospheric
conditions.
•Locate the appliance in a safe place to avoid possible falls that may endanger people or
damage the appliance.
4. INSTALLATION CONDITIONS
When installing the heater, you should take into account some specific technical conditions.
Failure to comply with these conditions could endanger people and property. Operation of the
heater and its accessories should be tested. When installing the heater, the following must be
observed:
•The heater should be installed on a horizontal surface, safely and in a non-combustible
environment.
•The location must be dry and it must be ensured that no moisture enters the appliance. If any
fluid gets into the appliance, unplug it immediately from the power outlet and arrange for it to
be checked by a qualified service technician.
•The appliance must be connected to a power outlet in accordance with the required technical
specifications (see “Technical data”).
•The heater should not be placed in dusty environments.
•The appliance should be placed at least 2 metres away from any obstruction on all sides.
•It must be at least 50 cm from walls.
•The site should not be excessively humid so as not to cause condensation inside.
•The air intake and outlet of the appliance must not be obstructed.
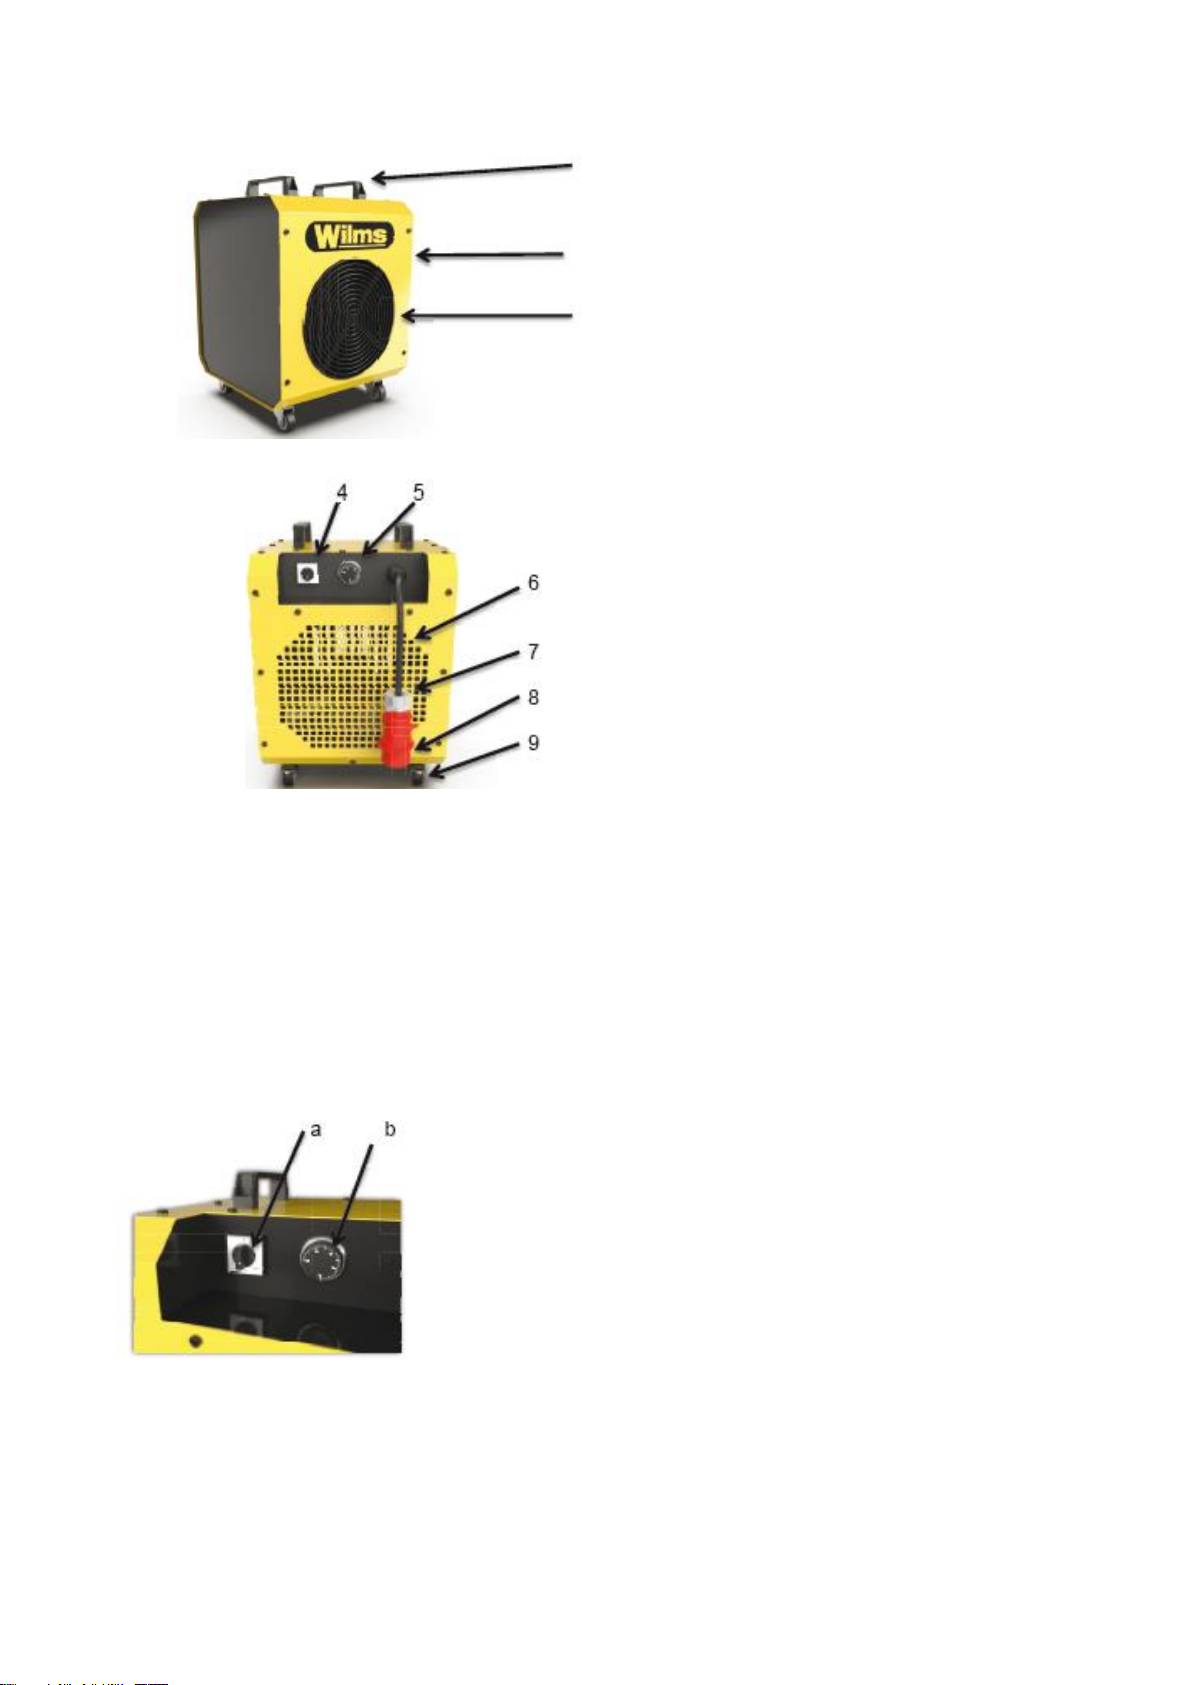
5. OPERATING PRINCIPLES
This electric heater is a mobile appliance used for heating ambient air. For improved heating,
thawing or drying of spaces, this area should be closed.
The built-in thermostat allows regulation to a constant ambient temperature.
Operating principles
The air to be heated is drawn through an axial fan and subsequently flows through the interior
of the appliance. It is warmed by flowing past a heating element. This air is then expelled by
the air outlet panel into the environment (see description).
The heater may be used in continuous operation.
6. APPLICATION
This electric heater is designed for heating and air ventilation, and may be used indoors. It is
used for drying, thawing, heating or simply for ventilation.
This electric heater has been designed and developed for professional use and is therefore
suitable for use in locations that are under construction, construction sites or for heating and
drying buildings, greenhouses or other industrial areas, cellars, thaw machinery or pipelines.
- 5 of 11 -