WindStream Technologies Verge IP Phone Series User manual
1-888-623-VOIP (8647) Revised: May 2, 2018
windstreamenterprise.com P/N 5000418 Rev. 02
©2018 Windstream Services, LLC
Models: Verge 9308-WE
Verge 9312-WE
Verge™ IP Phone Series
Quick Start Guide
The Verge IP phone series has a high-resolution, color LCD that provides information about the call, identifies the programmable buttons and soft
key names, and displays instructions to perform features or update configurations. Additionally, the Verge IP phone series uses:
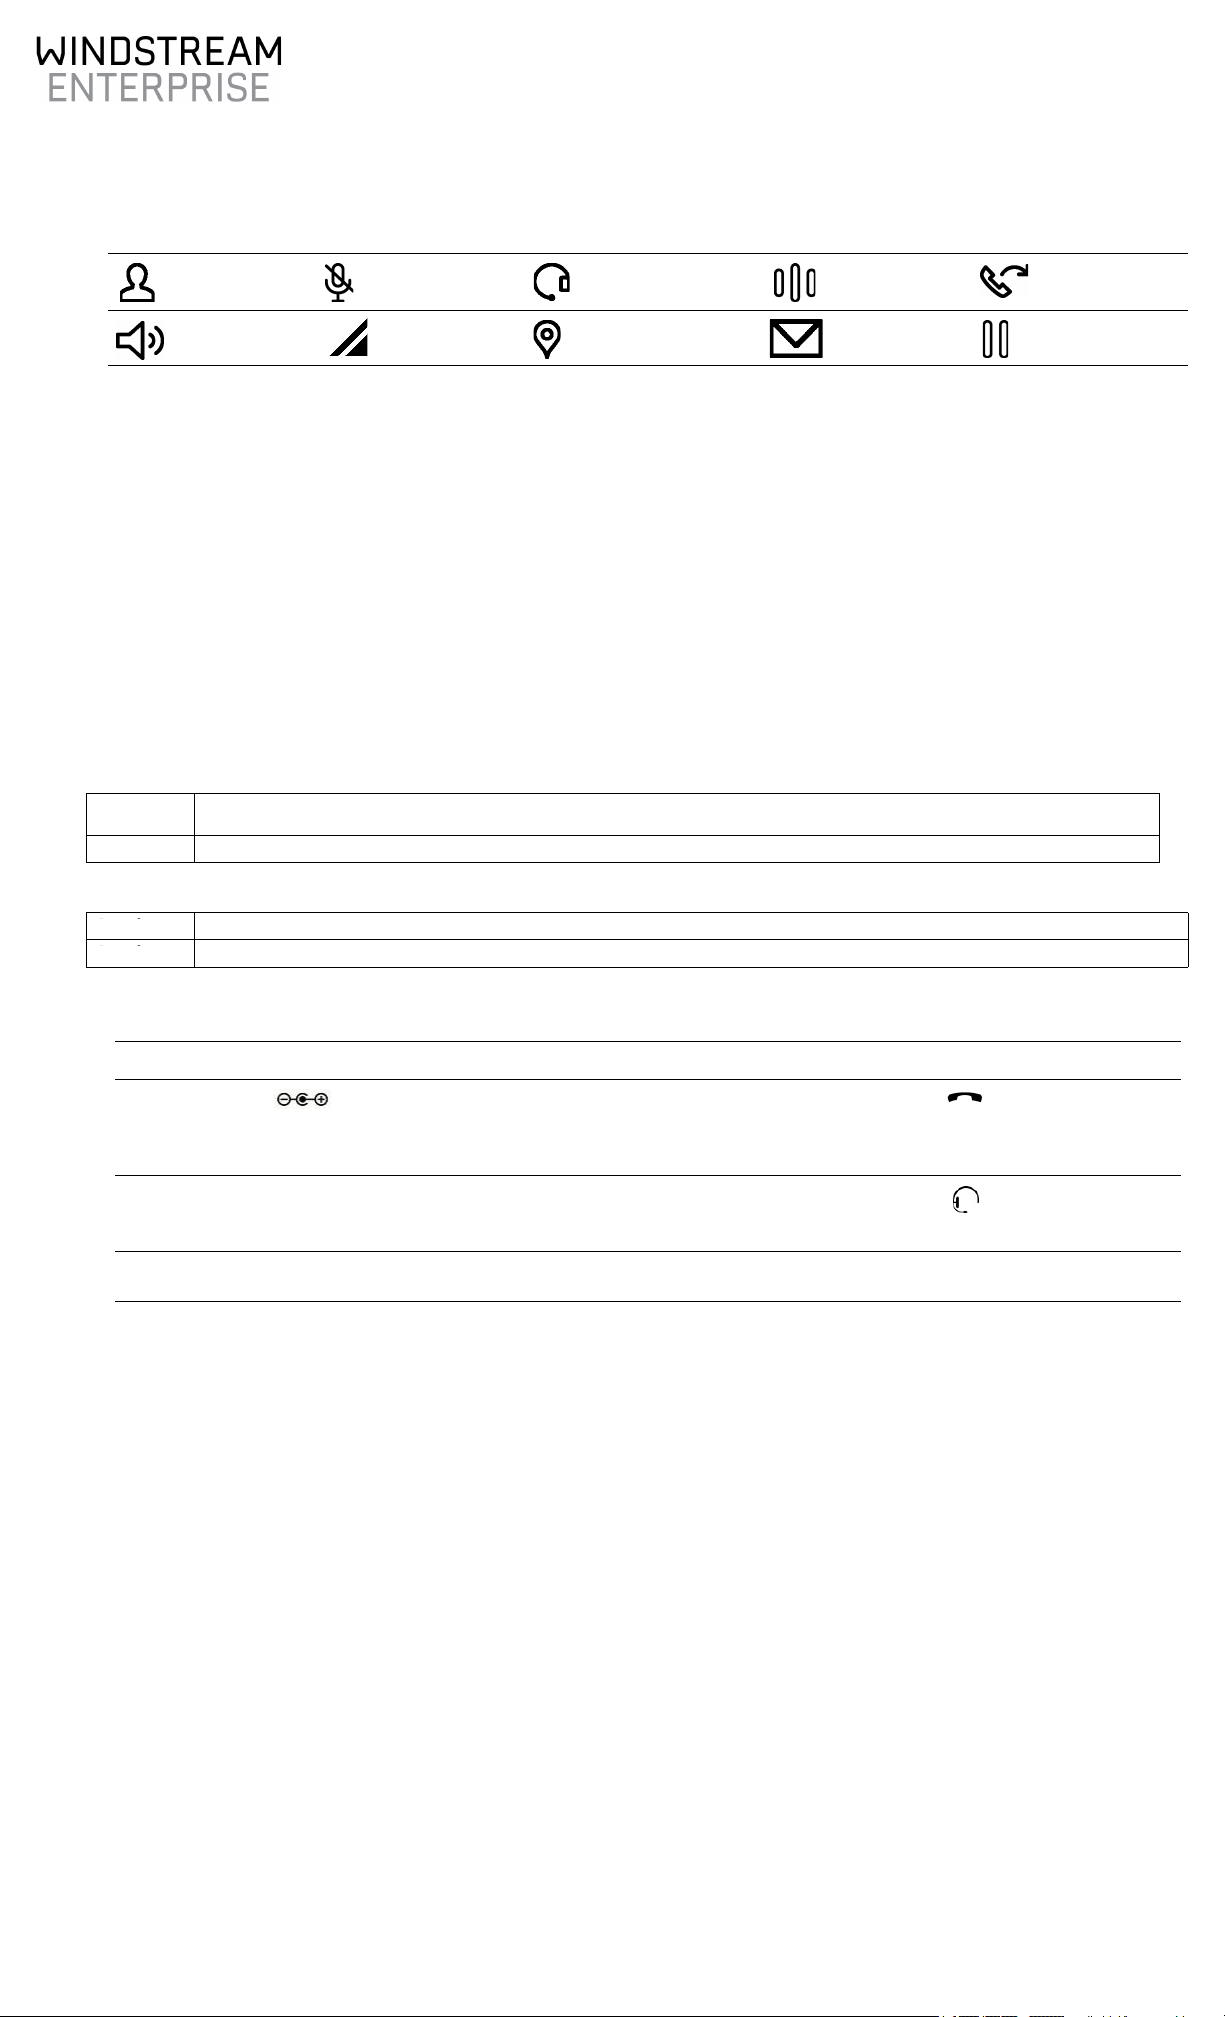
• function buttons - physical buttons to control call management such as Do Not Disturb, Headset, Transfer, etc. Icons identify each button:
• soft keys - located under the Verge IP phone screen. The soft keys are specialized actions that change depending on the current screen.
• programmable buttons - display on the Verge IP phone screen and are a short cut to features available on the phone.
Setting up the Verge IP Phone
1. Unpack the Verge IP phone and accessories, and inspect for missing items.
2. Determine the Verge IP phone location: Desktop or Wall Mount.Verify all Verge IP phone connections are unplugged, and remove the
handset from the hook.
3. (Wall Mount only) Attach the wall mounting plate (not included - must meet TIA-570-B, Section 5, standard. Available from a local telephone
company or local retailer) to the wall and attach the Verge IP phone wall mount unit (catalog number 8400196) to the mounting plate.
4. Connect the cables to the jacks on the back of the Verge IP phone using one of the options below:
•Desktop - thread all cables through the phone stand to the phone jack to connect.
•Wall Mount - use the wall mount cable guide to thread the network cables.
5. Finish mounting the Verge IP phone.
a. Desktop - align the Verge IP phone with one of the three available positions to connect the phone stand to the Verge IP phone and
slide the phone stand to the right to secure.
b. Wall Mount - align the Verge IP phone back to the wall mount unit and slide it to the right. All power and RJ-45 cable connections exit
between the Verge IP phone and the wall, and then route to the network connection and/or a power connection.
6. Peel off all protective strips, i.e. LCD, handset, etc. If necessary, adjust the handset retainer clip to prevent the handset from slipping out of
the cradle. Insert a coin in the retainer clip slot and turn the coin 180 degrees to adjust the retainer clip to the up or down position.
7. View the initialization progress on the Verge IP phone screen. A normal sequence takes approximately 2 minutes to complete and includes:
Applying the Verge IP Phone Settings
Required: OfficeSuite extension and PIN number.
1. Press the ACTIVATE programmable button.
2. Enter the assigned extension and press the Done soft key.
3. Enter the OfficeSuite PIN and press the Done soft key. The Verge IP phone is ready for use.
Pairing a Bluetooth® Device
The Verge 9312-WE IP phone supports Bluetooth pairing to a headset or mobile device. Tap Settings > Bluetooth > Select (center navigation
button) > Turn On and follow the on screen instructions.
Contacts Mute Audio Route -
Headset
Intercom Transfer
Speakerphone More soft keys
available
Do Not Disturb Messages -
Voicemail
Hold
Included:• Verge IP phone and stand
• Handset with cord
• Ethernet Cable
Not
included:
• (Optional) Verge 9318Ex-WE Expander (catalog number
8113718) only available for the Verge 9312-WE IP phone
• (Optional) Wall Mount Kit (catalog number 8400196)
• (Optional) Power Supply (catalog number 8400006)
Customer
Provided:
• Headset with cord
• Bluetooth®Headset (Verge 9312-WE only)
Caution:
Caution:
If using a standard telephone wall mount plate, DO NOT connect to the RJ-11 jack. This connection is for analog phones and may cause
damage to the Verge IP phone, which voids the warranty.
Caution:
Caution:
The wall mount supports one Verge IP phone or the Verge 9312-WE IP phone and one Verge 9318Ex-WE expander.
Caution:
Caution:
Do not connect the Verge IP phone to an analog phone line. This may cause damage to the Verge IP phone, which voids the warranty.
Caution:
Caution:
Unit is to be connected only to Ethernet networks without routing to the outside plant.
Cable Position Connections Cable Position Connections
Optional:
Power Supply:
rated 24VDC,
400 mA or higher
Phone DC jack. recommended: surge protector.
Only required if the Ethernet cable does not provide PoE
Handset cord Handset jack
Ethernet cable Network Network jack and Wall Ethernet jack
Power over Ethernet (PoE): provides power to the Verge IP
phone after connecting the Ethernet cable.
Optional:
Headset cord
Headset jack
Optional:
Ethernet cable
Computer Computer jack and the computer
Logo
Black
Screen
Initializing
Network
Starting VLAN
Discovery
Startup
DHCP
Loading
Configuration Files
Contacting
Redirection Services
Hardware/Phone
Software Versions
Initialization
Complete

1-888-623-VOIP (8647) Revised: May 2, 2018
windstreamenterprise.com P/N 5000418 Rev. 02
©2018 Windstream Services, LLC
Verge IP Phone Series - Quick Start Guide
Models: Verge 9308-WE • Verge 9312-WE
OfficeSuite Portal
Log on at http://MyOfficeSuite.broadviewnet.com to program the buttons on your Verge IP phone and expansion module(s), as well as manage
your Office Suite UC® features and services.
Regulatory Notices
This equipment has been tested and found to comply with the limits for a Class B digital device, pursuant to Part 15 of the FCC rules. These limits
are designed to provide reasonable protection against harmful interference in a residential installation. This equipment generates, uses, and can
radiate radio frequency energy and, if not installed and used in accordance with the instructions, may cause harmful interference to radio
communications. However, there is no guarantee that interference will not occur in a particular installation. If this equipment does cause harmful
interference to radio or television reception, which can be determined by turning the equipment off and on, the user is encouraged to try to
correct the interference by one or more of the following measures:
• Reorient or relocate the receiving antenna.
• Increase the separation between the equipment and the receiver.
• Connect the equipment into an outlet on a circuit different from that to which the receiver is connected.
• Consult the dealer or an experienced radio/TV technician for help.
FCC Caution: Any changes or modifications not expressly approved by the party responsible for compliance could void the user’s authority to
operate this equipment.
This product adheres to the IEEE 802.3af standard for Power over Ethernet (PoE).
This equipment is Hearing Aid Compatible (HAC).
This device complies with Part 15 of the FCC rules. Operation is subject to the following two conditions: (1) This device may not cause harmful
interference, and (2) this device must accept any interference received, including interference that may cause undesired operation.
Important Note:
FCC Radiation Exposure Statement:
This equipment complies with FCC radiation exposure limits set forth for an uncontrolled environment. This equipment should be installed and
operated with minimum distance 20 cm between the product and your body.
Industry Canada Statement
This digital apparatus does not exceed the Class B limits for radio noise emissions from digital apparatus set out in the Radio Interference
Regulations of the Canadian Department of Communications.
This device complies with Industry Canada license-exempt RSS standard(2). Operation is subject to the following two conditions:
1. this device may not cause interference, and
2. this device must accept any interference, including interference that may cause undesired operation of the device.
Le présent appareil est conforme aux CNR d’Industrie Canada applicables aux appareils radio exempts de licence. L’exploitation est autorisée aux
deux conditions suivantes :
1. l’appareil ne doit pas produire de brouillage, et
2. l’utilisateur de l’appareil doit accepter tout brouillage radioeléctrique subi, même si le brouillage est susceptible d’en compromettre le
fonctionnement.
Radiation Exposure Statement:
This product complies with the Canada portable RF exposure limit set forth for an uncontrolled environment and are safe for intended operation
as described in this manual. The further RF exposure reduction can be achieved if the product can be kept as far as possible from the user body.
Déclaration d’exposition aux radiations:
Le produit est conforme aux limites d’exposition pour les appareils portables RF pour le Etats-Unis et le Canada établies pour un environnement
non contrôle. Le produit est sûr pour un fonctionnement tel que décrit dans ce manuel. La réduction aux expositions RF peut être augmentée si
l’appareil peut être conservé aussi loin que possible du corps de l’utilisateur.
User Guides
To view the user guide for the Verge IP phone series, visit: www.windstreamenterprise.com.
Warning:
For use only with:
A Power over Ethernet (PoE) supply – This product adheres to IEEE 802.3af standard for Power over Ethernet (PoE), OR:
A Windstream Enterprise-approved Limited Power Source, 24 VDC, 400 mA or higher – The optional wall mount switching Power Supply has
the following specifications: Input Voltage is 100-240VAC, 50/60Hz, 450mA. Output voltage is 24VDC @ 400mA or higher. UL Listed Limited
Power Source. Output connector size is 5.5 mm x 2.5 mm (inner diameter) x 9.5 mm with center positive.
Do not connect an analog or ISDN phone line.
Caution:
Caution:
The ear piece region on the handset can attract and retain small objects.
This manual suits for next models
2


