6
WOLF BUILT-IN OVENS
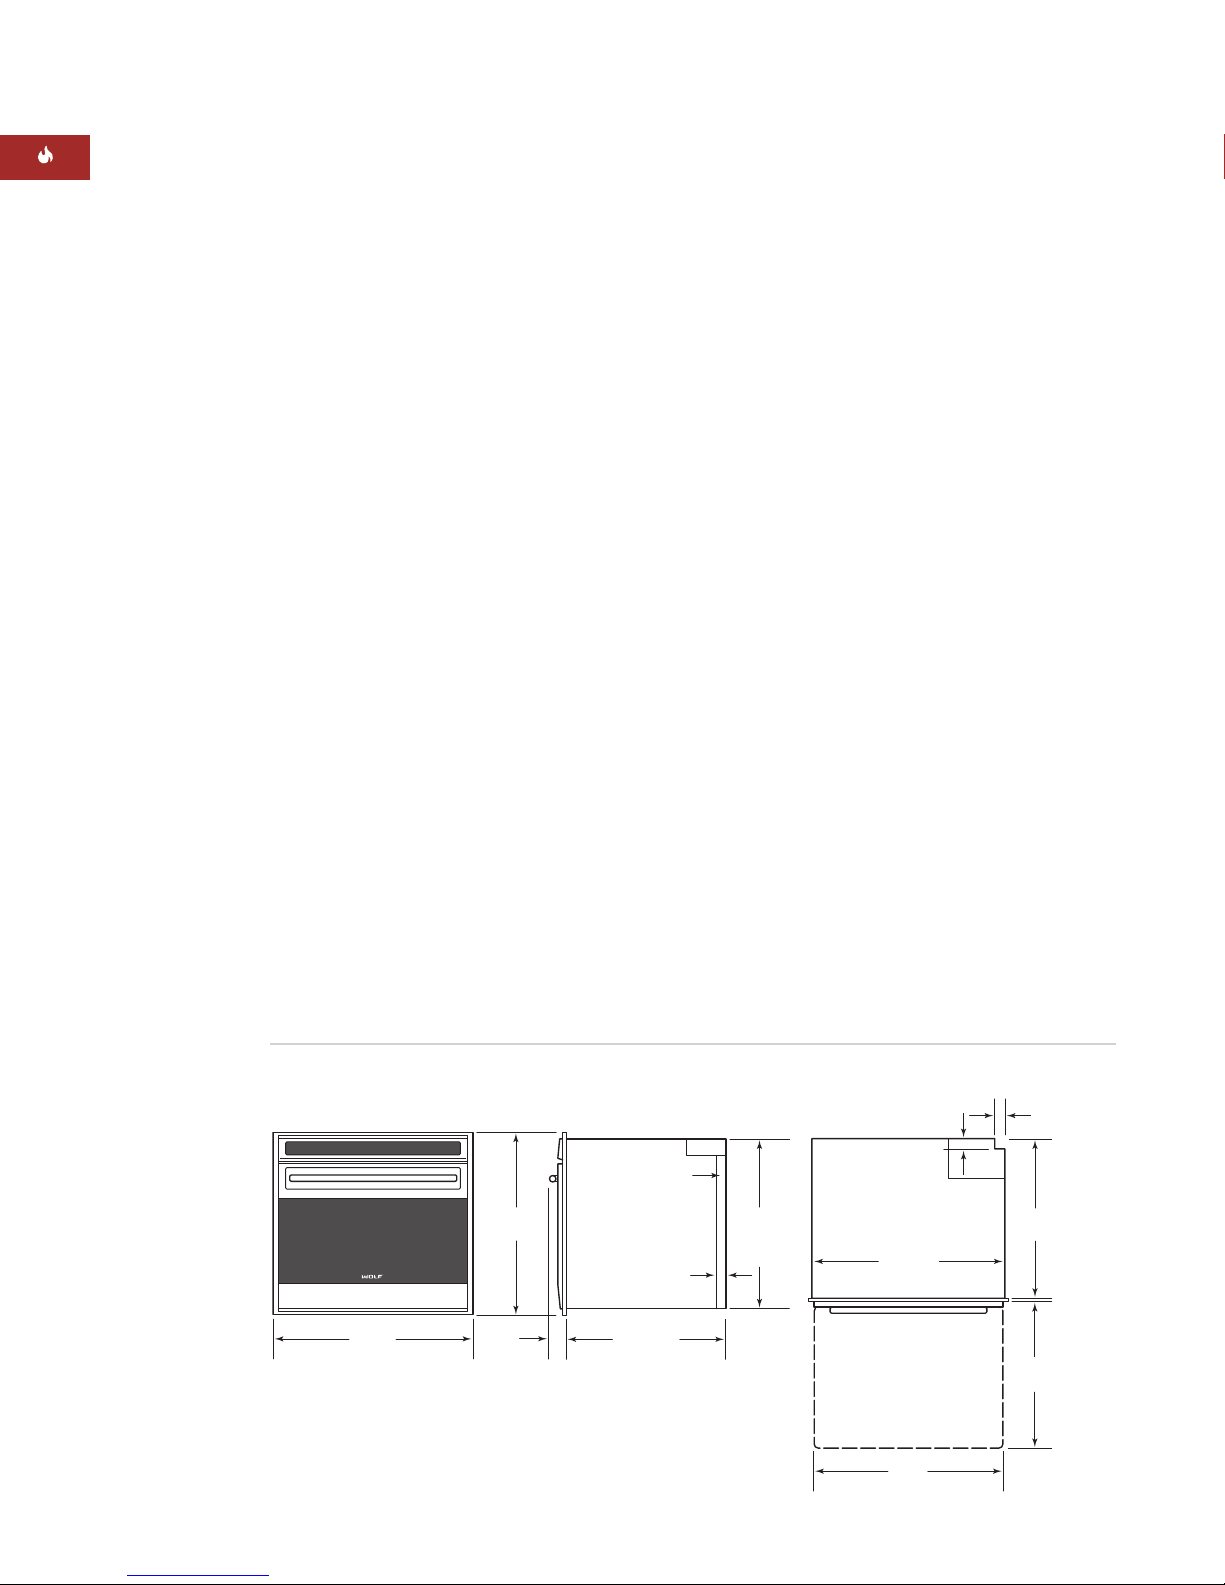
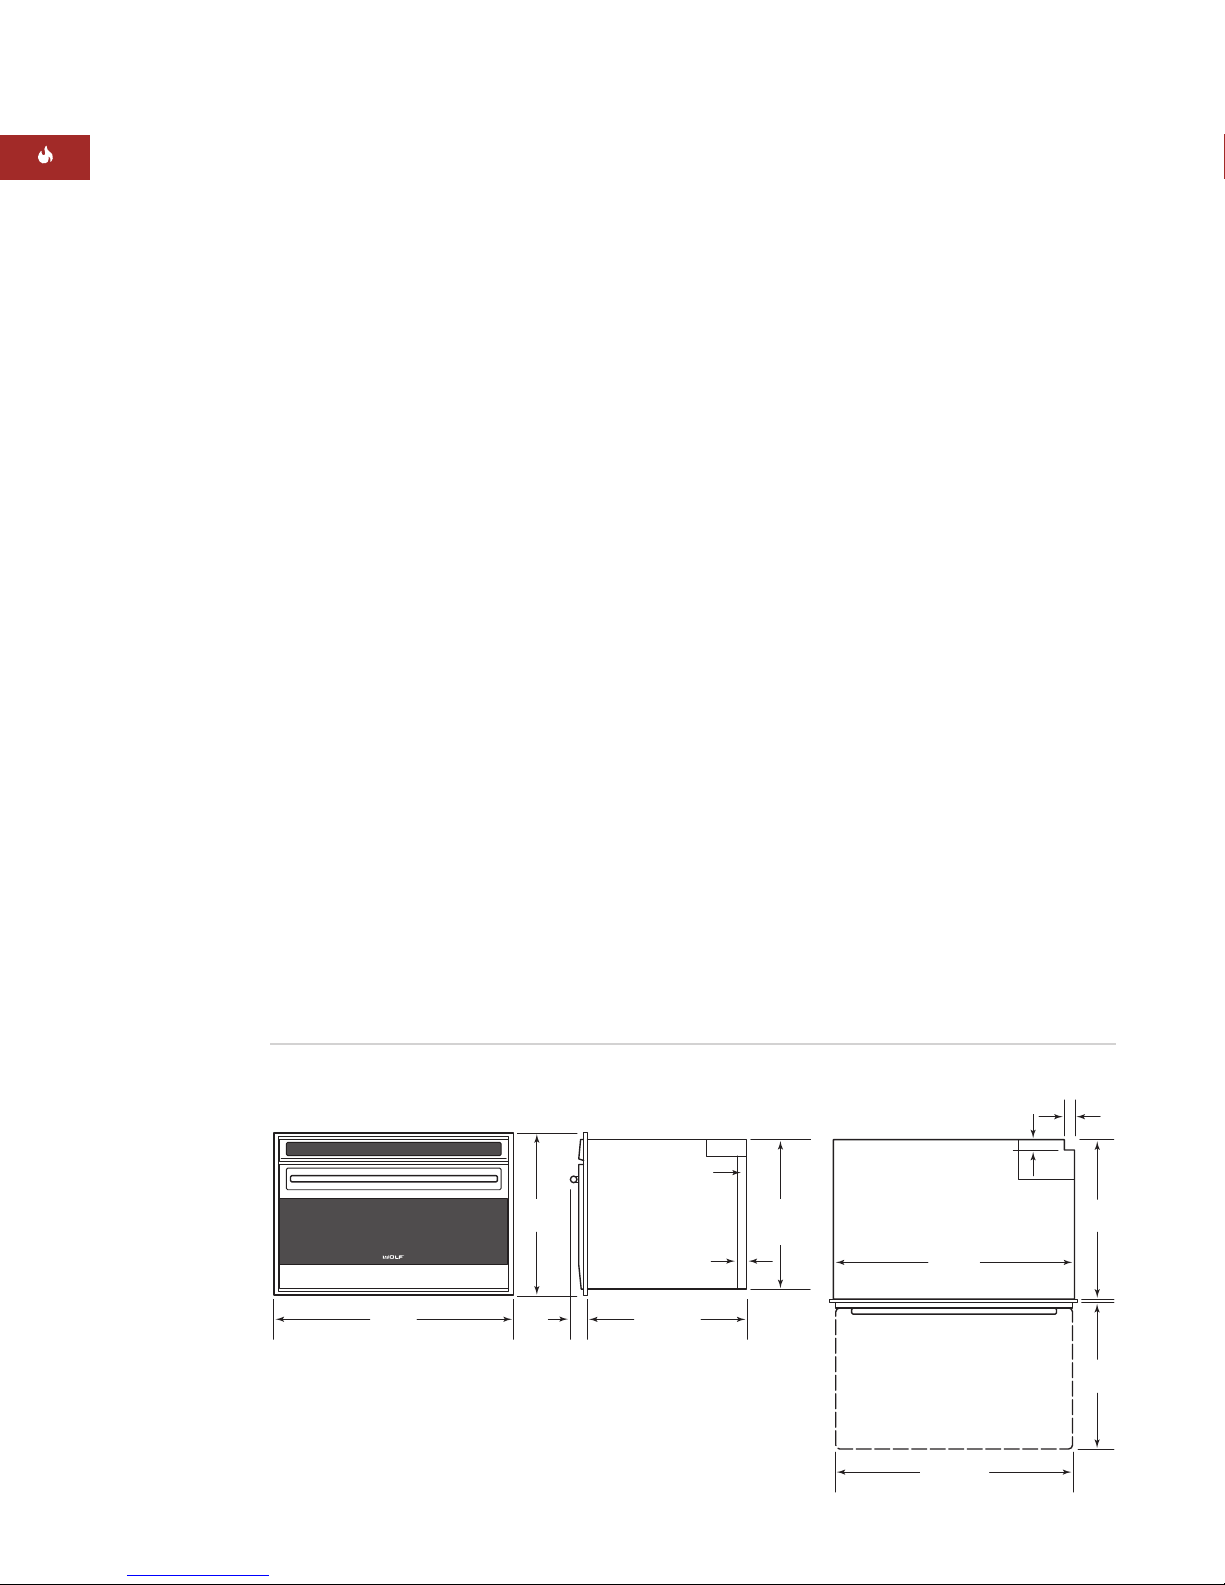
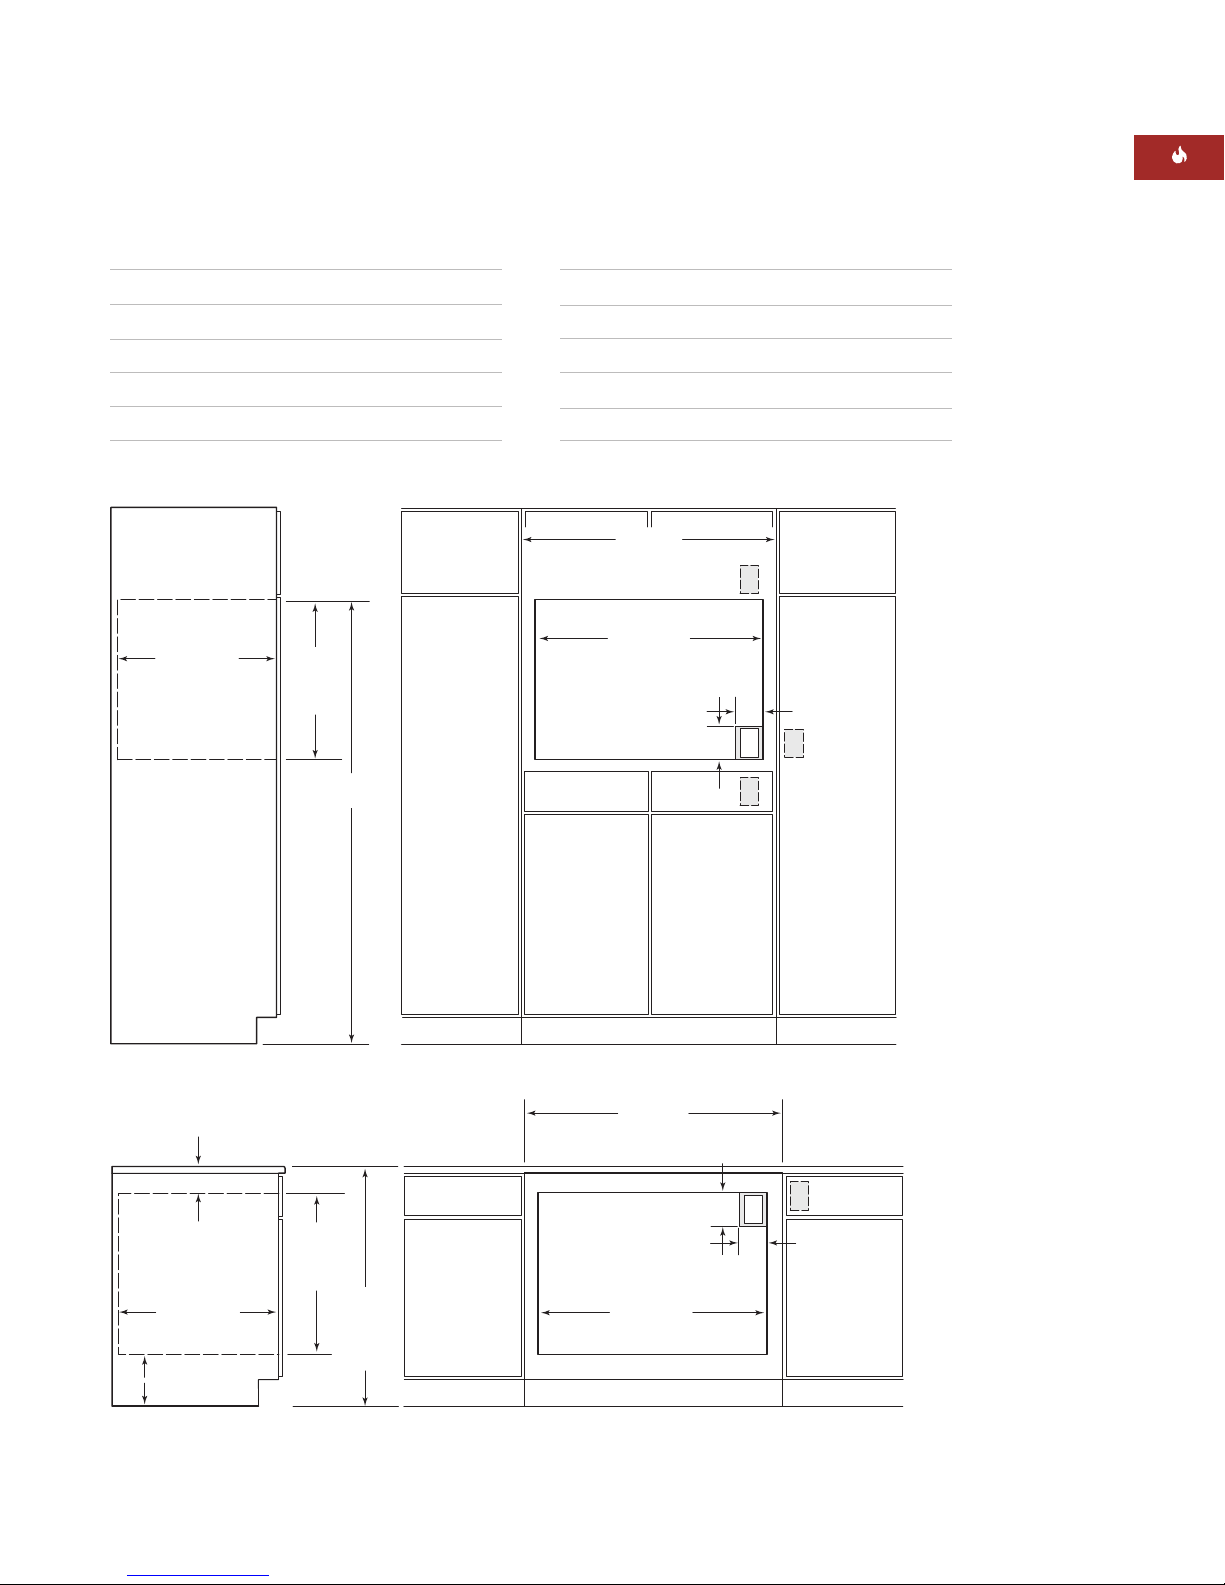
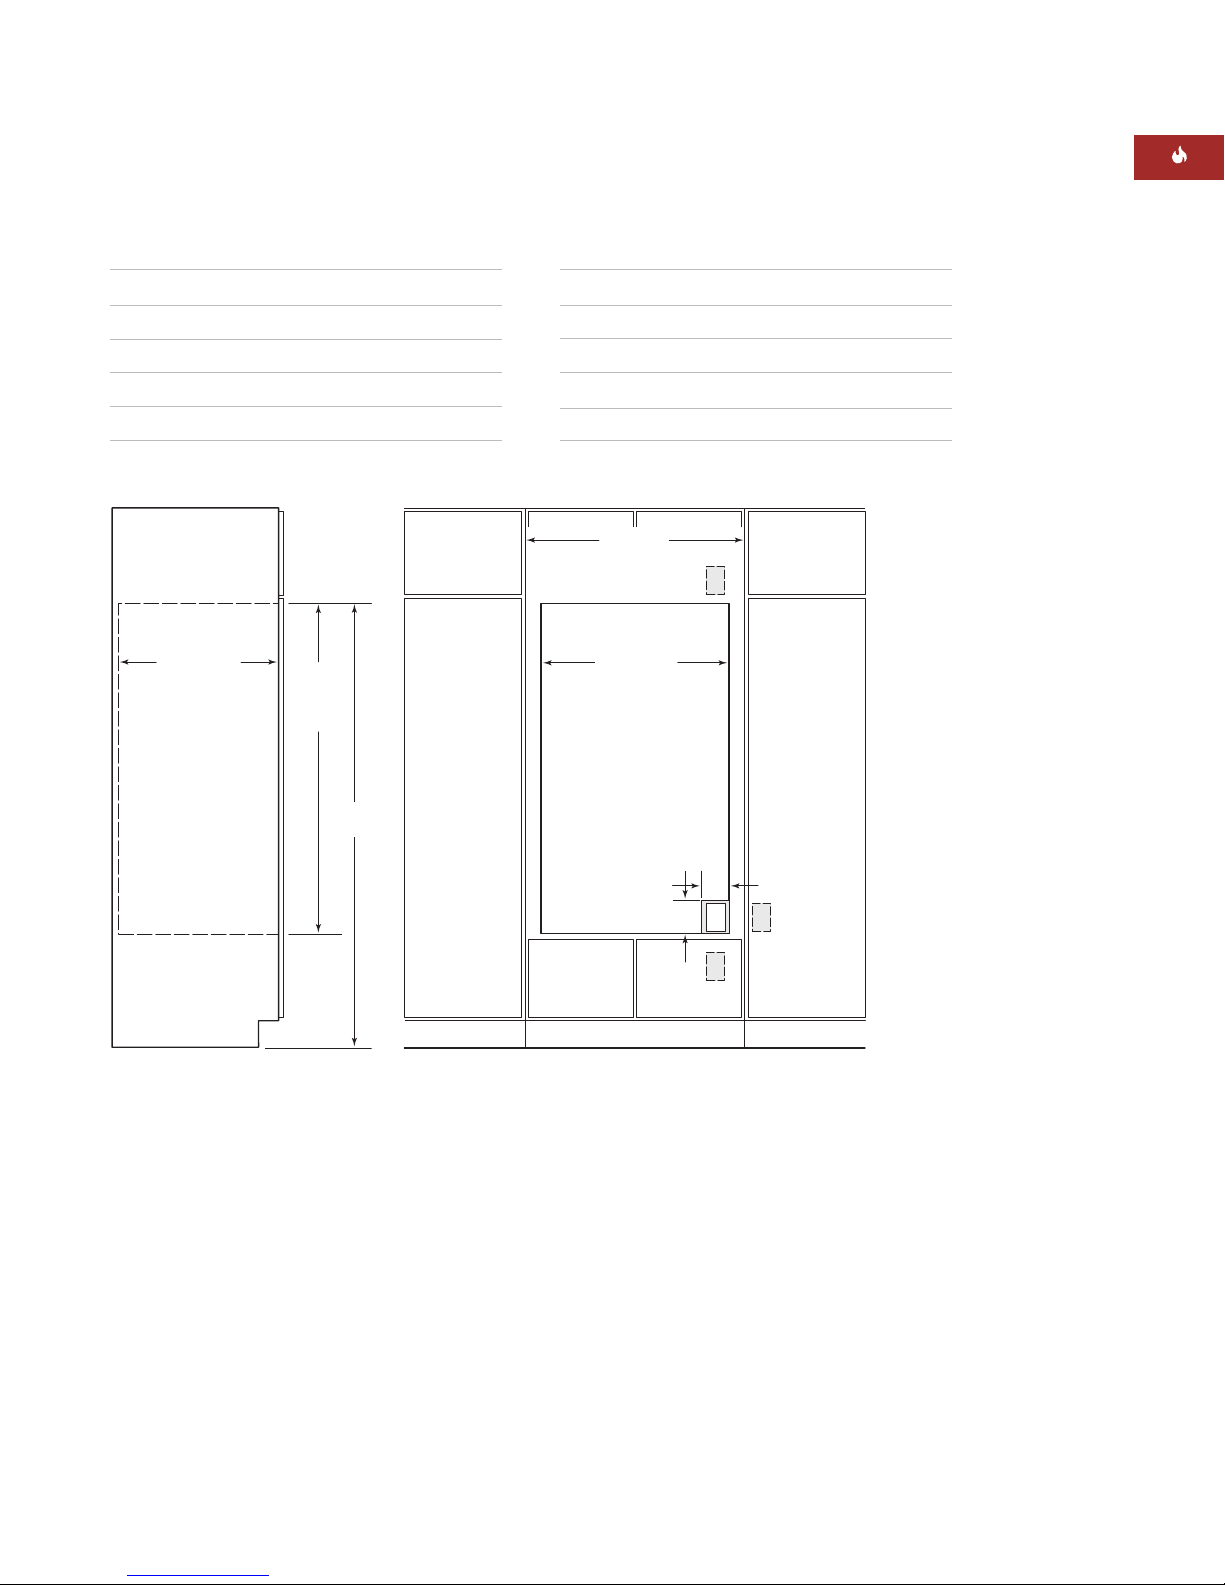
36" (914) SINGLE OVEN
MODEL SO36U
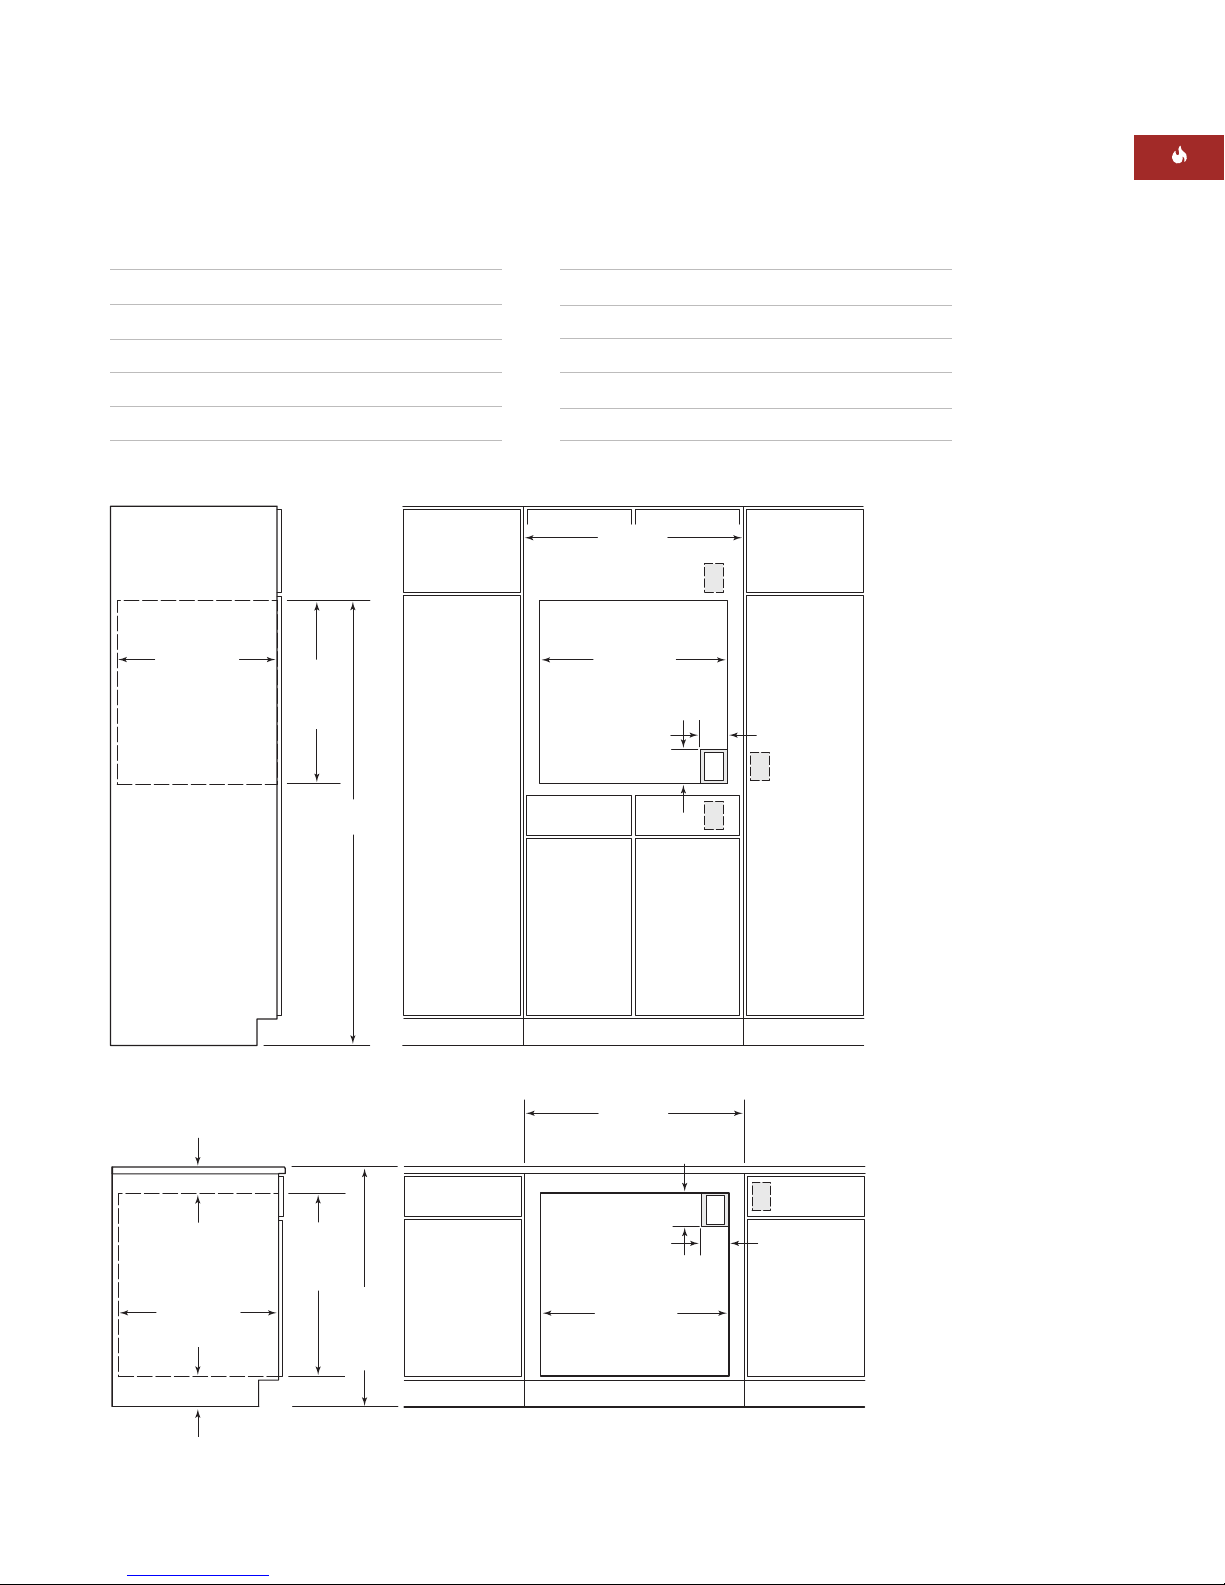
IMPORTANT NOTE:
Aminimum 24" (610) of
usable cabinet depth is required, or the back
panel of the cabinet may need to be removed
for proper installation. The electrical box must
be flush with the back panel of the cabinet.
For ease of installation, Wolf recommends
using 39" (991) wide cabinets with the 36"
single (914) oven. The cabinet base platform
must be able to support 250 lbs (113 kg).
Refer to the following illustrations for overall
dimensions, installation specifications and
electrical location for the 36" (914) single oven.
The 36" (914) single oven requires a separate,
grounded 4-wire240/208 V AC, 60 Hz, 30 amp
service with its own circuit breaker. It is
provided with a 3' (.9 m) flexible 4-wire
conduit, which can make a connection at an
electrical box. Refer to Electrical Requirements
on page 12. The oven is not supplied with an
electrical plug.
IMPORTANT NOTE:
Unless you are using
cabinets deeper than 24" (610), it is recom-
mended that the electrical supply be placed in
an adjacent cabinet within reach of the
conduit. Choose the location shown in the
Installation Specifications illustration that best
suits your installation.
INSTALLATION OPTIONS
The 36" (914) single oven may be installed
below a Wolf 36" (914) electric or gas cooktop.
Unless you are using cabinets deeper than
24" (610), it is recommended that the electrical
supply be placed in the base cabinet to the
right of the oven within reach of the conduit.
The 36" (914) single oven may also be installed
below a Wolf 30" (762) framed electric cooktop,
but not below a 30" (762) unframed electric
cooktop or 30" (762) gas cooktop.
When a 36" (914) oven is installed below a
cooktop, it is recommended that the rough
opening for the oven be 73/4"(197) from the
floor to ease the use of the oven door.
A36" (914) single oven may be installed
directly above another 36" (914) oven. You
must allow enough space between oven rough
openings to accommodate a base platform for
the top oven. Each cabinet base platform must
be able to support250 lbs (113 kg).
AWolf 36" (914) single oven may be installed
next to another 36" (914) oven. You must allow
for a 21/2"(64) space between the oven rough
openings. Also, a separate inner wall is
required for each oven between openings.
24" (610)
BEHIND FRAME
243/8"
(619)
355/8"
(905)
24"
(610)
23" (584)
INSIDE
SIDE TRIM
POWER CORD
CHANNEL
OPEN OVEN DOOR
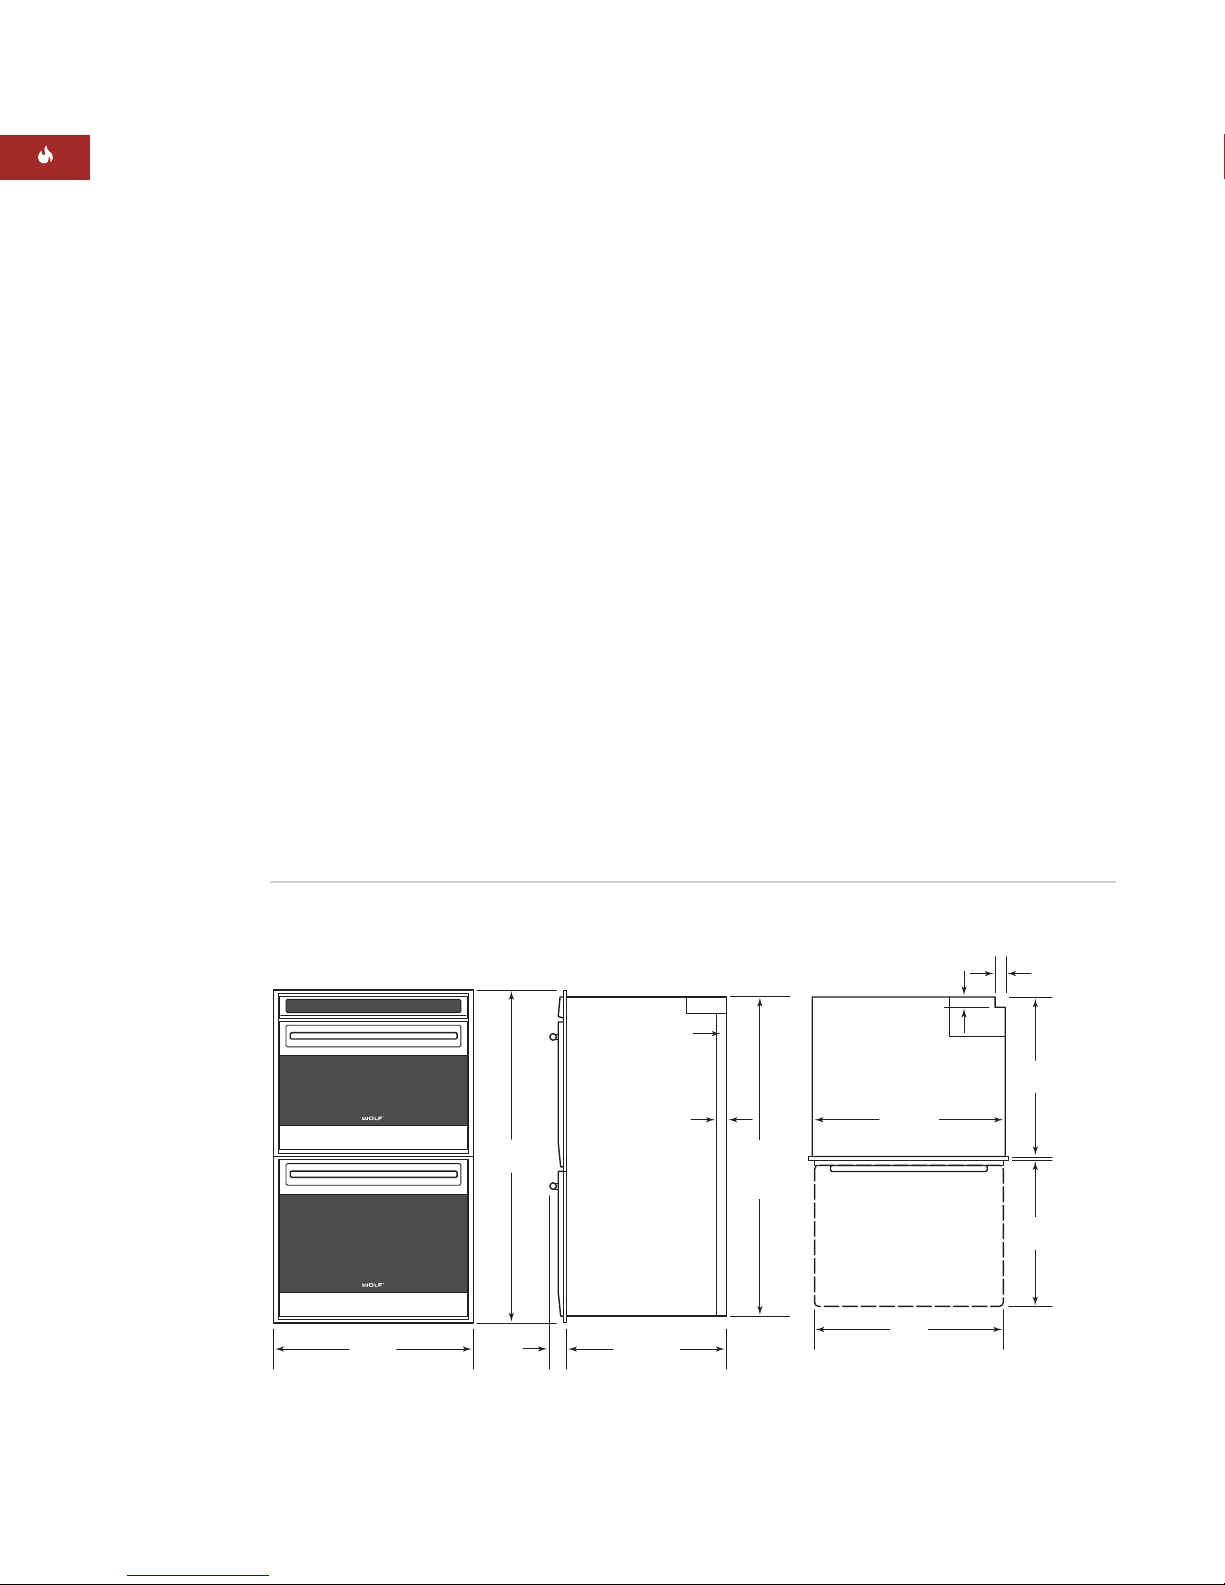
TOP VIEW
341/8"
(867)
3311/16"
(870)
3"
(76)
173/4"
(451)
11/4"
(32)
17/8"
(48)
17/8"
(48)
RIGHT SIDE VIEW
OVERALL DIMENSIONS – MODEL SO36U