WolfPack WolfPad User manual

1
WolfPad
Programmable 10-button Keypad with PoE Function
WolfPad User Manual

2
Important Safety Information
1. Read, follow, and keep these instructions.
2. Heed all warnings.
3. Do not use this product near water. Keep away from wet places, such as: spas, pools, sinks, laundries, wet
basements, etc.
4. When cleaning, unplug the switcher and wipe with a dry cloth. Do not use damp cloths, cleaning fluids, or
aerosols which may result in electric shock, fire, or switcher damage.
5. Operate this product using only the included power supply and/or power cable. Use of an unapproved
power implement may impair performance, damage the product, or cause fires.
6. Do not block any ventilation openings. Install in accordance with the manufacturer’s instructions.
7. Do not install or place this product near any heat sources such as radiators, heat registers, stoves, or other
apparatus (including amplifiers) that produce heat.
8. Protect the power cord from being walked on or pinched particularly at plugs, convenience receptacles,
and the point where they exit from the product.
9. Only use attachments/accessories specified by BC to avoid fire, shock, or other hazards.
10. To reduce the risk of electric shock and/or damage to this product, never handle or touch this switcher or
power cord if your hands are wet or damp. Do not expose this product to rain or moisture.
11. Unplug this product during lightning storms or when unused for long periods of time.
12. Never open, remove switcher panels, or make any adjustments not described in this manual. Attempting to
do so could result in electric shock, damage to the switcher, or other hazards.

3
Contents
Important Safety Information ....................................................................................................................2
1. Introduction ........................................................................................................................................... 1
2. Features..................................................................................................................................................1
3. Package Contents................................................................................................................................... 1
4. Panel Description ...................................................................................................................................1
5. Specification...........................................................................................................................................2
6. Installation.............................................................................................................................................. 3
7. Configuration settings............................................................................................................................ 3
Application ...............................................................................................................................................18
1
1. Introduction
HDTV Supplys WolfPad is a 10-button IP enabled keypad controller aimed at providing customers simple and
economic control solutions. With built-in PoE, it can receive power from PoE enabled ethernet switch. The keypad
can control devices like presentation switches through LAN(PoE) port or RS232 port. It supports button
configuration and control, also system firmware update on web UI.
2. Features
WEB GUI programming
Ten buttons
Supports TCP/IP and RS232
Supports PoE function
US or UK single panel for selection
3. Package Contents
1 x BYOD-1000
1 x 1-Gang US Plastic Decora Plates, White
1 x Phoenix Male Connector (3.5mm, 2 Pins)
1 x Phoenix Male Connector (3.5mm, 3 Pins)
2 x #6-32*20mm Cross-Head Screws, Silver
1 x Sheet of pre-printed button labels
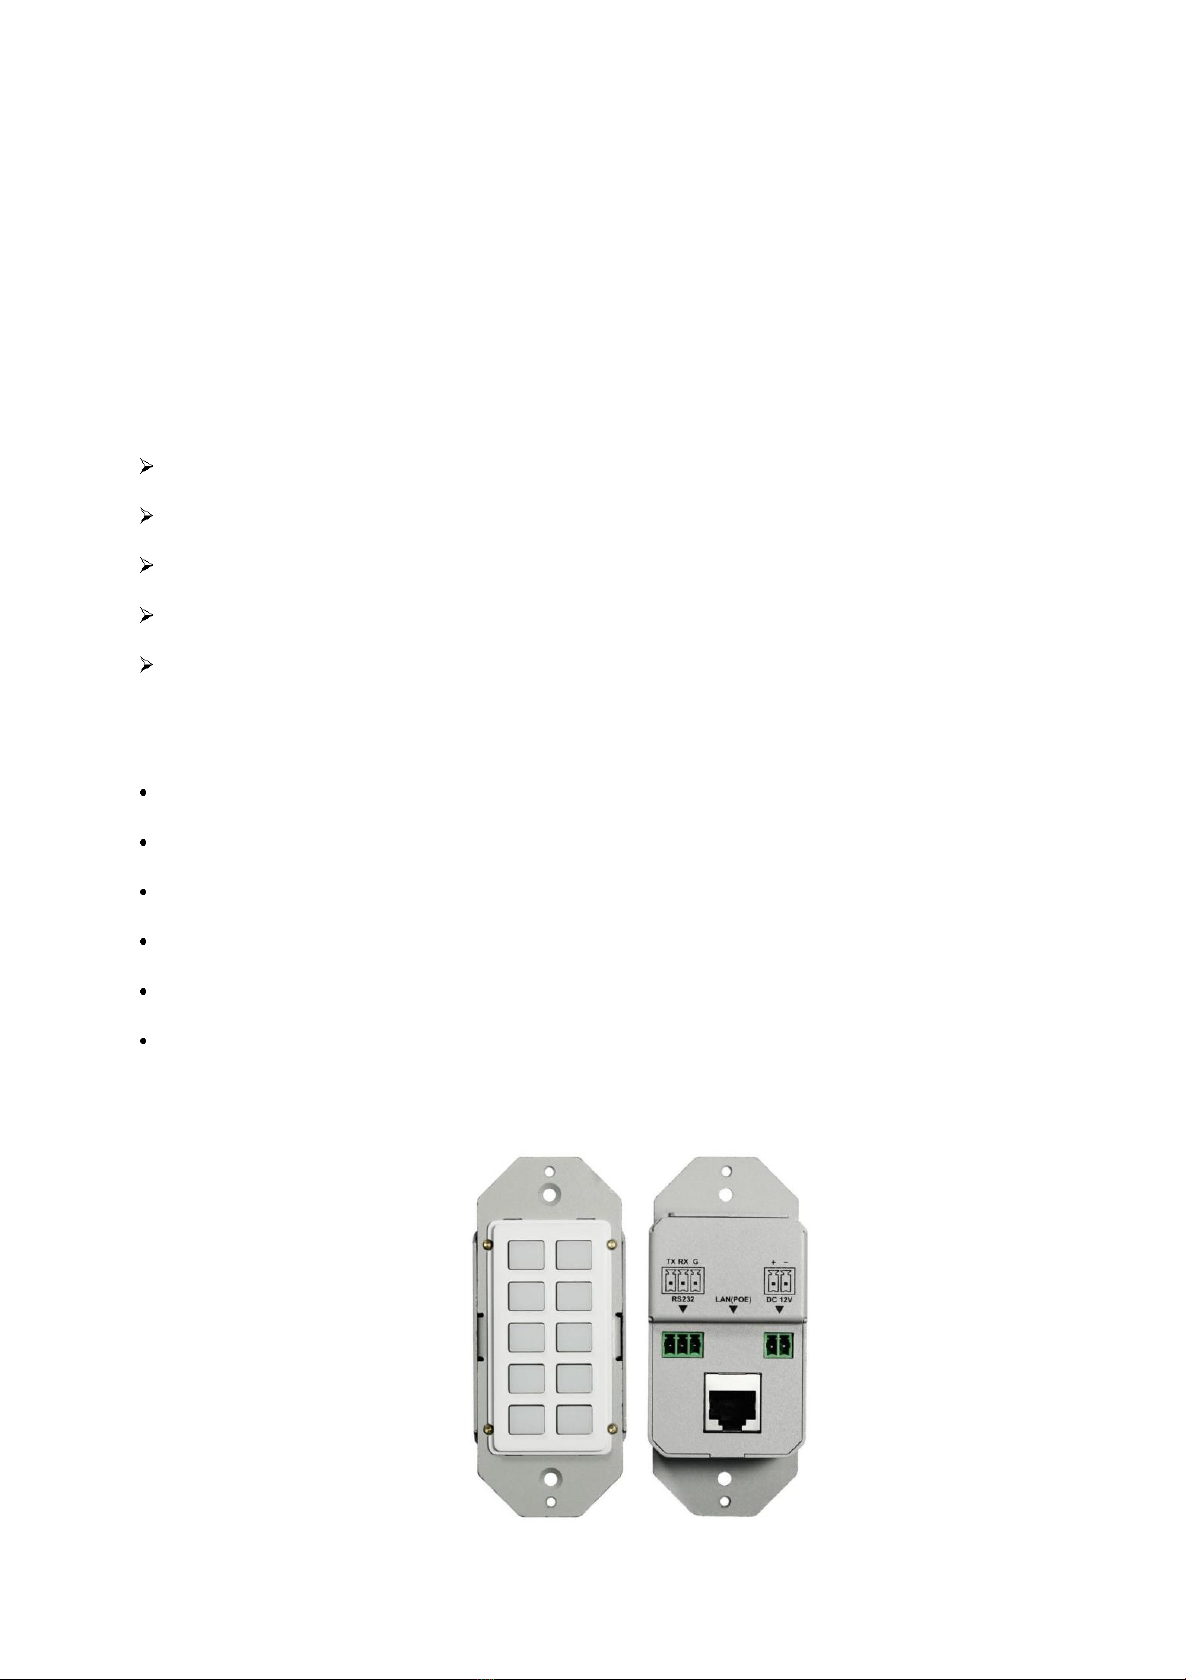
4. Panel Description
2
No.
Name
Description
1
Buttons
Ten buttons on front panel.
The buttons are not defined by default.
Users can configure functions for the buttons through WEB GUI
2
RS232
Connect to a RS232 enabled device for RS232 control.
3
LAN (PoE)
Connect to a network device such as an Ethernet switch, router for LAN control (Web UI &
Telnet).
4
DC 12V
Connect to DC 12V power adapter (Power adapter is not included in the package).
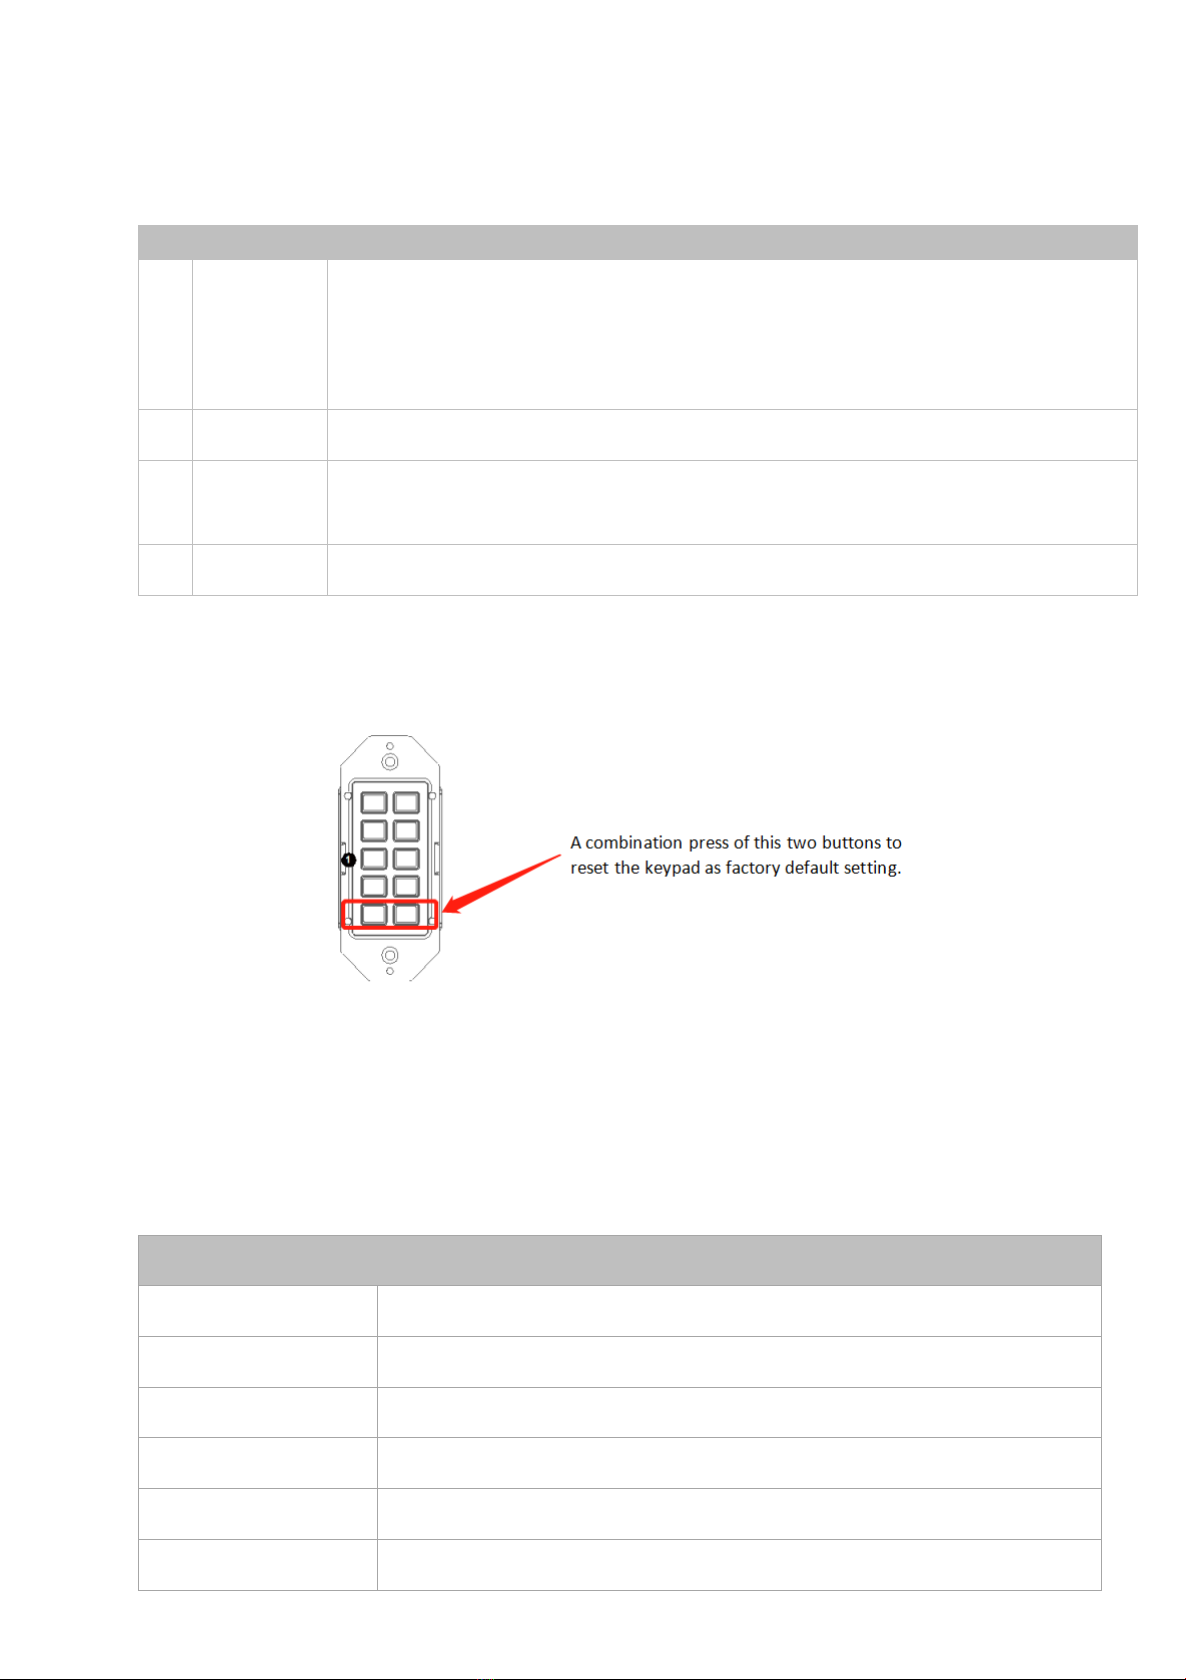
* Factory default setting (The factory default IP address is 192.168.1.254)
* Press the two buttons shown in the above picture at the same for at least until all the backlights of the buttons
blink 3 times, the keypad will be reset to factory defaults.
5. Specification
Technical
Front panel
10 x Buttons (silicone soft buttons)
Back panel
1 x LAN (RJ45, PoE), 1 x RS232; 1 x DC 12V Power In
Operating Temperature
0°C to 45°C (32°F to 113°F)
Storage Temperature
-20°C to 70°C (-4°F to 158°F)
Humidity
10% to 90%, non-condensing
ESD Protection
Human-body Model, ±8kV (Air-gap discharge)/±4kV (Contact discharge)

3
Technical
Power Supply
DC 12V 0.5A (Power adapter is not included in the package)
Consumption (Max)
1.3W
Device Dimension
(W x H x D)
45mm x 105.6mm x 36mm/
1.77” x 4.16” x 1.42”
Product Weight
0.18kg/0.40lb
6. Installation
If the ethernet switch doesn’t support PoE and keypad can’t get power from PoE, users will need to make a power
adapter with supplied phoenix connector to power the keypad through DC 12V port externally.
*Check and ensure that the power adapter is with 12V, and its current is equal to or more than 0.5A.
Plug in the 2-pin cable equipped phoenix connector to DC 12V port of the keypad. Connect the adapter to the
power, the keypad should start work (press the any button, it will flash).
7. Configuration settings
The keypad supports WEB GUI to setup devices and configure commands for the Keypad buttons, it also supports to
set network and system information. The Web UI can be accessible through a browser with latest version, e.g.
Chrome, Firefox, Safari, Opera, IE10+, etc.
Step 1: Connect LAN (PoE) port of the keypad to an Ethernet switch using a straight UTP cable.
Note:
•If the switch supports PoE, the keypad can receive power from it. Otherwise, connect a DC 12V power adapter
to the keypad. The power adapter is not included, for how to make a power adapter, please refer to “Make a
Keypad Power Adapter with Phoenix Connector” section.
•The default network mode of the keypad is DHCP, ensure the ethernet switch is connected to a DHCP server
such as a router.
4
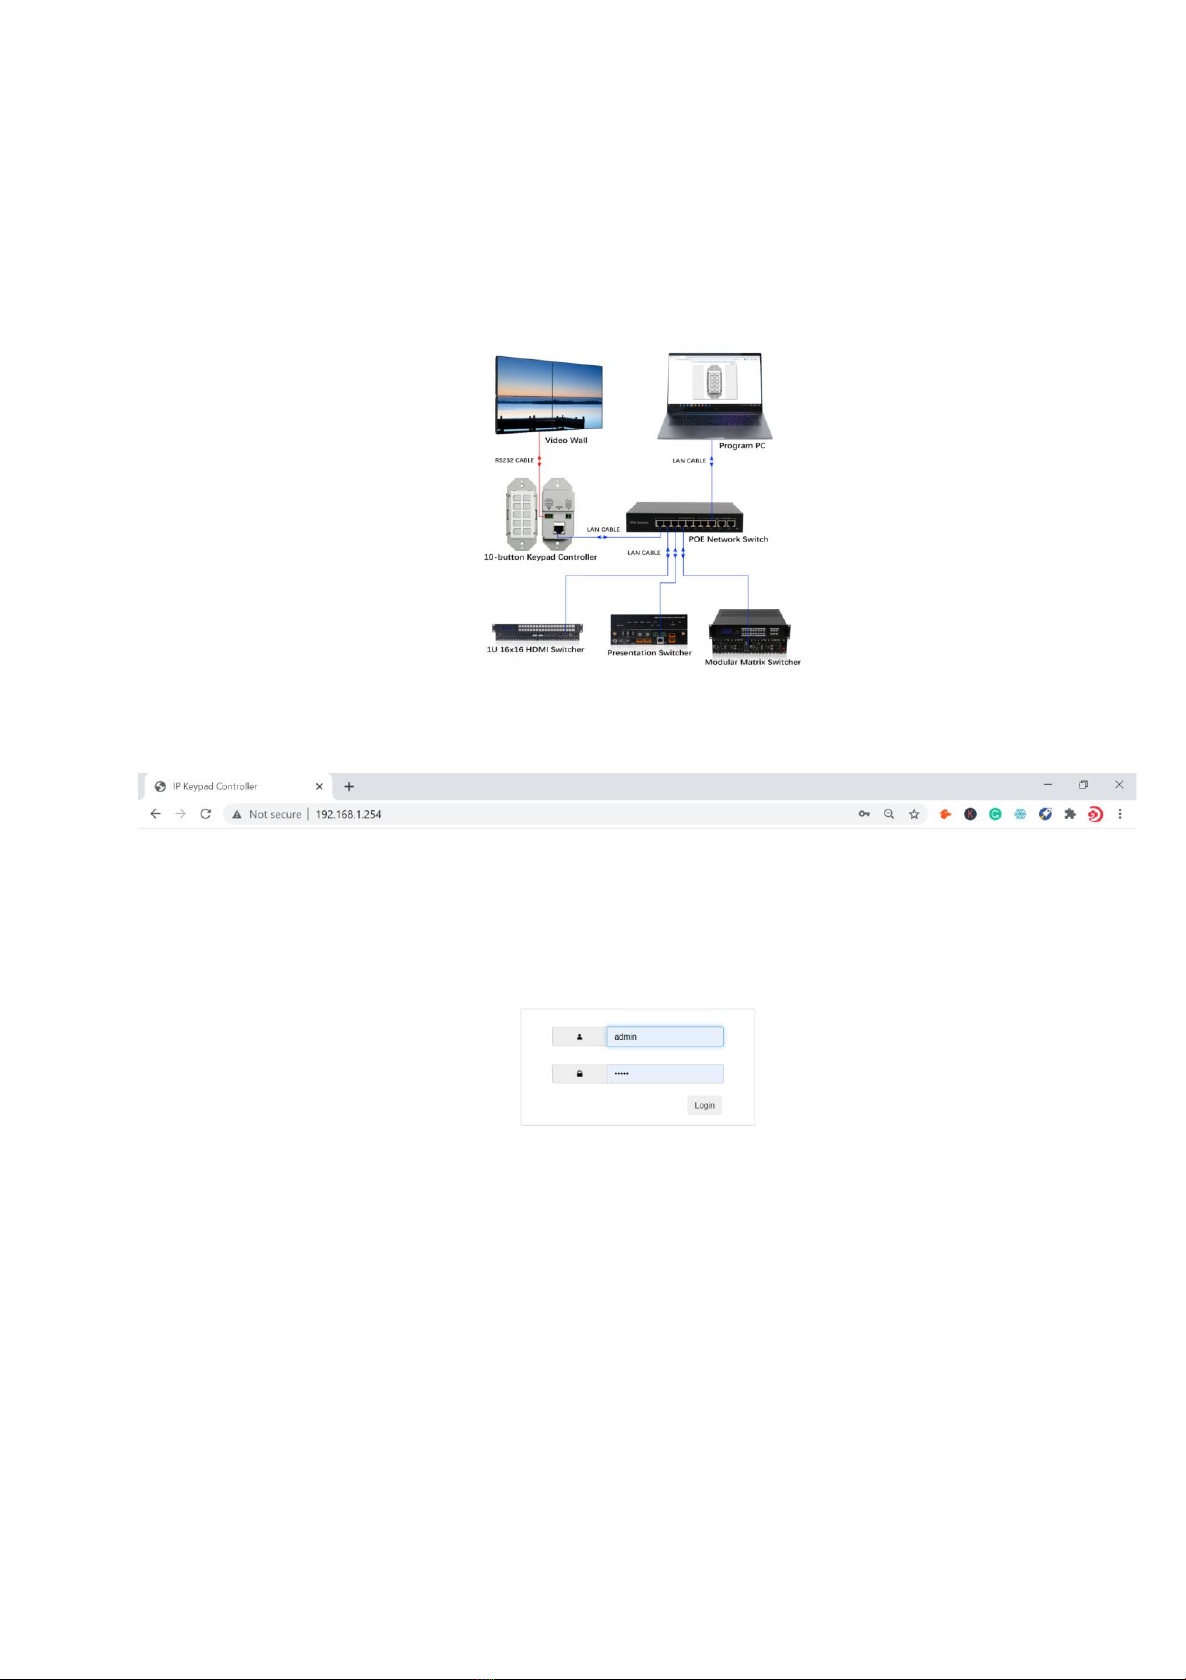
Step 2: Connect a PC to the same network.
Step 3: Power on all devices.
See the following diagram:
Input the IP address(the factory default IP address is 192.168.1.254) to the browser and press Enter. The following
Login window will display. Input the default Username(admin) and Password(admin):
Click “Login” to enter the following page.

5
The main page includes 5 interfaces: Key settings, Command Settings, Device Settings, Network Settings, System
Settings.
“Device Settings”, “Command Settings” and “Key Settings” are used to configure and store functions for buttons.
“Network Settings” is used to configure DHCP/Static IP information.
“System Settings” is used to configure general system settings.
Configure Functions for Buttons
“Device Settings”, “Command Settings” and “Key Settings” submenus allows you to set up mostly used devices and
commands for quick button function definition.
The configuration sequence should be as follows:
6
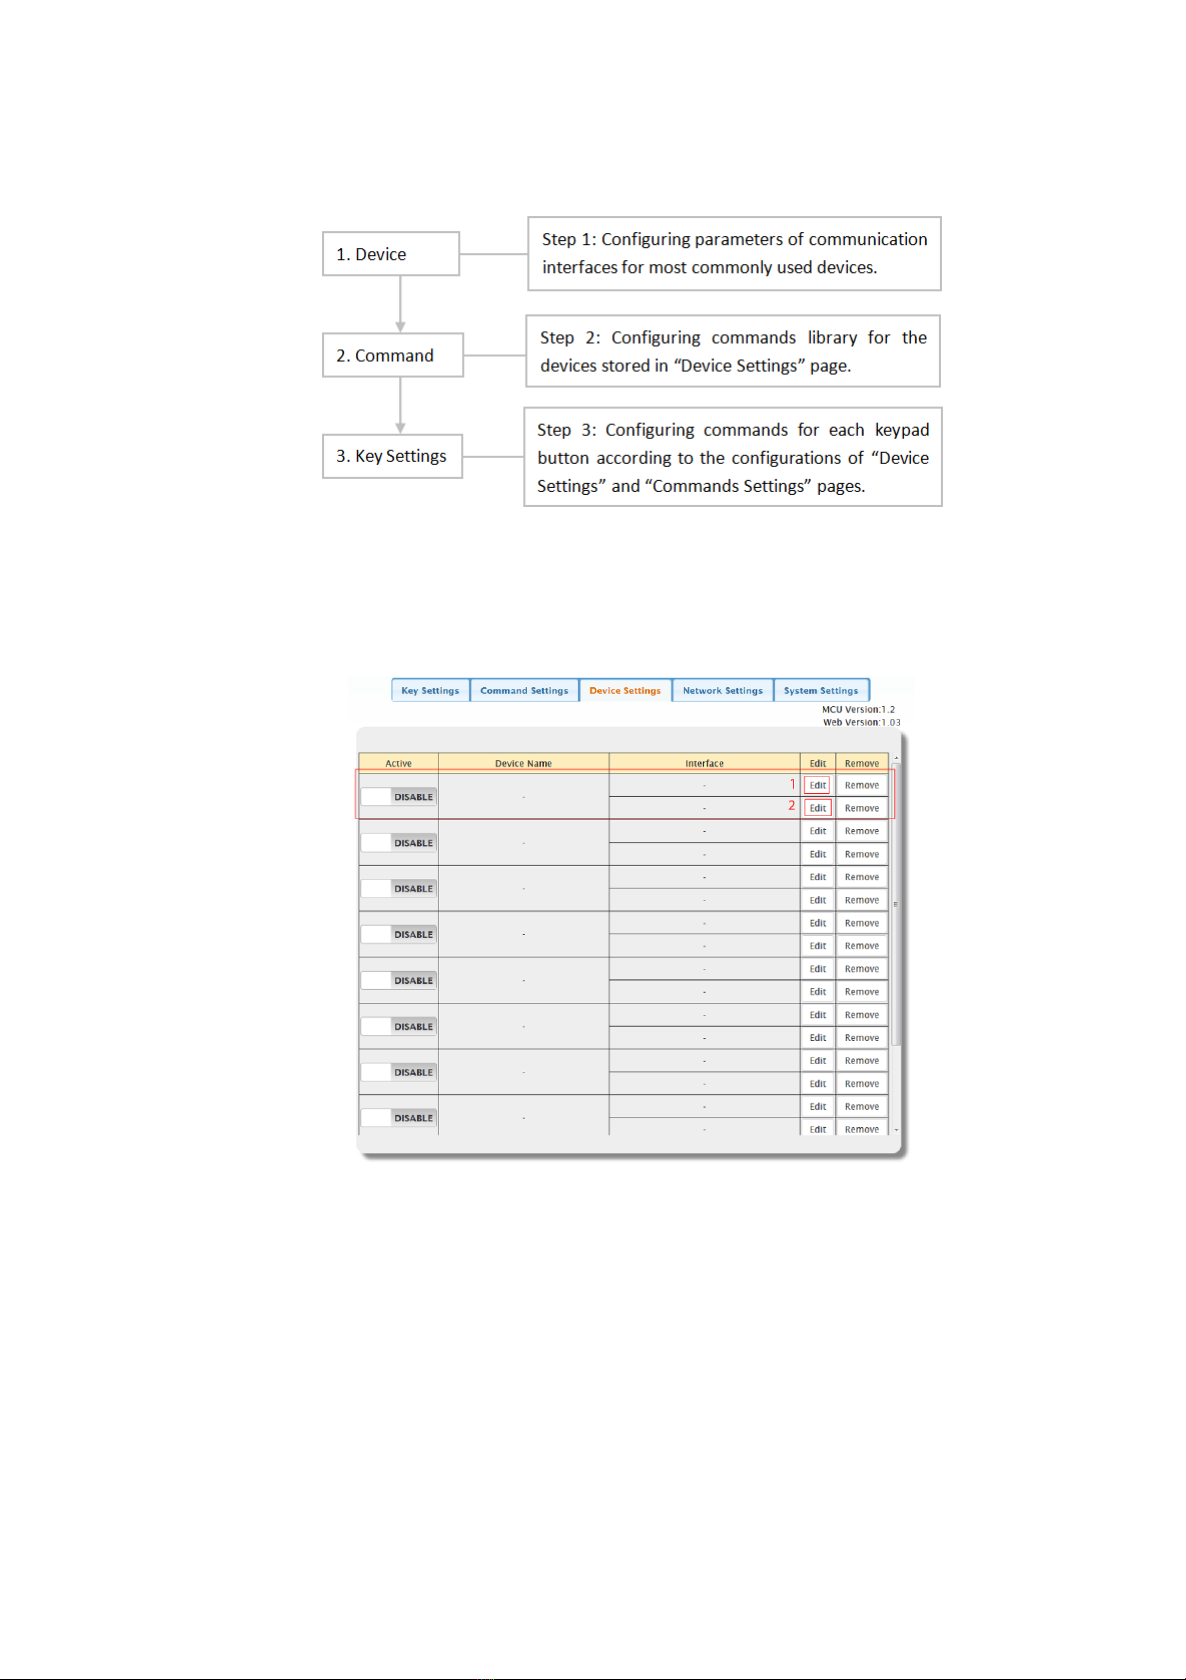
Device Settings
This section allows you to configure device library for most commonly used devices. See operation in detail as
below.
The controlled devices can be connected to LAN (via network) port or RS232 port of the keypad. Users can configure
IP control parameters and RS232 control parameters for these most commonly used devices by clicking the “Edit” to
start:
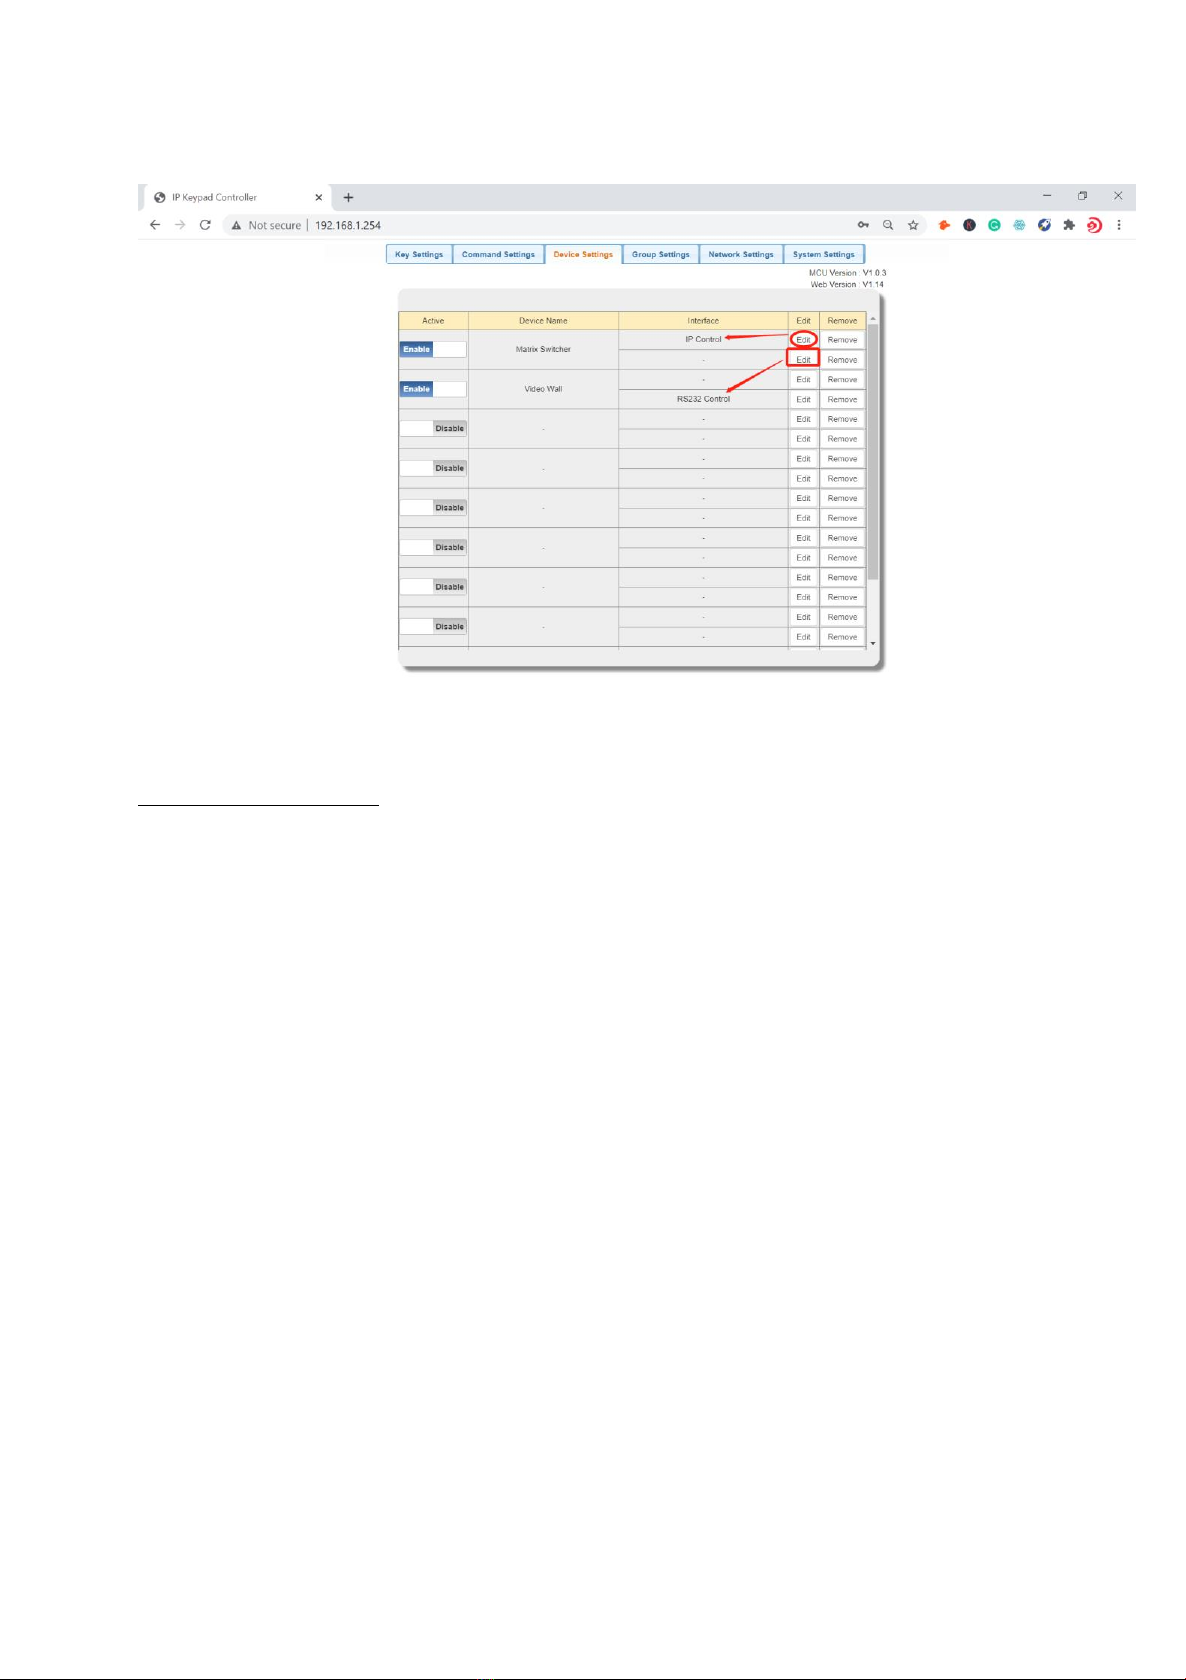
7
Configurations of IP Control:
(1) Click the first “Edit” to enter device name and IP information like the following page.
(2) Configure the items in the picture above.
•Device Name: Configure a device name for the controlled third-party device.
Note: The length of each “Device Name” shall not exceed 16 characters and can include letters, numbers
and underscores.
•IP Address: Input the IP address of the controlled device.
•Connect Port: Input the port number of the controlled device.
•Username: Input the telnet control username of the controlled device.
•Password: Input the telnet control password of the controlled device.
Note: The Connect Port, Username and Password are provided by third-party devices manufacturers and can be
found in instructional documentations.
(3) Click “Save” to save all configurations above.
Table of contents


