Ensure minimum of 12mm front edge of frame
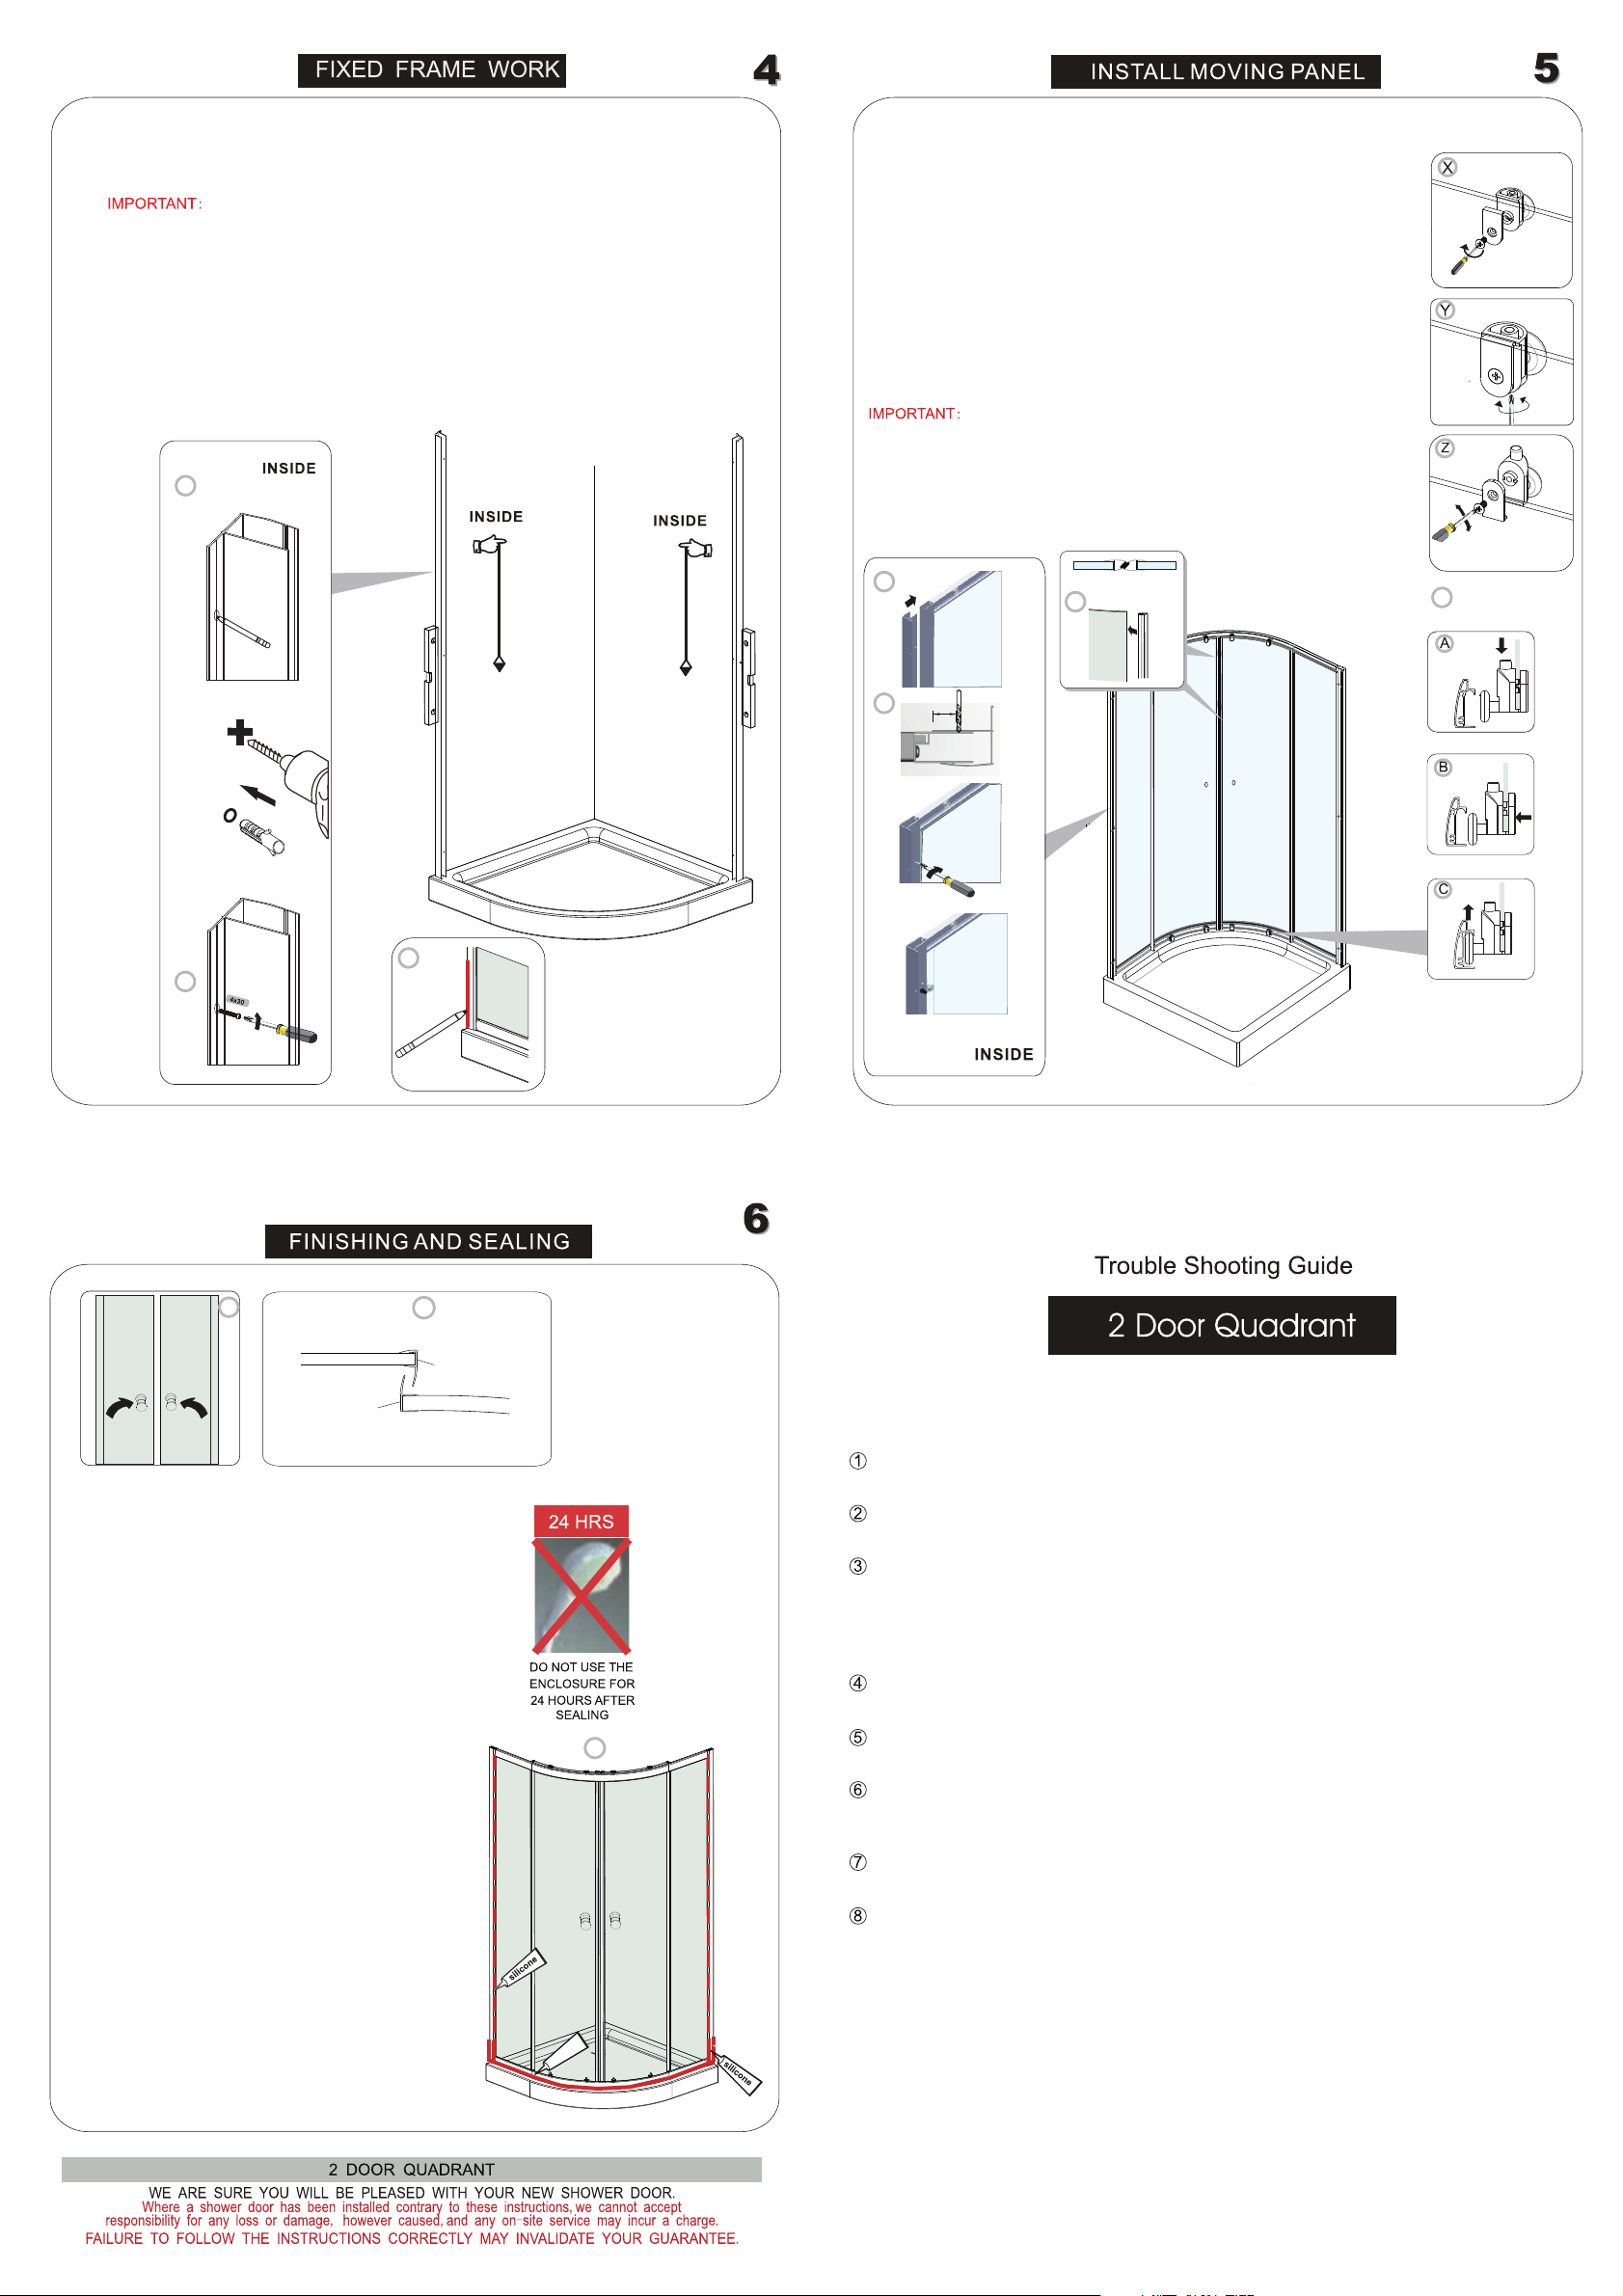
To ensure the correct rolling action and the magnets meet evenly when
the doors are closed, adjust the roller by adjusting the screw clockwise
or anti-clockwise as shown in Y.
and decide on the step in from the edge of the tray to the wall profiles. Wall profile can
Position the assembled door frame (with wall profile fully pushed into frame) on the tray Place the assembled frame onto the tray and slot into the wall
Install the top and bottom rollers (C065)/(C064) to the top / bottom
holes of the moving panels B. See X and Z. Slot top rollers into the top
profile and then clip in the bottom rollers as shown in steps A, B and C
Attach the magnetic seal (C057) to the front of the moving panels
Adjust magnet in or out on glass to ensure there are no further gaps
Drill 3 equally spaced holes with 3mm drill bit through the wall
profile and frame. Fix the frame to the wall profile with
(2SY50) and cover cap (C070).
screws
(see picture below).
profiles.
Ensure full door frame is positioned correctly in from the edge of the tray
be adjusted out until door is positioned correctly on the tray.
before drilling holes in wall for attaching the wall profiles.
Curved face on the profile is to the outside.
Remove frame from tray. position the wall profiles back on the tray. Ensure the wall
profiles are plumb. Mark the position for fixing the wall profile to the wall.
Drill with 6mm masonry drill bit and insert wall plug (2SP12)
Fix the wall profile to the wall with screws (2SY51) and screw cover cap (C070).
Second wall profile can be fixed into door frame when lifting onto tray in situations
where enclosure is a tight fit
Note:
NOTE:
Seal also the joints between the wall profile and the
frame profile.
6mm
5
6
4
45 degree angle
88
12mm
7
9
12
10 11
Moving panel
Fixed panel
C039
C038
Fit handle (C063).
Note: Do not over tighten.
Attach the moving panel upright seals (C038) to the
back of the moving panel (long seal). Attach the fixed
panel upright seals (C039) to the front of the fixed
panel (short seal).
Ensure they are resting on the bottom fixed glass clips
glass clip where applied in step 3.
Use a quality silicone sealant to seal the finished
door. Seal any joints between profiles on bottom.
Seal only along bottom rail on the OUTSIDE
between profile and the tray and approx 50mm up
between the wall profile and the wall.
Seal also where bottom profile and frame profile
overlap 50mm up.
Seal top to bottom on the between theINSIDE
wall profile and the wall.
Note: Do not apply sealant on inside fo tray.
Sealing Inside
Sealing Outside
Note: The moving panel seals are longer.
(C071). Remove excess silicone from the fixed
C
Is the tray level? (See page 3 of the site installation instructions.)
Are the wall profiles plumb (vertically aligned and checked with a spirit level)? (See step 5)
Gap between the magnet at the front:
A) Ensure the magnets are on the correct way.
B) Adjust magnets out on glass to ensure there are no gaps. (See step 8)
Are the rollers properly adjusted? (See step 8)
Is the unit correctly sealed with silicone? (See step 12)
Do the finished measurements on the tray comply with the adjustments listed in the
product specifications book?
Are the upright seals fitted correctly? (See step 11)
Ensure a sufficient dab of silicone is applied between fixed clip and glass on bottom
profile and upright seal is fitted to fixed panel. Then remove excess silicone. (Step 3)
Step 4 Step 7
Step 8
Step 9
Step 10
Step 11
Step 12
Step 5
Step 6
silicone


