Identifyandverifythatyouhaveallthepartslisted.
Readtheinstructionsatleastonce,familiarizingyourself
withthepartsbeforebeginning.You'llneeda#3Phillips
screwdriveranda7/16"wrenchforassembly.
3265
Micro Adjuster
Please Read Carefully!
Part# Description Qty.
WB002 Washer 2
Part# Description Qty.
5770B 1/2" Screw 1
Part# Description Qty.
5772B 1" Screw 1
Part# Description Qty.
NUT015 Nut 2
Part# Description Qty.
WL002 Lock Washer 1
Parts List:
Parts listed below are not shown in the hardware
drawings. Refer to photos in the instructions:
Part Description Quantity
4523 Micro Adjuster . . . . . . . . . . . . . . . . . . . . 1
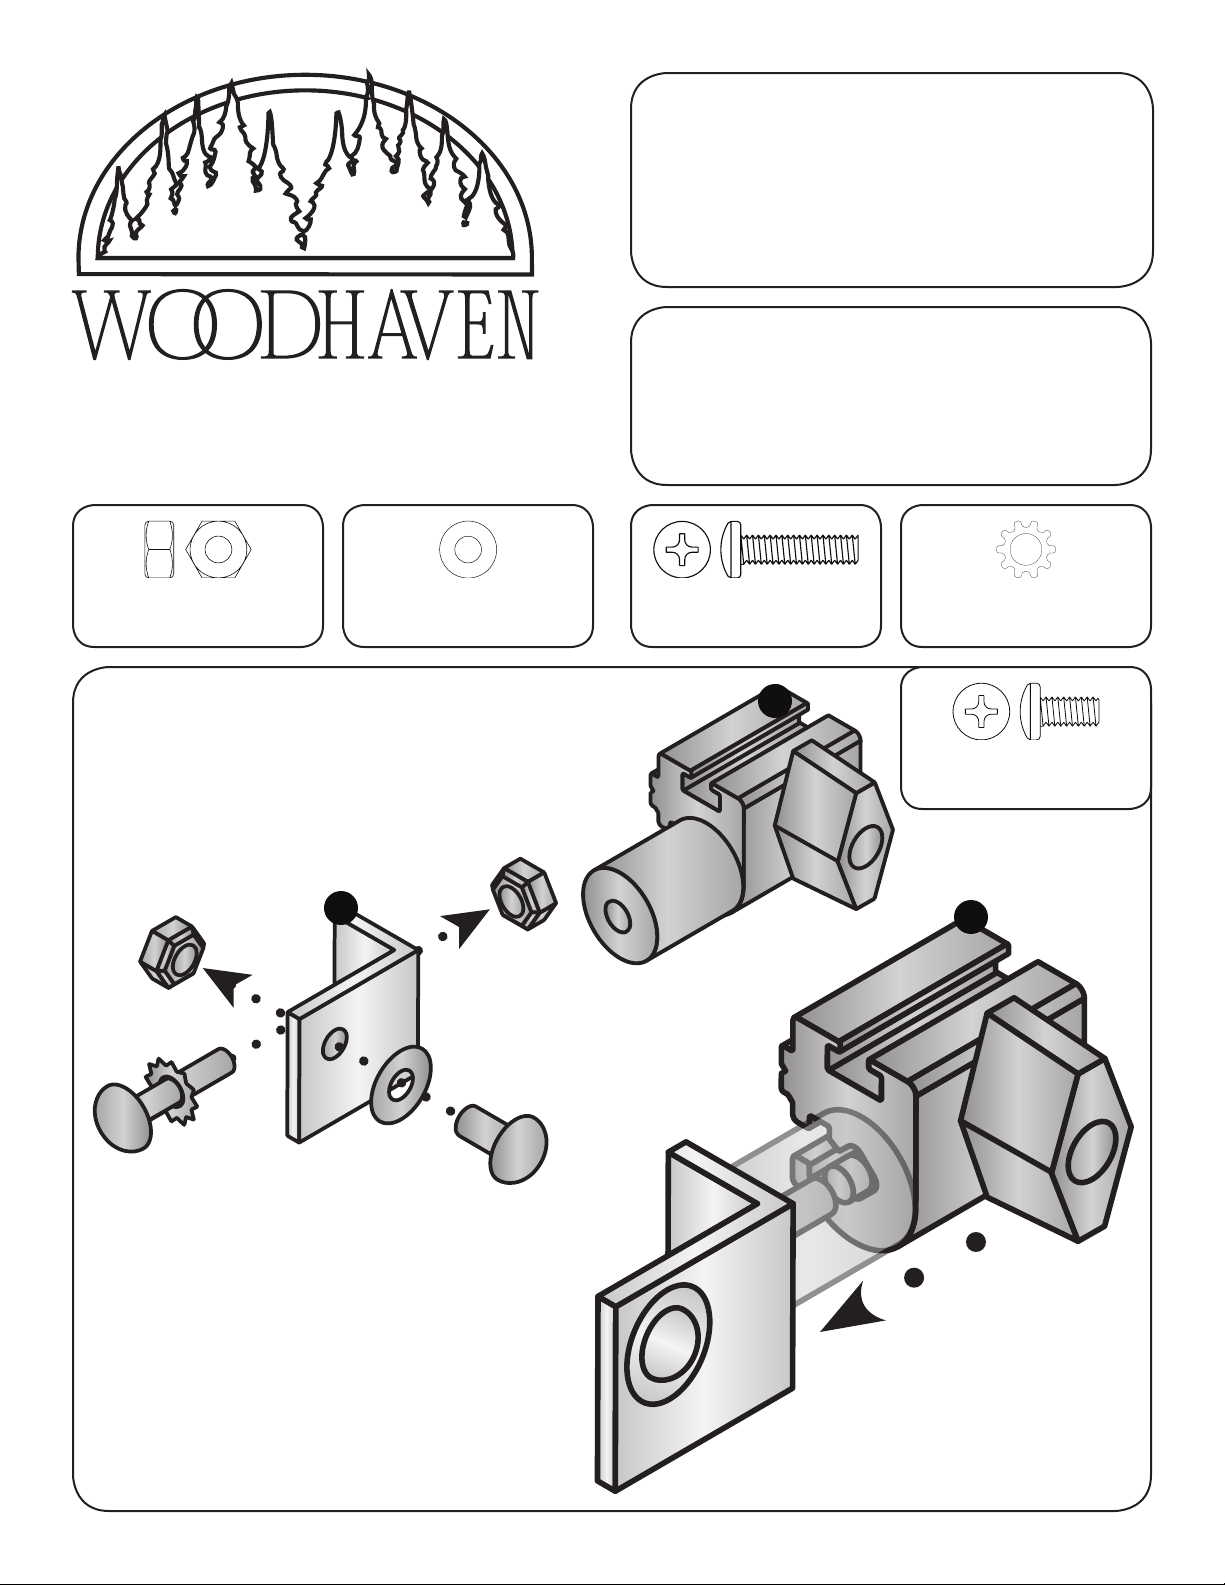
Assemblethe4523MicroAdjusteraccording
totheinstructionsthatcomewithit.Youwill
notusethe1"stud,10-24nut,10-24setscrew
or3/32"allenwrench.Itshouldlooklikethe
imageontherightwhenassembled.See fig. A
Installthelockwasher(WL002)onthe
1"screw(5772B)andinsertitthrutheholein
theshortedgeofthebracket(3265A).Installa
washer(WB002)andnut(NUT015)onthescrew.
Screwthenutonuntilalmosttight.See fig. B
Installawasher(WB002)onthe1/2"
screw(5770B),insertthescrewthruthehole
inthelongfaceofthebracketandstarta
nut(NUT015)onthescrew.See fig. B
Screwtheknurledknob
oftheMicroAdjusteronthe
1"screwuntilit'sabout1/16"
awayfromthenut.Assembly
iscomplete.See fig. C
A
BC
5772B x1
WL002 x1
NUT015 x1
NUT015 x1
5770B x1
WB002 x1
4523
Assembly
3265A


