Worx WA0163 User manual

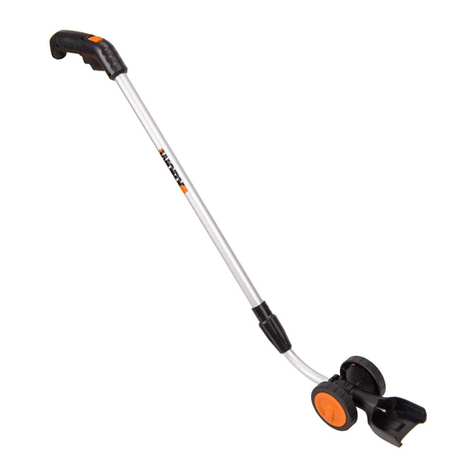
Extension pole for JAWSAWTM
Forlængerstang til JAWSAWTM
EN
DK
P06
P09
WA0163

Original instructions EN
Oversættelse af de oprindelige instruktioner DK


7
6
5
4
3
1
8
2

III
1
BA C
E F
G
D
H I
J

Extension pole for JAWSAWTM EN
76
1. LOCK OUT BUTTON
2. PUSH HANDLE
3. TRIGGER SWITCH
4. SLIDING HANDLE
5. HANDLE CLAMP
6. HANDLE CLAMP RELEASE LEVER
7. POWER CORD
8. CABLE HOOK
TECHNICAL DATA
Length 1.6m
Weight 1.6kg

Extension pole for JAWSAWTM EN
76
SAFETY INSTRUCTIONS
WARNING: Read and understand
all instructions. Failure to follow all
instructions listed below may result in serious
personal injury.
1. When using the extension pole to cut the
branches on a tree, make sure to keep a
firm footing and balance. Do not stand in a
position where the branch may land after
being cut.
2. When using this machine with the
extension pole, make sure to attach the
power cord of the machine to the power
cord of the extension pole firstly, and then
attach the power cord of the extension
pole to power supply.
OPERATING INSTRUCTIONS
NOTE: Before using the tool, read the
instruction book carefully as well as the
instruction book of JawSaw WG307E WG308E.
This extension pole is designed for use with
WORX JawSaw WG307E WG308E.
ASSEMBLY
WARNING: Before attaching the
extension pole, make sure that the
tool is switched off and unplugged.
1. Turn the release lever to allow the handle
clamp to spring open (See Fig. A).
2. With the pole slightly angled away from
the tool, insert the steel tab into the slot
behind the front handle, then swing the
pole towards the tool’s rear handle
(See Fig. B).
3. Position the pole handle clamp inside the
tool’s rear handle as shown in Fig. C.To
allow the clamp to properly fit the handle,
push lock-out button and depress the
trigger.
4. Close the clamp, the locking lever will
automatically lock into place.
5. Check that the rear handle is properly fitted
to the clamp and check that the clamp is
properly set in the lock position.
6. Plug in the tool’s power cord to the
extension pole power cord 1. (See Fig. D)
WARNING! Before attaching the
power cord of the tool to the
power cord of the extension pole ( 1
in Fig. D), make sure that the tool is
switched off and unplugged from the
power supply.
WARNING! When using the tool
with the extension pole, make sure
to attach the power cord of the tool to
the power cord of the extension pole,
and then attach the power cord of the
extension pole to power supply.
WARNING! ELECTROCUTION
HAZARD
Never use the JawSaw or extension
pole in an area with overhead power

Extension pole for JAWSAWTM EN
988
lines or where the branch being cut can
come into contact with overhead power
lines.
CUTTING WITH EXTENSION POLE
1. Attached the pole as described in
‘’Assembly’’.
2. Connect the JawSaw to extension cord.
Connect extension cord to power supply.
NOTE: The JawSaw is quite heavy on the
end of the extension pole.
Add the pole attachment when cutting limbs
above shoulder height and remove the pole
saw when cutting limbs at or below shoulder
height.
3. Lift JawSaw with extension pole upward
one step by one step (See Fig. E).To raise
to the vertical position, lift by the JawSaw
first, then hand over hand along the pole.
4. Before cutting a high branch, consider all
the same points detailed in the “Trimming
Branches” section in the instruction
manual for JawSaw but pay particular
attention to the likely path of the falling
branch.
WARNING: Do not stand directly
below a branch being cut. Keep
bystanders far away. Do not stand on a
ladder or other type of unstable support
while using the tool. Do not use the tool
near cable, electrical power or telephone
lines. Keep 10’ (3m) away from all power
lines. (See Fig. F-I)
5. Position the Jaw perpendicularly on the
branch being cut.
NOTE: Maximum cutting capacity of
JawSaw is 100mm.
6. One hand should firmly grip the push
handle of the extension pole.The other
hand should hold the metal portion of the
pole or the sliding handle on the pole
(See Fig. J).
7. Complete the cut as described in
“Trimming Branches”.
8. At the completion of the cut, be ready to
immediately support the weight of the
entire tool as the branch falls.
WARNING: Do not let the JawSaw
fall to the ground at the completion
of the cut, this may damage the tool.

98 9
Forlængerstang til JAWSAWTM DK
1. KONTAKTSPÆRRE
2. BAGESTE HÅNDGREB
3. UDLØSER
4. GLIDEHÅNDTAG
5. KLEMME TIL HÅNDTAG
6. UDLØSER PÅ KLEMME TIL HÅNDTAG
7. TIL EFFEKTLEDNING
8. LEDNINGSKROG
TEKNISK DATA
Længde 1.6m
Maskinens vægt 1.6kg

1110
Forlængerstang til JAWSAWTM DK
SIKKERHEDSINSTRUK-
TIONER
ADVARSEL! Læs samtlige
anvisninger. Følges nedenstående
instruktioner ikke, kan der opstå personskade.
1. Hvis du bruger forlængerstangen til, at
klippe grenene på et træ, skal du sørge for
at stå stabil på jorden med en god balance.
Undgå, at stå på områder hvor grenene
muligvis kan falde ned.
2. Når du bruger en forlængerstang på
dette værktøj, skal du først slutte stikket
fra værktøjet til forlængerstangen, og
slut herefter stikket fra værktøjet til
stikkontakten.
BETJENINGSVEJLEDNING
NOTER:Før du bruger dette værktøj,
læs instruktionsbogen omhyggeligt,
såvel som instruktionsbogen fra JawSaw
WG307E WG308E.
Forlængerstangen er beregnet til en WORX
JawSaw WG307E WG308E.
SAMLING
ADVARSEL: Før du sætter
forlængerstangen på, skal du sørge
for at værktøjet er slukket og at stikket
er trækket ud.
1. Drej låsehåndtaget, så klemmen åbnes
(Se A1).
2. Hold forlængerstangen skråt over
værktøjet, sæt ståltappen i hullet bagved
det forreste håndtag og drej stangen mod
det bagerste håndtag. (Se B)
3. Sæt klemmen på forlængerstangens ind
i det bagerste håndtag, som vist i Fig. C.
For at klemmen kan passe på håndtaget,
skal du trykke på lås-op knappen og trykke
på udløseren.
4. Luk klemmen, hvorefter låsehåndtaget
automatisk låses på plads.
5. Kontroller, at det bagerste håndtag sidder
ordentligt på klemmen, og sørg for at
klemmen sidder ordentligt låst.
6. Slut stikket fra værktøjet i stikket på
forlængerstangen 1. (Se D)
ADVARSEL! Før du slutter stikket
fra værktøjet til stikket på
forlængerstangen ( 1i Fig. D), skal du
sørge for at værktøjet er slukket, og at
stikket er trukket ud af stikkontakten.
ADVARSEL! Når du bruger en
forlængerstang på dette værktøj,
skal du først slutte stikket fra værktøjet
til forlængerstangen, og slut herefter
stikket fra værktøjet til stikkontakten.
ADVARSEL! FARE FOR ELEKTRISK
STØD
Brug aldrig saven eller forlængerstangen
på et område med luftledninger, eller
hvor grenen, som skal skæres over, kan
komme i kontakt med luftledninger.

1110
Forlængerstang til JAWSAWTM DK
SKÆRING MED FORLÆNGERSTANGEN
1. Sæt forlængerstangen på værktøjet, som
beskrevet i ”Samling af forlængerstangen”.
2. Slut forlængerledningen til saven. Slut
forlængerledningen til stikkontakten.
BEMÆRK: Saven er ret tung i enden, som
forlængerstangen sættes på.
Sæt forlængerstangen på, hvis du skal skære
grene der sidder over skulderhøjde, og
tag den af hvis du skal skære grene under
skulderhøjde.
3. Løft saven med forlængerstangen opad
trin for trin (Se E). For at hæve værktøjet
lodret, skal du først løfte saven, og begynd
herefter at holde på forlængerstangen.
4. Før du begynder, at skære en højtsiddende
gren, skal du tage de samme ting i
betragtning, som står i afsnittet “Trimning
af grene”, og hold godt øje med hvor
grenen vil falde.
ADVARSEL: Stå ikke direkte
under en gren, som skæres over.
Hold folk, der står omkring, på sikker
afstand. Undgå, at stå på en stige
eller andre ustabile støtteelementer,
mens du bruger værktøjet. Undgå,
at bruge værktøjet i nærheden af
kabler, højspændingsledninger og
telefonledninger. Hold værktøjet 3m væk
fra alle højspændingsledninger. (Se F-I)
5. Hold klipperen vinkelret på grenen, som
skal skæres over.
BEMÆRK: Savens maksimale
skærekapacitet er 100mm.
6. Hold fat om trykhåndtaget på
forlængerstangen med den ene hånd. Hold
på metalstykket eller på glidehåndtaget
med den anden hånd (Se J).
7. Sav færdig, som beskrevet i “Trimning af
grene”.
8. Sørg for, at være klar til at bære værktøjets
fulde vægt, umiddelbart efter grenen er
blevet skåret over.
ADVARSEL: Undgå, at saven falder
på jorden, når du er færdig med at
skære, da dette kan ødelægge den.

Copyright © 2012, Positec. All Rights Reserved.
Other manuals for WA0163
1
Table of contents
Languages:
Other Worx Power Tools Accessories manuals