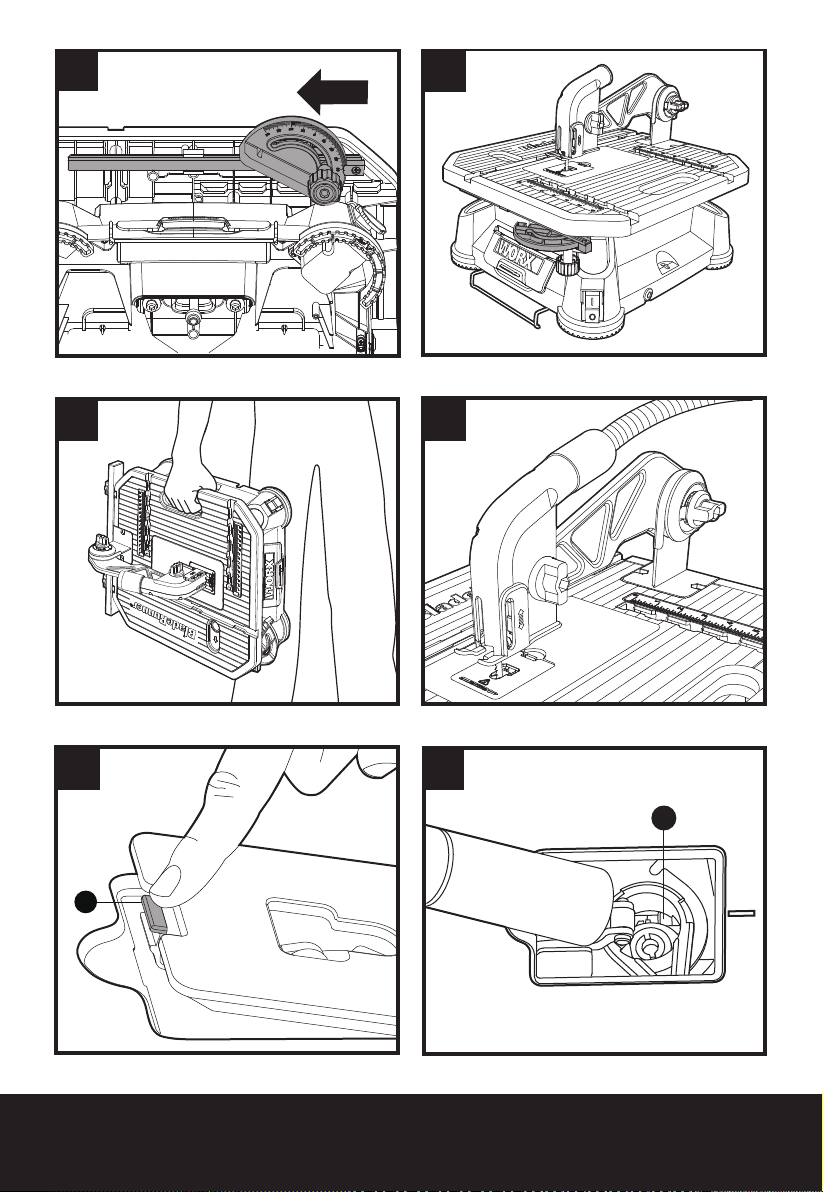
Worx BladeRunner X2 WX572 User manual

WX572
P09
P15
P21
P27
P33
EN
DK
FIN
NOR
SV
BladeRunner®X2
BladeRunner®X2
BladeRunner®X2
BladeRunner®X2
BladeRunner®X2

Original instructions EN
Original brugsanvisning DK
Alkuperäiset ohjeet FIN
Original driftsinstruks NOR
Bruksanvisning i original SV

12
11
10
8
9
7
3
4
15
13
14
5
6
1
2
20

B3
1
2
3
4
B2
2
1
B1
19
A2
A1
18
17
1
2

1
2
E2
CD1
2
1
E1
2
1
D2

ONOFF
G1
G2 G3
F
H1 H2

I1 I2
16
K
J
L1 L2

L3 L4
MN
e
O
19
P

BladeRunner®X2 EN
9
1. ON SWITCH
2. OFF SWITCH
3. STABILIZER BRACKET
4. BLADE STORAGE
5. MITER GAUGE
6. TABLE INSERT
7. GUARD KNOB
8. GUARD
9. VACUUM PORT
10. GUARD ARM
11. GUARD ARM CLAMP KNOB
12. RIP FENCE
13. FENCE SLOT
14. MITER SLOT
15. BLADE RELEASE
16. VACUUM ADAPTER (See Fig. K )
17. BOLT (See Fig. A1)
18. GUARD ARM ASSEMBLY KNOB
(See Fig. A1)
19. BLADE (See Fig. B2)
20. BLADE HOLDER
TECHNICAL DATA
Type WX572 (5 - designation of machinery, representative of BladeRunner)
Voltage 230-240V~50/60Hz
Rated power 650W
No load speed 3000/min
Cutting capacity
Wood 40mm
PVC pipe 30mm
Aluminum 10mm
Steel 3mm
Ceramic 10mm
Stroke Length 19mm
Blade shank T-shank
Blade length 100mm or less
Table size 400X430mm
Protection class /ll
Weight 6.7kg

BladeRunner®X2 EN
10
NOISE INFORMATION
A weighted sound pressure LpA: 83.4dB(A)
A weighted sound power LwA: 96.4dB(A)
KpA& KwA 3.0dB(A)
Wear ear protection when sound pressure is over 80dB(A)
ACCESSORIES
Miter gauge 1
Rip Fence 1
Blades:
Wood cutting blade 1
Aluminum cutting blade 1
Steel cutting blade 1
Ceramic Tile Cutting Blade 1
Scrolling Blade 1
Vacuum Adapter 1
Blade Grip 1
We recommend that you purchase your accessories from the same store that sold you the tool.
Use good quality accessories marked with a well-known brand name. Choose the type according
to the work you intend to undertake. Refer to the accessory packaging for further details. Store
personnel can assist you and offer advice.

BladeRunner®X2 EN
11
ADDITIONAL SAFETY
INSTRUCTIONS FOR YOUR
BLADE RUNNER
1. SAFETY PRECAUTION
1) Do not use saw blades which are damaged
or deformed;
2) Replace the table insert when worn;
3) Connect blade runner to a dust-collecting
device when sawing wood;
4) Take care that the selection of the saw
blade and the speed depends on the
material to be cut;
5) Do not clean the saw blade whilst it is in
motion;
6) Wear suitable personal protective
equipment, when necessary, this could
include:
– Hearing protection to reduce the risk of
induced hearing loss;
– Respiratory protection to reduce the risk of
inhalation of harmful dust;
– Gloves for handling the saw blade and
rough material.
2. SAFE OPERATION
1) During transportation the saw blade guard
should be locked at fully down (close to the
table) position;
2) Do not use guard and its support system
for handling or transportation;
3) When cutting round timber use a suitable
holding device to prevent twisting of the
workpiece;
4) Any time after cutting, the knob for locking
blade guard shall be released so that the
guard is fully down to the table.
5) The thickness of cutting material cannot
exceed the recommended maximum
thickness.This tool cannot be used for
cutting glass or mesh wire.
To reduce the risk of injury, user
must read instruction manual
Double insulation
Wear ear protection
Wear eye protection
Wear dust mask
Warning: do not expose to rain or
use in damp locations
Before any work on the machine
itself, pull the power plug from the
outlet
Wear protective gloves
Wood
Aluminium
Metal
Plastic
Ceramic tile
Teeth per inch
SYMBOLS

BladeRunner®X2 EN
12
Incorrect
Correct
Lock
Unlock
Tighten Guard and Guard Arm firmly
down onto material, don’t raise up
the Guard Arm when cutting
Waste electrical products must not be
disposed of with household waste.
Please recycle where facilities exist.
Check with your local authorities or
retailer for recycling advice
OPERATING INSTRUCTIONS
NOTE: Before using the tool, read the
instruction book carefully.
BladeRunner
®
— A compact, easy-to-use table-top
tool for cutting wood, metal, plastic, and ceramic
tile. Lightweight and portable for use right at the
work area. Blade is stationary while user moves
the material for easier, more precise work.
BEFORE PUTTING THE MACHINE INTO
OPERATION
1. All covers and safety devices have to
be properly fitted before the machine is
switched on.
2. It must be possible for the blade to run freely.
3. When working with wood that has been
processed before, watch out for foreign
bodies such as nails or screws etc.
4. Before you turn ON the switch, make sure that
the saw blade is correctly fitted and that the
machine’s moving parts run smoothly.
5. If the cutting operation will produce a high
amount of dust, especially hazardous dust
such as ceramic tile or treated wood, connect
an effective vacuum to the vacuum port (9).
ASSEMBLY AND OPERATION
Action Figure
Guard arm installation See Fig. A1,A2
Blade installation See Fig. B1-B3
Blade changing See Fig. C
Stabilizer bracket
adjustment
See Fig. D1,D2
Guard adjustment See Fig. E1,E2
On/off safety switch See Fig. F
Rip cut See Fig. G1-G3
Cross cut See Fig. H1,H2
Miter cut See Fig. I1,I2
Internal cut See Fig. J
Dust collection See Fig. K
Store the accessories See Fig. L1,L2,L3,L4
Carrying See Fig. M
MAINTENANCE
WARNING:
Remove the plug from the
socket before carrying out any adjustment,
servicing or maintenance.To insure proper
operation and extend tool life, prevent dust from
accumulating under the table insert (5).
a) Be sure to use a vacuum or dust extractor
for dusty cutting operations such as
ceramic tile. (See Fig. N)
b) If dust accumulates, remove theTable Insert
by lifting the latch (e). (See Fig. O)
c) Vacuum out the dust in and around the
Blade Holder. (See Fig. P)
d)
Reattach theTable Insert securely.
There are no user serviceable parts in your power
tool. Never use water or chemical cleaners to
clean your power tool. Wipe clean with a dry
cloth. Always store your power tool in a dry place.
Keep the motor ventilation slots clean. Keep all
working controls free of dust. If you see some
sparks flashing in the ventilation slots, this is
normal and will not damage your power tool.
If the supply cord is damaged, it must be
replaced by the manufacturer, its service
agent or similarly qualified persons in order to
avoid a hazard.

BladeRunner®X2 EN
13
TROUBLE SHOOTING
Symptom Possible Causes Possible Solution
Tool will not start when
switched on.
• Power cord is not plugged
in.
• Check to make sure power cord
is connected well into a working
outlet.
Poor cut quality
• Blade is worn out.
• Blade is set incorrectly
•Too much vibration in
material.
•Too much vibration of the
saw.
• Feed rate too fast.
• Make sure the blade is sharp and
not broken.
• Make sure the blade is installed
properly.
• Tighten Guard and Guard Arm
firmly down onto material.
• Clamp or fasten saw base to
tabletop.
• Feed the material more slowly.
Work efficiency is low. • Blade is worn out.
• Feed rate too fast.
• Change to a new blade.
• Feed the material more slowly.
Blade is not clamped tightly by
the Blade Holder.
• Blade is not inserted into
place fully.
• Use blade grip to push the blade as
far into the blade holder as possible
before letting go of Blade Release.
Blade Release button cannot be
pressed down. • Dust accumulates. • Clean the dust around the Blade
Release button.
Guard Arm vibrates too much.
• Screws fixing the Guard
Arm on the work table are
loose.
• Tighten the screws as shown in
Fig A1.
Rip Fence cannot slide into
Fence Slot smoothly.
• Rip Fence locking knob too
tight.
• Loosen the Rip Fence locking
knob.

14
BladeRunner®X2 EN
14
ENVIRONMENTAL
PROTECTION
Waste electrical products must not be
disposed of with household waste. Please
recycle where facilities exist. Check with
your local authorities or retailer for recycling
advice.
PLUG REPLACEMENT
( UK & IRELAND ONLY )
If you need to replace the fitted plug then
follow the instructions below.
IMPORTANT
The wires in the mains lead are colored in
accordance with the following code:
BLUE =NEUTRAL
Brown = Live
As the colors of the wires in the mains lead of
this appliance may not correspond with the
colored markings identifying the terminals
in your plug, proceed as follows.The wire
which is colored blue must be connected to
the terminal which is marked with N.The wire
which is colored brown must be connected to
the terminal which is marked with L.
WARNING! Never connect live or neutral
wires to the earth terminal of the plug. Only
fit an approved 13ABS1363/A plug and the
correct rated fuse.
NOTE: If a moulded plug is fitted and has to
be removed take great care in disposing of the
plug and severed cable, it must be destroyed
to prevent engaging into a socket.
Connect
Blue to N
(neutral)
Outer sleeve
firmly clamped
Cable grip
Brown L (live)
13 Amp fuse approved
to BS1362
DECLARATION OF
CONFORMITY
We,
POSITEC Germany GmbH
Konrad-Adenauer-Ufer 37
50668 Köln
Declare that the product,
Description BladeRunner®
Type WX572 (5-designation of machinery,
representative of Blade Runner )
Function Sawing various materials
Complies with the following Directives,
2006/42/EC
2004/108/EC
2011/65/EU
Standards conform to:
EN 61029-1
EN 55014-1
EN 55014-2
EN 61000-3-2
EN 61000-3-3
The person authorized to compile the technical
file,
Name: Russell Nicholson
Address: Positec Power Tools (Europe)
Ltd, PO Box 152, Leeds, LS10 9DS, UK
2014/11/19
Allen Ding
Deputy Chief Engineer,Testing & Certification

BladeRunner®X2 DK
15
1. TÆND-KONTAKT
2. SLUK-KONTAKT
3. STABILISATORKONSOL
4. KLINGEOPBEVARING
5. GEARINGSLÆRE
6. BORDINDLÆG
7. SKÆRMHOVED
8. SKÆRM
9. SUGEHOVEDET
10. SKÆRM
11. KLEMMEHÅNDTAG TIL SKÆRM
12. SAVGRÆNSE
13. RILLE I SKJOLD
14. VINKELRILLE
15. KLINGEUDLØSER
16. VAKUUM ADAPTER (Se Fig. K )
17. BOLT (Se Fig. A1 )
18. SKÆRMARMENS
MONTERINGSHOVED (Se Fig. A1 )
19. BLAD (Se Fig. B2 )
20. KLINGEHOLDER
TEKNISK DATA
Type WX572 (5 - udpegning af maskiner, repræsentant for Saw)
Nominel Spænding 230-240V~50/60Hz
Effekt 650W
Hastighed uden belastning 3000/min
Skærekapacitet
Træ 40mm
PVC rør 30mm
Aluminium 10mm
Stål 3mm
Flise 10mm
Slaglængde 19mm
Klingeskaft T-shank
Bladet Laengde 100mm eller mindre
Bordstørrelse 400X430mm
Isolationsklasse /ll
Maskinvægt 6.7kg

BladeRunner®X2 DK
16
STØJINFORMATION
Typiske A-vægtede lydniveauer lydtrykniveau LpA: 83.4dB(A)
Typiske A-vægtede lydniveauer lydeffektniveau LwA: 96.4dB(A)
KPA& KWA 3.0dB(A)
Brug høreværn, når lydtrykket er over 80dB(A)
TILBEHØR
Gearingslære 1
Savgrænse 1
Blad:
Blad til skæring i træ 1
Blad til skæring i aluminium 1
Blad til skæring i metal fliseklinge 1
Rulleklinge 1
Vakuum Adapter 1
Greb til klinge 1
Det anbefales, at alt udstyr købes i samme butik som maskinen. Anvend udstyr af god kvalitet og
af et velkendt mærke. Se på emballagen til tilbehøret for at få yderligere oplysninger. Få hjælp og
råd i butikken.

BladeRunner®X2 DK
17
VIGTIGE
SIKKERHEDSANVISNINGER
FOR SKÆREKLINGER
1. SIKKERHEDSFORANSTALTNINGER
1) Undgå, at bruge klinger, der er beskadiget
eller skæve.
2) Udskift bordindlægget når det er nedsklidt.
3) Forbind båndsaven til en støvsamler, når
du saver i træ.
4) Sørg for, at du bruger den korrekte klinge og
hastighed til materialet, som du skærer i.
5) Undgå, at rengøre klingen når den er i
bevægelse.
6) Sørg for, at bruge beskyttelsesudstyr når
det er nødvendigt, herunder:
– Et høreværn, så du reducere risikoen for
beskadigelse af din hørelse.
– Åndedrætsbeskyttelse, så du reducere
risikoen får indånding af skadeligt støv.
– Handsker til at håndtere savbåndet samt
grove materialer.
2. SIKKER BETJENING
1) Savskærmen skal være helt lukket (tæt på
bordet) under transport af maskinen.
2) Undgå, at bruge skærmen og dens
støttesystem til håndtering eller transport.
3) Når du skærer i rundt træ, bedes du bruge
en passende holdeenhed, så du forhindre
arbejdselementet i at dreje rundt.
4) Når du er færdig med at skære, skal
du altid sørge for at knappen til
klingeskærmen udløses, så skærmen er
helt nede ved bordet.
5) Tykkelsen på det skærende materiale må
ikke overskride den anbefalede maksimale
tykkelse. Dette værktøj må ikke bruges til at
skære glas eller trådnet.
For at undgå risikoen for
personskader skal brugeren læse
brugervejledningen
Dobbelt isoleret
Bær høreværn
Bær øjenværn
Bær støvmaske
Advarsel: må ikke udsættes for
regn eller bruges i vådrum
Før ethvert arbejde på selve
maskinen skal stikket trækkes ud
af stikkontakten.
Bær beskyttelseshandsker
Træ
Aluminium
Metal
Plastik
Flise
Tænder pr. inch
SYMBOLER

BladeRunner®X2 DK
18
Forkert
Rigtigt
Lås
Lås op
Stram skærm og skærmarmen fast
ned mod materialet; skærmarmen
må ikke hæves, når der saves
Affald af elektriske produkter må ikke
bortskaffes sammen med husholdning-
saffald. Indlever så vidt muligt produktet
til genbrug. Kontakt de lokale myndighed-
er eller forhandleren, hvis du er i tvivl
BETJENINGSVEJLEDNING
NOTER: Før du bruger dette værktøj, læs
instruktionsbogen omhyggeligt.
BladeRunner
®
—
Et kompakt værktøj, der er nemt at
bruge til at skære i træ, metal, plastik og keramiske filer.
Let og transportabel til brug lige ved arbejdsområdet.
Bladet flytter sig ikke, mens brugeren bevæger materialet
hvilket giver en lettere og mere præcis skæring.
FØR MASKINEN TAGES I BRUG
1. Alle dæksler og sikkerhedsenheder skal være
korrekt monteret, før maskinen tændes.
2. Det skal være muligt for klingen, at dreje frit
rundt.
3. Når du arbejder med træ, som har
været brugt før, skal du holde øje med
fremmedlegemer, såsom søm og skruer osv.
4. Før du trykker påTÆND knappen, skal du
sørge for at klingen er monteret ordentligt,
og at maskinens bevægelige dele kører
ordentligt.
5. Hvis skæringen vil give meget støv, og
specielt farligt støv såsom fra keramiske
fliser eller behandlet træ, bedes du tilsluttet
en passende støvsuger til sugeåbningen(9).
MONTERING OG DRIFT
Handling Figur
Installation af
skærmarm Se Fig..A1,A2
Montering af klingen Se Fig. B1-B3
Udskiftning af klingen Se Fig. C
Justering af
stabilisatorkonsol
Se Fig. D1,D2
Skærmjustering Se Fig. E1,E2
Tænd/sluk-knap Se Fig. F
Længdesnit Se Fig. G1-G3
Tværsnit Se Fig. H1,H2
Vinkelsnit Se Fig. I1,I2
Intern skæring Se Fig. J
Støvsamling Se Fig. K
Opbevaring af tilbehør Se Fig. L1,L2,L3,L4
Transport Se Fig. M

BladeRunner®X2 DK
19
FEJLFINDING
Symptom Mulige årsager Mulig løsning
Maskinen starter ikke, når man
tænder for det • Strømkablet er ikke sluttet til. • Sørg for, at strømkablet er
ordentligt sluttet til stikkontakten.
Dårlig skærekvalitet
• Klingen er slidt ned.
• Klingen er samlet forkert
• For megen vibration i
materialet.
• For megen vibration i saven.
• Fremføringshastighed for
hurtig.
• Sørg for, at klingen er skarp og
ikke beskadiget.
• Sørg for, at klingen er sat ordentlig
på.
• Stram skærm og skærmarm ned
mod materialet.
• Klem eller fastgør savbasen til
bordpladen.
• Før materialet frem langsommere.
Maskinen skærer ikke særligt
effektiv.
• Klingen er nedslidt
• Fremføringshastighed for
hurtig.
• Skift klingen med en ny.
• Før materialet frem langsommere.
Klingen kan ikke spændes
ordentlig fast med
klingeholderen.
• Klingen er ikke sat helt på
plads.
• Brug klingegreb til at skubbeklingen
så langt ind i klingeholderen som
muligt, før klinge udløses.
Klingeudløserknap kan ikke
presses ned. • Der samler sig støv. • Rengør støv rundt om
klingeudløserknappen.
Skærmarm vibrerer for meget.
• Skruer, der fastholder
skærmarmen på
arbejdsbordet er løse.
• Spænd skruerne som vist i Fig A1.
Savgrænse glider ikke let ind i
grænsestikket.
• Savgrænsens låsehoved er
for stram. • Løsn savgrænsens låsehoved.

20
BladeRunner®X2 DK
20
VEDLIGEHOLDELSE
ADVARSEL: Træk stikket ud af
stikkontakten, inden der udføres nogen
form justering, service eller vedligeholdelse.
For at sikre at værktøjet virker ordentligt, samt
forlænge dets levetid, skal du sørge for at støv
ikke opsamler sig under bordindsættelsen (5).
a) Sørg for at bruge en støvsuger eller en
støvsamler, når du skærer i emner der
støver meget, såsom fliser. (Se Fig. N)
b) Hvis der samler sig støv, skal du fjerne
bordindsættelsen ved at løfte låsen (e). (Se
Fig. O)
c) Støvsug støvet indeni og omkring
klingeholderen. (Se Fig. P)
d) Sæt bordindsættelsen ordentligt på igen.
Der er ingen dele i din bore-/skruemaskine, der
kan serviceres af brugeren. Brug aldrig vand
eller kemiske rengøringsmidler til rengøring.
Må kun rengøres med en tør klud. Opbevar
altid din bore-/skruemaskine på et tørt sted.
Hold motorens ventilationsåbninger rene.
Knapperne o.l. skal være rene og frie for støv.
Det er helt normalt, at der kan forekomme
gnister i ventilationsåbningerne, og det
beskadiger ikke bore-/skruemaskinen.
Hvis elledningen beskadiges, skal
den udskiftes af producenten, dennes
servicerepræsentant eller anden kvalificeret
fagmand for at undgå, at der opstår farlige
situationer.
MILJØBESKYTTELSE
Affald af elektriske produkter må
ikke bortskaffes sammen med
husholdningsaffald. Indlever så vidt
muligt produktet til genbrug. Kontakt de lokale
myndigheder eller forhandleren, hvis du er i
tvivl.
KONFORMITETSERKLÆRING
Vi,
POSITEC Germany GmbH
Konrad-Adenauer-Ufer 37
50668 Köln
Erklærer herved, at produktet,
Beskrivelse BladeRunner®
Type WX572 (5- Udpegning af maskiner,
repræsentant for Saw)
Funktioner Savning af forskellige
materialer
Er i overensstemmelse med følgende direkti-
ver:
2006/42/EC
2004/108/EC
2011/65/EU
Standarder i overensstemmelse med
EN 61029-1
EN 55014-1
EN 55014-2
EN 61000-3-2
EN 61000-3-3
Personen, autoriseret til at udarbejde den
tekniske fil,
Navn Russell Nicholson
Adresse Positec Power Tools (Europe)
Ltd, PO Box 152, Leeds, LS10 9DS, UK
2014/11/19
Allen Ding
Vicechef; Ingeniør,Test & Certificering
Other manuals for BladeRunner X2 WX572
2
This manual suits for next models
2
Table of contents
Languages:
Other Worx Saw manuals