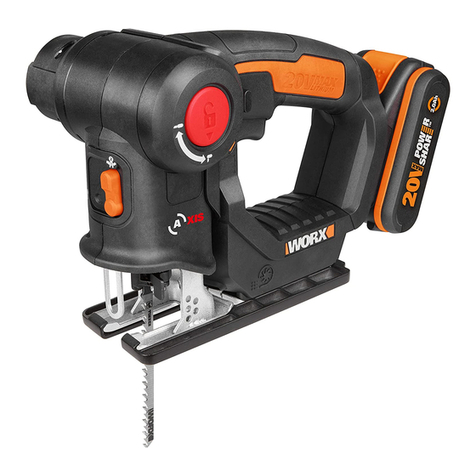
Worx WX473 User manual

SAFETY AND OPERATING MANUAL
Jigsaw WX473 WX473.1 WX474

Jigsaw W X 4 7 3 W X 4 7 3 . 1 W X 4 7 4
GENERAL SAFETY RULES
WARNING! Read all instructions. Failure to
follow all instructions listed below may result
in electric shock, fire and/or serious injury.The
term “power tool” in all of the warnings listed
below refers to your mains-operated (corded)
power tool or battery-operated (cordless)
power tool.
SAVE THESE INSTRUCTION
1 Work area
1) Keep work area clean and well lit.
Cluttered or dark areas invite accidents.
2) Do not operate power tools in
explosive atmospheres, such as in the
presence of flammable liquids, gases
or dust. Power tools create sparks which
may ignite the dust or fumes.
3) Keep children and bystanders
away while operating a power tool.
Distractions can cause you to lose control.
2 Electrical safety
1) Power tool plugs must match the
outlet. Never modify the plug in any
way. Do not use any adapter plugs
with earthed (grounded) power tools.
Unmodified plugs and matching outlets
will reduce risk of electric shock.
2) Avoid body contact with earthed or
grounded surfaces, such as pipes,
radiators, ranges and refrigerators.
There is an increased risk of electric shock
if your body is earthed or grounded.
3) Do not expose power tools to rain or
wet conditions. Water entering a power
tool will increase the risk of electric shock.
4) Do not abuse the cord. Never use
the cord for carrying, pulling or
unplugging the power tool. Keep cord
away from heat, oil, sharp edges or
moving parts. Damaged or entangled
cords increase the risk of electric shock.
5) When operating a power tool
outdoors, use an extension cord
suitable for outdoor use. Use of a cord
suitable for outdoor use reduces the risk of
electric shock.
6) If operating a power tool in a damp
location is unavoidable, use a residual
current device (RCD) protected
supply. Use of an RCD reduces the risk of
electric shock.
3 Personal safety
1) Stay alert, watch what you are
doing and use common sense when
operating a power tool. Do not use
a power tool while you are tired or
under the influence of drugs, alcohol
or medication. A moment of inattention
while operating power tools may result in
serious personal injury.
2) Use safety equipment. Always wear
eye protection. Safety equipment such as
dust mask, non-skid safety shoes, hard hat,
or hearing protection used for appropriate
conditions will reduce personal injuries.
3) Avoid accidental starting. Ensure the
switch is in the off-position before
plugging in. Carrying power tools with
your finger on the switch or plugging in
power tools that have the switch on invites
accidents.
4) Remove any adjusting key or wrench
before turning the power tool on. A
wrench or a key left attached to a rotating
part of the power tool may result in
personal injury.
5) Do not overreach. Keep proper
footing and balance at all times. This
enables better control of the power tool in
unexpected situations.
6) Dress properly. Do not wear loose
clothing or jewellery. Keep your
hair, clothing and gloves away from
moving parts. Loose clothes, jewellery or
long hair can be caught in moving parts.
7) If devices are provided for the
connection of dust extraction and
collection facilities, ensure these are
connected and properly used. Use
of these devices can reduce dust-related
hazards.
4 Power tool use and care
1) Do not force the power tool. Use
the correct power tool for your
application.The correct power tool will
do the job better and safer at the rate for

Jigsaw W X 4 7 3 W X 4 7 3 . 1 W X 4 7 4
which it was designed.
2) Do not use the power tool if the
switch does not turn it on and off.
Any power tool that cannot be controlled
with the switch is dangerous and must be
repaired.
3) Disconnect the plug from the power
source and/or the battery pack from
the power tool before making any
adjustments, changing accessories,
or storing power tools. Such preventive
safety measures reduce the risk of starting
the power tool accidentally.
4) Store idle power tools out of the
reach of children and do not allow
persons unfamiliar with the power
tool or these instructions to operate
the power tool. Power tools are
dangerous in the hands of untrained users.
5) Maintain power tools. Check for
misalignment or binding of moving
parts, breakage of parts and any other
condition that may affect the power
tool’s operation. If damaged, have the
power tool repaired before use. Many
accidents are caused by poorly maintained
power tools.
6) Keep cutting tools sharp and clean.
Properly maintained cutting tools with
sharp cutting edges are less likely to bind
and are easier to control.
7) Use the power tool, accessories and
tool bits etc. in accordance with these
instructions, taking into account the
working conditions and the work to
be performed. Use of the power tool for
operations different from those intended
could result in a hazardous situation.
5 Service
1) Have your power tool serviced by
a qualified repair person using only
identical replacement parts. This will
ensure that the safety of the power tool is
maintained.
2) If the replacement of the supply cord
is necessary, this has to be done by
the manufacturer or his agent in order
to avoid a safety hazard.
ADDITIONAL SAFETY
RULES FOR YOUR JIG SAW
1. Always wear a dust mask.
2. Hold power tool by insulated
gripping surfaces when performing
an operation where the cutting tool
may contact hidden wiring or its own
cord. Contact with a” live” wire will make
exposed metal parts of the tool” live” and
shock the operator.
3. Use clamps or another practical way
to secure and support the workpiece
to a stable platform. Holding the work
by hand or against your body leaves it
unstable and may lead to loss of control.
4. Always wear safety glasses or eye
shields when using the jig saw.
Everyday eyeglasses have only
impact-resistant lenses; they are NOT
safety glasses. Following this rule will
reduce the risk of serious personal injury.
5. Always wear hearing protection
during extended periods of operation.
Following this rule will reduce the risk of
serious personal injury.
6. Keep your hands away from cutting
area. Do not reach under the material
being cut because the nearness of the
blade to your hand is hidden from your
sight.
7. Do not use dull or damaged blades.
Bent blades can break easily, or cause
kickback.
8. Remove the plug from the socket before
carrying out any adjustment, servicing or
maintenance.
9. Fully unwind cable drum extensions to
avoid potential overheating.
10. When an extension cable is required you
must ensure it has the correct ampere
rating for your power tool and is in a safe
electrical condition.
11. Ensure your mains supply voltage is the
same as indicated on the rating plate.
12. Your tool is double insulated for additional
protection against a possible electrical
insulation failure within the tool.
13. Always check walls, floors and ceilings to
avoid hidden power cables and pipes.
14. After long working period, external metal
parts and accessories could be hot.
15. Only withdraw the blade from the cut
when the blade has been stopped moving.
16. The pivoting blade foot must be held firmly
against the material being cut to reduce

Jigsaw W X 4 7 3 W X 4 7 3 . 1 W X 4 7 4
saw vibration, blade jumping and blade
breakage.
17. Before cutting, check the cutting line is free
of nails, screws, etc.
18. If possible, ensure the work-piece is firmly
clamped to prevent movement.
19. Never stop the cutting blade by applying
side pressure to the blade.
20.Your Jigsaw is a hand held tools, do not
clamp your Jigsaw.
WARNING: Some dust particles created
by power sawing, contain chemicals
known to cause cancer, birth defects or other
reproductive harm. Some examples of these
chemicals are:
• Leadfromlead-basedpaints.
• Crystallinesilicafrombricksandcement
and other masonry products.
• Arsenicandchromiumfromchemically
treated lumber.
Your risk from these exposures varies,
depending upon how often you do this type of
work.To reduce your exposure to these
chemicals:
• Workinawell-ventilatedarea.
Work with approved safety
GENERAL SAFETY
WARNINGS FOR YOUR
LASER (ONLY FOR WX474)
WARNING: Read all safety warnings
and all instructions. Failure to follow
the warnings and instructions may result in
serious injury.
Save all warnings and instructions for
future reference.
These lasers do not normally present an
optical hazard although staring at the
beam may cause flash blindness.
Do not stare directly at the laser beam. A
hazard may exist if you deliberately stare
into the beam, please observe all safety
rules as follows:
1. The laser shall be used and maintained
in accordance with the manufacturer’s
instructions.
2. Never aim the beam at any person or
an object other than the work piece.
3. The laser beam shall not be
deliberately aimed at another person
and shall be prevented from being
directed towards the eye of a person
for longer than 0.25 seconds.
4. Always ensure the laser beam is
aimed at a sturdy work piece without
reflective surfaces, e.g wood or rough
coated surfaces are acceptable. Bright
shiny reflective sheet steel or similar is
not suitable for laser applications as the
reflective surface may direct the laser beam
back at the operator.
5. Do not change the laser device with
a different type. Repairs must be carried
out by the manufacturer or an authorized
agent.
6. CAUTION: Use of controls or
adjustments other than those
specified herein may result in
hazardous radiation exposure.
Additional safety warning for class 2
laser
The laser device fitted to this tool is
class 2 with a maximum radiation of
1mW and 650nm wavelength.
CLASS 2 LASER RADIATION, DO NOT
STARE INTO BEAM
Double insulation
The tool is double insulated.This means that
all the external metal parts are electrically
insulated from the main power supply.This is
done by placing insulation barriers between
the electrical and mechanical components
making it unnecessary for the tool to be
earthed.
Important note
Be sure the supply is the same as the voltage
given on the rating plate.The tool is fitted with
a two-core cable and plug.
Remove the main plug from socket before
carrying out any adjustment or servicing.

Jigsaw W X 4 7 3 W X 4 7 3 . 1 W X 4 7 4
SYMBOLS
To reduce the risk of injury, user
must read instruction manual
Warning
Double insulation
Wear eye protection
Wear ear protection
Wear dust mask
Rcm approval mark
Laser radiation
Do not stare into beam

Jigsaw W X 4 7 3 W X 4 7 3 . 1 W X 4 7 4

Jigsaw W X 4 7 3 W X 4 7 3 . 1 W X 4 7 4
1. SWITCH LOCK-ON BUTTON
2. ON/OFF SWITCH
3. VARIABLE SPEED CONTROL
4. HAND GRIP AREAS
5. ALLEN KEY
6. VACUUM ADAPTER
7. PARALLEL GUIDE
8. BLADE STORAGE
9. PLASTIC FOOT PLATE PROTECTION
10. ANGLE PLATE
11. DUST BLOWER SWITCH
12. BLADE GUIDE
13. PARALLEL GUIDE FIXTURES
14. BASE PLATE
15. PROTECTION FINGER
16. TOOL-FREE BLADE HOLDER
17. DUST COVER
18. PENDULUM ACTION CONTROL
19. LASER (Only for WX474)
20. LASER ON-OFF SWITCH (Only for WX474)
Not all the accessories illustrated or described are included in standard delivery.

Jigsaw W X 4 7 3 W X 4 7 3 . 1 W X 4 7 4
TECHNICAL DATA
WX473 WX473.1 WX474
Rated voltage 230-240V~50Hz 220-240V~50Hz
Rated power 650W 720W
Rated no load speed 500-3000/min 500-3000/min
Stroke length 20mm 20mm
Cutting capacity, max. thickness
Wood 100mm 100mm
Aluminum 20mm 20mm
Steel 10mm 10mm
Protection class /II
Machine weight 2.5kg 2.5kg
ACCESSORIES
Plastic foot plate protection 1
Hex key 1
Vacuum adaptor 1
Parallel guide 1
Wood cutting blade 1
Metal cutting blade 1
Aluminium cutting blade 1
You can only use the blade type shown in fig D. Don’t use other blade types.
We recommend that you purchase your accessories from the same store that sold you the tool.
Use good quality accessories marked with a well-known brand name. Choose the type according
to the work you intend to undertake. Refer to the accessory packaging for further details. Store
personnel can assist you and offer advice.

Jigsaw W X 4 7 3 W X 4 7 3 . 1 W X 4 7 4
OPERATING INSTRUCTIONS
NOTE: Before using the tool, read the instruction
book carefully.
1. ON/OFF SWITCH
Depress to start and release to stop your tool.
2. SWITCH LOCK-ON BUTTON
Depress on/off switch (2) then lock-on button (1) (See
A), release on/off switch first then lock-on button
second.Your switch is now locked on for continuous
use.To switch off your tool just depress and release
on/off switch.
3. VARIABLE SPEED CONTROL
Adjust the variable speed control to increase or
decrease the speed (See B) according to the material,
material thickness and blade specification to be used
(also possible during no load operation). See Chart 1
for general guidance on speed selection.
Avoid prolonged use at very low speed as this may
damage your jigsaw’s motor.
Chart 1
Material Speed setting
Wood 5-6
Metal 3-4
Aluminum 3-5
PVC 3-4
Ceramic 3-5
4. HAND GRIP AREAS
Always ensure you maintain a firm grip whilst
operating your jigsaw.
5. DUST COVER
When operating your jigsaw the dust cover must be
closed to allow the dust extraction system to work
efficiently.The dust cover can be moved to improve
access for cleaning, blade fitting, etc (See C).
6. BLADE FITTING
You can only use the blade type shown in Fig D.To
open the blade holder (11) rotate the ring clockwise
(Jigsaw upside down) and hold in position (See E).
Then fully insert the blade into the blade holder slot
with blade teeth facing forward and release the ring,
A
B
C
D

Jigsaw W X 4 7 3 W X 4 7 3 . 1 W X 4 7 4
which will self rotate and clamp over the top of the
blade. Push the blade into the blade holder again to
ensure it is locked in position. Ensure the edge of the
blade is located in the groove of the blade guide (See
F).To remove a blade, holds the blade and rotate the
blade holder ring clockwise then lift out the blade
(blade could be spring ejected).
WARNING: blade teeth are very sharp.
For best cutting results ensure you use a blade
suited to the material and cut quality you need.
7. PARALLEL GUIDE FIXTURES
Slide the parallel guide (7) arm through both fixtures to
achieve the required cutting distance and tighten both
screws to lock into position.
8. BLADE GUIDE
Ensure the blade is located and runs smoothly in the
groove (See F) otherwise the pendulum function will
not work correctly and the blade will not be supported
during cutting.
9. PENDULUM ACTION CONTROL
The pendulum action varies the forward cutting angle
of the blade for increased cutting efficiency.This can
also be adjusted during no load running. Refer to the
chart 2 for more details. Do not use excessive blade
force when cutting with the pendulum action.The blade
cuts on the upward stroke only (See G).
Chart 2
1Thin materials. Fine cuts.Tight curves.
2Hard materials, (e.g. steel & chipboard)
3Thick materials (e.g. wood) & plastic
4Fast cuts (e.g. softwood). Cutting in the
direction of the wood grain.
10. BASE PLATE
Adjusting the angle of the base plate (13) enables bevel
cutting.The base plate must always be held firmly
against the materials being cut to reduce saw vibration,
blade jumping or blade breakage.
11. BASE PLATE PROTECTION
Your tool is equipped with base plate protection that
protects finer surface.
To attached, hook the protection over front of base plate
and snap into place at the rear of base plate.
E
F
G
H

Jigsaw W X 4 7 3 W X 4 7 3 . 1 W X 4 7 4
12. BASE PLATE ANGLE ADJUSTMENT
Use an Allen key (5). First loosen the bolts securing the
base plate and pull the base plate out of the slots (See H).
For preset angles rotate so the lines of the angle on the
base plate and angle plate (9) superposition at the desired
angle (0, 15, 30, 45) (See I). For other bevel angles, rotate
to your desired angle (use a protractor scale). Following
one of the above procedures, hold the base plate in
position and firmly tighten the bolts to clamp the base
plate at that angle. Finally, check the angle and ensure the
base plate is firmly clamped.The angle markings on the
base plate are accurate for most general purposes but it
is recommended for accurate work to set the angle with a
protractor and make a test cut on other material.
13. VACUUM ADAPTER
The adapter (6) rotates anti-clockwise inside the housing
and locks in position by a groove inside the housing (See
J&K).The adapter must then be connected to a suitable
external dust extraction machine.
14. PROTECTION FINGER
The finger (14) is located in front of the blade holder.
Whilst working, it will help prevent accidental contact
with moving blade.
15. DUST BLOWER SWITCH (See L)
The sawdust blower device leads an air jet to the saw
blade.The air jet avoids sawdust from covering the
cutting line during operation.
The sawdust vacuum device can be connected to the
cleaner. Push the switch to the vacuum position, the
cleaner will imbibe the sawdust through the vacuum
adapter.
As a suction mechanism for the suction of cutting
dust.
NOTE:You should connect the vacuum adapter to the
cleaner when you use the sawdust vacuum function.
As a blower for blowing cutting dust away from
the holes of the blade guard and into the area
during cutting operation.
16. LASER GUIDE (Only for WX474)
Depress the laser on/off switch button (20), the laser
device can provide a beam in the same plane as the
blade, which projects onto the work piece to generate
a line.The saw blade can be directed to follow the line
in order to align the cut with the line. Either straight
cutting or bevel cutting, it will make more precise
movement during cutting.
I
J
K
L

Jigsaw W X 4 7 3 W X 4 7 3 . 1 W X 4 7 4
WORKING HINTS FOR YOUR JIG
SAW
If your power tool becomes too hot, especially when
used at low speed, set the speed to maximum and
run no Load for 2-3 minutes to cool the motor. Avoid
prolonged usage at very low speeds.
GENERAL
Always use a blade suited to the material and material
thickness to be cut. Always ensure the work–piece is
firmly held or clamped to prevent movement. For easier
control, use low speed to start cutting, then increase to
correct speed.
Any movement of the material may affect the quality of
the cut.The blade cuts on the upward stroke and may
chip the uppermost. Ensure your uppermost surface is
a non-visible surface when your work is finished.
CUTTING LAMINATES
Use a fine tooth blade when cutting most laminates
and thin wood materials.To reduce edge chipping,
clamp pieces of waste wood at both ends on both sides
and cut through the wood during cutting.
CIRCLE CUTTING
Do not use the pendulum action when cutting tight
circles or angles.
PLUNGE SAWING
Plunge cutting may be used only on soft materials such
as wood, aerated concrete, gypsum plaster boards,
etc.!
Use only short saw blades.
Place the front edge of the base plate on the workpiece
and switch on. Press the machine firmly against the
workpiece and plunge the saw blade slowly into the
workpiece.
As soon as the complete surface of the base plate rests
on the work piece, continue to saw along the cutting
line. (See fig M,N)
METAL CUTTING
Use a finer tooth blade for ferrous metals and a coarse
tooth blade for non-ferrous metals. When cutting thin
sheet metals always clamp wood on both sides of the
sheet to reduce vibration or tearing of the sheet metal.
Both wood and sheet metal must be cut. Do not force
the cutting blade when cutting thin metal or sheet steel,
as they are harder materials and will take longer to cut.
M
N

Jigsaw W X 4 7 3 W X 4 7 3 . 1 W X 4 7 4
Excessive blade force may reduce the life of the blade
or damage the motor.To reduce heat during metal
cutting, add a little lubricant along the cutting line.
MAINTENANCE
Remove the plug from the socket before carrying
out any adjustment, servicing or maintenance.
Your power tool requires no additional lubrication or
maintenance.
There are no user serviceable parts in your power
tool. Never use water or chemical cleaners to clean
your power tool. Wipe clean with a dry cloth. Always
store your power tool in a dry place. Keep the motor
ventilation slots clean. Keep all working controls free
of dust. Occasionally you may see sparks through the
ventilation slots.This is normal and will not damage
your power tool.
If the supply cord is damaged, it must be replaced by
the manufacturer, its service agent or similarly qualified
persons in order to avoid a hazard.


C
opyright © 2009, Positec. All Rights Reserved.
Other manuals for WX473
4
This manual suits for next models
2
Table of contents
Other Worx Saw manuals

Worx
Worx WX425 User manual

Worx
Worx WX523 WorxSaw User manual

Worx
Worx WX531 User manual

Worx
Worx WX424 HandyCut Installation manual

Worx
Worx WX437 Operation instructions

Worx
Worx WU404 User manual

Worx
Worx AXIS WX550L.X User manual

Worx
Worx WX445 User manual

Worx
Worx WX80RS User manual

Worx
Worx WX845L User manual