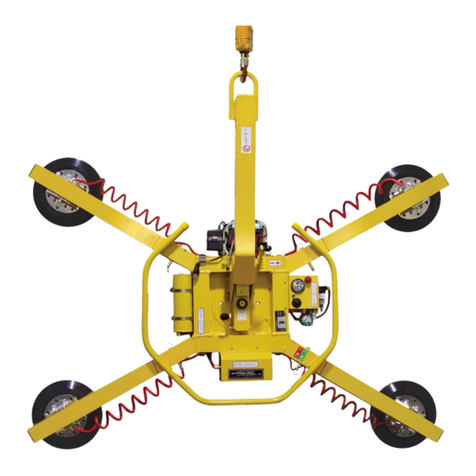
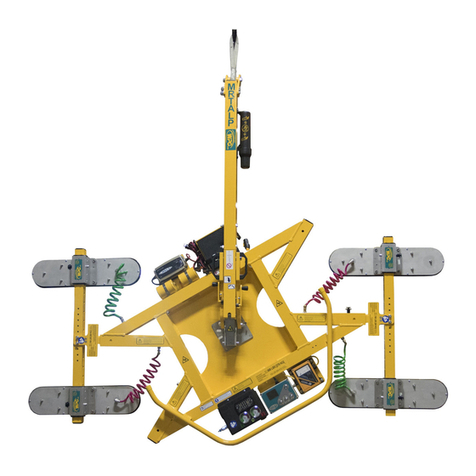
WPG MRTALPCH611LDC Reference guide

TST-019 MRTALPCH CHANNEL –Rev. 2016-310
LEAK TEST
PROCEDURE
MRTALPCH611LDC –REMOTE READY LIFTERS W/ 3 BUTTON CONTROL
APPLICABLE TO LIFTERS WITH
SERIAL NUMBERS GREATER THAN # 20100742
TESTING AND MAINTENANCE MUST BE
DONE BY A QUALIFIED PERSON
KEEP FOR FUTURE REFERENCE

TST-019 MRTALPCH CHANNEL –Rev. 2016-310

TST-019 MRTALPCH CHANNEL –Rev. 2016-310 Page 1 of 20
SYMPTOMS OF VACUUM LEAK
Severe leakage is evidenced by a lifter’s inability to draw full vacuum while attached to a clean,
smooth, nonporous surface. In such cases, the vacuum pump will run continuously and the vacuum
level shown on the vacuum gauges will be less than 16" Hg [-54 kPa], the red zone of the vacuum
gauge.
Moderate leakage is indicated by intermittent cycling of the vacuum pump during a lift. If the
vacuum generating system turns on more than once every 10 minutes, leakage is serious enough to
warrant repairing the lifter’s vacuum system.
To determine if your lifter has a vacuum leak, perform the Vacuum Test as described in the
Maintenance section of your instruction manual.
When you perform the vacuum test, we recommend that you note the time and leakage rate, such
as “lost 5" Hg [-17 kPa] in 10 minutes”. Note that, if both the blue/green and red circuits of the lifter's
vacuum system are leaking, you should record this information for each circuit. This information can
assist in diagnosing the location of the leak because there may be more than one component
leaking vacuum. For example, when you are performing maintenance, if an isolated section tests
positive for a leak, but the leakage rate is less than that of the whole lifter, this indicates that there is
still one vacuum leak or more elsewhere in the system.
Note: The vacuum test, as described in the instruction manual, is performed with the power switch
in the off ( ) position. However, due to the unique design of this vacuum system, the situation
may arise where, with the power turned on (), the vacuum pump may cycle repeatedly but the
vacuum level, as shown on the vacuum gauges, does not drop, giving no indication of a vacuum
leak.
Due to this, it is recommended that an additional vacuum test be performed with the power switch
on ( ). In this test, if you do not see a drop in vacuum as indicated on either of the vacuum
gauges, but the vacuum pump does cycle more than once in 10 minutes, a specific section of the
vacuum generating system is indicated as being the problem. Review the remaining information in
this section and then proceed to the Vacuum Generating System Test, step 10.
If, when tested in the off ( )position, the vacuum level, as shown on the gauges, does begin and
continue to drop and the rate of leakage, as shown on the vacuum gauge(s), is sufficient to warrant
repair, proceed as follows:
To locate the cause of leakage, begin by inspecting the vacuum pads, fittings and hoses of the
entire vacuum system. Look for contamination, cuts or abrasions on pad faces and cracking at the
suction stem, cracks, abrasions or cuts in hoses, damaged fittings and loose hoses at connection
points. If leakage is severe, the cause is often a visibly damaged part.
Do not apply soapy water to fittings or vacuum hoses in an attempt to find leaks, since it will only be
drawn inside the vacuum system.
If the source of leakage is not immediately evident, the various sections of the entire vacuum system
must be systematically isolated and tested to determine the leakage point. The process to
accomplish this is described in the tests to follow.

TST-019 MRTALPCH CHANNEL –Rev. 2016-310 Page 2 of 20
Please note that the information gathered when performing a vacuum test is only valid if the tools
used to perform the test are accurate. Be sure that the tools you use are capable of completely
sealing the isolated parts of your system when tested. Recommended tools, in addition to an
appropriate test surface, are plugs for hoses and fittings, a ball valve with vacuum gauge attached,
push-in and barbed hose adapters and extra vacuum hose of the required sizes. This procedure is
written with the assumption that you have access to the appropriate tools.
If needed, test equipment is available from Wood’s Powr-Grip Co. To find out what is available,
contact a WPG Technical Sales Representative for additional information.
A set of screwdrivers may also be needed if the valve enclosure or pump cover needs to be
removed. Note: Always proceed with caution when removing the covers. Since wiring and hoses
may be connected to components in the cover, gentle removal is recommended so as not to
damage the attached components.
When removing a hose from a barbed fitting, take care to avoid damaging the barbs of the fitting to
which the hose is attached. Cuts or nicks in fitting barbs can create a leak that did not previously
exist. Additionally, if a hose is removed from a barbed fitting, cut approximately 1/8"-1/4" [3-6 mm]
off the end of the hose before reinstalling it on the fitting, in order to remove damaged hose ends.
For push-in fittings, the hose end must be cut square and straight to seal properly. To remove a
hose from a push-in fitting press the locking collar in towards the fitting and pull out on the hose. If a
hose is removed from a push-in fitting, cut approximately 1/8" [3 mm] off the end of the hose before
reinstalling it on the fitting, in order to remove damaged hose ends and to provide a fresh point of
contact for the locking collar. When installing a hose in a push-in fitting, push the hose in firmly and
then gently pull outward on the hose to ensure that it is fully secured (the hose should not pull out).
Additionally, when a hose is installed in a push-in fitting, it needs to run reasonably straight out from
the fitting, with minimal sideways pressure on the hose locking collar, to reduce the chance of a
vacuum leak.
Note: The vacuum system of this model lifter provides release using a “blow off” feature. This is
where the pressure side of the vacuum pump is plumbed to the control valve and pumps air into the
pad system when release mode is engaged, to help speed the release of the vacuum pads. When
testing the lifter for leaks, it is often necessary to seal off the system in some manner (cap off or plug
fittings and/or plug lines). Due to this, the use of the release function is not recommended during
the repair process, as it will cause pressure to build in the sealed-off section and may damage
components.

TST-019 MRTALPCH CHANNEL –Rev. 2016-310 Page 3 of 20
PRELIMINARY TEST
This test determines whether leakage is located in the vacuum generating system or the pad
system. This test should be performed if, during the overall test, the lifter’s vacuum gauges
indicated a leak sufficient to warrant repair. Note: The following assumes that you have access to
suitable plugs, a ball valve with vacuum gauge, and additional hose and adapter fittings for
connecting the ball valve to the lifter’s vacuum lines and fittings.
Note: Since the vacuum tanks are part of the pad system, any leakage will appear to be faster than
seen in the overall test, due to the reduced system volume.
1) Remove the 4 screws (1A) that attach the valve
cover (1B) to the channel. Note, there are no
components attached to this cover, so it can be
removed and set aside.
2) This will expose the 2 filters (2A) shown in FIGURE 2.
S
3) Since the vacuum gauges are connected to the pad system, it will be necessary to use a ball
valve with vacuum gauge, fitted with an adapter for the push-in hose, as shown below, to
perform the following test. Also, when using a single ball valve assembly, if, during the overall
test of the lifter, it was determined that both circuits (red and blue/green) leak, you will have to
test each circuit individually.
FIGURE 2
2A
FIGURE 1
1B
1A

TST-019 MRTALPCH CHANNEL –Rev. 2016-310 Page 4 of 20
4) Remove the 1/4" o.d. hose (3A) from one of the filters (3B), that connects the filter to the pad
line. Using an additional piece of 1/4" o.d. hose, connect the end of the ball valve with the
vacuum gauge to the filter. Close the ball valve (turn handle perpendicular to valve body). See
FIGURE 3, where the red circuit is shown being tested.
5) Note, since only one of the two circuits (red or blue/green) is being tested, the lifter will need to
be attached to a smooth, clean, non-porous surface for the other circuit to seal.
6) Switch the power on ( ), and activate the vacuum generating system by pressing the apply
( ) push button.
7) Switch the power to off () and observe the vacuum gauge of the ball valve to determine the
area of the leak.
If the vacuum level on the ball valve’s vacuum gauge holds steady and does not drop, the
indication is that this circuit (red or blue/green) does not leak between the check valve and
the filter.
If, during the overall test of the lifter, a leak was indicated in both circuits (red and
blue/green), remove the ball valve from the circuit being tested and repeat the process for
the other circuit.
Once it has been verified that neither circuit (red or blue/green) of the vacuum generating
system leaks, proceed to Pad System Tests.
If the vacuum level on the ball valve’s vacuum gauge starts and continues to drop, the
indication is that this circuit of the vacuum generating system does leak.
If, during the overall test of the lifter, a leak was indicated in both circuits (red and
blue/green), remove the ball valve from the circuit being tested and repeat the process for
the other circuit. This is to determine if the leak in this circuit is also in the vacuum
generating system.
Once both circuits (red and blue/green) of the vacuum generating system have been
checked and the condition of each is known, proceed to Vacuum Generating System Test.
FIGURE 3
BALL VALVE SHOWN
IN CLOSED POSITION
3A
3B

TST-019 MRTALPCH CHANNEL –Rev. 2016-310 Page 5 of 20
VACUUM GENERATING SYSTEM TEST
Note: The following assumes that you have access to suitable plugs, a ball valve with vacuum
gauge, and additional hose and adapter fittings for connecting the ball valve to the lifter’s vacuum
lines and fittings.
Note: If you are testing only one of the two circuits, the lifter will need to be attached to a clean,
smooth surface for the remaining section to seal to during testing.
The most likely leak points in the vacuum generating system are the check valve, the hose
connections to the filters, the control valve or vacuum tank/check valve assembly. Leave the filter
disconnected and test these items as follows:
Isolate the filter from the control valve / check valve assembly:
1) Remove the ball valve from the filter.
Disconnect the 1/4" o.d. hose (4A) from
the port (4B) of the solenoid valve that
connects to the filter. Connect the end
of the ball valve with the vacuum gauge
to this port of the solenoid valve. See
FIGURE 4.
2) With the ball valve in the closed position
(handle turned perpendicular to the
valve), switch the power on ( ), and
activate the vacuum generating system by pressing the apply ( )push button.
3) Switch the power to off ( )and observe the vacuum gauge of the ball valve to determine the
area of the leak.
If the vacuum level on the ball valve’s vacuum gauge holds steady and does not drop, the
indication is that the filter is the source of the leak.
Verify that the O-ring seal of the filter cap is in good shape, that the cap is tight and that the
filter housing is clean. Check the filter and the ends of the hose attached to the filter. Cut
approximately 1/8" [3 mm] from the ends of the hoses, ensuring that the cuts are straight
and square. Reattach the hoses to the filter in the same manner as done in the Preliminary
Test and retest the lifter as shown in the Preliminary Test. If the lifter continues to leak,
replace the filter and or hoses.
Note: When the filter is installed in its holder, it is critical that the hoses be positioned so
that there is minimum sideways pressure on the filter hose.
If the vacuum level on the ball valve’s vacuum gauge starts and continues to drop, the
indication is that the leak is located in either the solenoid valve assembly or the check valve.
Proceed to next step.
FIGURE 4
4A
4B

TST-019 MRTALPCH CHANNEL –Rev. 2016-310 Page 6 of 20
4) Remove the ball valve from the solenoid. Using a piece of 1/4" O.D.
hose, cap off the end of the hose to create a fitting plug, as shown in the
picture at right. Use the capped hose to cap off the port of the solenoid
that connected the filter. See picture for how to create the fitting plug and
FIGURE 5 for how used.
Note, the yellow caps shown at right can be used to create a fitting plug
for any fitting using hose sizes 1/4" O.D. and smaller.
5) The capped port of the solenoid is item 5A.
This is the port that was connected to the filter.
Disconnect the 1/4" o.d. hose (5B) from the
solenoid of the affected circuit that connects to
the vacuum tank assembly. The red hose
shown (5B), loops around the battery and back
to the vacuum tank assembly on the left; the
blue/green circuit is more direct. Connect the
end of the ball valve without the vacuum gauge
to the hose from the vacuum tank. Using an
additional piece of hose, connect the end of
the ball valve with the vacuum gauge to the
port (5C) of the solenoid assembly.
See FIGURE 5.
6) With the ball valve in the open position (handle
in line with the valve), switch the power on ( ), and activate the vacuum generating system by
pressing the apply ( ) push button.
7) Close the ball valve (turn handle perpendicular to the valve), switch the power to off ( )and
observe the vacuum gauge of the ball valve to determine the area of the leak.
If the vacuum level on the ball valve’s vacuum gauge holds steady and does not drop, the
indication is that the check valve, located on the vacuum tank assembly, or the connecting
hose, is the cause of the leak.
Check the ends and overall condition of the hose connected to the tank assembly. If
needed, cut approximately 1/8" [3 mm] from each end, ensuring that the cuts are straight
and square.
If there are no visible problems with the hose, remove the tank assembly of the affected
circuit (blue/green or red) and check the fittings for any indications of damage. If neither the
hose nor fittings appear to be the cause, replace the check valve.
If the vacuum level on the ball valve’s vacuum gauge starts and continues to drop, this
indicates that the solenoid assembly is the cause of the leak. Remove the solenoid
assembly of the affected circuit (blue/green or red) and check the fittings for any indications
of damage. If the fittings do not appear to be the cause, replace the solenoid valve.
8) Once all leaks, for both the red and blue/green circuit, have been located and repaired,
reassemble the vacuum generating system. If needed, repeat the preliminary test, where the
ball valve was attach to each circuit’s filter, to confirm that the vacuum generating system no
longer leaks.
5A
5C
FIGURE 5
5B

TST-019 MRTALPCH CHANNEL –Rev. 2016-310 Page 7 of 20
Once the vacuum generating system is confirmed to not leak, reattach the pad lines to the
filters and repeat the original vacuum test with all parts attached and the power in the off ( )
position.
If the vacuum level, as shown on the lifter’s vacuum gauge(s), starts and continues to drop,
this indicates that there is still a leak present in the pad system. Proceed to the Pad System
Tests.
If the vacuum level as shown on both of the lifter’s vacuum gauges holds steady and does
not drop, the indication is that there are no leaks in the vacuum system between the check
valves and the vacuum pads. Proceed to next step.
9) Repeat the vacuum test with all parts attached and the power switch left in the on ( ) position.
If the vacuum level, as shown on both of the lifter’s vacuum gauges, holds steady and does
not drop and the lifter does not cycle during the second test with the power switch on,
proceed to System Confirmation.
If, during the second test with the power switch on ( ), the lifter cycles, but there is no
indication of a leak, as shown on the lifter’s vacuum gauges, the indication is a special
circumstance unique to this lifter design. Proceed as follows.
10) The following deals with a specific issue, where, if during a vacuum test of the whole lifter, the
vacuum pump cycles regularly but the system’s vacuum level does not drop (no leak indicated
by either vacuum gauge), the indication is that a leak exists between the vacuum pump and the
check valve(s).
If either the solenoid valve that seals off the vacuum pump to the vacuum system, the vacuum
switch, or the connections from the pump to the vacuum switch or vacuum tank(s) were to
develop a leak, but the check valves sealing the main vacuum circuits still seal properly, the
result is that the pump will recycle regularly even though the vacuum level on the vacuum
gauges does not indicate a leak. This is caused by the fact that the area the vacuum switch is
located in is sealed via the pump valve and, if a leak were to exist in this section, the vacuum
switch would sense the leak and cycle the system to maintain its set vacuum level. However,
since the vacuum gauges are located in the individual vacuum circuits, which are sealed via
their respective check valves, there would be no loss of vacuum shown on either vacuum
gauge if the check valves continue to keep the pad system sealed. If this is the situation,
proceed as follows.
11) The vacuum tanks are connected to the pump by
the 3/8" O.D. hose connected to the 45° barbed
fitting (6A), of the pump solenoid. Note, the valve
shown is for lifters with serial numbers before
20161736. If your lifter has serial number
20161736 or greater, there will be a digital
vacuum switch attached to the valve. The test is
the same for either configuration.
Note, to provide easier access to the connected
hose, the hose cover (shown in FIGURE 13) was
removed from the channel and hose 6A pulled out
of the frame slot before performing the test shown
in FIGURE 7.
FIGURE 6
6A

TST-019 MRTALPCH CHANNEL –Rev. 2016-310 Page 8 of 20
12) Begin by separating the tank line from the
pump/control box assembly. Disconnect the
hose (7A) from the 45° barbed fitting,
connected to the pump solenoid. Attach the
end of the ball valve assembly with the
vacuum gauge to this hose. Using an
additional piece of hose, attach the other end
of the ball valve to the 45° barbed fitting.
See FIGURE 7.
13) With the ball valve in the open position,
(handle in line with the valve), switch the
power on ( ), and activate the vacuum
generating system by pressing the apply ( ) push button.
14) Close the ball valve (turn handle perpendicular to the valve) but leave the power turned on
( ).
Note, it is possible for both the following conditions to exist. If so, then perform the tests in the
order listed.
If the vacuum pump cycles during the test, the indication is that the pump solenoid, the
vacuum switch or the hose connections between these parts, is the cause of the leak.
Switch the power off ( ) and proceed to next step.
If the vacuum level, as shown on the ball valve’s vacuum gauge, starts and continues to
drop, the indication is that the hose connection to the vacuum tanks is the cause of the leak.
Proceed to step 30.
15) Remove the ball valve from the tank
line and solenoid valve. Using a short
piece of hose (8A), connect the end of
the ball valve with the vacuum gauge
directly to the pump solenoid. With the
gauge end of the ball valve connected
to the 45° barbed fitting of the solenoid
valve, close the ball valve (turn handle
perpendicular to the valve), as shown in
FIGURE 8.
16) With the ball valve in the closed
position (handle perpendicular to the
valve), switch the power on ( ) and
activate the vacuum generating system by pressing the apply ( ) push button.
17) Switch the power to off (). If the vacuum level of the ball valve’s vacuum gauge starts and
continues to drop, a leak does exist in this section of the pump/vacuum switch assembly.
18) Note: Lifters with serial number 20161736 or greater, have been fitted with the digital vacuum
switch. Proceed to next step for these lifters.
Lifters with serial numbers before 20161736, will have an analog vacuum switch mounted
inside the control enclosure. Proceed to step 20 for these lifters.
FIGURE 8
8A
FIGURE 7
7A

TST-019 MRTALPCH CHANNEL –Rev. 2016-310 Page 9 of 20
19) If a leak existed when the valve with digital vacuum
switch, shown in FIGURE 9, was tested, there is no
convenient way to isolate the vacuum switch from the
valve.
In this case, since the digital vacuum switch is not
prone to leak, the likely cause is the solenoid or an
attached fitting. Check the fittings for any indication of
damage or cracks. If there is no indication of damaged
fittings, replace the solenoid.
20) For lifters using the analog vacuum switch:
The next test will require the ball valve to be set up to use on the 5/32" O.D. hose. As shown in
the following graphic.
21) Remove the ball valve from the
solenoid and cap off the 45°
barbed fitting, (10A) in FIGURE 10.
See inset for close-up view.
22) The vacuum switch is located
inside the control box.
Disconnect the 5/32" O.D. hose
(10B) from the control box (10C)
that connects to the solenoid
assembly. Note, this hose may
be blue or black.
23) Attach the end of the ball valve
with the vacuum gauge to the
hose removed from the control box that connects to the solenoid assembly. Using an
additional piece of hose, attach the other end of the ball valve to the control box. See FIGURE 10.
24) With the ball valve in the open position (handle in line with the valve), switch the power on
( ), and activate the vacuum generating system by pressing the apply ( ) push button.
25) Close the ball valve (turn handle perpendicular to the valve) but leave the power on ( ).
Note, both of the following conditions may exist; effect repairs as needed.
If the vacuum level of the ball valve’s vacuum gauge starts and continues to drop, the
indication is that the pump solenoid is the cause of the leak.
Examine the fittings attached to the solenoid assembly and, if there is no indication of
damaged fittings, replace the solenoid.
FIGURE 9
FIGURE 10
10C
C
10B
10A

TST-019 MRTALPCH CHANNEL –Rev. 2016-310 Page 10 of 20
If, during the test, the pump cycles, the indication
is that the vacuum switch or the hose connections
between the solenoid and the vacuum switch are
the cause of the leak. Note, if the pump does
begin to run, it will not shut off with the ball valve
closed. Check the hoses that connect the vacuum
switch to the pump solenoid.
Note, there are two hoses used: one (11A) from
the solenoid assembly to the control box external
connection and one (11B) from the control box
internal connection to the vacuum switch (11C)
See FIGURE 11.
26) Remove the ball valve. Disconnect the hoses
from the push-in fittings and cut approximately
1/8" [3 mm] from the ends of each hose. Check
that the hose connection to the vacuum switch is
secure; if it pulls off easily, recut this hose end as
well. Reattach the hose (12A) from the pump
solenoid to the control box. Attach the other hose
(12B) to the end of the ball valve with the vacuum
gauge. Using an additional piece of hose, attach
the other end of the ball valve to the inside box
connection. See FIGURE 12.
27) With the ball valve in the open position (handle in
line with the valve), switch the power on ( ), and
activate the vacuum generating system by pressing the apply ( ) push button.
28) Close the ball valve (turn handle perpendicular to the valve) and switch the power off ( ).
If the vacuum level, as shown on the ball valve’s vacuum gauge, starts and continues to
drop, the indication is that the vacuum switch leaks. Check the hose connection to the
vacuum switch and, if it is easily removed, replace the hose and repeat the test to see if the
leak stops. If the hose connection appears and feels secure to the fitting, replace the
vacuum switch.
If the vacuum level, as shown on the ball valve’s vacuum gauge, holds steady and does not
drop, the indication is that the leak exists in either the hose used to connect the vacuum
switch to the pump solenoid or the connection to the push-in fittings. Replace the hose to
the pump solenoid.
29) Repeating the test shown in step 15, where the gauge end of the ball valve was connected
directly to the pump solenoid’s 45° fitting (FIGURE 8), if the vacuum level, as shown on the ball
valve’s vacuum gauge, holds steady and does not drop, this verifies that this section of the
pump/control box assembly no longer leaks.
FIGURE 11
11B
11C
11A
FIGURE 12
12A
12B

TST-019 MRTALPCH CHANNEL –Rev. 2016-310 Page 11 of 20
30) If, in step 14, the indication was that
the hose connection to the vacuum
tanks leak, proceed as follows.
The hose runs from the solenoid valve
and through the slot to the outer surface
of the channel, where it is split with a
Y-fitting to provide a connection to each
vacuum tank; the hoses are guarded by
the hose cover shown in FIGURE 13. If
the cover is still attached, remove the two 1/4-20 bolts (13A) securing the cover to the channel
in order to access the hoses and fittings.
31) The components involved will be the hose running from the 45° fitting of the pump solenoid
(14A) to the Y-fitting (14B) and the green and red hoses (14C) running from the Y-fitting to their
respective vacuum tank connection. See FIGURE 14.
32) Check the connection of the 3/8" O.D. red (15A) and green (15B) hose to the push-in fitting of
the vacuum tanks, shown in FIGURE 15. Cut approximately 1/8" [3 mm] from the end of each
hose, taking care to keep the cuts square and straight, and reattach them to the vacuum tanks.
33) Repeat the vacuum test (steps 12 through 14) shown in FIGURE 7.
14A
14B
14C
FIGURE 14
NOTE: THE GRAPHIC ABOVE WAS SPLIT TO BETTER SHOW THE LOCATIONS OF THE PARTS DISCUSSED
FIGURE 13
13A
FIGURE 15
15A
15B

TST-019 MRTALPCH CHANNEL –Rev. 2016-310 Page 12 of 20
FIGURE 16
If the vacuum level of the ball valve’s vacuum gauge now holds steady and does not drop,
the indication is that the leak to the vacuum tanks has been repaired. Once all identified
leaks have been repaired, proceed to System Confirmation.
If the vacuum level, as shown on the ball valve’s vacuum gauge, starts and continues to
drop, this indicates that the leak in the vacuum tank connections still exists. Proceed as
follows.
34) Remove the ball valve from the pump solenoid and reconnect the
tank hose to the solenoid.
35) Remove the hose from the Y-fitting that connects to the pump
solenoid, leaving the tank lines connected.
Note: Use caution when removing a hose from the Y-fitting shown
in FIGURE 16. These fittings have only a single barb on each hose
connection. Remove the hose carefully so as not to damage the
single barb of the fitting.
36) Using an additional piece of hose, connect
the end of the ball valve with the vacuum
gauge to the Y-fitting. Connect the other end
of the ball valve to the hose connected to the
pump solenoid. See FIGURE 17.
37) With the ball valve in the open position
(handle in line with the valve), switch the
power on ( ), and activate the vacuum
generating system by pressing the apply ( )
push button.
38) Close the ball valve (turn handle
perpendicular to the valve), switch the power to off ()and observe the vacuum gauge of the
ball valve to determine the area of the leak.
If the vacuum level, as shown on the ball valve, holds steady and does not drop, the
indication is that the hose from the pump solenoid leaks. Replace the hose from the Y-
fitting to the pump solenoid. Repeating the test shown in FIGURE 7 can be used to confirm
that the leak is repaired.
If the vacuum level, as shown on the ball valve, starts and continues to drop, this indicates
that the leak is located between the Y-fitting and the tank connections. Proceed as follows.
FIGURE 17

TST-019 MRTALPCH CHANNEL –Rev. 2016-310 Page 13 of 20
39) Disconnect the two hoses, one red and one
green, from the Y-fitting that connect to the
vacuum tanks, taking care to not damage the
fitting barbs. Examine the barbs of the Y-fitting to
determine if there are any large nicks in the barbs
that could allow a hose to leak. If the barbs are
not damaged, cap off the barbs as shown in
FIGURE 18.
40) With the ball valve in the open position (handle in
line with the valve), switch the power on ( ), and
activate the vacuum generating system by
pressing the apply ( ) push button.
41) Close the ball valve (turn handle perpendicular to the valve), switch the power to off ( ) and
observe the vacuum gauge of the ball valve.
If the vacuum level, as shown on the ball valve’s vacuum gauge, starts and continues to
drop, the indication is that the Y-fitting leaks. Replace the Y-fitting. Reconnect the hoses
and confirm by repeating the test shown in FIGURE 7. If the leak continues, proceed to next
step to test the individual tank lines.
If the vacuum level of the ball valve’s vacuum gauge holds steady and does not drop, the
indication is that one or both of the hoses connected to the vacuum tanks is the cause of the
leak. Proceed as follows.
42) Remove one of the caps from either barb of the Y-fitting and reconnect one tank line.
FIGURE 19 shows how to test either the red or green tank lines.
43) With the ball valve in the open position (handle in line with the valve), switch the power on
( ), and activate the vacuum generating system by pressing the apply ( ) push button.
FIGURE 19
FIGURE 18

TST-019 MRTALPCH CHANNEL –Rev. 2016-310 Page 14 of 20
44) Close the ball valve (turn handle perpendicular to the valve), switch the power to off ( ) and
observe the vacuum gauge of the ball valve.
If the vacuum level, as shown on the ball valve’s
vacuum gauge, starts and continues to drop, the
indication is that the hose to the tank connection
(20A) leaks. Replace this hose and repeat the test
to verify that the leak has been repaired. If the
leak continues, examine the area where the check
valve is attached to the push-in fitting, circled in
FIGURE 20,for any indication of cracks.
If there are no indications of damage to the
threads of the check valve, replace the push-in
fitting of the vacuum tank (20A) that connects to
the 3/8" O.D. hose (the red tank connection is shown in FIGURE 20).
If the vacuum level of the ball valve’s vacuum gauge holds steady and does not drop, the
indication is that this hose does not leak. Leave this hose attached (since it was confirmed
to not leak) and attach the other tank hose to the other barb of the Y-fitting.
45) Repeat the test with both hoses attached, using the criteria above, to determine whether there
are any problems with the last connected, unverified hose.
46) Once it has been verified that there are no longer any leaks present in the section between
the pump and check valves, proceed to System Confirmation.
FIGURE 20
20A

TST-019 MRTALPCH CHANNEL –Rev. 2016-310 Page 15 of 20
PAD SYSTEM TESTS
Note: This section assumes it was determined that either the vacuum generating system does not
leak or that any existing leaks in the vacuum generating system have been repaired up to the filter
connections.
Note: The following assumes that you have access to suitable plugs, a ball valve with vacuum
gauge, and additional hose and adapter fittings for connecting the ball valve to the lifter’s vacuum
lines and fittings.
Note: If you are testing only one of the two circuits, the lifter will need to be attached to a clean,
smooth surface for the remaining section to seal during testing.
Isolate the vacuum pads, fittings and vacuum line sections until the leak point can be located, as
follows:
1) If not already attached, reattach
the filter lines to reconnect the
vacuum generating system to the
pad system.
2) Remove each pad fitting from the
vacuum pads of the affected
(leaking) circuit, disconnecting
the pads of this circuit from the
vacuum system.
3) Cap the pad fittings of the
disconnected pads, to seal off
the vacuum lines. See FIGURE 21,
where all 6 pad fittings are shown capped off; red circuit shown in top views and green circuit
shown in bottom views.
Note: If only one set of pads (green or red circuit) is capped off, the lifter will need to be
attached to a clean, smooth surface for the remaining section to seal during testing.
4) With the vacuum pads capped off (all or just one set of pads), switch the power on ( ), and
activate the vacuum generating system by pressing the apply ( ) push button.
5) Allow the vacuum system to reach a suitable vacuum level or to shut off automatically, then
switch the power to off ( ) and observe the lifter’s vacuum gauge(s) to determine the area of
the leak.
If the vacuum level shown on the lifter’s vacuum gauge for the circuit (red or green) that is
being tested holds steady and does not drop, this indicates the leak is in one or more pads
of that circuit. Reconnect one pad to its vacuum line and retest. If indications of leakage
resume, replace that pad. Continue testing until all pads have been reconnected and all
defective pads have been identified and replaced.
If the vacuum level shown on the lifter’s vacuum gauge for the circuit (red or green) that is
being tested starts and continues to drop, this indicates the leak is located in the fittings,
quick connects, or vacuum lines between the vacuum pads and the filter.
If it is determined that the leak is between the pads and the filters, continue testing as
follows. Note, the pad fittings should still remain capped off for the following tests.
FIGURE 21

TST-019 MRTALPCH CHANNEL –Rev. 2016-310 Page 16 of 20
6) Vacuum line sections and included fittings may be tested by moving up each line (toward the
vacuum generating system) to the next fitting, removing the hose and plugging it at the fitting,
or by installing the ball valve assembly (with the gauge end towards the section that the lifter’s
gauge has been separated from) into the line.
7) Each circuit (red and green) has one vacuum pad connected by a quick connect, shown in
FIGURE 22 below. Disconnect the quick connect and repeat the vacuum test.
If, with the quick connect disconnected, the vacuum level, as shown on the lifter’s vacuum
gauge, still indicates a leak (vacuum level drops), proceed to step 10.
If, with the quick connect disconnected, the vacuum level, as shown on the lifter’s vacuum
gauge, now holds steady and does not leak, the indication is that the leak is located in the
section that was removed. This would be the pad fitting, hose, the quick connect plug
assembly, or that the quick connect leaks when connected. Proceed as follows.
8) Remove the hose from the barbed fitting of
the male quick connect plug and cap off the
barbed fitting. Connect the male plug to the
female quick connect coupler. See FIGURE 23.
Repeat the vacuum test.
If the leak resumes, examine the threads
of the barbed fitting for indication of
cracks. If the fitting itself does not appear
damaged, replace the quick connect.
Note, the O-ring that seals the male
portion of the quick connect to the female
half when they are attached is part of the
female coupler, due to this it is recommended that both the male and female quick connect
be replaced.
If the vacuum level, as shown on the lifter’s vacuum gauge, continues to hold steady and
does not drop, the indication is that the quick connect does not leak when connected.
Continue to next step.
FIGURE 22
FIGURE 23

TST-019 MRTALPCH CHANNEL –Rev. 2016-310 Page 17 of 20
9) After confirming that the quick connect
does not leak, remove the cap from the
barbed fitting. Remove the pad fitting
from the hose and reattach the hose to
the quick connect. Attach the end of the
ball valve without the vacuum gauge to
the hose of the quick connect and,
using an additional piece of hose, attach
the end of the ball valve with the
vacuum gauge to the pad fitting. See
FIGURE 24.
Repeat the vacuum test.
If the vacuum level, as shown on the
ball valve’s vacuum gauge, starts
and continues to drop, replace the
pad fitting.
If the vacuum level on the lifter’s vacuum gauge starts and continues to drop, replace the
hose to the quick connect.
10) If, in step 7, it was determine that the leak continued when the quick connects were
disconnected, this indicates that the leak is not caused by the connected quick connect, the
hose attached to the male quick connect or the pad fitting. It will exist between the quick
connect and the filter connection of the circuit being tested.
11) Test the quick connect by itself when
disconnected. Remove the hose from
the barbed fitting of the female quick
connect coupler. Attach the end of the
ball valve without the vacuum gauge to
this hose. Using an additional piece of
hose, attach the end of the ball valve
with the vacuum gauge to the barbed
fitting of the quick connect. See FIGURE
25. Note that the quick connect
assembly was unbolted from the
channel to provide easier access to the
hose and fitting.
If the vacuum level on the ball
valve’s vacuum gauge starts and
continues to drop, this indicates that the quick connect leaks when disconnected. Examine
the threads of the barbed fitting for indication of cracks. If the barbed fitting itself does not
appear damaged, replace the quick connect.
If the vacuum level on the lifter’s vacuum gauge starts and continues to drop, this indicates
that the leak is located further back, towards the filter connection. Continue to next step.
FIGURE 25
FIGURE 24

TST-019 MRTALPCH CHANNEL –Rev. 2016-310 Page 18 of 20
12) Vacuum line sections and included fittings may be tested by moving up each line (toward the
vacuum generating system) to the next fitting, removing the hose and plugging it at the fitting,
or by installing the ball valve assembly into the pad line, which provides access to an additional
vacuum gauge when needed.
Individual parts and fittings can be tested in the same manner as the pad fitting is shown being
tested in FIGURE 24, where the capped off fitting was connected to the end of the ball valve with
the vacuum gauge, and the other end of the ball valve connected to an active vacuum line.
Vacuum was applied with the ball valve in the open position (handle in line with the valve) and
then the ball valve was closed (handle turned perpendicular to the valve) and the lifter turned
off.
If the assembly or fitting being tested leaks, it will be indicated by a drop in the vacuum level of
the ball valve’s vacuum gauge. If the vacuum level holds steady the fitting does not leak.
13) The following will describe the various methods used.
In FIGURE 23 the quick connect is shown with the male connector attached and the barbed fitting
of the male plug capped off. In this scenario, if the leak, as indicated on the lifter’s vacuum
gauge, were to stop, this indicates that the leak exists in the section (hose or fittings) that was
disconnected from the quick connect. If the leak continues, the indication is that the leak exists
between the capped barb and the filter connection. The next step would be to move to the next
fitting in the pad line, remove the hose leading from it to the quick connect, cap off the fitting
and repeat the test. If the leak continues, continue to work back towards the filter connection to
locate the leak. When the leak stops, it will be located within the last section that was
disconnected from the section being tested.
To test individual parts or assemblies, use the ball valve with the vacuum gauge. This is shown
in FIGURE 25, where only the female quick connect coupler is shown being tested; in FIGURE 24
where a single pad fitting is being tested; and in FIGURE 18, where a Y-fitting is being tested.
Attach the part to be tested to the end of the ball valve with the vacuum gauge, cap off any
open barbs, and attach the other end of the ball valve to an active vacuum line. Apply ( )
vacuum with the ball valve in the open position (handle in line with the valve) and then close the
ball valve (handle turned perpendicular to the valve) then switch the lifter to off ().
If the assembly or fitting being tested leaks, it will be indicated by a drop in the vacuum level of
the ball valve’s vacuum gauge. If the vacuum level holds steady, the part being tested does not
leak.
14) The ball valve assembly can also be
used in place of a plug, as shown in
FIGURE 26. The gauge end of the ball
valve was connected to an additional
piece of hose. The pad line hose was
removed from the reducing fitting,
connected to the filter hose. Vacuum
was applied ( )with the ball valve in
the closed position, then the power
switched off ( ). If a leak were to be
indicated by a drop in vacuum, it will
exist in either the reducer fitting or the hose between the reducer and the filter.
FIGURE 26
Table of contents
Other WPG Lifting System manuals