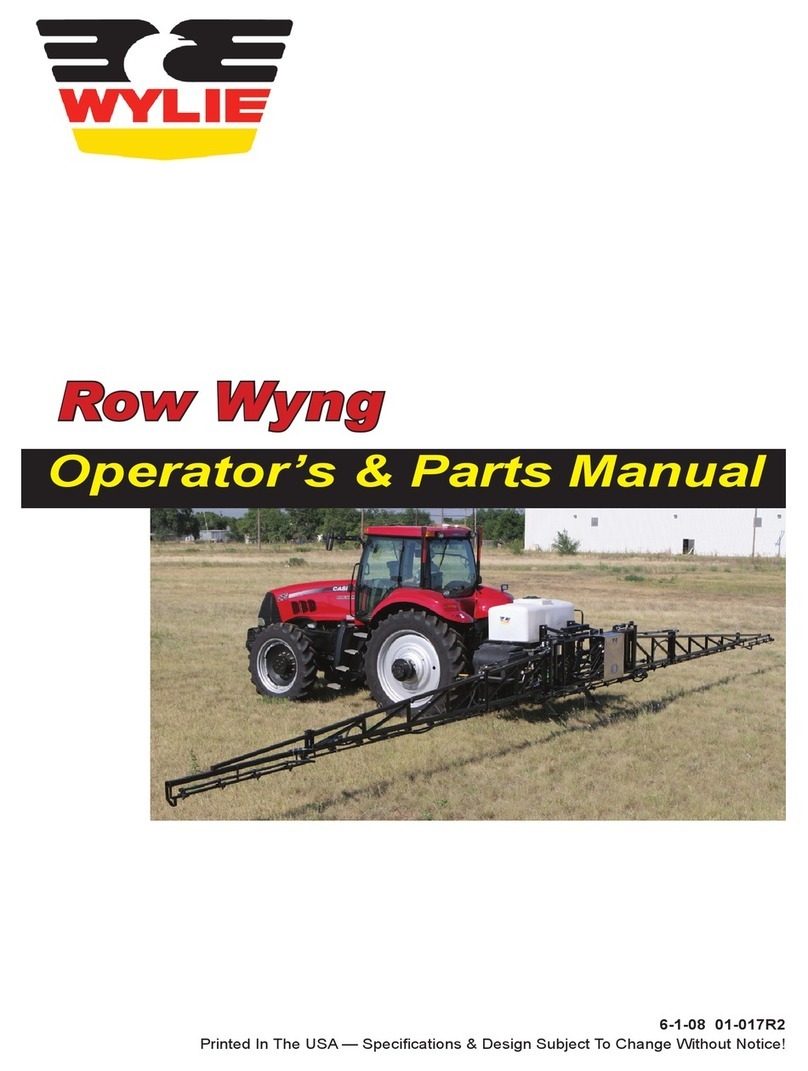
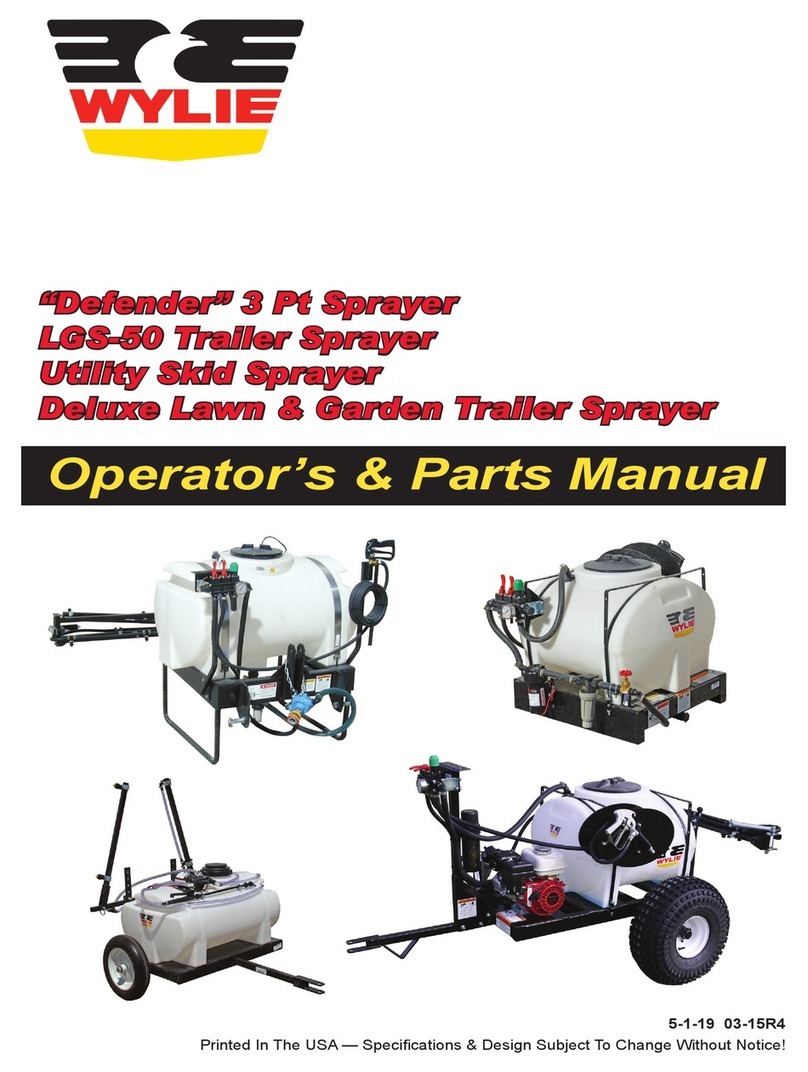
Wylie Power Sprayer Series Programming manual

Operator’s & Parts Manual
Power Sprayer Skid & Trailer
Printed In The USA — Specications & Design Subject To Change Without Notice!
5-15-19 02-024R5

This is a limited warranty. It covers products manufactured by WYLIE Mfg. Co. The Warrantor is WYLIE Mfg. Co., 702 E. 40th
St., Lubbock, TX, 79404, USA. The duration of the warranty for WYLIE manufactured equipment and products (excluding
polyethylene tanks) is for one year from date of delivery to the carrier. The Warrantor warrants to the Buyer that the product(s)
sold hereunder are free from defects to material and workmanship, under normal use and service, in the hands of the original
buyer.
If goods are defective, the defective goods will be replaced with identical goods. If identical goods are not available, the Buyer
may elect to receive a refund of the purchase price for the defective goods, or the Buyer may order similar goods. The damage
for defective goods shall not exceed the purchase price of the defective goods. No allowance shall be made for labor
or expense or repairing goods without prior approval in writing by the Warrantor. The Buyer’s remedy under this warranty
does not include incidental or consequential damages.
For products not manufactured by the Warrantor, the Warrantor warrants these products to the extent of the warranties of their
respective manufactures. There are no warranties which extend beyond this limited warranty, including the implied
warranty of merchantability. Dealers or representatives shall not make any representation in regard to particular goods except
as authorized by the Warrantor through a written warranty accompanying those particular goods.
WYLIE Mfg. Co., and its divisions, “Wylie Spray Centers,” in each location, requires as a condition of sale and coverage by its
LIMITED WARRANTY that all equipment sold by it be used in accordance with the instructions and specications of the Warrantor.
This requirement is in addition to the LIMITED WARRANTY.
Polyethylene and berglass tanks – These tanks are warranted for the storage and transport of water, herbicide solutions
(on farm), liquid fertilizer and liquid feed. Such tanks should not be used for the storage of any bulk herbicide (undiluted). Any
such use will render this warranty void.
In addition, the Warrantor makes no warranty with regard to bulkhead tank ttings used in connection with tanks containing bulk
herbicides and the use of any such ttings sold by the Warrantor or any WYLIE dealer in connection with tanks containing bulk
herbicides is improper.
Chemical Incompatibility – The Warrantor does not make any recommendations or warranties regarding chemical compatibility.
WYLIE shall not be liable for any damages due to chemical incompatibility, and any Buyer or user should rely solely on written
information furnished by the chemical manufacturer regarding chemical compatibility.
No employee of WYLIE Mfg. Co., or its representatives, agents or dealers, is authorized to vary the terms of this limited
warranty.
This equipment was carefully designed and manufactured to give you dependable service. To insure ecient operation of
this equipment, please read this operator’s manual carefully. Check each item and acquaint yourself with the adjustments
required to maintain optimum performance and operation. Remember, this equipment’s performance depends on
how you operate and care for it!
At the end of each season, thoroughly clean and inspect your equipment. Preventive maintenance saves time and pays
dividends. Your nearest Wylie Spray Center has original equipment parts which assure proper t and best performance.
Record your equipment’s model and serial numbers and the date you purchased this equipment in the space below.
Have this information available when you order parts or attachments.
Model Number:
Serial Number:
Date Purchased:
A Message To The Owner And Operator
Limited Warranty
Disclaimer of Warranty
Warranty Information

Wylie Manufacturing Company
702 E. 40th St.
Lubbock, TX 79404
Ph. 888-788-7753
Owner Registration
Date of Purchase
Model Number
Skid/Trailer Serial Number
Tank Serial Number
Pump Model
Wylie Invoice Number
Owner’s Name
Address
City State Zip
Phone
Email
Dealer
Owner’s Signature
Must be returned within 10 days to validate the warranty.
Primary Use of Applicator:
Herbicide Pest
Sprayer Control
Livestock Tree
Sprayer Sprayer
De-Icing Other
Power Sprayer Skids and Trailers
-- Or Register Online --
Go to: www.wyliesprayers.com

.

1
Table of Contents
Table Of Contents
Safety Issues .............................................................................................................................................................2-3
Reporting Safety Defects.............................................................................................................................................. 3
Safety Decals & Placement .......................................................................................................................................... 4
Introduction ................................................................................................................................................................... 5
Inspection & Setup ....................................................................................................................................................6-8
Sprayer Operation ...................................................................................................................................................9-12
Maintenance ............................................................................................................................................................... 13
Troubleshooting Guidelines ........................................................................................................................................ 14
Tire Safety Information ........................................................................................................................................15 - 25
Repair Parts.........................................................................................................................................................27 - 50
Power Sprayer Trailer Frame ........................................................................................... 28
Trailer Pump and Plumbing .............................................................................................. 29
Power Sprayer Skid Frame .............................................................................................. 30
Skid Pump and Plumbing ................................................................................................. 31
Twin Reel Skid Frame ...................................................................................................... 32
Twin Reel Skid Plumbing .................................................................................................. 33
Wiring Schematic ............................................................................................................. 34
Brakes & Lights ................................................................................................................ 35
Axles ..........................................................................................................................35 - 36
Hose Reel ..................................................................................................................37 - 40
CDS-John Blue Pump ...............................................................................................41 - 44
Hypro Roller Pump ........................................................................................................... 45
AR Diaphragm Pump ................................................................................................46 - 49
Ace Centrifugal Pump ...................................................................................................... 50

2
Safety Precautions
Be alert when you see the above symbol in the manual. It warns of a hazard
which might lead to injury. It means: Attention! Become alert! Your safety is
Involved!
Three (3) words (Danger, Warning, and Caution) are associated with this symbol.
DANGER – Indicates a hazardous situation, which, if not avoided, will result in death or serious injury. This signal word
is to be limited to the most extreme situations.
WARNING – Indicates a hazardous situation, which, if not avoided, could result in death or serious injury.
CAUTION – Indicates a hazardous situation, which, if not avoided, may result in minor or moderate injury.
NOTICE – Indicates information considered important, but not hazard-related (e.g., messages relating to property damage).
SAFETY INSTRUCTIONS - Indicates a type of safety sign where specic safety-related instructions or procedures are described.
Before Use
Do not operate sprayer until this manual has been read and understood!
* Thoroughly read and understand all instructions before operating this sprayer. If you have questions,
please contact Wylie Manufacturing, 702 E. 40th St., Lubbock, TX, 79404. (888) 788-7753.
You can also contact your nearest Wylie Spray Center.
* Always wear safety goggles, chemical resistant apron and rubber gloves when handling chemicals.
* Read and understand the chemical manufacturer’s safety guidelines on handling, mixing and application.
* Secure the skid to the bed of the truck to prevent the sprayer from sliding o the truck.
* Always check where you are going to spray. Be sure that people, non-targeted animals, etc. are not in the
path of the spray or overspray.
* Check on wind speed and direction. Make sure that sprayed chemical will not drift to non-target area.
During Use
* Do not allow anyone to ride on sprayer during operation. Falling can cause injury.
* Reduce speed when crossing uneven or rough terrain.
* Always turn o engine before making adjustments or repairs.
* Do not point the gun toward people. Trigger might be accidentally engaged, exposing people to chemical.
* Never add gasoline to an engine that is running. Turn o engine and let cool for several minutes before
adding fuel. Adding gasoline to an operating engine could cause an explosion and re resulting in serious
injury or death.
Safety Issues

3
Safety Issues
After Use
* Inspect sprayer for wear or damage.
* Ensure that all fasteners and ttings are tight.
* Flush tank and pump with fresh water. Dispose of ush water using appropriate means.
* Carry out maintenance and/or lubrication procedures as outlined in this manual.
* During cold weather, ush the pump and plumbing with an anti-freeze solution to prevent freeze damage
to components.
Always
* Keep hands, feet and clothing away from moving parts.
* Wear protective clothing and gloves when working with chemicals.
*Assure that the hitch is attached to the proper size ball.
*Attach the safety chains and breakaway brake cable to the tow vehicle.
*Plug the lights into the tow vehicle.
Operator’s Instructions
* Reduce speed when turning, crossing slopes and on rough, slick or muddy surfaces.
* Do not permit others to ride on sprayer.
* Roll up hoses and secure trigger gun before transporting sprayer.
* Take care to prevent spilling of chemical.
* Know where you are going to spray. Do not spray non-targeted areas.
Wylie Manufacturing, 702 E. 40th St., Lubbock, TX 79404
Reporting Safety Defects
If you believe that your vehicle has a defect which could cause a crash or could cause injury or death, you should
immediately inform the National Highway Trac Safety Administration (NHTSA) in addition to notifying Wylie
Manufacturing.
If NHTSA receives similar complaints, it may open an investigation, and if it nds that a safety defect exists in a
group of vehicles, it may order a recall and remedy campaign. However, NHTSA cannot become involved in indi-
vidual problems between you, your dealer, or Wylie Manufacturing.
To contact NHTSA you may either call the Auto Safey Hotline toll-free at 1-888-327-4236 (TTY: 1-800-424-9153);
go to http://www.safercar.gov; or write to:
NHTSA
U. S. Department of Transportation
12000 New Jersey SE
Washington, DC 20590
You can also obtain other information about motor vehicle safety from the http://www.safercar.gov.

4
Safety Decals & Placement
Safety Issues
Decal #SW700
Decal #V9020
Power Sprayer Skids and Trailers
Decal #V9055
or manual replacements.
Decal #SW701W

5
The Wylie Power Sprayer Skids and Trailers are the result of years of testing and eld proven experience. They are
built of the nest materials and expert workmanship to provide you with years of reliable service. The Power Sprayer is
available in either a skid or trailer version, in capacities from 50-500 gallons.
The Power Sprayers are designed to be versatile sprayers in the areas of landscape spraying, pest control, livestock
spraying, tree spraying, washing and cleaning, remote spot watering, de-icing and a host of other uses.
This manual explains where and how to make necessary adjustments to your sprayer for safe and proper operation.
Thoroughly read and understand the contents of this manual before operating your sprayer. If you have questions or do
not understand particular items, contact your nearest Wylie Spray Center or call Wylie Manufacturing at (888) 788-7753.
Please keep this manual handy to answer questions you may have as they arise.
Pay Particular Attention To All Safety Suggestions – Their purpose is to assure safe operation of the sprayer and
prevent injury or damage to yourself or the unit.
Introduction & Specs
Introduction
Model Capacity
(gal.)
Frame
Length
Overall
Length
w/reel
Frame
Width
Overall
Width
Height Empty
Weight
PS50 50 50” 63” 27” 27” 41” 270 lb
PS100L
PS100
100
100
68”
51½”
81”
64½”
29½”
47½”
31½”
47½”
41”
41”
320 lb
330 lb
PS200 200 67” 80” 40” 44” 44” 420 lb
PS300F 300 60” 61” 65½” 68” 62” 535 lb
PS300 300 95½” 110” 37½” 51” 41” 700 lb
PS500 500 101” 115½” 48” 57” 46” 805 lb
Model Capacity
(gal.)
Overall
Length
Track
Width
Overall
Width
Height GVWR
PS100T 100 118” 53½” 61” 56” 2,350 lb
PS200T 200 116” 64” 72” 58” 2,950 lb
PS300T 300 140” 64” 73” 59” 4,100 lb
PS500T 500 147” 66” 78” 62” 5,975 lb
Power Sprayer Skid Specications Power Sprayer Trailer Specications

6
Inspection & Setup
Inspection & Setup
Your Wylie Power Sprayer was manufactured to the high-
est standards of quality. It is necessary though, to check
to make sure that nothing was damaged during shipping.
Check bolts and fasteners for tightness, especially lug
nuts. Check the motor/pump, plumbing and hose reel for
any signs of damage.
Your Wylie Power Sprayer was completely assembled at
the factory and should not need any additional assembly
before use.
Check the engine for proper oil level (see engine owner’s
manual for proper procedure).
Mounting Skid on Truck/Pickup
Make sure that the vehicle that will carry the skid Power
Sprayer is designed to carry the unit when full of water. Water
weighs 8.34 lb/gal. Therefore, a 500 gallon Power Sprayer
skid can weigh almost 5,000 lbs. when fully loaded.
When picking up a skid sprayer from the side, be aware
that the center of gravity is not at the center of the frame
due to the weight of the engine and pump.
Figure A1
Mounted Skid Sprayer in Truck
Use caution when picking up the skid from the side.
Assure that the center of gravity is between the
forks of a forklift to prevent tipping.
Carefully set the skid on the truck bed or slide the skid
between the wheel wells of a pickup. It is suggested that
the tank is positioned close to the cab for best weight
distribution as well as better accessibility to the engine
and hose reel.
Firmly secure the sprayer to the vehicle to prevent damage
to the sprayer or vehicle.
Attaching Trailer to Vehicle
Power Sprayer trailers require a 2” ball for proper t. Open
the 2” hitch by depressing the trigger and rotating the hitch
handle upward until the hitch locks open. Align the truck
under the hitch and lower the hitch onto the ball by rotating
the jack handle counterclockwise. Rotate the hitch handle
until the trigger locks in place. Secure the hitch handle
with a clip pin. (See Figure A3)
DOT regulations in some states require the safety
chains to be crossed. Check the regulations in your
state for specic instructions.
Attach the safety chains to the eyelets.
Skid sprayer must be secured to the bed of the truck.
Failure to do so could result in the sprayer falling o
the truck or damage to the sprayer and truck.
Figure A2
200 Gallon Skid Properly Mounted With Tailgate Closed

7
Inspection & Setup
Electric brake trailers have a battery powered breakaway
brake system that activates the trailer brakes if the trailer
becomes unhitched from the truck while travelling. Attach
the brake cable to the hitch.
Plug the light cable into the truck light socket. Check the
lights to make sure that the clearance, turn, brake and tail
lights are working properly.
Pull the jack pin and rotate the jack or remove the jack
from the mount collar.
The Wylie DOT tag trailer is equipped with a height adjust-
able hitch. The trailer should travel level when the tank is
full. To level the hitch, lower the jack to support the tongue,
remove the hitch bolts, adjust the tongue height as needed,
and reinsert the hitch bolts.
Figure A4
Trailer Hitch Details
A seven prong plug is provided with the trailer. If your
vehicle is not equipped with a corresponding receptacle,
change either the vehicle or trailer to match. If your vehicle
does have a seven prong receptacle, insert the trailer plug
and check to make sure that the two plugs are properly
matched i.e. brakes, lights and turn signals operate in the
correct order.
The DOT trailer is equipped with a breakaway brake kit that
will engage the electric trailer brakes if the trailer comes
unhooked from the truck. The breakaway brake kit consists
of a battery that is charged by the electrical system and an
engaging switch that is activated when a plug is pulled from
the switch by a cable. The breakaway brake cable should
be attached to the truck.
The breakaway brake system is equipped with a test but-
ton and lights to show the status of the breakaway system
battery. Depress the test button to see the status.
Electric Hose Reel
If your sprayer is equipped with an electric hose reel, you
may or may not need additional set-up. Sprayers that
include an electric start engine will have the reel wired to
the sprayer motor battery and will not need any additional
set-up.
Sprayers with a pull start engine will require an auxiliary
power source for the electric hose reel. If an optional bat-
tery was ordered with the sprayer, the necessary wiring
has been completed and the reel is ready for operation.
< Clip Pin
Crossed >
Safety
Chains
< Breakaway
Brake Cable
< Electric Cable
Breakaway >
Brake System
Figure A5
Test Button on Breakaway Brake System
Figure A3
Rotate Lock Tab To Open 2” Hitch
Hitch Handle >
< Trigger

8
The hose reel can be powered by the vehicle battery. It
will be necessary to route 4 gauge battery cables from the
reel to the vehicle battery. Do not try to power the hose
reel directly through the trailer electrical system. The wires
are not heavy enough to carry the current. A charger for
an auxiliary battery can be powered through the trailer
electrical system.
Inspecting Motor and Pump
Check the oil level in the gasoline engine before initial start-
up. Some pumps such as the CDS/John Blue diaphragm
pumps have an oil bath crankcase. Check the oil level in
the sight glass to assure proper operation.
Initial Start-up
Add enough water to the spray tank to get above the level
of the strainer and ball valve. Do not add any chemical
to the spray tank until the sprayer has been checked
for proper operation.
Open the ball valve between the tank and pump to allow
water to ow to the pump. The valve is open when the valve
handle is in line with the valve. Inspect the system for any
leaks. Tighten any ttings necessary to stop any leaks. Any
water leaking from supply lines before the pump is started,
will result in an air leak when the pump is engaged, result-
ing in low operating pressure.
Inspection & Setup
< Pressure Regulating
Control Knob
< Discharge Ball Valves
Pressure Hose >
By-Pass Hose >
Figure A7
Discharge Controls
< Supply Valve (in “o” position)
< Strainer
Figure A6
Supply Valve & Strainer
Initial Start-up of CDS/John Blue Diaphragm
Pump
Open the pressure hose ball valve and the agitator ball
valve. Rotate the blue by-pass handle counter-clockwise
so that the pump is in full by-pass.
Remove the trigger gun from the gun holder and start the
engine. Engage the trigger gun and allow water to ow
through the whole system. The pressure may not rise to the
desired level until the pressure regulating valve is adjusted.
Once the system has been checked for any leaks in a low
pressure setting, the sprayer can be changed to high pres-
sure operation. Close the agitator ball valve and rotate the
blue by-pass control handle clockwise to the “pressure” set-
ting. Rotate the pressure regulating control knob to adjust
the pressure. Screw the knob “in” to increase the pressure.
Check the system carefully for any leaks. Tighten ttings
as necessary.
Agitator Hose >
By-Pass Control Handle >
Powering the electric hose reel through the trailer
electrical system can damage the trailer wiring.
Connect to vehicle battery with 4 gauge cable.

9
Operation
Operation
Adding Chemical
Many applications for Wylie Power Sprayers require chemi-
cal agents to be added to a carrier solution.
Read the chemical manufacturer’s label for directions for
the proper procedure and amount of chemical to add. Once
the chemical has been added to the spray tank, start the
pump in by-pass mode to allow the chemical to thoroughly
mix. (See “Operation” section for detailed instructions.)
Swivel Hose Reel
All of the hose reels are mounted on a 180º swivel. This
swivel can be locked in one of ve positions or the pins
can be removed to allow the reel to swivel freely.
Protective clothing and equipment must be worn
any time chemicals are being handled. This may
include, but not be limited to, rubber gloves, rubber
apron, face/eye shield, and respirator. Failure to use
protective clothing could result in chemical
exposure causing sickness or death.
Figure B1
Swivel Hose Reel Mount
The Coxreel reels are equipped with a lock pin to prevent
the reel from unrolling during transport. Set the lock pin in
the unlock position before unrolling the hose.
Operation
Check the area to be sprayed to make sure that people or
non-targeted animals will not be in the path of the spray
or drift.
If hazardous chemicals are being sprayed, protective
clothing should be worn for protection from chemical
exposure.
Operation of CDS/John Blue Diaphragm Pump
Always open the main tank valve before starting the engine
and pump. Running the pump without uid will quickly
damage the pump.
Figure B2
Hose Reel Lock Pin
< Lock Pin
Never point the spray toward any part of your body.
The high pressure discharge could cause
serious bodily injury.
Figure B3
Open Main Tank Valve

10
Always start the engine with the pump in the bypass mode.
Rotate the blue bypass handle counterclockwise to put the
pump in the bypass mode.
Starting procedures will vary for dierent engines (see en-
gine owner’s manual). The Honda manual start engine is
very popular on the Wylie Power Sprayers. Turn the engine
switch “on” before pulling the rope to start the engine.
If chemicals need further mixing in the tank, open the
agitator ball valve.
Operation
Once the chemical is thoroughly mixed, close the agita-
tor valve. Remove the trigger gun from the storage frame
and unroll a sucient length of pressure hose. Open the
pressure hose ball valve.
Change the pump from bypass mode to pressure mode by
rotating the blue handle clockwise.
Adjust the pressure by turning the pressure adjustment
knob. Screw the knob “in” to increase pressure, “out” to
decrease pressure. The maximum pressure built by the
CDS/John Blue diaphragm pump in 580 psi. Do not set
the pressure above 600 psi.
Figure B5
Honda Engine Start Switch
Figure B4
Bypass Valve
Figure B6
Open Agitator Ball Valve
Figure B7
Open Pressure Ball Valve
Figure B8
Change To Pressure Mode By Rotating Clockwise

11
The agitator valve can be partially opened, if desired,
to keep the chemical in suspension. Opening the valve
completely, though, will prevent spraying at maximum
pressure.
Operating Other Pump Styles
Other pump styles are available for the Wylie Power Spray-
ers such as roller and centrifugal pumps. The controls for
the roller pump will be similar to the diaphragm pump, i.e.
an adjusting valve varies pressure and provides bypass.
The centrifugal pump has an agitator valve. The primary
point to remember is that the main tank valve must be open
to feed uid to the pump and any air leak on the suction
side of the pump will prevent the pump from achieving
operating pressure.
Operating The Trigger Gun
The Hypro Long-Throw trigger gun sprays in a range from
a powerful straight stream to a wide angle mist. The rear
trigger handle turns the spray on or o. The front handle
adjusts the angle of the spray by rotating the handle forward
or backward. Pulling the handle back creates a straight
stream. Push the handle forward for a wide angle spray.
Special Operating Instructions For Twin Tank
Power Sprayers
If agitation is used, it is imperative that the suction
and agitator valves be open for the same tank.
Failure to do so could mix the chemicals and
overow the agitated tank.
The Twin Tank Power Sprayers are equipped with separate
agitator systems for each tank. Open the suction ball valve
for the desired tank. To prevent contamination between the
tanks, make sure that only one suction valve is opened at
a time. Opening both valves, especially when the pump is
turned o, will allow uid to ow between the tanks until
the volume is equalized.
When the pump is operating and agitation is desired,
make sure that the agitator valve and suction valve for the
same tank are open. Opening the wrong agitator valve will
contaminate the tank being agitated and could overow
that tank.
Figure B9
Adjusting Pressure
Figure B10
Handle Back -- Straight Handle Forward -- Wide Angle
Operation
Figure B11
Twin Tank Suction & Agitator Valves
< Right Tank Suction Valve
Left Tank Suction Valve >
Main Suction Valve >
< Right Tank Agitator Valve
< Left Tank Agitator Valve

12
A variety of options can be added to the Power Sprayer
for specic applications.
Walking Boom
The walking boom can be quick coupled to the pressure
hose for even applications on lawns and landscape. Check
the TeeJet nozzle manual for recommended pressure and
tip selection for specic applications. Generally, broadcast
spraying requires less than 50 psi.
The walking boom can be adjusted for proper boom height
and folded for easy access through gates.
Flat Fold Boom
The at fold boom mounts to the receiver hitch on many
pickups. The Power Sprayer trailers have mounting holes
for a at fold boom mount. The at fold boom height can be
adjusted with several holes in the mount tube. The boom
is equipped with breakaway springs to protect the boom
when an obstruction is hit as well as to fold the boom for
transport. To unfold the boom for spraying, manually un-
fold each section of the boom 180º, then unfold the outer
extensions vertically.
Check the TeeJet nozzle manual for recommended pres-
sure and tip selection for specic applications. Generally,
broadcast spraying requires less than 50 psi.
Fresh Water Tank
A fresh water tank is designed especially for the twin tank
power sprayer but can be mounted to other models as well.
The fresh water tank features a spigot for hand washing.
Additionally, the fresh water tank can ush chemical from
the tank and lines when two chemicals are stored in the
twin tanks. Close the tank ball valve and open the fresh
water tank valve. Start the engine and pump fresh water
through the system.
End of Day Procedure
Some chemicals may require the pump to be ushed at
the end of each day to prevent corrosion. If so, add several
gallons of fresh water to the spray tank and pump through
the system. Check the oil level in the engine and pump
as well as for any loose or damaged ttings. Repair as
necessary.
End of Season Procedure
The sprayer must be protected from freezing during winter
months. If the sprayer is not to be used, drain the spray
tank and add an anti-freeze solution. Start the pump and
circulate the anti-freeze solution through the sprayer. Sim-
ply draining water from the spray tank will not adequately
protect the sprayer from freezing.
Figure B14
Fresh Water Tank
Figure B12
Walking Boom
Figure B13
Flat Fold Boom
Operation

13
Maintenance
Strainer Maintenance
From time to time it may be necessary to clean the strainer
of debris that has collected. Low pump pressure and
volume is an indication that the strainer is clogged and
needs cleaning.
Figure C1
Removing Strainer
With the engine shut o, close the suction ball valve and
remove the strainer bowl. Empty and rinse the bowl and
clean the screen as needed. Make sure the O-ring that
seals the bowl to the base is not lost when the bowl is
removed. Firmly hand tighten the bowl to the base and
open the suction ball valve.
Engine/Pump Maintenance
The engine and pump each has an owner’s manual printed
by the respective manufacturer that has been included
with this manual. If you did not receive a pump or engine
manual, contact Wylie Customer Service at 888-788-7753
to request a manual.
Refer to the manufacturer’s manual for recommended
service and maintenance.
Spray Tank
The spray tank may be manufactured from either natural
white or “algae resistant” black resin. If water only is to be
sprayed from a white tank it may be necessary to add a
small amount of bleach to the tank to prevent the growth of
algae which will discolor the interior of a white tank.
Maintenance

14
Troubleshooting Guidelines
Troubleshooting
Problem Cause Solution
Engine Will Not
Operate
(1) Engine out of gasoline
(2) Engine controls not set properly
(3) Malfunctioning engine
(1) Add gasoline to fuel tank
(2) See manufacturer’s manual
(3) See manufacturer’s manual
Pump Will Not
Operate (1) Malfunctioning pump
(1) See pump owner’s manual or contact Wylie
Pump will not
move solution
(1) Spray tank empty
(2) Tank ball valve closed
(3) Plugged strainer
(4) Malfunctioning pump
(1) Fill tank
(2) Open ball valve
(3) Clean strainer screen
(4) See pump owner’s manual or contact Wylie
Spray Center
Pump output is
very low; erratic
(1) Spray tank low; air getting in pump
(2) Tank ball valve partially closed
(3) Plugged strainer
(4) Collapsed suction hose
(5) Air leak in suction system
(6) Control bypass engaged
(7) Pressure control knob set too low
(8) Malfunctioning pump
(1) Fill tank; bleed air by removing top plug
(2) Open ball valve
(3) Clean strainer screen
(4) Replace suction hose
(5) Tighten ttings;
Check for cracked or cut components;
Apply thread sealant to pipe threads.
(6) Close “blue” bypass lever
(7) Screw pressure control knob “in” to increase
pressure
(8) See pump owner’s manual or contact Wylie
Spray Center
No output or
insucient
pressure at
spray tip(s)
(1) Air leak in suction side of system
(2) Problem with pump
(3) Control valve malfunctioning
(4) Control bypass engaged
(5) Pressure hose ball valve closed
(6) Spray tips not proper size
(1) See above
(2) See above
(3) Replace pressure adjusting valve;
See controller owner’s manual or
contact Wylie Spray Center
(4) Close “blue” bypass lever
(5) Open pressure hose ball valve
(6) Replace with proper tip
Hypro trigger
gun spray pat-
tern is incor-
rect
(1) Front handle in wrong position (1) Pull front handle “back” for straight stream
Push front handle “forward” for wide stream

15
Tire Safety Information
1. TIRE SAFETY INFORMATION
This portion of the User’s Manual contains tire safety information as required by 49 CFR 575.6.
Section 2.1 contains “Steps for Determining Correct Load Limit - Trailer”.
Section 2.2 contains “Steps for Determining Correct Load Limit –Tow Vehicle”.
Section 2.3 contains a Glossary of Tire Terminology, including “cold inflation pressure”, “maximum inflation
pressure”, “recommended inflation pressure”, and other non-technical terms.
Section 2.4 contains information from the NHTSA brochure entitled “Tire Safety –Everything Rides On It”.
This brochure This brochure, as well as the preceding subsections, describes the following items;
Tire labeling, including a description and explanation of each marking on the tires, and information
about the DOT Tire Identification Number (TIN).
Recommended tire inflation pressure, including a description and explanation of:
A. Cold inflation pressure.
B. Vehicle Placard and location on the vehicle.
C. Adverse safety consequences of under inflation (including tire failure).
D. Measuring and adjusting air pressure for proper inflation.
Tire Care, including maintenance and safety practices.
Vehicle load limits, including a description and explanation of the following items:
A. Locating and understanding the load limit information, total load capacity, and cargo capacity.
B. Calculating total and cargo capacities with varying seating configurations including quantitative examples
showing / illustrating how the vehicles cargo and luggage capacity decreases as combined number and size
of occupants’ increases. This item is also discussed in Section 3.
C. Determining compatibility of tire and vehicle load capabilities.
D. Adverse safety consequences of overloading on handling and stopping on tires.
1.1. STEPS FOR DETERMINING CORRECT LOAD LIMIT –TRAILER
Determining the load limits of a trailer includes more than understanding the load limits of the tires alone. On all trailers
there is a Federal certification/VIN label that is located on the forward half of the left (road) side of the unit. This
certification/VIN label will indicate the trailer’s Gross Vehicle Weight Rating (GVWR). This is the most weight the fully
loaded trailer can weigh. It will also provide the Gross Axle Weight Rating (GAWR). This is the most a particular axle
can weigh. If there are multiple axles, the GAWR of each axle will be provided.
If your trailer has a GVWR of 10,000 pounds or less, there is a vehicle placard located in the same location as the
certification label described above. This placard provides tire and loading information. In addition, this placard will show
a statement regarding maximum cargo capacity. Cargo can be added to the trailer, up to the maximum weight specified on
the placard. The combined weight of the cargo is provided as a single number. In any case, remember: the total weight of
a fully loaded trailer can not exceed the stated GVWR.
For trailers with living quarters installed, the weight of water and propane also need to be considered. The weight of fully
filled propane containers is considered part of the weight of the trailer before it is loaded with cargo, and is not considered
part of the disposable cargo load. Water however, is a disposable cargo weight and is treated as such. If there is a fresh
water storage tank of 100 gallons, this tank when filled would weigh about 800 pounds. If more cargo is being
transported, water can be off-loaded to keep the total amount of cargo added to the vehicle within the limits of the GVWR
so as not to overload the vehicle. Understanding this flexibility will allow you, the owner, to make choices that fit your
travel needs.
When loading your cargo, be sure it is distributed evenly to prevent overloading front to back and side to side. Heavy
items should be placed low and as close to the axle positions as reasonable. Too many items on one side may overload a
tire. The best way to know the actual weight of the vehicle is to weigh it at a public scale. Talk to your dealer to discuss
the weighing methods needed to capture the various weights related to the trailer. This would include the weight empty or
unloaded, weights per axle, wheel, hitch or king-pin, and total weight.
Tire Safety Information

16
Excessive loads and/or underinflation cause tire overloading and, as a result, abnormal tire flexing occurs. This situation
can generate an excessive amount of heat within the tire. Excessive heat may lead to tire failure. It is the air pressure that
enables a tire to support the load, so proper inflation is critical. The proper air pressure may be found on the
certification/VIN label and/or on the Tire Placard. This value should never exceed the maximum cold inflation pressure
stamped on the tire.
1.1.1. TRAILERS 10,000 POUNDS GVWR OR LESS
Tire and Loading Information Placard – Figure 1-1
1. Locate the statement, “The weight of cargo should never exceed XXX kg or XXX lbs.,” on your vehicle’s
placard. See figure 1-1.
2. This figure equals the available amount of cargo and luggage load capacity.
3. Determine the combined weight of luggage and cargo being loaded on the vehicle. That weight may not
safely exceed the available cargo and luggage load capacity.
The trailer’s placard refers to the Tire Information Placard attached adjacent to or near the trailer’s VIN
(Certification) label at the left front of the trailer.
1.1.2. TRAILERS OVER 10,000 POUNDS GVWR (NOTE:THESE TRAILERS ARE NOT REQUIRED TO HAVE A TIRE
INFORMATION PLACARD ON THE VEHICLE)
1. Determine the empty weight of your trailer by weighing the trailer using a public scale or other means.
This step does not have to be repeated.
2. Locate the GVWR (Gross Vehicle Weight Rating) of the trailer on your trailer’s VIN (Certification) label.
3. Subtract the empty weight of your trailer from the GVWR stated on the VIN label. That weight is the
maximum available cargo capacity of the trailer and may not be safely exceeded.
1.2. STEPS FOR DETERMINING CORRECT LOAD LIMIT –TOW VEHICLE
1. Locate the statement, “The combined weight of occupants and cargo should never exceed XXX lbs.,” on
your vehicle’s placard.
2. Determine the combined weight of the driver and passengers who will be riding in your vehicle.
3. Subtract the combined weight of the driver and passengers from XXX kilograms or XXX pounds.
4. The resulting figure equals the available amount of cargo and luggage capacity. For example, if the “XXX”
amount equals 1400 lbs. and there will be five 150 lb. passengers in your vehicle, the amount of available
cargo and luggage capacity is 650 lbs. (1400-750 (5 x 150) = 650 lbs.).
5. Determine the combined weight of luggage and cargo being loaded on the vehicle. That weight may not
safely exceed the available cargo and luggage capacity calculated in Step # 4.
6. If your vehicle will be towing a trailer, load from your trailer will be transferred to your vehicle. Consult the
tow vehicle’s manual to determine how this weight transfer reduces the available cargo and luggage
capacity of your vehicle.
1.3. GLOSSARY OF TIRE TERMINOLOGY
Accessory weight
The combined weight (in excess of those standard items which may be replaced) of automatic transmission,
power steering, power brakes, power windows, power seats, radio and heater, to the extent that these items
are available as factory-installed equipment (whether installed or not).
Tire Safety Information
This manual suits for next models
10
Table of contents
Other Wylie Paint Sprayer manuals
Popular Paint Sprayer manuals by other brands

Smithco
Smithco Spray Star 1750 Series Operator's manual

ESTELLE
ESTELLE ESPRTANMTA user guide

Scheppach
Scheppach 7906100721 Translation of original operating manual

WAGNER
WAGNER Paint Crew HIGH PERFORMANCE AIRLESS SPRAYER owner's manual

DeVilbiss
DeVilbiss JGA PRO Series Technical bulletin

Victory
Victory VP200ESK Safety instructions