manuals.online logo
Brands
  1. Home
  2. •
  3. Brands
  4. •
  5. X-Cite
  6. •
  7. Lighting Equipment
  8. •
  9. X-Cite 120LED User manual

X-Cite 120LED User manual

Other X-Cite Lighting Equipment manuals

X-Cite XCPSK67RGB Manual

X-Cite

X-Cite XCPSK67RGB Manual

X-Cite WPS BULKHEAD Manual

X-Cite

X-Cite WPS BULKHEAD Manual

X-Cite TURBO User manual

X-Cite

X-Cite TURBO User manual

X-Cite 200DC User manual

X-Cite

X-Cite 200DC User manual

X-Cite FLOOD XCFC100NW Manual

X-Cite

X-Cite FLOOD XCFC100NW Manual

X-Cite EXIT BOX Manual

X-Cite

X-Cite EXIT BOX Manual

X-Cite 120Q User manual

X-Cite

X-Cite 120Q User manual

X-Cite XCMF10 Manual

X-Cite

X-Cite XCMF10 Manual

X-Cite XYLIS User manual

X-Cite

X-Cite XYLIS User manual

X-Cite TWINSPOT Manual

X-Cite

X-Cite TWINSPOT Manual

X-Cite EM BULKHEAD Manual

X-Cite

X-Cite EM BULKHEAD Manual

X-Cite XCSK65RGB Manual

X-Cite

X-Cite XCSK65RGB Manual

X-Cite 120PC Q User manual

X-Cite

X-Cite 120PC Q User manual

X-Cite mini plus User manual

X-Cite

X-Cite mini plus User manual

Popular Lighting Equipment manuals by other brands

Life 39.9F70020C quick start guide

Life

Life 39.9F70020C quick start guide

EuroLite LED ML-20 user manual

EuroLite

EuroLite LED ML-20 user manual

LIGMAN OD-50141 installation manual

LIGMAN

LIGMAN OD-50141 installation manual

Home Accents Holiday 1002461144 instructions

Home Accents Holiday

Home Accents Holiday 1002461144 instructions

Experia IRiS Ripple Light instruction manual

Experia

Experia IRiS Ripple Light instruction manual

Erco Gecko Mounting instructions

Erco

Erco Gecko Mounting instructions

Inter-lux ZTA.100.Surface Installation and maintenance instructions

Inter-lux

Inter-lux ZTA.100.Surface Installation and maintenance instructions

Whelen Engineering Company TN Series installation guide

Whelen Engineering Company

Whelen Engineering Company TN Series installation guide

IKEA BJÖRKSPIREA manual

IKEA

IKEA BJÖRKSPIREA manual

Toolland PM 6640 instruction manual

Toolland

Toolland PM 6640 instruction manual

GTD GTD-LP200 user manual

GTD

GTD GTD-LP200 user manual

LIVARNO home 1105-W-UK manual

LIVARNO home

LIVARNO home 1105-W-UK manual

ProLights EclPar IPMFC user manual

ProLights

ProLights EclPar IPMFC user manual

Velvet EVO Series user manual

Velvet

Velvet EVO Series user manual

IDTOLIGHT GENT installation instructions

IDTOLIGHT

IDTOLIGHT GENT installation instructions

MAYTONI S35 installation manual

MAYTONI

MAYTONI S35 installation manual

MaxLite MLFP14DP4535 user manual

MaxLite

MaxLite MLFP14DP4535 user manual

SLV Elektronik 550621 instruction manual

SLV Elektronik

SLV Elektronik 550621 instruction manual

manuals.online logo
manuals.online logoBrands
  • About & Mission
  • Contact us
  • Privacy Policy
  • Terms and Conditions

Copyright 2025 Manuals.Online. All Rights Reserved.

SIDE 1
X-Cite®120LED: Quick Start Guide
Warning –Refer to User Guide 035-00536R for all safety precautions prior to use.
WARNING: Possibly hazardous optical radiation emitted from this product. Avoid eye and skin exposure to unshielded product. Do not
look at operating LED. Eye injury may result. IEC 62471:2006 / EN62471:2008 Risk Group 3.
Refer to X-Cite 120LED User’s Guide 035-00536R, Section 2
Printed in Canada
035-00537R Rev. 0
SETUP
Unpack
1. Carefully unpack the unit and accessories from shipping carton.
2. When removing the LED Head and powerCUBE from the carton,
ensure that both components are supported and there is always
some slack in the cable. Do not use the cable as a “handle”.
Install the Microscope Flange
1. Remove protective cap from LED Head.
2. Align the mounting holes and dowel pins on the Microscope
Flange and the LED Head.
3. Attach the Microscope Flange using the Hex Tool and three (3)
fasteners provided.
Install on Microscope
1. Position the equipment. Do not kink or bend cable. Ensure
adequate clearance for ventilation around powerCUBE.
2. Connect LED Head to microscope light train. Verify “arrow” is
pointing up, and vents are on bottom of LED Head.
3. Connect speedDIAL cable to “remote” port on powerCUBE.
4. Connect AC power to properly grounded outlet.
MANUAL OPERATION
1. Flip rocker switch to turn unit on.
2. When display shows “x%”, it is ready to use.
3. Click speedDIAL to illuminate a specimen.
4. Turn speedDIAL to adjust intensity.
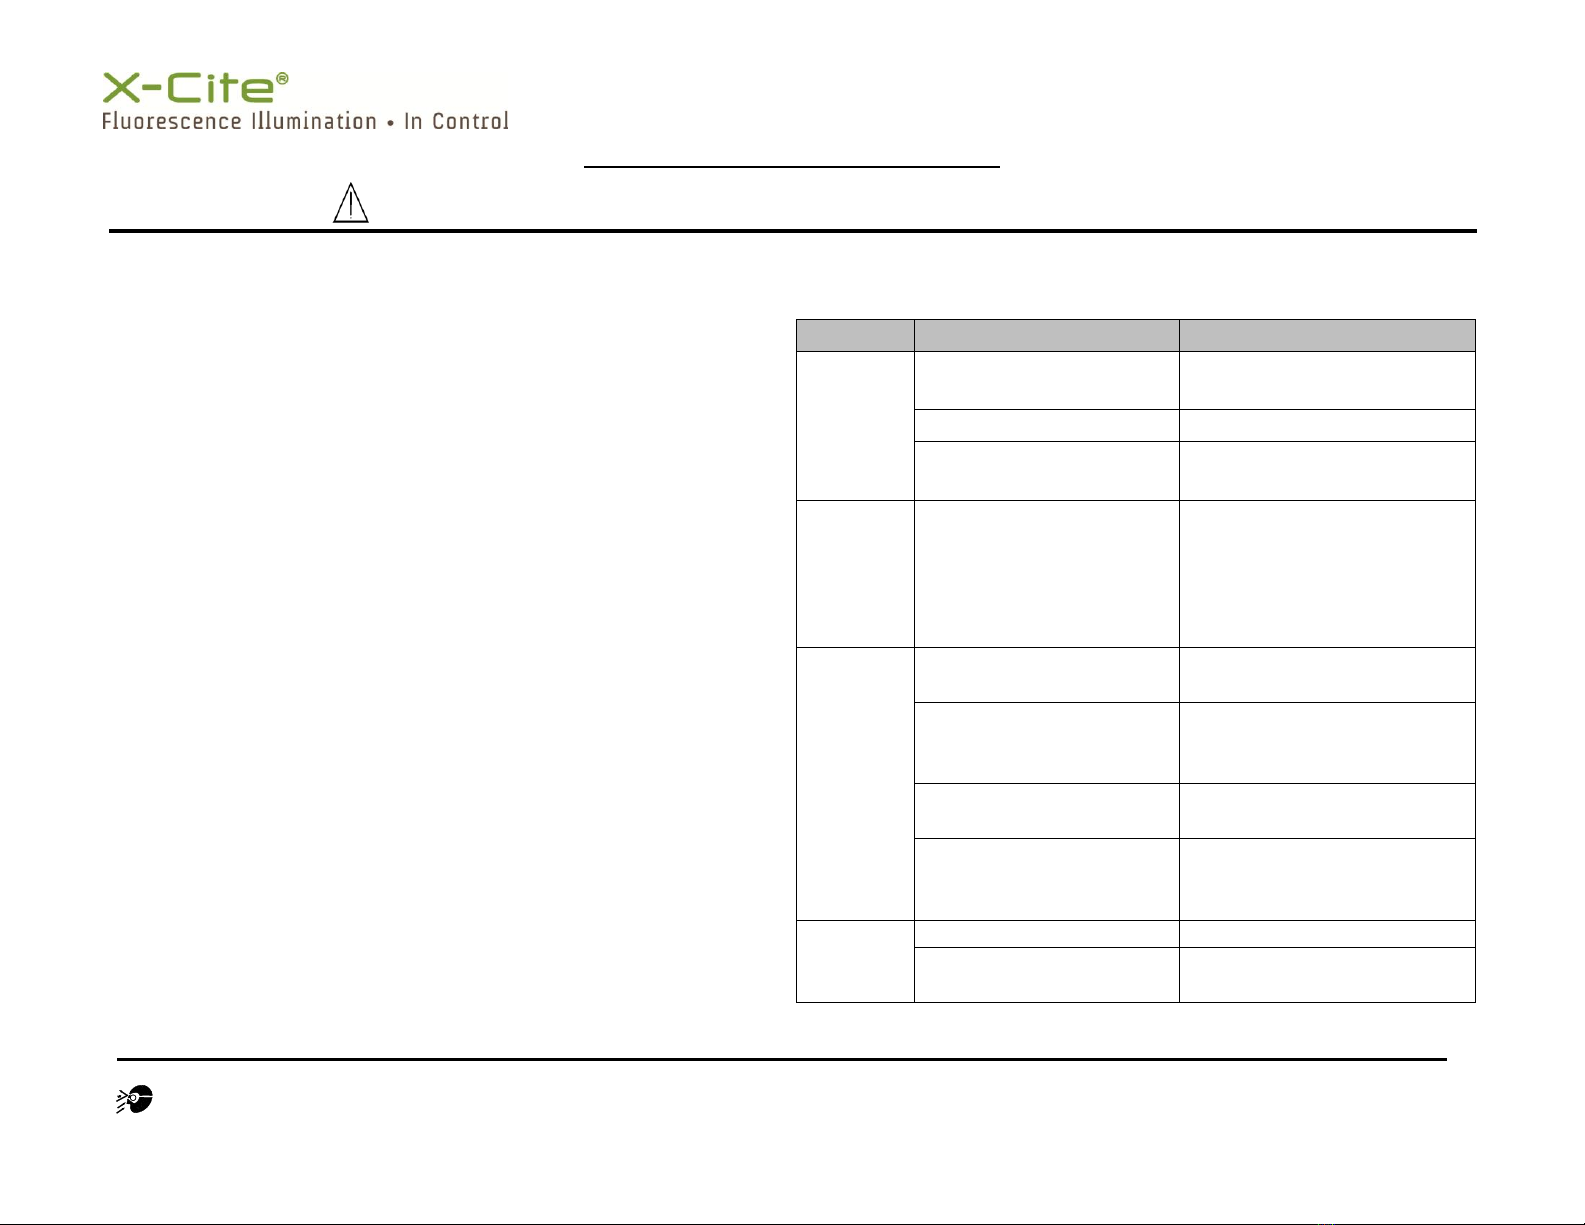
BASIC TROUBLESHOOTING
(refer to user guide for complete details)
Category
Symptom
Action
Error
messages
Error 1 (High Temp.)
Turn off, let cool; check
clearance around vents
Error 3 or 5 (Internal)
Turn off, restart
Error 6 (Low Temp.)
Allow unit to warm to room
temperature and restart
Intensity
Low output intensity
Check speedDIAL settings
Check flange type
Check microscope beam path,
filters, apertures, shutters,
objectives
speedDIAL
Double-click turns off LED
Increase delay in the speed
(Spd) setting
New settings forgotten
when unit is shut down
After changing settings, wait
at least five minutes before
shutting unit down
Dial does not scroll
through the menu
Turn dial in the opposite
direction
“Lock” icon on display,
speedDIAL not responding
to manual control
Send “unlock” command via
computer OR power down
unit and restart
TTL
TTL does not trigger unit
Enable TTL mode
TTL response time is
longer than usual
Verify that timeout settings
are appropriately set
SIDE 2
SpeedDIAL Quick Reference Guide
Tel: 1-905-821-2600
Toll Free: 1-800-668-8752
Fax: 1-905-821-2055
www.ldgi.com
SpeedDIAL Home Screen
SpeedDIAL Menus and Settings
To access the main menu, press and hold the dial (shutter button) for
one (1) second.
To navigate the menus, turn the dial to scroll through the options. An
arrowhead will indicate the currently selected menu option, click the
dial to make a selection.
To adjust settings, turn the dial. To select a setting and return to sub-
menu, click the dial.
To exit menu system at any time, press and hold the dial for one (1)
second.
SpeedDIAL Menu
(refer to user guide for complete instructions)
Menu Item
Description
LCD
Display Screen Brightness and Color Settings
Dim
Backlight timeout (off = backlight always on)
Brig
Screen brightness (0% = backlight off)
Color
Screen color
Favo
Favorite Intensity Setting
-Double-click jumps to preset intensity level
Int
Select favorite intensity level
Enbl
Enable or disable this feature
Spd
Adjust delay time between clicks
(defines “double-click”)
TTL
TTL Mode Control
-Required for TTL triggering
Enbl
Enable or disable this mode
Time
Define a timeout setting (recommended)
Hand
Display Screen Orientation
-Rotate display screen 180°
Srvc
Service Data
-Embedded software versions, serial number,
LED hours, system temperatures