manuals.online logo
Brands
  1. Home
  2. •
  3. Brands
  4. •
  5. X-Cite
  6. •
  7. Lighting Equipment
  8. •
  9. X-Cite 120Q User manual

X-Cite 120Q User manual

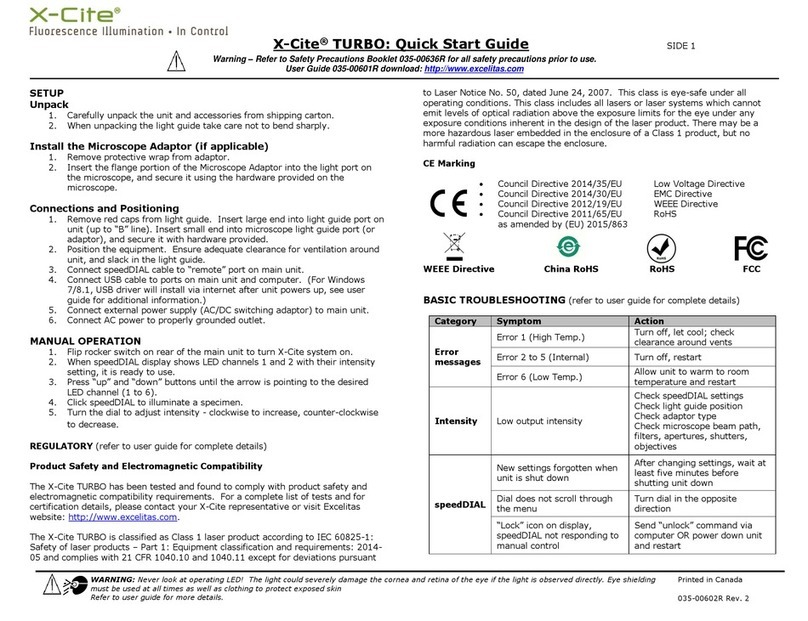
X-Cite®120Q: Quick Start Guide SIDE 1
Warning –Refer to Safety Precautions Booklet 035-00636R for all safety precautions prior to use.
User Guide 035-00327R download: http://www.excelitas.com/Pages/Product/X-Cite-120Q.aspx
WARNING: Never look into the light emitting end of the light guide! The light could severely damage the cornea and retina of the eye if the light is
observed directly. Eye shielding must be used at all times as well as clothing to protect exposed skin
Printed in Canada
Refer to user guide for more details.
035-00591R Rev. 2
Start Up
1. Install the lamp module (see side 2).
2. Install the light guide (see below).
3. Plug the unit into a properly grounded AC outlet.
4. Turn on the Power switch at the front of the unit.
5. The lamp will automatically strike when power is turned on to the unit.
Warning: UV light and high levels of visible light will be emitted
from the end of the light guide !
6. Allow the lamp to warm up (approximately 90 seconds). During the warm
up period the LCD display will flash and the lamp indicator symbol in the
display window will illuminate.
Installing the Light Guide
1. Remove the protective end caps from the light guide
2. Insert the light guide into the light guide port on the rear panel until it
seats with a positive click (up to the “A” line printed on the grey ferrule).
3. Insert the light emitting end of the light guide into the collimating adapter
after it has been installed on the microscope.
Viewing the Accumulated Lamp Hours
The accumulated lamp hours are continuously shown on the LCD display on the
front panel of the unit. The lamp hours are automatically updated.
Setting the Intensity Level with Iris Adjustment (Optional)
1. If your X-Cite 120Q system includes the optional iris adjustment, then it is
possible to manually change the amount of illumination out of the unit.
2. Turn the iris adjustment wheel upward or downward to increase or
decrease the light output. The notch in the iris adjustment wheel shows the
current setting of the iris. The iris adjustment includes 5 different
illumination settings: 0%, 12%, 25%, 50% and 100%.
(Note: No light will be emitted if 0% is selected)
REGULATORY (refer to user guide for complete details)
Product Safety and Electromagnetic Compatibility
The X-Cite 120Q has been tested and found to comply with product safety and
electromagnetic compatibility requirements. For a complete list of tests and for
certification details, please contact your X-Cite representative or visit
http://www.excelitas.com/Pages/Product/X-Cite-120Q.aspx.
CE Marking
Council Directive 2014/35/EU Low Voltage Directive
Council Directive 2014/30/EU EMC Directive
Council Directive 2012/19/EU WEEE Directive
Council Directive 2011/65/EU RoHS
WEEE Directive China RoHS RoHS FCC
X-Cite®120Q: Quick Start Guide SIDE 2
Warning –Refer to Safety Precautions Booklet 035-00636R for all safety precautions prior to use.
User Guide 035-00327R download: http://www.excelitas.com/Pages/Product/X-Cite-120Q.aspx
Excelitas Canada Inc.
2260 Argentia Road Mississauga ON L5N 6H7
Tel: 1-905-821-2600
Toll Free: 1-800-668-8752
www.excelitas.com/x-cite
Installing the Lamp Module
1. Be sure the AC power cord is disconnected from the unit.
2. Remove the screw from the lamp access side panel using the 3mm hex tool
located on the bottom of the unit and remove the panel from the unit
cover.
3. Open the Lamp bracket arm by pulling towards you and to the right.
4. Carefully remove the lamp module from its container, holding only the
ceramic components.
Caution: Do not touch the bulb’s glass envelope or the inside surface of
the reflector. Skin oils can cause the lamp module to fail prematurely.
5. With the lamp facing towards the rear of the unit and “This Side Out” label
facing out, position the lamp so that the two leading edges of the lamp
ceramic mount slide into the groove of the lamp bracket. The middle of the
lamp should be in position to fit into the spring clamp.
6. Slide the lamp all the way in so that both leading edges of the lamp
ceramic mount are in the upper and lower grooves of the lamp bracket.
The middle of the lamp will snap into the spring clamp.
7. Close the Lamp bracket arm by pushing it in and to the left.
8. Insert the 4-pin Intelli-Lamp connector into its mating receptacle on the
lamp housing wall as illustrated below.
Tip: the Intelli-lamp connector will only attach in the correct orientation. If
you are having difficulty inserting the connector, try rotating it by 180º.
9. Attach the 2-pin Lamp Power connector to its mating receptacle on the
lamp housing wall as illustrated below.
10. Insert the Intelli-Lamp lead harness and the 2 Lamp Power leads into the
alignment grooves on the lamp housing as illustrated below
11. Replace the lamp access side panel and tighten the fastening screw.
Note: if the lamp is not properly installed, the “bulb” message will display
and the lamp will not strike.

Other X-Cite Lighting Equipment manuals

X-Cite EXIT BOX Manual

X-Cite

X-Cite EXIT BOX Manual

X-Cite WPS BULKHEAD Manual

X-Cite

X-Cite WPS BULKHEAD Manual

X-Cite 120LED User manual

X-Cite

X-Cite 120LED User manual

X-Cite XCMF10 Manual

X-Cite

X-Cite XCMF10 Manual

X-Cite FLOOD XCFC100NW Manual

X-Cite

X-Cite FLOOD XCFC100NW Manual

X-Cite mini plus User manual

X-Cite

X-Cite mini plus User manual

X-Cite TWINSPOT Manual

X-Cite

X-Cite TWINSPOT Manual

X-Cite EM BULKHEAD Manual

X-Cite

X-Cite EM BULKHEAD Manual

X-Cite XYLIS User manual

X-Cite

X-Cite XYLIS User manual

X-Cite XCSK65RGB Manual

X-Cite

X-Cite XCSK65RGB Manual

X-Cite 200DC User manual

X-Cite

X-Cite 200DC User manual

X-Cite XCPSK67RGB Manual

X-Cite

X-Cite XCPSK67RGB Manual

X-Cite 120PC Q User manual

X-Cite

X-Cite 120PC Q User manual

X-Cite TURBO User manual

X-Cite

X-Cite TURBO User manual

Popular Lighting Equipment manuals by other brands

Robus RSD18CCT3-01 instruction manual

Robus

Robus RSD18CCT3-01 instruction manual

Ayrton Levante S manual

Ayrton

Ayrton Levante S manual

Acuity Brands Lithonia Lighting VAP installation instructions

Acuity Brands

Acuity Brands Lithonia Lighting VAP installation instructions

Hytronik HEM06-T quick start guide

Hytronik

Hytronik HEM06-T quick start guide

Pro-Elec PELL0008 instructions

Pro-Elec

Pro-Elec PELL0008 instructions

Rollei Lumen Pro RGB 50 W manual

Rollei

Rollei Lumen Pro RGB 50 W manual

Eterna BH60BK Safety and installation instructions

Eterna

Eterna BH60BK Safety and installation instructions

Hubbell Dual-Lite UFO-LP1 installation instructions

Hubbell

Hubbell Dual-Lite UFO-LP1 installation instructions

ADB L-810 SBOL user manual

ADB

ADB L-810 SBOL user manual

ambiance LR-016 Installation and safety instructions

ambiance

ambiance LR-016 Installation and safety instructions

Animated Lighting Haunted House in a Box Assembly and operating instructions

Animated Lighting

Animated Lighting Haunted House in a Box Assembly and operating instructions

Ecco Pro Vantage 12+ Series Installation & operation instructions

Ecco

Ecco Pro Vantage 12+ Series Installation & operation instructions

CowboyStudio Flash40 Setup instructions

CowboyStudio

CowboyStudio Flash40 Setup instructions

Fresh-Aire MINI UV installation instructions

Fresh-Aire

Fresh-Aire MINI UV installation instructions

Glamox C50-S user manual

Glamox

Glamox C50-S user manual

Chauvet COLORdash Batten user manual

Chauvet

Chauvet COLORdash Batten user manual

Intex SL503 owner's manual

Intex

Intex SL503 owner's manual

Regent Lighting Solutions Longo installation instructions

Regent Lighting Solutions

Regent Lighting Solutions Longo installation instructions

manuals.online logo
manuals.online logoBrands
  • About & Mission
  • Contact us
  • Privacy Policy
  • Terms and Conditions

Copyright 2025 Manuals.Online. All Rights Reserved.