Xblitz Xblitz LIMITED User manual

1/ 11
1080FHD High Definition
Car Video Recorder
User manual
Xblitz LIMITED

2/ 11
Contents
1. POWER KEY------------------------------------------------------------------------- 4
2. OK KEY ----------------------------------------------------------------------------- 4
3. M KEY ------------------------------------------------------------------------------- 4
4. UP KEY ------------------------------------------------------------------------------ 5
5. DOWN KEY -------------------------------------------------------------------------- 5
6. PARKING KEY ---------------------------------------------------------------------- 5
7. FILE LOCK KEY -------------------------------------------------------------------- 5
8. VEHICLE MOVEMENT ----------------------------------------------------------- 6
9. TF CARD PREPARED -------------------------------------------------------------- 6
10. INSTALLAND PUT OUT THE TF CARD --------------------------------------6
11. ADJUST THE POSITION OF THE LENS ---------------------------------------6
12. TURN ON/OFF THE DEVICE ----------------------------------------------------6
13. THE BASIC OPERATION OF CAR DVR---------------------------------------7
14. PRODUCT FEATURES -----------------------------------------------------------10
15. TECHNICAL SPECIFICATIONS -----------------------------------------------10
16. PRODUCT STRUCTURE --------------------------------------------------------11

3/ 11
Product added 4 features except the normal common function :
(1)High definition 1080P 30fps H.264 MJEP , High resolution, high night vision, HDMI high
output.
(2)fast lock/unlock video file.
(3)Parking monitoring: After parking mode started, it can even judge the environment and
save the file automatically on the condition of switch off.
(4)Built-in G-Sensor: record the information of G-Sensor and judge according to the
movement of the vehicles, when it arrives the a certain value, it will realized something
wrong happened with the vehicles and lock the video file.
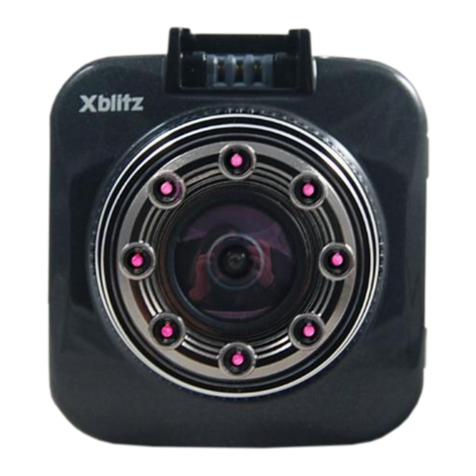
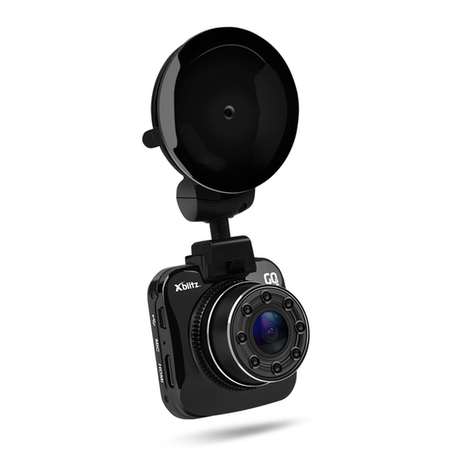
Product Structure Sketch Map
1) OK key 2)down key 3)parking monitor key 4)up key 5)lock file 6)Menu key 7)TF card slot
8)power key 9)HDMI connector 10)AV connector 11)USB connector

4/ 11
1. power key:
Function 1:switch on and off
on the state of switch off, press[power key]to the working state. On the state of switch on,
press[power key] to save all information and turn off the device
Function 2:display screen
on the state of working /video/ photography, press[power key] to switch on and off screen.
2. ok key:
Function 1:switch on and off video
on the state of working, press [yes key] to turn on the video, press [yes key] to stop video when
in video.
function 2:photography
on the state of photography, press [yes key] shortly to take pictures.
function 3:play the video
on the state of review, press[yes key] shortly to play/stop the video.
Function 4:yes
On the state of video/ setting menu/photography/ review menu, agree with all the setting and
save the information.
3. M key:
Function 1:switch mode
On the state of video,press [M key] shortly to enter the condition of photography.
On the state of photography, press [M key] shortly to
enter the condition of review.
On the state of review, press [M key] to enter the condition of video.
Function 2:menu

5/ 11
On the state of video, press [M key] for a long time to enter the mode of video, press it again to
enter the setting menu, it will exit if you press it again in this mode.
On the state of photography, press [M key] to enter photography menu, press it again to enter
the setting menu.
On the state of review, press [M key] to enter file menu, press it again to enter the setting menu.
4. up key:
Function 1:you can choose the function you like on the setting menu.
Function 2:for the video in playing, you can add the voice using this key, also can add the
speed of the playing.
Function 3:on the state of the video, you can start/ stop the microph1 .
5. down key:
Function 1:you can choose the function you like on the setting menu.
Function 2:for the video in playing, you can reduce the voice using this key, also can reduce
the speed of the playing.
Function 3:on the state of video, you can start/stop the flash LED using this key.
6. parking key:
Function 1:if you press parking key before turning off the device, there will be a “P” showed
on the right corner of the screen, it means the device is in parking mode, if anything touch the
device or vehicles, the device will turn on automatically for about 20s to video and then turn
off.
when you star the mode of parking, if you want to cancel it, press parking key, the “P” will
disappear .
7. file lock key:
When it is in video, press [file lock key] to protect the video.

6/ 11
8. vehicle movement:
Choose the type of your car first, and then choose the area, we can only support China and
TaiWan at present, if you set the speed limited in the device, any speeding happened , the
device will alarm, it can help the driver to drive safety .
9. TF card prepared
The requirement of TF card:the capacity of the card is over the speed of CLASS6.
10. install and put out the TF card
10.1 put the TF card to the slot according to the correct direction, please make sure TF card will
be fixed in the slot.
10.2 when you put out the TF card, please press the TF card smoothly, you can take out the card
after it bullet.
notice:
a. please don’t put out the TF card when the device is in working.
b. please notice the direction to install the TF card, if opposite the direction, it may destroy the
device and the TF card.
c. after you install the TF card to the device, the device will recognize the card as the first store
device, the information in the TF card can’t be read .
d. if the TF card can’t match with the device, pelase reinstall it again or change the card.
e. it can support the Max 32g.
11. adjust the position of the lens
the lens of this device can movement around of the direction of 120 degree, so that you can get
a excellent video.
12. turn on/off the device
12.1 Manual operation:press once shortly,the screen will be light. press for a long time,

7/ 11
the device will turn off.
12.2 automatic operation :please connect with the 5V charger, the device will be video
automatically after the car drive.
13. The basic operation of Car DVR
13.1 Switch the working mode
There are 3 modes in this device: video/photography/preview, you can press MODE key to
switch.
13.2 Menu setting and system setting
In the camera or camera mode, long press (MENU) key, go to "System Settings" option, then
"Menu Settings" field is in blue background. Press the Up / Down keys to select the desired
setting item; press "OK" button to confirm the setting, press the Menu button again to exit the
menu
13.3 System setting
Parking mode
:
close/2G/4G/8G
Date and time
:
auto power off
;
close/1/3/minute
screen saver
:
close/3/5/10 minute(automatic close the screen)
keypad t1
;
open/close
language option
;
English/Portugal/Russian/Chinese/Japanese/Spanish/France/German/Italian
TV system
:
P/N
power frequency
:
50/60
fill-in light
:
open/close
format
:
memory card
default setting : yes/no
firmware release
:
version number
13.4 Recording
when the Camera into video mode, the upper left corner of the screen when recording mark,
press the OK button to start the video, the top left corner flag a video screen flashing, press the
camera button to stop the video recording, while the upper left corner of will disappear.;
13.5 video mode option
resolution ratio
:
1080FHD
、
1080P
、
720P
、
WVGA
、
VGA
;

8/ 11
loop video
:
close
,
1 minute
,
2 minute
,
3 minute
,
5minute
,
10 minute
;
exposure compensation
:
EV-2.0
,
EV-5/3
,
EV-4/3
,
EV-1.0
,
EV-2/3
,
EV-1/3
,
EV+0.0
,
EV+1/3
,
EV+2/3
,
EV+1.0
,
EV+4/3
,
EV+5/3
,
EV+2.0
movement detection
:
open/close
;
video frequency
:
open/close
Date label
:
open/close
G-sensor
:
close/2G/4G/8G
lane movement:Function Switch / models / sensitivity / Region Select / Start speed / on / off remind sound.
13.6 photograph mode and setting
13.6.1 When you press the switch button, the camera into the camera mode, press the mode
button to enter the camera mode, the upper left corner of the screen there are pictures symbols,
it means the device is into the camera mode.
13.6.2 Press video camera key, there will be image preview wait about 1 second after the
camera is complete, hold on so as not to shake the camera when taking pictures, so as not to
affect the picture quality.
Shooting mode
:
single shooting.
Resolution
:
12M
,
10M
,
8M
,
5M
,
3M
,
2M
,
VGA
,
1.3
M
continue shooting
:
open/close
image quality
:
high quality
,
standard
,
normal
Sharpness
:
Strong, standard, soft
White Balance: Auto, Daylight, Cloudy, Tungsten, Fluorescent
ISO
:
auto
,
100
,
200
。
Exposure Compensation
:
EV-2.0
,
EV-5/3
,
EV-4/3
,
EV-1.0
,
EV-2/3
,
EV-1/3
,
EV+0.0
,
EV+1/3
,
EV+2/3
,
EV+1.0
,
EV+4/3
,
EV+5/3
,
EV+2.0
Anti-shake: On / Off
Quick preview: Off, 2 seconds, 5 seconds
Date Label: Off, Date, Date / Time
13.6 browse files
When the camera to complete the boot process and enter the camera mode, then press the mode
button twice to enter playback mode, press the up or down key audio and video data can be
viewed on the picture. Playback browse by file type, respectively, when the file type is the
video, you can only browse the video file, a picture, you can only view images.
13.7 Delete and Protection
In playback mode, press the Menu key lock option appears to delete and protect, press OK to

9/ 11
enter the "delete current" "Delete All" option, press the OK button to enter, press the OK key.
You can also enter the lock on the file, it can not be deleted before unlocking protect some
important information.
13.8 shortcut key in video mode:
13.8.1 Press the Mode button: emergency situation manually press [lock button] of the current
video files plus unlock short press again to unlock the file.
13.8.2 Power key: When is recording short press [Power button] to turn on / off the screen
backlight.
Short press the button: quickly switch lights
13.8.3 Press the button to turn off the microph1: In the video mode, press the button to quickly
turn on / off the microph1, press the button to open and close the gravity sensor
13.9 Video mode while charging
Car charge connected to the machine's USB, boot that can enter the video mode while charging
13.10 Video and USB functions to read instructions.
This unit supports USB direct read, you can also directly connect the machine when the
machine reads the recorded video file to the computer with a USB cable, or directly remove the
TF card, read the files with TF card reader.
13.11 PCCAM PC camera
The machine can be used as PC camera, with a USB cable to connect the camera to the
computer, a pop-up camera memory selection, press the arrow keys to move and press the OK
button to confirm the camera, open my computer, there will be a image of
,Double-click on this icon to use when the computer camera.
When the OK button to select the memory card using a computer can view data within
13.12 Connecting a TV broadcast
10 / 11
1. TV cable can be connected with high-quality TV for playback
Tip: No need to install drivers.
14. Product Features
1) Large screen can more clearly see the effect of pre-recorded. 1080P ultra wide-angle lens is
the perfect combination of visual design, more convenient for various occasions multi-angle,
high-resolution video capture
2) Built-in 1/3 inch low-noise and high-quality sensor, can capture in darker situations
ultra-clear picture
3) Built-in lithium battery while charging recording function
4) Built-in microphone / speaker
5) Support high-capacity Micro TF card
6) Car launch automatically start recording function
7) With a delayed start function to prevent the car to start an instant pulse current damage
machine
8) Gravity sensor G-SENSOR
15. Technical Specifications
Shot
120 degrees ultra-wide
Options Language
English / Portuguese / Russian / Chinese Simplified
/ Traditional Chinese / Japanese / Spanish / French /
German / Italian
Recording video format
MJEPAVI
TF memory card slot
Micro TF
Microph1 / Speaker
Internal
Car Power DC
5V 1A
battery
Built-in lithium polymer battery
System Requirements
Windows 2000/XP/Vista/Windows 7,MAC OS x
10.3.6

11 / 11
16. Product Structure
Image Sensor
FHD
Display
2.4-inch HD display
Shot
All-glass + grade high-resolution multi-layer optical
wide-angle lens
Video Specifications
MJEPAVI
Image Format
JPEG
Video output
AV output HDMI output
Transmission speed
USB2.0
Power Interface
5V 1A
Capacity support
Max 32GB
Built-in speaker
8R 1W
Built-in recording
Fidelity speakers
battery
Built-in lithium polymer
Table of contents
Other Xblitz Dashcam manuals

Xblitz
Xblitz Z10 SLIM User manual

Xblitz
Xblitz Z3 User manual

Xblitz
Xblitz X7 User manual

Xblitz
Xblitz X6 User manual

Xblitz
Xblitz Z8 NIGHT User manual

Xblitz
Xblitz TANGO 4K User manual

Xblitz
Xblitz PARK VIEW 2 User manual

Xblitz
Xblitz P600 User manual

Xblitz
Xblitz GO2 User manual

Xblitz
Xblitz A2 GPS User manual

Xblitz
Xblitz NaviiGPS User manual

Xblitz
Xblitz PARK VIEW ULTRA User manual

Xblitz
Xblitz PARK VIEW User manual

Xblitz
Xblitz Z9 User manual

Xblitz
Xblitz XB-P100 User manual

Xblitz
Xblitz Black Bird User manual

Xblitz
Xblitz Night User manual

Xblitz
Xblitz Professional P100 User manual

Xblitz
Xblitz Dual Core User manual

Xblitz
Xblitz XB-CLASSIC User manual