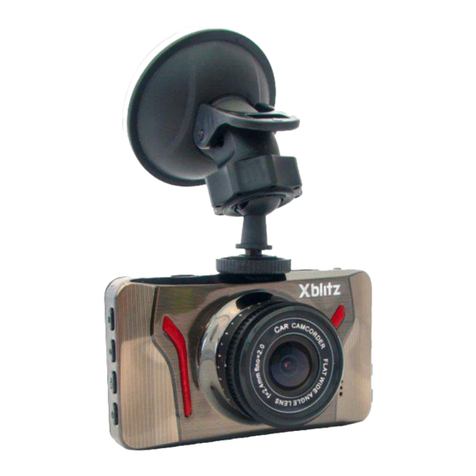
Xblitz S3 Duo User manual

Instrukcja obsługi w języku polskim - PL
User’s manual in English lanugage - EN
[ Duo]S3
Bedienungsanleitung, in deutscher Sprache - DE
Uživatelská příručka v českém jazyce - CZ


INSTRUKCJA OBSŁUGI
PL
[ Duo]S3

W ZESTAWIE
4
Szanowny Kliencie,
dziękujemy za wybranie kamery samochodowej Xblitz S3 Duo. Zakupione
przez ciebie urządzenie jest wideo rejestratorem, który jest wyposażony
w dodatkową kamera wsteczną. Kamera przeznaczona jest do użytkowania
w samochodach i służy do nagrywania trasy pojazdu.
PRZED UŻYCIEM
1. Zaleca się używanie markowych kart SD (pojemność od 8 do 32GB) klasy 10.
2. Przed umieszczeniem karty pamięci w rejestratorze, należy sformatować
ją do systemu plików FAT32 na komputerze, a następnie w rejestratorze.
3. Kartę pamięci należy instalować, gdy urządzenie jest wyłączone. W przeciwnym
razie może dojść do uszkodzenia karty i urządzenia. To samo dotyczy wyciągania
karty z urządzenia.
4. Ustaw w menu:
a. Datę i godzinę.
b. Nagrywanie w pętli (dostosuj czas nagrań). Jeżeli wyłączysz nagrywanie w pętli,
pliki nie będą nadpisywane.
c. Ustaw najwyższą dostępną rozdzielczość.
d. Ustaw G-Sensor na najniższą możliwą czułość, tak aby kamera nie wyłapywała
nierówności na drodze i zabezpieczała niepotrzebnie nagrań.
e. Włącz tryb HDR.
5. Kiedy karta pamięci się zapełni, najstarsze niezabezpieczone nagrania zostaną
nadpisane.
6. Zaleca się stosowanie funkcji urządzenia zgodnie z ich przeznaczeniem, to znaczy
niestosowania funkcji TRYBU PARKINGOWEGO oraz WYKRYWANIA RUCHU
w trakcie jazdy. Może to spowodować samoczynne włączanie i wyłączanie
nagrywania, a każde zrobione nagranie z tymi trybami będzie zabezpieczane przed
nadpisaniem.
7. Dźwięk: urządzenie posiada mikrofon pojemnościowy, który nagrywa wszelkie
odgłosy otoczenia. Dźwięki mogą nakładać się na siebie powodując zniekształcenia.
8. Urządzenie posiada wbudowany super kondensator i działa tylko przy użyciu
zasilania zewnętrznego.
1. Kamera samochodowa Xblitz S3 Duo
2. Kamera wsteczna
3. Czytnik kart pamięci micro SD
4. Uchwyt z przyssawką
5. Ładowarka
6. Przewód USB
7. Przewód AV (do kamery tylnej)
8. Instrukcja

5
PL
OPIS REJESTRATORA
1. Przycisk Menu / Mode
2. Przycisk W GÓRĘ
3. Przycisk W DÓŁ
4. Przycisk POWER / NAGRYWAJ
5. Głośnik
6. Obiektyw
7. Slot na kartę pamięci micro SD
8. Port AV (do podpięcia kamery tylnej)
9. Port mini USB
10. Przycisk RESET
11. Uchwyt z regulacją 360°

6
01. MONTAŻ KAMERY
1. Wybierz miejsce montażu kamery. Najlepiej ustawić kamerę tak, aby na podglądzie
wyświetlacza widać było jak największy obszar przed samochodem. Upewnij się,
że kamera nie będzie zasłaniała widoku kierowcy podczas jazdy.
2. Zamontuj uchwyt na szybie, następnie zainstaluj w nim kamerę.
3. Przeprowadź kabel USB w taki sposób aby nie utrudniał kierowania pojazdem.
4. Poprowadź kabel kamery cofania i podepnij go do kamery.
5. Podłącz wtyczkę mini USB do kamery oraz podłącz ładowarkę do gniazda
zapalniczki 12/24V.
Miejsce montażu kamery dodatkowej dołączonej do zestawu zależy od Państwa
predyspozycji. Kamera spełnia normy wodoszczelności IP67 (odporna na warunki
atmosferyczne).
Podłączenie kamery wstecznej:
Kabel kamery wstecznej należy podłączyć do portu AV, który znajduje się
na obudowie głównego wideorejestratora. Upewnij się czy urządzenie główne widzi
kamerę dodatkową (jeśli nie, sprawdź ustawienia kamery w menu głównym lub
sprawdź czy kable kamery zostały poprawnie zainstalowane).
Montaż kamery cofania:
Przewody wychodzące z tylnej kamery należy podłączyć do przewodów zasilających
lampkę biegu wstecznego. Podłączenie przewodów w ten sposób, pozwoli
na aktywację funkcji cofania. Instalacja wyprowadzona na zewnątrz powinna być
dobrze zaizolowana oraz nie powinna być naprężona mechanicznie.
Uwaga! Kamerę tylną należy zamocować stopką mocującą do góry. Montaż
za pomocą wkrętów lub taśmy dwustronnej.
Uwaga! Kamera rejestruje obraz w tzw. „Odbiciu lustrzanym”.
02. OPIS DZIAŁANIA KLAWISZY
1. POWER
Aby włączyć lub wyłączyć kamerę, przytrzymaj przycisk przez ok. 3 sekund. Krótkie
wciśnięcie przycisku włącza lub wyłącza nagrywanie video lub wybudza ekran
z funkcji wygaszacza.
2. MENU / MODE
Dłuższe wciśnięcie powoduje otwarcie menu kontekstowego (o ile w tym samym
czasie, kamera nie rejestruje obrazu). Dłuższe naciśnięcie przycisku przechodzenie
do trybów video / foto i przeglądania plików. W MENU oraz w trybie przeglądania
funkcjonuje jako klawisz cofnij. Krótkie wciśnięcie przycisku w trakcie nagrywania
filmu chroni obecnie nagrywany plik przed nadpisaniem.
03. FUNKCJE URZĄDZENIA
1. Podwójna kamera – pozwala na wyłączenie lub włączenie nagrywania przez
kamerę wsteczną.
2. Nagrywanie w pętli – pozwala ustawić maksymalną długość nagrywanych plików.
3. HDR – pozwala włączyć zakres wysokiej dynamiki.
4. Ekspozycja – pozwala dostosować czułość obiektywu na światło.
5. Wykrywanie ruchu – włącza / wyłącza tryb detekcji ruchu. Tryb ten
wykrywa wibracje pojazdu (np. w trakcie stłuczki lub nagłego hamowania)
i zabezpiecza nagranie przed nadpisaniem.
6. Nagrywanie – włącza / wyłącza nagrywanie dźwięku.
7. Znacznik daty – włącza / wyłącza wyświetlanie daty na nagraniu lub zdjęciu.
8. Czujnik grawitacji (G – Sensor) – ustawia czułość czujnika grawitacyjnego.
Czujnik ten wykrywa wibracje pojazdu (np. w trakcie stłuczki lub nagłego
hamowania) i zabezpiecza nagranie ze zdarzenia przed nadpisaniem.
9. Numer samochodu – pozwala włączyć/wyłączyć wyświetlenie numeru tablic
rejestracyjnych na nagraniach.
7
PL
3. W DÓŁ
W trybie przeglądania plików, naciśnięcie przycisku przełącza między plikami
zapisanymi na karcie pamięci lub w menu urządzenia. W trybie wideo wciśnięcie
przycisku włącza lub wyłącza nagrywanie dźwięku.
4. W GÓRĘ
W menu i trybie przeglądania plików odpowiada za nawigacje po poszczególnych
pozycjach. W trybach wideo i foto wciśnięcie przycisku przełącza widok pomiędzy
przednią i tylną kamerą.
5. RESET
Wciśnięcie przycisku resetuje urządzenie i przywraca je do ustawień fabrycznych.
04. ŚRODKI OSTROŻNOŚCI
1. Nie należy samodzielnie rozbierać ani ingerować w kamerę. W razie wystąpienia
awarii należy skontaktować się z serwisem.
2. Używaj wyłącznie oryginalnych akcesoriów.
3. Korzystaj wyłącznie z oryginalnej ładowarki dołączonej do zestawu. Użytkowanie
innego zasilacza może źle wpływać na działanie baterii.
4. Urządzenia nie można wykorzystywać niezgodnie z prawem obowiązującym
w danym kraju lub regionie.
5. Dopuszczalne temperatury pracy urządzenia to 0 °C – 35 °C, przechowywania:
5 °C - 45 °C.
6. Nie narażaj urządzenia na uszkodzenia oraz uderzenia fizyczne.

8
05. FAQ
1. Urządzenie nie włącza się, miga ekran.
Przed uruchomieniem należy naładować baterię urządzenia.
2. Urządzenie nie włącza/wyłącza się automatycznie.
Powodem takiego zachowania może być stałe zasilanie w gnieździe zapalniczki
samochodowej.
3. Urządzenie restartuje się w trakcie jazdy.
Zaleca się sprawdzenie źródła zasilania.
4. Urządzenie nie nagrywa w Pętli (nagrywa losowo).
Należy sprawdzić ustawienie funkcji (wykrywanie ruchu” oraz „trybu parkingowego”
– obie powinny być wyłączone w trakcie jazdy.
5. Urządzenie pokazuje komunikat „karta pełna”.
Należy sprawdzić funkcje „G – Sensor” oraz „trybu parkingowego” i ustawić
je na minimum. Kartę należy sformatować w formacie FAT32 najpierw
w komputerze, a następnie w rejestratorze.
6. Urządzenie nagrywa szumy, zniekształcony, niewyraźny dźwięk.
Urządzenie posiada bardzo czuły mikrofon, który nagrywa wszelkie odgłosy
z otoczenia. Nagrane dźwięki mogą nakładać się na siebie. Nawiew powietrza
przedniej szyby również może zniekształcić dźwięk.
7. Urządzenie nie odpowiada.
Wciśnij krótko przycisk Reset lub przywrócić urządzenie do ustawień fabrycznych.
8. Nan graniu występują poprzeczne pasy.
Błędne ustawienia wartości częstotliwości odświeżania obrazu. Ustaw wartość
częstotliwości na „50Hz” lub „60Hz” w zależności od ustawień lokalnych.
W związku z ciągłym doskonaleniem produktów producent zastrzega sobie
możliwość zmiany w urządzeniu oraz jego zestawie bez wcześniejszego
informowania. Niektóre funkcje opisane w niniejszej instrukcji mogą się nieznacznie
różnić w rzeczywistości.
7. Dbaj o czystość produktu a w szczególności obiektywu. Nie korzystaj
z detergentów oraz środków chemicznych przy czyszczeniu.
8. Czyść wyłącznie, gdy urządzenie jest odłączone od zasilania.
9. Trzymaj urządzenie poza zasięgiem dzieci.
10. Nie wystawiaj urządzenia na działanie bardzo wysokich temperatur oraz ognia.

Procesor: JL5603
Rozdzielczość nagrywania: 1920x1080 / kamera wsteczna: VGA 640x480
Sensor: SC2368
Pamięć: Karty micro SD do 32 GB klasy 10
USB: Mini USB
Mikrofon/Głośniki: Wbudowane
Wyświetlacz: 2.45 cala
Kąt widzenia: 140°
Format zapisu: MOV
Przysłona: F2.0
Zasilanie: 5V
Wymiary (bez uchwytu): 75x43x22 mm
Waga: 83 g
Temperatura przechowywania: od 5 °C do 45 °C
Temperatura pracy: od 0 °C do 35 °C
9
PL
UWAGA! Należy używać wyłącznie oryginalnej ładowarki o prądzie ładowania 5V.
Nie podłączać bezpośrednio do gniazdka 220/230V. Niestosowanie się do zaleceń
może spowodować uszkodzenie kamery lub doprowadzić do niebezpiecznych sytuacji.
UWAGA! Odtwarzanie plików na komputerze: kamera nie posiada trybu pamięci
masowej. Aby odtworzyć pliki na komputerze należy wyjąć kartę pamięci z kamery
i podłączyć za pomocą czytnika do komputera.
06. SPECYFIKACJA

Specyfikacje i zawartość zestawu mogą ulec zmianie bez powiadomienia,
Przepraszamy za wszelkie niedogodności.
Producent:
KGK Trade sp. z o.o. sp. k.
ul. Ujastek 5b
31-752 Kraków Wyprodukowano w P.R.C.
07. KARTA GWARANCYJNA
/ REKLAMACJE
Produkt objęty jest 24-miesięczną gwarancją. Warunki gwarancji można
znaleźć na stronie: https://xblitz.pl/gwarancja/
Reklamacje należy zgłaszać za pomocą formularza reklamacyjnego
znajdującego się pod adresem: http://reklamacje.kgktrade.pl/
Szczegóły, kontakt oraz adres serwisu można znaleźć na stronie:
www.xblitz.pl
Pełna wersja instrukcji dostępna na stronie www.xblitz.pl

EN
USER’S MANUAL
[ Duo]S3

12
KIT CONTENT
Dear Customer,
Thank you for purchasing the Xblitz S3 Duo car camera! The device you purchased
is a video recorder that comes with an additional rearview camera. The camera
is designed for use in cars and is used to record the route of the vehicle.
Before using this device, we advise reading the following instructions.
BEFORE USE
1. It is recommended to use branded class 10 SD cards (capacity ranging from
8 to 32GB).
2. Before inserting the memory card into the recorder, the card must be formatted
to the FAT32 file system on your computer as well as on the recording device.
3. Only insert the memory card into the device when the device is turned o.
Inserting the memory card in the switched-on recorder may damage both the card
and the device. This also applies when removing the card from the device.
4. Menu Setup Recommendations:
a. Date and time.
b. Loop recording (adjust the recording time). If you disable loop recording, the files
will not be overwritten.
c. Set to the highest available resolution.
d. Set the G-Sensor to the lowest possible sensitivity so that the camera does not
pick up road irregularities and protects the recordings unnecessarily.
e. Enable HDR mode.
5. The oldest unprotected recordings and files on the memory card will
be overwritten when the memory card becomes full.
6. The device functions should only be used for their intended purposes. Do not
activate the motion detection or parking mode functions while driving. This may
result in the device turning on or o automatically.
7. The device has a condenser microphone that records all ambient sounds. These
recorded sounds may overlap with one another causing them to be distorted.
8. The device has a built-in super capacitor and will only work if it is connected
to an external power source.
1. Xblitz S3 Duo Dashboard Camera
2. Rearview Camera
3. Micro SD Memory Card Reader
4. Suction Cup Mounting Bracket
5. Charger
6. USB cable
7. AV cable (for connecting the rearview camera)
8. Instructions

13
EN
PRODUCT DESCRIPTION
1. Menu/Mode button
2. UP button
3. DOWN button
4. POWER / RECORD button
5. Loudspeaker
6. Lens
7. Micro SD memory card slot
8. AV port (for connecting a rearview camera)
9. Mini USB port
10. RESET button
11. 360° adjustable handle

14
01. MOUNTING YOUR CAMERA
1. Select a place to mount the camera. It is best to set the camera so that the display
preview shows the largest possible area in front of the car. Make sure the camera
does not obstruct the driver's view while driving.
2. Stick the mounting bracket to the windshield of the vehicle then mount the
camera on it.
3. Run the power cable to the device as shown in the image above.
4. Route the cable for the rearview camera and connect it to the camera.
5. Connect the mini USB cable to the camera and insert the charger into the 12 / 24V
cigarette lighter socket.
The place of installation for the additional rearview camera included in the set is your
personal choice. The camera meets the IP67 waterproof standards (resistant to all
weather conditions).
Connecting The Rearview Camera: The cable of the rearview camera should
be connected to the AV port, which is located on the housing of the main video
recorder. Make sure the main device can see the secondary camera (if not, check the
camera settings in the main menu or check if the camera cables are properly
installed).
Connecting The Rear Camera: The cables coming from the rear camera should
be connected to the cables supplying the reverse gear lamp. Connecting the wires
this way will enable the reversing function to be activated. The external installation
of the wire will need to be well insulated and should not be overstretched.
Caution! Attach the rear camera with the mounting foot facing up. Mounting with
screws or double-sided tape.
Caution! The camera recordings will be recorded as mirror images of the initial
camera view.
02. KEY DESCRIPTION
1. POWER
A quick push on this button will turn the display panel on and o. To turn the device
on or o, the key needs to be pushed in and held for 3 seconds.
2. MENU/MODE
Holding this key for longer will open the context menu (as long as the camera is not
recording at the same time). A longer press without holding the button will allow you
to switch between the video/photo modes and file browsing. In MENU and viewing
mode, it functions as a back button. A short press of the button during recording
in video mode protects the currently recorded file from being overwritten.

15
03. DEVICE FUNCTIONS
1. Dual Camera - Allows you to disable or enable recording by the rearview camera.
2. Loop recording - Allows you to set the maximum length of recorded files.
3. HDR - Allows you to enable a high dynamic range.
4. Exposure - Allows you to adjust the sensitivity of the lens to light.
5. Motion detection - Enables/disables the motion detection mode. This mode
detects vehicle vibrations (e.g. during a crash or sudden braking) and prevents the
recording from being overwritten.
6. Recording - Enables/disables sound recording.
7. Date Stamp - Enables/disables displaying the date on the recording or photo.
8. Gravity Sensor (G - Sensor) - Sets the sensitivity of the gravity sensor. This sensor
detects vehicle vibrations (e.g. during a crash or sudden braking) and protects the
event recording against overwriting.
9. Car Number - Allows you to enable/disable displaying the number of license
plates on recordings.
3. DOWN
This button allows you to navigate through any saved files found on the inserted
memory card as well as the device menu. When playing a video file, this button will
also activate the sound adjustment function by muting the video.
4. UP
While in the file browsing function, this button switches between the saved files
on the current memory card. In the menu, pushing the button will change the
currently selected item. In video recording mode, the button is used to switch audio
recording on or o.
5. RESET
Pushing the reset button will reset the whole device and restore it to the default
factory setting.
EN
04. PRECAUTIONS
1. Do not disassemble or tamper with the camera by yourself. In the event
of a failure, contact the service center.
2. Use only original accessories.
3. Use only the original charger included in the set. Using a dierent power adapter
may adversely aect the performance of the battery.
4. The device may not be used in violation of the laws of a given country or region.
5. The permissible operating temperature of the device is 0 °C - 35 °C, storage:
5 °C - 45 °C.

16
6. Do not expose the device to damage and physical impact.
7. Keep the product clean, especially the lens. Do not use detergents or chemicals
when cleaning.
8. Clean only when the device is disconnected from the power supply.
9. Keep the device out of the reach of children.
10. Do not expose the device to very high temperatures and fire.
05. FAQ
1. The device does not turn on, the screen flashes:
Connect and charge the device before starting it to ensure the battery is fully charged.
2. The device does not turn On/O automatically:
The reason for this may be caused by the power supply in the cigarette lighter socket
not being constant.
3. The device restarts while driving:
It is recommended to check the power source that the device is connected to.
4. The device does not record in Loop (records randomly):
Check the setting of the functions selected on the device (motion detection "and"
parking mode "- both should be turned o while driving).
5. The device shows the message "card full":
Check the "G - Sensor" and "Parking Mode" functions and set them to the minimum.
The card should be formatted in the FAT32 format first on a computer, and then
on the dashcam.
6. The device records noise, distorted, or unclear sound:
The device has a very sensitive microphone that records all ambient sounds from the
surroundings. Recorded sounds may overlap. Windshield airflow can also distort the
sound.
7. The device is not responding:
Briefly press the Reset button or restore the device to factory settings.
8. Recording displays distorted lines:
This may be caused by the refresh rate of the image setting being incorrect. Set the
frequency value to "50Hz" or "60Hz" depending on your local settings.
Due to the continuous improvement of products, the manufacturer reserves the right
to change the device and its set without prior notice. Some functions described
in this manual may be slightly dierent from the actual.
WARNING! Only use the original 5V charger. Do not connect directly to a 220/230V
socket. Not following the given instructions may lead to damage to your device and/
or hazardous situations.

17
EN
ATTENTION! Playing files on a computer: The camera does not have a mass storage
mode. To play files on a computer, remove the memory card from the camera and
connect it to the computer via a reader.
06. SPECIFICATIONS
Processor: JL5603
Video Resolution: 1920x1080 / rearview camera: VGA 640x480
Sensor: SC2368
Memory: Micro SD car dup to 32 GB class 10
USB: Mini USB
Microphone/Speaker: Built-in
Display: 2.45 -inch
Angle of View: 140 °
Save Format: MOV
Iris: F2.0
Power: 5V
Dimensions (without holding mount): 75x43x22mm
Weight: 83g
Storage Conditions: 5 °C - 45 °C
Working Conditions: 0 °C - 35 °C

07. WARRANTY / CLAIMS
This product is covered by a 24-month warranty. The warranty conditions
are available on the website: https://xblitz.pl/warranty/
Complaints should be submitted with the complaint form
which can be found at http://reklamacje.kgktrade.pl/
Contact details and the address of the service can be found
on the website: www.xblitz.pl
Manufacturer:
KGK Trade sp. z o.o. sp. k.
Ujastek 5b
31-752 Cracow
Poland
Made in P.R.C.
Specifications and contents of the kit are subject to change without notice,
We apologise for any inconvenience.
For the full version of the manual, please visit www.xblitz.pl

DE
BEDIENUNGSANLEITUNG
[ Duo]S3

20
LIEFERUMFANG
Sehr geehrter Kunde,
vielen Dank, dass Sie sich für die Xblitz 53 Duo Autokamera entschieden haben.
Bei dem von Ihnen erworbenen Gerät handelt es sich um einen Videorekorder , der
mit einer zusätzlichen Rückfahrkamera ausgestattet ist. Die Kamera ist für den
Einsatz im Auto konzipiert und dient der Aufzeichnung der Fahrtroute eines
Fahrzeugs.
VOR DEM GEBRAUCH
1. Es wirdempfohlen , Marken-SD-Karten (8 bis 32 GB Kapazität) der Klasse 10 zu
verwenden.
2. Bevor Sie die Speicherkarte in den Rekorder einsetzen, formatieren Sie sie im
FAT32-Dateisystem auf Ihrem Computer und anschließend im Rekorder.
3. Setzen Sie die Speicherkarte ein, wenn das Gerät ausgeschaltet ist . Andernfalls
können die Karte und das Gerät beschädigt werden. Dasselbe gilt für das Entfernen
der Karte aus dem Gerät.
4. Im Menü einstellen:
a. Datum und Uhrzeit
b. Aufnahme in einer Schleife (Aufnahmezeit anpassen). Wenn Sie die
Schleifenaufzeichnung deaktivieren, werden die Dateien nicht überschrieben.
c. Stellen Sie die höchste verfügbare Auflösung ein.
d. Stellen Sie den G-Sensor auf die kleinstmögliche Empfindlichkeit ein, damit die
Kamera keine Fahrbahnunebenheiten auängt und Aufnahmen unnötig schützt.
e. Aktivieren Sie den HDR-Modus.
5. Wenn die Speicherkarte voll ist, werden die ältesten ungesicherten
Aufzeichnungen überschrieben.
6. Es wird empfohlen, die Funktionen des Geräts entsprechend ihrem Zweck zu
nutzen, d.h. die Funktionen PARKMODUS und BEWEGUNGSERKENNUNG
während der Fahrt nicht zu verwenden. Dies kann dazu führen, dass die
Aufzeichnung automatisch ein- und ausgeschaltet wird , und jede mit diesen Modi
gemachte Aufnahme vor Überschreiben geschützt wird.
7. Ton: das Gerät verfügt über ein Kondensatormikrofon, welches alle Geräusche der
Umgebung aufzeichnet. Die Geräusche können sich überlagern und zu Verzerrungen
führen.
8. Das Gerät hat einen eingebauten Superkondensator und funktioniert nur bei
externer Stromversorgung .
1. Autokamera Xblitz 53 Duo
2. Rückfahrkamera
3. Micro-SD-Speicherkartenleser
4. Halterung mit Saugnapf
5. Ladegerät
6.U SB-Kabel
7. AV-Kabel (für Rückfahrkamera)
8.B edienungsanleitung
Table of contents
Languages:
Other Xblitz Dashcam manuals

Xblitz
Xblitz Dual Core User manual

Xblitz
Xblitz Night User manual

Xblitz
Xblitz Classic User manual

Xblitz
Xblitz PARK VIEW 2 User manual

Xblitz
Xblitz GOSE User manual

Xblitz
Xblitz V3 MAGNETIC User manual

Xblitz
Xblitz z3 RUN User manual

Xblitz
Xblitz Z10 SLIM User manual

Xblitz
Xblitz Z8 NIGHT User manual

Xblitz
Xblitz XB-P100 User manual

Xblitz
Xblitz PARK VIEW ULTRA User manual

Xblitz
Xblitz GORIDE User manual

Xblitz
Xblitz GHOST User manual

Xblitz
Xblitz NaviiGPS User manual

Xblitz
Xblitz X7 User manual

Xblitz
Xblitz XB-CLASSIC User manual

Xblitz
Xblitz PRISM User manual

Xblitz
Xblitz Z4 User manual

Xblitz
Xblitz Z9 User manual

Xblitz
Xblitz P600 User manual