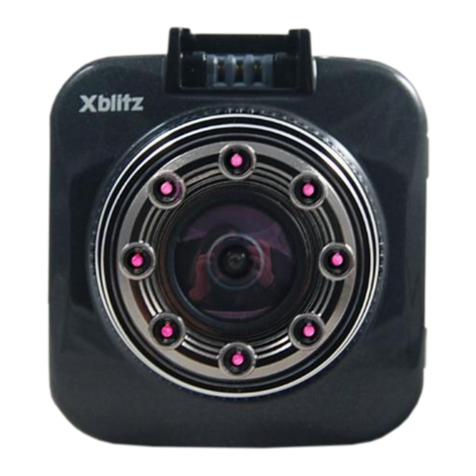
Xblitz Night User manual

20
www.xblitz.pl
Before first use:
1. It is recommended to use high-quality class 10 microSD cards for this device (4 to 32 GB).
2. It is necessary to format the memory card to FAT32 format before inserting it into the recorder.
3. Do not remove or insert the memory card while the device in powered on, as this may damage the memory card.
4. The battery allows you to record for no more than 5 minutes without external power.
5. When the memory card is full, the oldest unprotected video will be overwritten.
6. It is recommended to use the device's functions in accordance with their intended purpose. Do not use the MOTION DETECTION or
PARKING SURVEILLANCE mode while driving as this may cause automatic turning the device on and off, during a stop at the intersection.
It is recommended to set the G –SENSOR sensitivity level at a minimum, in order to avoid securing unnecessary recordings and the loss
of space on the memory card. The memory card must be formatted in FAT32 format first on the PC and then on the recorder.
7. Sound: the device has a capacitive microphone, recording all the sounds from the environment. The sounds may overlap causing
distortion.
Installation of the camera:

22
www.xblitz.pl
1- IR LEDs
Support recording at night.
2-Lens
It records the image from the front of the camera.
3- Place for a windshield mounting bracket.
4- RESET Button
You can use it when the camera „freezes”, meaning it does not respond to pressing other keys.
5- POWER Button
Long press turns on and off the camera. A short press activates and deactivates the recording.
6- Mini HDMI Port
It allows you to connect the external monitor with the appropriate cable.
7- Micro USB Port (power)
It’s where you connect the power cable.
8- MicroSD card slot
It’s where you insert your microSD card (the recorder supports Class 10 cards from 4GB to 32 GB).

23
www.xblitz.pl
1- MENU
2- UP
3- DOWN
4- OK
MENU:
Video Mode
1. Resolution
Defines the quality of video recordings. The higher the resolution the better the quality of recordings, but such files take up more space
on the memory card.
2. Loop recording
Length of the video recordings. During the recording, the selected option is symbolized by an icon, which is located on the left side of
the screen (off the menu).
3. WDR
Turning on and off the WDR function.
4. Motion Detection
1
2
3
4
3
2

24
www.xblitz.pl
When you enable this option and leave the camera in standby mode, powered on, the camera will record a short (10 second) video every
time motion is detected in front of it. If you manually stop recording, the option will be automatically disabled.
5. Auto Power On/Off
Once the camera is powered on (the vehicle engine starts), the device automatically turns on and starts recording. Once the camera is
powered off (the vehicle engine shuts down), the camcorder automatically saves the recording and turns off the power.
6. Turning off delay
Sets the time after which the camera turns off, once the engine shuts down.
7. Turning on delay
Sets the time after which the camera turns on, once the engine starts.
8. Sound recording
Enabling and disabling audio in recordings.
9. Date stamp
Enabling and disabling the date and time for the recording.
10. G-SENSOR settings
Sets the sensitivity of the sensor or switches it off. When the sensor is activated at the moment of impact, the recorded file is protected
against being overwritten. We recommend setting a lower value of sensitivity: "medium" or "low", otherwise the camera can capture
shock at the car bumps.
11. Parking Surveillance
When this function is turned on, and the camera is left in the car, powered on, it captures the shock of the car (for example, when our car
is hit by another car), turns on and starts recording. The lower the sensitivity value is set the more sensitive the camera is.
12. G-SENSOR active mode
With this setting you can choose whether the display should be on or off, when the camera detects a shock and starts recording.
13. Plates.
You can choose which plates will be displayed on the recordings.
25
www.xblitz.pl
Photo mode
1. Resolution
This option allows you to change the resolution of the photos.
2. Photo mode
You can set the time delay for taking the picture.
3. Sequence of photos
When this option is turned on, after pressing POWER button, the camera will take 5 pictures instead of just one.
4. Quality
Sets the quality of the pictures.
5. Sharpening
Sets the sharpness level of the pictures.
6. Color
Sets the color mode of the pictures. You can choose from: “normal”, “black and white”, “sepia”.
7. Quick preview
This function lets you to take a quick look at the picture that was taken.
8. Date stamp
Enabling and disabling the date and time for the photo.
Playback Mode
1. Delete
Deletes the selected file.
2. Protect
Protects recording against being overwritten.
3. Slide show.

26
www.xblitz.pl
Main Menu
(We enter it by double pressing the MENU key.).
1. Date and Time
Sets the date and time for the camera.
2. Auto shutting down
Sets the time after which the camera turns off, once the engine shuts down (it only works when the camera is recording).
3. Key sounds
Enabling and disabling key sounds.
4. Language
Sets the language for the camera.
5. TV Mode
Switching between NTSC and PAL (default and recommended).
6. Frequency
7. Screen saver
Sets the time after which the display should turn off.
8. Night Mode
Switching between auto and manual Mode. In the Auto Mode we set at what time the camera should enter the Night Mode. In the
Manual Mode we enter the Night Mode by pressing DOWN key.
9. Auto IR LEDs
Sets at what time the camera should enter the Night Mode.
10. Exposure
Exposure settings.
11. White balance
White balance settings.
12. Format
You can format the memory card in your device.

27
www.xblitz.pl
13. Default settings
Sets the default settings of the device.
14. Software version.
Keys
1. MENU
When the camera is not recording, pressing it allows you to enter the Menu. During recording, pressing it will protect the recording from
being overwritten.
2. UP
It is used to navigate between options in various menus. Pressing it during recording will start a new movie. In the Photo Mode it
activates the „Zoom+‘’ function.
3. DOWN
It is used to navigate between options in various menus. In the Recording Mode, it manually activates the Night Mode. In the Photo
Mode it activates the „Zoom-‘’ function.
4. OK
Outside the Menu it is used to navigate between modes: Recording / Photo / Playback. Inside every Menu it acts as a confirmation key.
Pressing it during recording a movie results in taking a picture.
Modes
We use the OK key to switch between various modes.
Video recording Mode
The camera turns on automatically and starts recording, once it is powered on (the engine of the car starts). Recording is indicated by the
blinking red dot in the upper left corner of the display. The recording time is shown in the upper right corner.
Recording can be stopped and resumed by pressing the POWER key.

28
www.xblitz.pl
1- Recording in progress info (red dot is blinking)
2- Time of the recording
3- Recording sound info.
4- Battery indicator
5- Time
6- Date
7- MicroSD card info
8- White balance settings
9- G-Sensor settings
10- Chosen recording length info
The MENU key takes us to the options (when the camera is not recording). During video recording it protects the recording from being
overwritten.
Pressing the UP key starts time-lapse recording (5kl/s). This is indicated by a camera icon inscribed in a red circle (on the right side of the
display).
Pressing the DOWN key activates the Night Mode. (if the Manual Night Mode option is turned on).
Pressing the OK key takes a picture.
3
3
5
6
7
8
9
10
2
4
1

29
www.xblitz.pl
1-Mode info
2- Photo resolution info
3- Photo quality
4- Battery indicator
5- The number of pictures possible to take (free space on
the memory card)
6- The memory card info
7- White balance info
8- Exposure info
2-
3-
4-
5-
6-
Photo Mode
We take a picture by pressing the POWER key.
By pressing the MENU key we enter the settings.
The UP key activates the „Zoom +” function.
The UP key activates the „Zoom -” function.
3
4
5
6
7
8
1
2

31
www.xblitz.pl
Night Mode
You can find settings for this Mode in the Main Menu. In the Auto Mode we set at what time the camera should enter the Night Mode. In the
Manual Mode we enter the Night Mode by pressing the DOWN key.
The red knob on the front of the camera can turn on the IR LEDs (middle position). The other two positions activate filter night only.

32
www.xblitz.pl
FAQ:
1) The device does not turn on, the display is blinking.
It is necessary to charge the device’s battery before the first use.
2) The device does not turn on,/turns off automatically.
The reason for this may be constant powering by the cigarette lighter socket.
3) The device reboots while driving.
Check the power source.
4) Loop recording does not work (the device records randomly).
Check the functions "MOTION DETECTION" and "PARKING SURVEILLANCE". They both should be turned off while driving.
5) The device displays the message "memory card full"
Check the "G-sensor" and "PARKING SURVEILLANCE" sensitivity settings –both should be set at a minimum.
The memory card must be formatted in FAT32 format first on the PC and then on the recorder.
6) The device records the noise and distorted, indistinct sound:
The device has a very sensitive microphone, which records all the sounds from the environment. The sounds may overlap. Airflow
windscreen effectively distorts the sound too.
7) The touch panel does not respond to touch:
The touch panel reacts to heat, cool air inlets can numb the touch sensor.

33
www.xblitz.pl
WARRANTY / CLAIMS
The product comes with a 24-month manufacturer's warranty. The warranty does not cover defects or damage caused by the fault of the user,
or as a result of improper use (or misuse). The guarantee does not cover mechanical damage and caused as a result of the use of accessories other
than those included in the kit. The guarantee does not cover consumable items such as batteries, rechargeable batteries. The warranty on batteries
is 6 months. Complaints should be submitted in writing, e-mail address: reklamacje@kgktrade.pl
Contact details and the address of the service: Xblitz, KGK TRADE, Os. Urocze 4, 31-952 Cracow
Phone: (+48) 530-183-248
Reseller / distributor:
Sale date:
Faults / repairs
Faults / repairs
Faults / repairs
Faults / repairs

34
www.xblitz.pl
NOTICE
Playing files on a computer:
The camera does not have a mass storage mode. In order to play files on your computer, remove the memory card from the camera and
connect it to the computer via the card reader.
Importer:
KGK Trade Sp. z o.o. sp. K
Os. Teatralne 24
31-946 Cracow
Made in P.R.C.
Table of contents
Other Xblitz Dashcam manuals

Xblitz
Xblitz P600 User manual

Xblitz
Xblitz Z9 User manual

Xblitz
Xblitz Xblitz LIMITED User manual

Xblitz
Xblitz S10 DUO User manual

Xblitz
Xblitz Z8 NIGHT User manual

Xblitz
Xblitz Z9 User manual

Xblitz
Xblitz PARK VIEW 2 User manual

Xblitz
Xblitz TANGO 4K User manual

Xblitz
Xblitz X7 User manual

Xblitz
Xblitz Dual Core User manual

Xblitz
Xblitz S3 Duo User manual

Xblitz
Xblitz PARK VIEW User manual

Xblitz
Xblitz X7 User manual

Xblitz
Xblitz XB-CLASSIC User manual

Xblitz
Xblitz S7 DUO User manual

Xblitz
Xblitz Z3 User manual

Xblitz
Xblitz z3 RUN User manual

Xblitz
Xblitz PARK VIEW ULTRA User manual

Xblitz
Xblitz XB-P100 User manual

Xblitz
Xblitz GHOST User manual