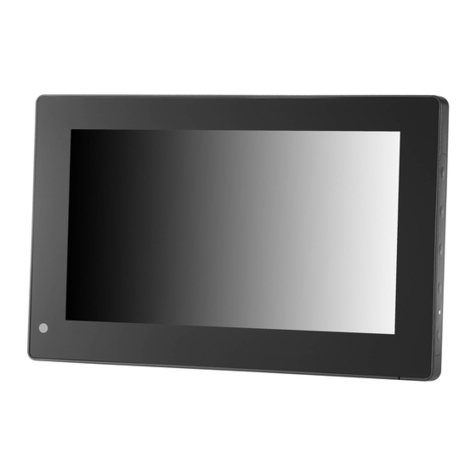
Xenarc 706TSA User manual

706 SERIES INSTALLATIONMANUAL
M


Features
·For In-Car Computing, PC, Server, GPS various VGA Use
·5-wire Resistive Touch Screen (USB)
·Multi-Monitor Touchscreen Support
·VGA
· DVI-D Input
Input (15 pin D-SUB) x1
·Video Input x2
·Audio Input/Built-in Speaker
·NTSC /PALMulti-System
·16x9 Aspect Ratio
·High Resolution Display -up to 1024 x768
·Upgraded High-Brightness LCD
·Adjustable backlightlevel for night-time use
·Pixelwork High Performance Image and Video Signal Processor
·AISS -Advanced Image-Scaling and Shaping
·16:9/4:3 Scaler Settings (Auto, Fill All, 1 to 1, Normal, Zoom, Wide )
3|Features
Model Comparison Chart
1
2
1
1
2
1
Mono
Standard Not Available
DVI-D Inputs
VGA (D Sub 15) Input
VIDEO (RCA) Inputs
AUDIO (RCA) Inputs
Built-In Speakers
High Quality Scaling
High Quality Anti-Aliasing
Auto Power On
Touch Screen
706YSA 706TSA
Mono

Specification |4
·Last Inputmemory
·Last Power Setting memory
·IR Remote Control
·Auto power-on upon signal detection
·Automaticdisplayadjustment
·OnScreen Display Control
·Stand:360°/HeightAdjustment
·26-Pin
·20-Pin Customized Monitor Connector
heavy-duty connector
·Anti Glare Coating
·Supports11V ~ 24V DC
·“E” Mark Certified for Automotive use
Specifications
Display Specifications:
·Screen Size:Diagonal 7"(16:9)
·Physical Resolution:800 (H)x480 (V)
·Pixel Pitch: 0.0074 (H) x0.0074 (V) (in)
·DotResolution:2400 x480 =1,152,000 (dots)
·Supported Resolution:640 x480 ~1024 x768
·Supported Refresh Rate: 60 ~75Hz
·LCD Panel Brightness:650 cd/m²
·Contrast Ratio: 300 :1
·Response Time:6 - 10 ms
·Viewing Angle:V40 - H70
·Colors: 18-bit(262,144 Colors)
Physical Specifications:
·Video Source Input
oRGB analog male connector (15-Pin D-SUB) x1
oRCAcompositevideo female connectorx2
·Audio Source Input
oRCA audio female connector x2
·Touch Panel I/O
oUSB connectorx1
·Power Source Input
oSingle 12V DC_IN (Supports11V ~ 24V)
·External Buttons Input
oOSD buttons for Power / Menu / Select / Increase / Decrease
oPWR button for power switch
·Dimension (In) :6.4 Wx4 Hx0.5 D
·Weight (Ib): 0.53
Electrical Specifications:
·Operating Voltage Range: DC 11V~24V, 1A
·Power Supply: DC 12V
·Power Consumption:
oStandby mode <0.3W
oSuspend mode <3W
oContinue mode <4W (w/o inverter), <8W (w/ inverter)
·Inverter output specifications:
·Power supply: +12V
·Lamp frequency: 50KHz
·Power consumption: <5W
Other Specifications:
·Operating Temperature:-22°F ~185°F
·FCC,CE, E8, ROHS Certification
·18 Month Warranty

Optional Mounting Stand
Step1.
Slide Monitor into optional mounting stand
Step2.
Secure “Height” position by adjusting
Knob
Step3.
Secure “Tilt” position by adjusting knob
CreatePower Source
Insert Power Adapter as shown
Create VGASource
Step1.
Attach the 20-Pin connector to the back of
the monitor
Step2.
Attach the D-Sub 15-Pin connector to your
computer’s analog VGA output connector
5|Quick-Start

Quick-Start |6
Create Audio /Video Source
Step1.
Attach your “video source one” (e.g.VCR,
video Game Console) to the Yellow RCA
connector marked Video 1.
Step2.
Attachyour “video sourcetwo” (e.g. Rear
View camera) to the Yellow RCAconnector
marked Video 2.
Step3.
Attach your “audio source” to the white/red
RCA connector. The sound will be output
through the monitor’s internal speaker.
Step4.
Attach your “ pc source” to the back VGA
connector.
Step5.
Attach your “ pc source” to the back earphone
connector.
TouchscreenInstallation
(706TSA Only)
Step1.
Install the Touchscreen driver from the
included CD disk. Please follow the
installation instruction on page 10.
Step2.
Attach the USB plug to your computer’s USB
connector.
Congratulations
Your monitor is now ready for use.
Video 1
Video 2
Audio R1
Audio L1

7|Hardware Installation
1. AV input x 2
2. DVI-D input x 1
3. VGA+AUDIO input x 1
4. DVI and VGA share a sound passway
5. PC/AV PIP/POP function
6. Automatic sensitization function
7. Remote control
8. Electric mode in the province: It will be turn off TFT LCD power and poor light
when no signal in 3 minutes.
9. Supply: 12V / 3A Max operating current:2A
Please make sure that signal line and monitor are connected and fixed.
Then insert the electricity to start the machine. Press the POWER can be open
and close.
Function
Hot Keys description:
Sensor light description:
Source menu input description:
1.Power key: ON/OFF
2.Select key: This button lets you select the internal signal. Press left ( ) or
right ( ) key to move cursor choice input source then press MENU key to enter.
3.MENU key: Stands for Menu. This button is show OSD menu and press up /
down key to move cursor. Then press menu key leave again.
Press select key to move cursor and press up / down select menu argument or
function.
4. Down key: This button can decrease volume directly.
5. Up key: This button can increase volume directly.
Auto sensor can set poor light in the menu of TFT LCD.
1. VGA: Use the computer input source only.
2. COMPOSITE AV1 : CVBS / AUDIO 1 input
3. COMPOSITE AV2 : CVBS / AUDIO 2 input
4. DIGITAL: The computer source ( DVI-D ) input.
5. SHOW SRC: To measuring input source when ALL / ACTIVE is selected.
In ALL mode will light. In ACTIVE mode will cover no to connect signal chose.

Remote Control
1. Power Button: On / Off
2. Mirror Button: Set the display mode by pressing the image mirror or not. You can
use " UP / DOWN / RIGHT / LEFT button to mirror selection.
Default is Off.
3. Dimmer Button: Set the dimmer mode by pressing the image light and shade.
4. Mute Button: The will be indicated by mute on the display and press the button
again to restore audio.
5. Display Button: Set the Audio and Video signal.
6. Sleep Button: Pressing the sleep mode that you can select " 30 -60-90-120-150-
180 minute or open / close selection.
7. Picture Button: The hot key available the image shining / custom / standard /
soft.
8. PC Auto Button: In PC input mode input signal than PC image can be auto
selection.
9. Menu Button: Press the menu button to adjust your preference, the following system
OSD will be shown. Press the menu button again to leave setting.
10. Source Button: Press the source button to set source mode. Use to " UP / DOWN
button to move cursor choice input source.
11. Vol- / Vol+ Button: Adjust volume to decrease or increase.
12. PIP Button: Press the PIP button to adjust PIP display. Press the PIP button again
to leave setting.
13. SWAP Button: Press SWAP button can change main and subsidiary menu directly.
In POP source can change right / left image directly.
14. Up / Down Button: UP / DOWN button to move cursor choice.
15. Right / Left Button: In menu mode, Use main OSD and argument function only.
16. Enter Button: Press enter button, the selected will start playing.
On Screen Display functions "SOURCE PIP/POP" description:
3. SETUP: The picture of the setup is adjusted.
1.LAYOUT: Press to move down key in a menu, press the right key to select the input signal
(SINGLE), (PIP), (POP) in WINDOW LAYOUT. Press again to turn MENU finish setting.
2.Press the down key again, to move cursor to MAIN WINDOW SOURCE one, then press
the right key to choosing sub-menu that there are DIGITAL , ANALOG , COMPAN , COMP
AVI inside.
SLEEP TEINER: Automatic shut-down is established. Adjuat time that can establish
as 30-60-90-120-150-180 minutes of AUDIO menus.
VOLUME: You can adjust volume from 0 to 100.
MUTE: Press once to mute all system audios, As long as the mute function is active,
"Mute" will appear on the screen. Press again to turn mute off.
POP
SWAP
PIP
MENU
DISPLAY
SOURCE
SLEEP
VOL-
PICTURE
VOL+
PC AUTO
MIRRORPOWER DIMMER MUTE
Remote Control |8

9|Hardware Installation
In AV1/AV2 input Mode (There are two OSD in the AV1/AV2 mode):
On Screen Display functions "Picture" description:
In PC mode menu
On Screen Display functions "IMG.ADJ" description:
1.PICTURE: The picture of the picture is adjusted.
Phase: Image flicker can by halftone phase adjustment. That can regulate the
picture centre. (DVI does not have this one)
Frequencv: Frequency is adjusted. Adjust the Frequency mode by pressing the
image remove of left and right sides. (DVI does not have this one)
Sharpness: Sharpness definition is adjusted, the range is from 0 to 015 , the greater
number value is clearer.
Color temp: PC (R , G , B) are adjusted, three base color can do it from 0 to 256
color.
Auto sensor: Automatic to adjust screen sensor and environment light switch. The s
able be colse / the enable be open.
2. IMAGE: The picture of the img.adj is adjusted.
Image.SIZE: Set the display mode to Fall FULL/ Fall ASPECT(16:9/4:3)/1TO1(1:1).
Set it to 4:3 if your video signal is in 4:3 aspect ratio and you don't want the display
to be stretched out. Default is 16:9.
Freeze FRAME: Static picture switch.
Horizontal: Adjust Horizontal position by pressing the lncrease ( )/Decrease ( )
buttons.
Vertical: Adjust Vertical position by pressing the lncrease ( )/Decrease ( ) buttons.
Brightness: Adjust brightness by pressing the Increase ( )/Decrease ( ) buttons. Increase
the number for higher brightness. Decrease the number for lower brightness. The range is
from 0 to 100.
Contrast: Adjust contrast by pressing the Increase ( )/Decrease ( ) buttons.
Increase the number for higher contrast. Decrease the number for lower contrast.
The range is from 0 to 100.
Backlight: Adjust backlight by pressing the Increase ( )/Decrease ( ) buttons. Increase the
number for higher backlight. Decrease the number for lower backlight. The range is from 0 to
100.

10|Hardware Installation
On Screen Display functions "SETUP" description:
On Screen Display functions "SOURCE PIP/POP" description:
On Screen Display functions "PICTURE" description:
3. SETUP: The picture of the setup is adjusted.
1.LAYOUT: Press to move down key in a menu, press the right key to select the input signal
(SINGLE), (PIP), (POP) in WINDOW LAYOUT. Press again to turn MENU finish setting.
2.Press the down key again, to move cursor to MAIN WINDOW SOURCE one, then press
the right key to choose sub-menu that there are DIGITAL , ANALOG , COMPAN , COMP
AVI inside.
SLEEP TEINER: Automatic shut-down is established. Adjust time that can establish
as 30-60-90-120-150-180 minutes of AUDIO menus.
VOLUME: You can adjust volume from 0 to 100.
MUTE: Press once to mute all system audios, As long as the mute function is active,
"Mute" will appear on the screen. Press again to turn mute off.
In AV1/AV2 input Mode (There are two OSD in the AV1/AV2 mode):
VIDEO mode menu
1.PICTURE: The picture of the picture is adjusted.
Adjust the CCFL backlight output level. Increase the number for higher output.
Decrease the number for lower output.
Brightness: Adjust brightness by pressing the Increase ( )/Decrease ( ) buttons.
Increase thenumber for higher brightness. Decrease the number for lower brightness.
The range is from 0 to 100.
Contrast: Adjust contrast by pressing the Increase ( )/Decrease ( ) buttons.
Increase the number for higher contrast. Decrease the number for lower contrast.
The range is from 0 to 100.
Sharpness: Sharpness definition is adjusted, the range is from 0 to 015 , the
greater number value is clearer.
Color: Adjust color by pressing the Increase ( )/Decrease ( ) buttons. Increase the
number for higher color. Decrease the number for lower color. The range is from 0 to 100.
Tint: Adjust tint by pressing the Increase ( )/Decrease ( ) buttons. Increase the
number for higher tint. Decrease the number for lower tint. The range is from 0 to 100.

11 |Hardware Installation
COLOR TEMP: Press the down key to move cursor to color temp, then press the
right key to adjust base color.
R E D : 000 to 256
G R E E N : 000 to 256
B L U E : 000 to 256
On Screen Display functions "IMG.ADJ" description:
2. IMAGE: The picture of the img.adj is adjusted.
FREEZE FRAME: Static picture switch, press the right key to play picture as OFF.
Want to pause picture as ON.
2.Press the down key again, to move cursor to MAIN WINDOW SOURCE one, then press
the right key to choosing sub-menu that there are DIGITAL , ANALOG , COMPAN , COMP
AVI inside.
Backlight: Adjust backlight by pressing the Increase ( )/Decrease ( ) buttons. Increase
the number for higher backlight. Decrease the number for lower backlight. The range is from
0 to 100.
Auto sensor: Automatic to adjust screen sensor and environment light switch. The
disable be close / the enable be open.
Image.SIZE: Set the display mode to AUTO/FILL ALL/1TO1/NORMAL/ZOOM/WIDE.
Horizontal: Adjust Horizontal position by pressing the lncrease ( )/Decrease ( )
buttons.
Vertical: Adjust Vertical position by pressing the lncrease ( )/Decrease ( ) buttons.
OSD SETTINGS: The menu is adjusted to moved the cursor one, press the right
key to enter.
1.TRANSPARENCY: The transparency of the menu is adjusted from 000 to 100 ,
The greater number value is more transparent.
2.OSD TIMEOUT ( S ) : The menu shows time establishes from 001 to 20 second
of AUDIO menus.
On Screen Display functions "SETUP" description:
3. SETUP: The picture of the setup is adjusted.
SLEEP TEINER: Automatic shut-down is established. Adjust time that can establish
as 30-60-90-120-150-180 minutes of AUDIO menus.
3.VOLUME: You can adjust volume from 000 to 100.
4.MUTE: Press once to mute all system audios, As long as the mute function is
active, "Mute" will appear on the screen. Press again to turn mute off.

12|Hardware Installation
On Screen Display functions " PIP/POP MENU " description:
MAIN WINDOW SOURCE: The signal source to switch between COMPAV1, COMPAV2,
DIGITAL, ANALOG source.
1.In PIP/POP mode, First press the remote control " " enter button then "Green
Frame" appears, press Left / Right button to move cursor choice main menu or
subsidiary menu. Setting menu adjustment as .the above-mentioned.
2.PIP/POP sound chooses: In PIP/POP AUDIO menu on at showing mode, main menu
" AUDIO SOURCE " set up voice of sub picture or main menu input.
PRIMARY (main menu sound ), SECONDARY (subsidiary menu sound ). Press the right
button in this menu.
3.PIP subsidiary menu is adjusted: In PIP mode, Main menu of SOURCE following PIP
ADJUSTMENTS select, Press right button enter set when move this one in cursor.
PIP SIZE:
The subsidiary menu show the size adjustment, the range is from 000 to 100
When number value is 000, the subsidiary menu can is 1/10 of the main menu.
When number value is 100, the subsidiary menu is 1/5 of the main menu.
Adjust Horizontal position in subsidiary menu. the range is from 000 to 100.
When number value is 000, the subsidiary menu move right on the left enter screen left.
When number value is 100, the subsidiary menu move on the screen right.
Adjust Vertical position in subsidiary menu. the range is from 000 to 100.
When number value is 000, the subsidiary menu move up on the down enter screen
down.
When number value is 100, the subsidiary menu move on the screen up.
ALPHA BLEND : Adjust transparency phase. the range is from 000 to 100.
When number value is 000, the subsidiary menu will be transparency.
When number value is 100, the subsidiary menu will not be transparency.
The screen of PIP/POP show the mode (16: 9/4: 3). The same as the adjustment
method of the IMG. ADJ set. (In IMG. ADJ menu adjust )
WINDOW LAYOUT: To move cursor choice PIP/POP display, Press the Right button to
show SINGLE / PIP / POP menu adjustment .

Software Installation|13
Installing Touch Screen Driver for 706TSA:
Here isawalkthrough ofWindowsXPTouchDriver Installation. Forother
operating systems, please go to the Document folder on the Driver CD to view the
corresponding Touch Driver setup instruction.
Step1.
Click on Start, Run, and Enter D:\Win2000_XP\Setup.exe(Please change the drive
lettercorresponding tothe drivecontaining the installation CD). Click OK.
Step2.
The Install Wizard window appears. Click Next.
Step3.
ClickNextto continue. Please leave the check box next to “PS2 Touchscreen
Driver”unchecked.

Step4.
Select the Rotating Monitor Utility and/or the Shutdown Utility if you want to install them and
click on Nexttocontinue.The Rotating Monitor Utility allows you torotateyour display
while the Shutdown Utility providesyou withone-click shutdown.
Step5.
ClickNextto accept the Destination Directory default, shown below.Click on
Browse to change Destination Directory.
14|Software Installation

Step6.
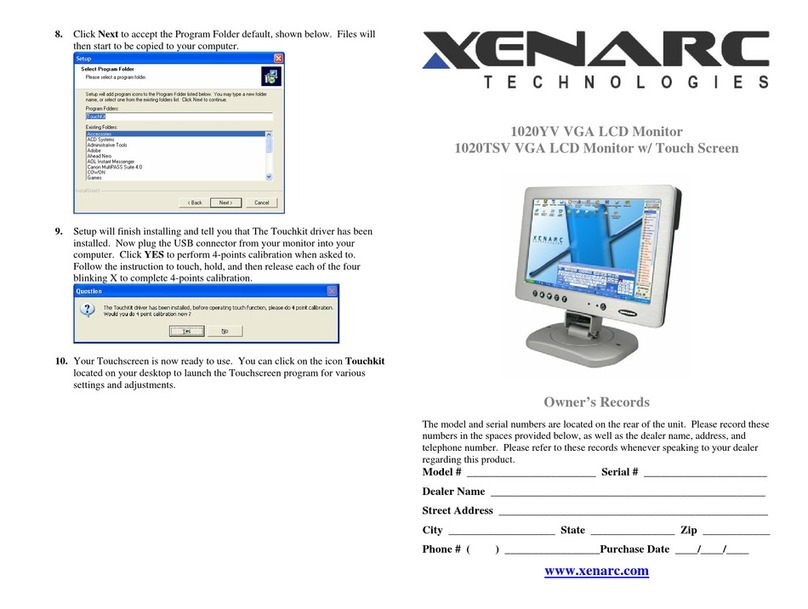
ClickNextto accept the Program Folder default, shown below.Files will then start
to be copied to your computer.
Step7.
When the warning that says this software has not passed Windows Logo test,
please click on Continue Anywayto continue the installation. File will continue to
be copied to your computer.
Software Installation|15

16|Software Installation
Step8.
Click Finish to finish the installation. You will be asked to restart your computer.
Step9.
Remove the CD and Restart your computer.After Windows XP is finished loading,
connect the 706TSA USB cable to one of your computer’sUSB Ports.
Step10.
Windows XPwill start “Found New Hardware Wizard” automatically upon detection
of the USB Touch Controller.Click on Nextto continue.

Step11.
Click on Nexttocontinue.
Step12.
Click Finish to finish Setup. Your Touchscreen is ready to use now.You can click on
the icon Touchkitlocated on your desktop to launch the Touchscreen program for
various settingsand adjustments.
Software Installation|17

NOTE
NOTE 1:
If you are trying to connect the monitor to alaptop computer,please make sure to
enable the 15-Pin D-SUB external monitor output located at the back of your laptop
computer.Some laptop computers have three modes: Laptop Display Only,Laptop
Display plus External Monitor,and External Monitor Only.If this is the case, please
switch to the External Monitor Only mode.
NOTE 2:
Touch Screen device driver must be installed onto your computer in order for the
Touch Screen to become functional. Uses Resistive TouchScreen panels in the
706TSA monitor. Touch Screen drivers and software for different operating
systems can be found in the included CD-ROM disc. You can refer to this manual
for awalkthrough of Touch Screen Driver installation under MicrosoftWindows XP.
NOTE 3:
The maximum voltage supported by the monitor is 24V DC.Feeding the monitor
with higher voltage will damage the monitor and void the warranty.Please use a
fused power source if you decide to wire the monitor directly to your car’s electrical
system. It is also crucial that you check the polarity of the connection.
NOTE 4:
If the monitor is not displaying the VGAsignal properly,the VGAsignal might be out
of range. Please try changing your display refresh rate to 60, 70, 72, or 75Hertz.
NOTE 5:
Please note that the LCD screen is made with high-precision technology.However,
black pointsor bright pointsof light (red, blue, or green) may appear constantly on
the LCD screen, and irregular colored stripes or brightness may appear on the LCD
screen. This is not malfunction. (Effective dots: more than 99.999%)
For Technical Support, please contact us at:
18|Additional Info.

Owner’sRecords
The model and serial numbers are located on the rear ofthe unit. Please record
these numbers in the spaces provided below,as well as the dealer name, address,
and telephone number.Please refer to these records whenever speaking to your
dealer regarding this product.
Owner’sRecord|19
Model Number:
Serial Number:
Dealer Name:
Street Address:
City:
State:
Zip:
Phone Number:
PurchaseDate:
All rightsreserved. Reproduction in whole or in part without permission is prohibited.
This manual suits for next models
1
Table of contents
Other Xenarc Monitor manuals

Xenarc
Xenarc 700CSH User manual

Xenarc
Xenarc 800 User manual

Xenarc
Xenarc 1500TS User manual

Xenarc
Xenarc 1200TS Installation and operating instructions

Xenarc
Xenarc 1029 User manual

Xenarc
Xenarc 1020YV User manual

Xenarc
Xenarc 1500CSH Installation and operating instructions

Xenarc
Xenarc 700TSH User manual

Xenarc
Xenarc 705YV User manual

Xenarc
Xenarc 709 User manual