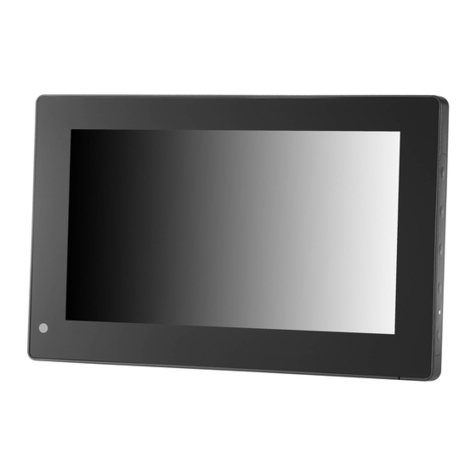
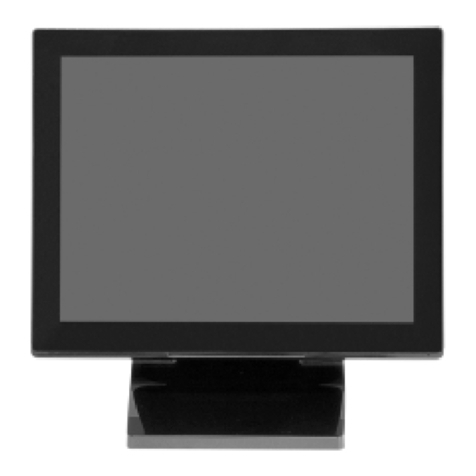
Xenarc 700TSH User manual

700TSH / 700YH INSTALLATION MANUAL

2 │ Table of Contents
Features ...............................................03
Specifications ......................................04
Hardware Installation ..........................10
Additional Info ......................................14
Remote Control ....................................07
Owner’s Record ....................................15
Quick - Start .........................................05
700TSH / 700YH Models

3 │ Features
Model Comparison Chart
Features
●For In-Car Computing, PC, Server, GPS, POS, and various VGA /HDMI
Use
● High Bright LCD Panel with LED Backlight
●5-wire Resistive Touch Screen ( USB )
● Multi - Monitor Touchscreen Support
●VGA Input ( D-SUB 15-Pin ) x 1
● Video Input x 2
●Audio Input x 3
HDMI input with sound x 1
●Built-in Speaker
● NTSC / PAL Multi-System
● 16:9 Aspect Ratio
● High Resolution Display
● Adjustable backlight level for night-time use
●Realtek High Performance Image and Video Signal Processor
● AISS - Advanced Image-Scaling and Shaping
● Factory Mode to disable front button(s)
● Factory Mode to disable on screen text
● Last Input memory
● Last Power setting memory
● IR Remote Control
● Auto power-on upon signal detection
● Automatic display adjustment
● On Screen Display Control
● Mirror Image Flip
● Vertical Image Flip
●CCD Auto Switching for backup camera
● Stand: 360° / Height Adjustment
● 26-Pin heavy-duty connector with connector locking
● Anti Glare Coating
●Supports 10V DC ~ 35V DC
● "E" Mark Certified for Automotive use
700YH700TSH
VGA ( D-SUB 15Pin ) Input 1 1
VIDEO ( RCA ) Inputs 2 2
AUDIO ( RCA ) Inputs 3 3
PC AUDIO ( DC 3.5mm ) Input 1 1
Built - In Speaker ● ●
High Quality Scaling ● ●
High Quality Anti - Aliasing
● ●
Auto Power On ● ●
Touch Screen ○ ●
●Standard ○Not Available
HDMI Input ( with sound )
●●
●
Supports HDMI version 1.1 ~ 1.3
●

4 │ Specification
Specifications
Display Specifications
● Screen Size : Diagonal 7” ( 16 : 9 )
● Physical Resolution : 800 ( H ) x 480 ( V )
● Pixel Pitch : 0.0025 ( H ) x 0.0075 ( V ) ( in )
● Dot Resolution : 2400 x 480 = 1,152,000 ( dots )
● Supported Resolution : 640 x 480 ~ 1920 x 1080
● Supported Refresh : 60~75Hz
●LCD Panel Brightness : 500cd/m²
● Contrast Ratio : 400 : 1
● Response Time : 10~15ms
●Viewing Angle : Vertical : 140゜ / Horizontal : 140゜
●Colors : 6-bits ( 262,144 colors )
Physical Specifications
● Video Source Input
─ RGB analog male connector ( 15-Pin D-SUB ) x 1
─ RCA composite video female connector x 2
─ HDMI input connector x 1
● Audio Source Input
─ RCA audio female connector x 1
─ DC 3.5 mini stereo plug x 1
─ HDMI audio x 1
●Touch Panel ( Input / Output )
─ USB connector x 1 ( 700 TSH Only )
● Power Source Input
─ Single 12V DC_IN ( Supports 10V~35V )
● External Buttons Input
─ OSD buttons for Power / Select / Menu / Increase / Decrease
─ Power button for power switch
●Dimension ( In ) : 7.72 ( L ) x 4.88 ( H ) x 1.42 ( D ) In
●Weight ( lb ) : 1.277 lbs
Electrical Specifications
●Operating Voltage Range : DC 10V ~ 35V
● Power Supply : DC 12V
● Power Consumption :
Suspended Mode < 2W ( Max )
Continuous Mode < 10W ( Max )
● Audio Input < 150MV
Other Specifications
● Operating Temperature : -4℉ ~ 158℉
● Storage Temperature : -22℉ ~ 176℉
● FCC, CE, E13, Certification
● ROHS Compliant
● 24 Month Warranty

5 │ Quick - Start
Attach the 26-Pin connector to the monitor
Attach the D-Sub 15-Pin connector to your
computer’s analog VGA output connector
Attach your “ Video source one ”
( e.g. VCR, Video Game Console)
to the Yellow RCA connector marked Video 1
Attach your “ Video source two ”
( e.g. Rear View Camera)
to the Yellow RCA connector marked CCD
Attach your “ Audio sources ” to the red RCA
connectors marked Audio. The sound will be
outputted through the monitor’s internal
speaker
Attach the mini stereo jack marked “ PC Audio ”
to your computer’s earphone jack
Attach the HDMI connector to your computer’s
HDMI output connector.

6 │ Quick - Start
Attach the USB plug to your USB connector
Slide Monitor into optional mounting stand
Secure “ Height ” position by adjusting knob
Secure “ Tilt ” position by adjusting knob
Insert Power Adapter as shown
Touchscreen Installation
( 700TSH Only )
Please download and install the Touchscreen
driver for your operating system from our
website WWW.XENARC.COM.

7 │ Remote Control
1. Power Button : Turn the monitor ON or OFF.
2. Mirror Button : Enable or Disable the mirroring of the display.
Continue to press it and choose the mirroring you want.
3. Dimmer Button : Dim the brightness of the display by pressing this
key continuously to set the brightness level of the display.
( Only available when auto sensor is disabled. )
4. Mute Button : Mute the speaker. Press again to restore the sound
of the speaker.
5. Display Button : Display the current input signal on the screen.
6. Sleep Button : Enable or Disable the sleep timer. Press this button
to select and set the time to turn off the monitor automatically.
7. Picture Button : Enable or select the picture mode you prefer.
Press this button and then you can select standard, user, bright,
or soft.
8. PC auto Button : Enable to adjust the picture automatically, only
available in VGA mode.
9. Menu Button : Enable the OSD menu. Press this button again to
exit.
10. Source Button : Enable to switch to different source input.
11. Vol+ / Vol- Button : Increase or Decrease the Volume.
12. Up / Down Button ( ▲ / ▼ ) : Navigate Up or Down in OSD menu.
13. Left / Right Button ( ◄ / ► ) : Navigate Left or Right in OSD menu,
as well as decreasing or increasing the value of setting in OSD.
14. Enter Button : Confirm the setting or selection.

8 │ Remote Control
Instructions for remote controller shortcuts
1. Dimmer ( Adjust the brightness )
By pressing the Dimmer button, it will adjust the brightness level from
0, 20, 40, 60, 80 and 100.
Default is 100 ( Only available when auto sensor is disabled )
2. Sleep ( Set the sleep time out )
Select the time to automatically turn off the monitor.
The minimum is 15 minutes and the maximum is 120 minutes.
3. Picture ( Set the modes of the picture )
Enable to select the picture modes you prefer.
Press this button and then you can select standard, user, bright, or soft.
4. PC AUTO ( Auto adjust, only on VGA )
By pressing PC AUTO, it will auto adjust the image.
5. Source ( Select the source )
Press this button to select the input signal to display.
If one of these modes is disabled in OSD menu, please setup under
( Function → Source Enable )

9 │ Remote Control
6. Mirror ( Image mirror )
Enable or Disable the mirroring of the display. Continue to press it
and choose the mirroring mode you wish to display.
7. Mute
Mute the speaker.
Press again to restore the sound of the speaker.
8. Display ( Display mode )
Display the current input signal on the screen.
9. VOL- / VOL+
Volume adjustment.

10 │ Hardware Installation
Buttons description:
1. Power Button : Press to turn ON or OFF the monitor.
2. Select Button : Press to select the input signal to display.
Press the left ( ◄ ) or right ( ► ) to highlight the input source
desired and then press menu button to make the selection.
3. Menu Button : Press the button to show the OSD menu.
And then press the left ( ◄ ) or right ( ► ) to navigate through
the menu.
Press “ Select ” button to go through a list of settings and
options.
Press the left ( ◄ ) or right ( ► ) buttons to change the values
of settings.
Press Menu button again to leave the OSD menu.
4. Right Button : Press this button to increase volume or the value
of settings inside the OSD menu.
5. Left Button : Press this button to decrease volume or the value
of settings inside the OSD menu.
Ambient Light Sensor Description
Ambient light sensor can be enabled or disabled in the OSD by going
into the “ MISC ” category, and selecting the option “ Auto Sensor ”.
When Auto Sensor is enabled, the LCD backlight brightness will be
adjusted automatically according to the ambient lighting condition.
Note
The brightness cannot be adjusted manually through the
dimmer button or through the OSD menu when the Auto Sensor
function is enabled.
OSD ( On-screen display ) Menu
Press MENU to display the OSD on the screen, then press
UP / DOWN ( or LEFT / RIGHT from the front control panel )
to highlight a different category. Press ENTER ( or Source ) to adjust
the selected highlighted category. Under the selected item page,
press UP / DOWN ( or Source ) to select the item from the list, use
LEFT / RIGHT to adjust. To select the sub-menu, please press LEFT to
enter to the sub-menu.

OSD ( On-Screen Display ) Menu
The Settings and options in the OSD menu are categorized into 6
Categories : Color, Adjust, OSD, Setup, Function, Sound
1. Colors
● Brightness : Adjust brightness by pressing Left ( ◄ ) or Right ( ► )
buttons. Increase the number for a higher level of brightness.
Decrease the number for a lower level of brightness.
●Contrast : Adjust contrast by pressing Left ( ◄ ) or Right ( ► )
buttons. Increase the number for a higher level of contrast.
Decrease the number for a lower level of contrast.
● Sharpness : Adjust sharpness by pressing left or right buttons.
Press left to decrease sharpness and right to increase the level
of sharpness.
●Color Temp : Set the color temp to the desired setting : 6500K,
9300K and User.
●Backlight : Adjust backlight intensity by pressing Left ( ◄ ) or Right
( ► ) buttons. Increase the number for a higher level of backlight
output. Decrease the number for a lower level of backlight output.
Only works when Auto sensor is turned off.
11 │ Hardware Installation
2. Adjust
● Auto Config : Adjust display automatically.
● H Position : Adjust the Horizontal position by pressing the left or
right buttons.
● V Position : Adjust the Vertical position by pressing the left or
right buttons.
●Phase : Phase ( fine ) adjustment. Image flickering can be removed
through changing this setting (only valid for VGA setting )
● Clock : Adjust the horizontal sync width of the screen image.

3. OSD
●H Position : Adjust the OSD Horizontal position by pressing the left or
right buttons.
●V Position : Adjust the OSD Vertical position by pressing the left or
right buttons.
●OSD Timeout : Adjust the time out of the OSD.
●Transparent : Adjust the transparency of the OSD screen image.
4. Setup
●CCD First : Set whether to have monitor switch to CCD signal
automatically if a signal is present. ( Default is OFF )
●Source Info : Select to turn OFF or turn ON displaying of On Screen
Source Information.
●Source Name : Display the source of input signal. If it is ON, it will
display the information on the left corner of the screen when Display
button is pressed on remote control.(Default ON )
●Mirror Hor : Adjust the horizontal mirroring position. If it is ON, the
image will be on the left and right side.(Default OFF )
●Mirror Ver : Adjust the vertical mirroring position. If it is ON, the
image will be on the upper and lower side.(Default OFF )
12 │ Hardware Installation
●Auto sensor : Enable or disable the auto sensor of surrounding
environment.
─“ On ” means the monitor can automatically adjust the brightness of
the display according to the surrounding environment.
─Please note : While auto sensor is enabled, the option of dimmer or
backlight inside the OSD can not work until auto sensor is disabled.

13 │ Hardware Installation
5. Function
● Reset : Reset to Factory default setting.
● Display Ratio : Select the display mode to 16:9, 4:3 and Auto.
● Sleep : Select the time to automatically turn off the monitor.
The minimum is 15 minutes and the maximum is 120 minutes.
●Keypad : The function allows you to disable or enable the buttons
at the front of the monitor. Power, Menu, Select, Left, and Right
buttons can be disabled or enabled.
●Source Enable : Select to Enable or disable the input signal. If
an input signal is turned off, the source will be disabled.
● Touch Controller : Switch the power source for touch control board.
6. Sound
●Volume : Adjust the audio volume of built-in speaker.
●Mute : Enable or disable muting of built-in speaker.
●HDMI Input : Select the audio source while in HDMI input mode.
When set to HDMI, the built-in speaker will output the digital
audio signal from HDMI.
When set to Analog, the built-in speaker will output the analog
audio signal from the mini stereo jack marked as “ PC Audio ”
※The HDMI output option is only available for TSH / YH models

14 │ Additional Info
NOTE:
NOTE 1 :
If you are trying to connect the monitor to a laptop computer, please
make sure to enable the 15-PIN D-SUB external monitor output located
at the back of your laptop computer. Some laptop computers have
three modes: Laptop Display Only, Laptop Display plus External
Monitor, and External Monitor Only. If this is the case, please switch
to the External Monitor Only mode.
NOTE 2 :
Touch Screen device driver must be installed onto your computer in
order for the Touch Screen to become operational. Touch Screen
driver and software for different operating systems can be
downloaded from our website at WWW.XENARC.COM.
NOTE 3 :
The maximum voltage supported by the monitor is 35V DC. Feeding
the monitor with higher voltage will damage the monitor and void the
warranty. Please use a fused power source if you decide to wire the
monitor directly to your car’s electrical system. It is also crucial that
you check the polarity on the connection.
NOTE 4 :
If the monitor is not displaying the VGA signal properly, the VGA signal
might be out of range. Please try changing your display refresh rate to
60, 70, 72, or 75 Hertz.
NOTE 5 :
Please note that the LCD screen is made with high-precision
technology. However black points or bright points of light ( red, blue, or
green ) may appear constantly on the LCD screen, and irregular
colored stripes or brightness may appear on the LCD screen.
This is not malfunction. ( Effective dots : more the 99.999% )
For Technical Support , Please contact us at:
Xenarc Technologies Corp.
Toll Free : 888 - 656 - 6536
E - Mail : support @ xenarc.com
Website : www.xenarc.com
The length of the mounting screw. 【 M3 x 5 mm (max) 】
( common between right side and left side )

15 │ Owner’s Record
Owner’s Record
The model and serial number are located on the rear of the unit.
Please record these numbers in the spaces provided below, as well
as the dealer name, address, and telephone number.
Please refer to these records whenever speaking to your dealer
regarding this product.
Model Number :
Serial Number :
Dealer Name :
Street Address :
City :
State :
Zip :
Phone Number :
Purchase Date :
All rights reserved. Reproduction in whole or in part without permission is prohibited.
This manual suits for next models
1
Table of contents
Other Xenarc Monitor manuals

Xenarc
Xenarc 1500CSH Installation and operating instructions

Xenarc
Xenarc 1500TS User manual

Xenarc
Xenarc 1020TSV User manual

Xenarc
Xenarc 1200TS Installation and operating instructions

Xenarc
Xenarc 706TSA User manual

Xenarc
Xenarc 705YV User manual

Xenarc
Xenarc 800 User manual

Xenarc
Xenarc 2409YNH User manual

Xenarc
Xenarc 700TSV User manual

Xenarc
Xenarc 700CSH User manual