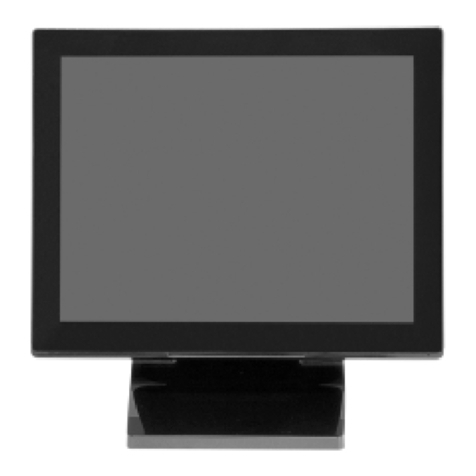
Xenarc 1500TS User manual

1
U
Us
se
er
r
M
Ma
an
nu
ua
al
l
/
/
I
In
ns
st
ta
al
ll
la
at
ti
io
on
n
G
Gu
ui
id
de
e
M
Mo
od
de
el
l
N
No
o.
.
1
15
50
00
0T
TS
S
Warning!Itwillcausemalfunctionifthemonitorisoperatingwithunspecifiedpowersupplyadaptor
orincorrectpowervoltage.Donotexposethisunitintherainormoistureenvironmenttoreducethe
riskoffireorelectricshock.
PRECAUTIONS
Donotusethemonitornearwater.
Donotplacethemonitoronanunstablecart,stand,ortable.Ifthemonitorfalls,itcaninjurea
personandcauseseriousdamagetotheappliance.Useonlyacartorstandrecommendedbythe
manufacturerorsoldwiththemonitor.Ifyoumountthemonitoronawallorshelf,useamounting
kitapprovedbythemanufacturerandfollowsthekitinstructions.
Themonitorshouldbeoperatedwithtypeofpoweradaptorindicatedonthelabel.
Normallyitispackedwithmonitor,orusinganadaptorapprovedbythemanufacturer.
Unplugtheunitduringalightningstormorwhenitwillnotbeusedforlongperiodsoftime.This
willprotectthemonitorfrombeingdamagedduetopowersurges.
Neverspillliquidsonthemonitor.
Donotattempttoservicethemonitoryourself;openingorremovingcoverscandamagetothe
monitororpanel.Pleasereferallservicingtoqualifiedservicepersonnel.
ForWallmountadaptor,wallsocketshallbeinstalledneartheequipmentandshallbeeasily
accessible.

2
Index:
I. Introduction‐‐‐‐‐‐‐‐‐‐‐‐‐‐‐‐‐‐‐‐‐‐‐‐‐‐‐‐‐‐‐‐‐‐‐‐‐‐‐‐‐‐‐‐‐‐‐‐‐‐‐‐‐‐‐‐‐‐‐‐‐‐‐‐‐‐‐‐‐‐‐‐‐‐‐‐‐‐‐‐‐‐‐‐‐‐‐‐‐‐‐‐‐‐‐‐‐‐‐3
Features‐‐‐‐‐‐‐‐‐‐‐‐‐‐‐‐‐‐‐‐‐‐‐‐‐‐‐‐‐‐‐‐‐‐‐‐‐‐‐‐‐‐‐‐‐‐‐‐‐‐‐‐‐‐‐‐‐‐‐‐‐‐‐‐‐‐‐‐‐‐‐‐‐‐‐‐‐‐‐‐‐‐‐‐‐‐‐‐‐‐‐‐‐‐‐‐‐‐‐‐‐‐‐‐‐ 3
Unpackthemonitor‐‐‐‐‐‐‐‐‐‐‐‐‐‐‐‐‐‐‐‐‐‐‐‐‐‐‐‐‐‐‐‐‐‐‐‐‐‐‐‐‐‐‐‐‐‐‐‐‐‐‐‐‐‐‐‐‐‐‐‐‐‐‐‐‐‐‐‐‐‐‐‐‐‐‐‐‐‐‐‐‐‐‐‐‐‐‐‐‐‐ 3
CheckAccessories‐‐‐‐‐‐‐‐‐‐‐‐‐‐‐‐‐‐‐‐‐‐‐‐‐‐‐‐‐‐‐‐‐‐‐‐‐‐‐‐‐‐‐‐‐‐‐‐‐‐‐‐‐‐‐‐‐‐‐‐‐‐‐‐‐‐‐‐‐‐‐‐‐‐‐‐‐‐‐‐‐‐‐‐‐‐‐‐‐‐‐‐ 3
II. Installation‐‐‐‐‐‐‐‐‐‐‐‐‐‐‐‐‐‐‐‐‐‐‐‐‐‐‐‐‐‐‐‐‐‐‐‐‐‐‐‐‐‐‐‐‐‐‐‐‐‐‐‐‐‐‐‐‐‐‐‐‐‐‐‐‐‐‐‐‐‐‐‐‐‐‐‐‐‐‐‐‐‐‐‐‐‐‐‐‐‐‐‐‐‐‐‐‐‐‐‐‐ 4‐6
PowerSupply&Signalconnection‐‐‐‐‐‐‐‐‐‐‐‐‐‐‐‐‐‐‐‐‐‐‐‐‐‐‐‐‐‐‐‐‐‐‐‐‐‐‐‐‐‐‐‐‐‐‐‐‐‐‐‐‐‐‐‐‐‐‐‐‐‐‐‐‐‐‐‐‐‐ 4
CapacitiveTouchKeyControl‐‐‐‐‐‐‐‐‐‐‐‐‐‐‐‐‐‐‐‐‐‐‐‐‐‐‐‐‐‐‐‐‐‐‐‐‐‐‐‐‐‐‐‐‐‐‐‐‐‐‐‐‐‐‐‐‐‐‐‐‐‐‐‐‐‐‐‐‐‐‐‐‐‐‐‐‐‐ 4
StructureofOSDsettings‐‐‐‐‐‐‐‐‐‐‐‐‐‐‐‐‐‐‐‐‐‐‐‐‐‐‐‐‐‐‐‐‐‐‐‐‐‐‐‐‐‐‐‐‐‐‐‐‐‐‐‐‐‐‐‐‐‐‐‐‐‐‐‐‐‐‐‐‐‐‐‐‐‐‐‐‐‐‐‐‐‐‐ 5
III. Foryoursafety‐‐‐‐‐‐‐‐‐‐‐‐‐‐‐‐‐‐‐‐‐‐‐‐‐‐‐‐‐‐‐‐‐‐‐‐‐‐‐‐‐‐‐‐‐‐‐‐‐‐‐‐‐‐‐‐‐‐‐‐‐‐‐‐‐‐‐‐‐‐‐‐‐‐‐‐‐‐‐‐‐‐‐‐‐‐‐‐‐‐‐‐‐‐‐‐ 6
IV. Supporttiming‐‐‐‐‐‐‐‐‐‐‐‐‐‐‐‐‐‐‐‐‐‐‐‐‐‐‐‐‐‐‐‐‐‐‐‐‐‐‐‐‐‐‐‐‐‐‐‐‐‐‐‐‐‐‐‐‐‐‐‐‐‐‐‐‐‐‐‐‐‐‐‐‐‐‐‐‐‐‐‐‐‐‐‐‐‐‐‐‐‐‐‐‐‐‐ 6
V. ResistiveTouchPanel‐‐‐‐‐‐‐‐‐‐‐‐‐‐‐‐‐‐‐‐‐‐‐‐‐‐‐‐‐‐‐‐‐‐‐‐‐‐‐‐‐‐‐‐‐‐‐‐‐‐‐‐‐‐‐‐‐‐‐‐‐‐‐‐‐‐‐‐‐‐‐‐‐‐‐‐‐‐‐‐‐‐‐‐6~10
TouchDriverinstallation‐‐‐‐‐‐‐‐‐‐‐‐‐‐‐‐‐‐‐‐‐‐‐‐‐‐‐‐‐‐‐‐‐‐‐‐‐‐‐‐‐‐‐‐‐‐‐‐‐‐‐‐‐‐‐‐‐‐‐‐‐‐‐‐‐‐‐‐‐‐‐‐‐‐‐‐‐‐‐‐‐‐‐6~10
VI. Mechanicaldimension‐‐‐‐‐‐‐‐‐‐‐‐‐‐‐‐‐‐‐‐‐‐‐‐‐‐‐‐‐‐‐‐‐‐‐‐‐‐‐‐‐‐‐‐‐‐‐‐‐‐‐‐‐‐‐‐‐‐‐‐‐‐‐‐‐‐‐‐‐‐‐‐‐‐‐‐‐‐‐‐‐‐‐‐‐ 11
VII. EMCWarningStatement‐‐‐‐‐‐‐‐‐‐‐‐‐‐‐‐‐‐‐‐‐‐‐‐‐‐‐‐‐‐‐‐‐‐‐‐‐‐‐‐‐‐‐‐‐‐‐‐‐‐‐‐‐‐‐‐‐‐‐‐‐‐‐‐‐‐‐‐‐‐‐‐‐‐‐‐‐‐‐‐‐‐‐ 12
FCCClassAWarning‐‐‐‐‐‐‐‐‐‐‐‐‐‐‐‐‐‐‐‐‐‐‐‐‐‐‐‐‐‐‐‐‐‐‐‐‐‐‐‐‐‐‐‐‐‐‐‐‐‐‐‐‐‐‐‐‐‐‐‐‐‐‐‐‐‐‐‐‐‐‐‐‐‐‐‐‐‐‐‐‐‐‐‐‐‐‐‐ 12
CISPR22classAWarning‐‐‐‐‐‐‐‐‐‐‐‐‐‐‐‐‐‐‐‐‐‐‐‐‐‐‐‐‐‐‐‐‐‐‐‐‐‐‐‐‐‐‐‐‐‐‐‐‐‐‐‐‐‐‐‐‐‐‐‐‐‐‐‐‐‐‐‐‐‐‐‐‐‐‐‐‐‐‐‐‐ 12
VIII. ProductGeneralSpecification‐‐‐‐‐‐‐‐‐‐‐‐‐‐‐‐‐‐‐‐‐‐‐‐‐‐‐‐‐‐‐‐‐‐‐‐‐‐‐‐‐‐‐‐‐‐‐‐‐‐‐‐‐‐‐‐‐‐‐‐‐‐‐‐‐‐‐‐‐‐‐‐‐‐‐‐ 13

3
I. Introduction
‐ThismonitorproducesclearimageswiththevividcoloratresolutionsfromVGAupto
XGAandusedwithgraphicsadapterofscanningfrequencyfrom30KHzto82KHzinhorizontal
sweepwhileverticalrefreshrateis56Hzto76Hzcontinuously.
‐OnScreenDisplayprovideflexibilitywithsimple&user‐friendlycontrols.
‐IntegratedD‐subandHDMIinputsprovideflexibleconnectivityforhigh‐definitionmultimedia
devicesandgamingconsoles
‐Optionalbuilt‐in2Wx2Speakers
‐USBinterface5‐WireResistiveTouchPanel
Features
-15inchdiagonalscreenwithnativedisplayresolution1024*768
-Dual Video input: VGA, HDMI
-Full flat front panel with high quality resistive touch panel
-Fully Glossy surface throughout monitor’s appearance.
-Rimless front bezel design, spill &dust proof
-Cable management down routing through the mounting stand
-Light weight, only 3290g physically.
-5Wires Resistive Touch Panel Control Function
Unpackthemonitor
-Putthemonitoronacleansurface;makesuretheboxinuprightposition.
-Removepackingmaterialsfrominsideofbox.
Checkaccessory
Pleasemakesuretheentireaccessoryisincluded:
1.8 meter VGA 15 pin Power
Adaptor
D‐sub Video cable
USB cable

4
II. Installation:
PowerSupply&Signalconnection:
Powersupply:UseDC12Vdcpower.
HDMIsignal:ApplyHDMIsignal
CapacitiveTouchKeyControl/Connectors
Power
()
UUse the power switch to turn the power ON or OFF. We recommend
turning your system power on first, then the LCD monitor.
Press Power key to turn on and Press again for 2~3sec. to power off monitor
AutoAdjust
(AUTO)
a. PressingtoexecuteAUTO‐Adjustingfunction.Thisfunctionwilloptimize
thedisplayimage
b. Sometimesthisfunctioncan'tachievetheoptimaleffects.Pleasefollowthe
manualadjustingprocedure.
c. AfterOSDmenuisactivated,pressthiskeycanturnofftheOSDmenu.
Menu
(MENU)
a. PressMenukeytoactivateOSDMenu
b. Thiskeyalsomeans“OK”;
Press“Up,Down”keytomovetheindicatortothedesireditem,thenpress
Menukeytoselectandreadtoadjust.

5
Afteradjustment,pressthiskeytoreturntopreviousMenu.
Up
(▲)
a. WhenOSDmodeisactivated(When“MENU”keyispressed).Thesetwo
keysareusedtoselecttheadjustmentitems.
b. Whenadjustmentitemisselected,thesetwokeysaredefinedtodecrease
orincreasethevalueofeachselecteditem.
c. Directaccess“Up”KeywillrevealBrightnessOSDforadjustment.
Directaccess“Down”keywillrevealVolumeOSDforadjustment.
Down
(▼)
OSDLock/Unlock:
Press“Menu”Keyformorethan7secondsshalllockallcontrolkeysfunction.
Afterkeyslocked,press“Menu”keyagainformorethan7secondshallunlockthekey
function.
StructureofOSDsettings
Man Menu:
Main
Menu
Level1Level2Level3OperatingProcedure
AutoAdjust Press“UP”or“DOWN”toadjustH‐phase&H‐position&V‐position
clockautomatically.
Luminance
Brightness
Contrast
Sharpness
Exit
Press“UP”keytoincreasebrightness,“DOWN”keytodecrease
brightness.
Press“UP”keytoincreasecontrast,“DOWN”keytodecrease
contrast.
Press“UP”keytoincreaseimagesharpness,“DOWN”keytodecrease
imagesharpness.
ExittopreviousMenu
Management
H.Position
V.Position
PixelClock
Phase
Exit
Press“UP”keytoshiftscreenleft,“DOWN”keytoshiftscreenright.
Press“UP”keytoshiftpictureupward,“DOWN”keytoshiftpicture
downward.
Toreduceanyverticalbarsorstripsvisibleonthescreenbackground.
AdjustingtheClockwillalsochangethehorizontalscreenimage
width
Toremoveanyhorizontalnoiseandclearorsharpentheimageof
characters.
ExittopreviousMenu
Color
9300K
6500K
5400K
Press“UP”or“DOWN”tochoosethreetypesofcolortemperature
9300°k,6500°k,sRGBanduserdefine.
UserPreset
Red
Green
Blue
Exit
SelectUserPresettoenterColorAdjustMenu,
Selectdesiredcolortoadjust
Exit−ExittoMainMenu
OSD
H.Position
−
AdjustOSDMenuhorizontalposition,press“UP”keytoshiftMenu
right,“DOWN”keytoshiftMenuleft
V.PositionAdjustOSDMenuverticalposition,press“UP”keytoshiftMenu
upward,“DOWN”keytoshiftMenudownward
OSDTimeSetsthetimedurationinsecondsthattheOSDisvisibleafterthelast
buttonispressed.
ExitExittopreviousMenu
Language
English
Francais
Deutsch
Italino
Espanol
−
PressUp/DownkeytomoveOSDbartodesiredlanguage,
Thenpresstoconfirm,theOSDMenuwillchangetodesiredlanguage
andreturntoMainMenu.
6
日本語
繁體中文
简体中文
Portuguese
한국어
русский
Main
Menu
Recall
Recallcolor
RecallAll
Exit
Yes
No
Yes
No
Press”Yes”toresetColortofactorysetting
Press“Yes”torestallsettingsbacktofactorysetting,exceptlanguage
Press“Ext”toreturntoMainMenu
Information
Display
information
Exit
−
PressDisplayinformationtodisplayresolutionandrefreshrate
Press“Exit”toreturntoMainMenu
Ext−−Press“Exit”keywillcloseOSDMenuandsavethesettings
SourceSelectMenu:Directpress“Down”keycanselectvideosource
VGA
HDMI
III. Foryoursafety
1. Whenmovethemonitor,alwaysswitchoffpoweranddisconnectallcablestoavoidanydanger.
2. Pleaseusethepowerandsignalcablescorrectlywheninstallit.
3. Incaseofnoticeanyabnormalsmellornoise,pleasestopoperationandcallthenearestdealeror
servicecenter.
IV. Supporttimingchart:
Timing
Mode
Reference
Standard Resolution Pixel
MHz FH KHz FV Hz Interlace H
Polarity
V
Polarity
Mode 1 VESA 1024 x 768 65.00 48.363 60.004 NO −−
Mode 2 VESA 1024 x 768 75.00 56.476 70.069 NO −−
Mode 3 VESA 1024 x 768 78.75 60.023 75.029 NO + +
Mode 4 VESA 800 × 600 36.00 35.156 56.250 NO + +
Mode 5 VESA 800 × 600 40.00 37.879 60.317 NO + +
Mode 6 VESA 800 × 600 50.00 48.077 72.188 NO + +
Mode 7 VESA 800 × 600 49.50 46.880 75.000 NO
Mode 8 VGA 640 x 480 25.17 31.47 59.94 NO −−
Mode 9 MAC 640 x 480 30.24 35.00 66.67 NO −−
Mode 10 VGA 720 x 400 28.32 31.47 70.08 NO −+
V. ResistiveTouchPanel:
P
a
n
e
l
:
Type:Five‐Wires Analog Resistive
Input Mode:Five‐Wires Analog Resistive
Transparency:80% +/‐5%
Build‐in Touch Control
Modu
l
e
(Note: For Panel Touch Control, user need to connect upstream cable to System PC)
Control type:USB
Touch Control Driver :eGalax Touch Drivers

7
Touch Driver installation:
1.0 Screen display as below, please click Next>.
2.0 Select the set up type, don’t tick the box if PS2 interface is not required, Click “Next>

8
3.0 RS232 interface driver installed is default, please click Next>

9
4.0 You can select to do Touch screen calibration after system boot up or notDefault setting is” None”
5.0 Select to use Multi‐Monitor system, then press Next>

10
6.0 Choose destination location, default folder location shown as below.
Press Next>
7.0 Figure shown below, please press Next> to complete installation

11
VI. Mechanicaldimension

12
VII. EMCWarning:
FCC ClassA Warning
ThisequipmenthasbeentestedandfoundtocomplywiththelimitsforaClassAdigitaldevice,
pursuanttoPart15oftheFCCRules.Theselimitsaredesignedtoprovidereasonableprotection
againstharmfulinterferencewhentheequipmentisoperatedinacommercialenvironment.This
equipmentgenerates,uses,andcanradiateradiofrequencyenergyand,ifnotinstalledandused
inaccordancewiththeinstructionmanual,maycauseharmfulinterferencetoradio
communications.Operationofthisequipmentinaresidentialareaislikelytocauseharmful
interferenceinwhichcasetheuserwillberequiredtocorrecttheinterferenceathisown
expense.

13
VIII. ProductGeneralSpecification:
Model1500TS
CabinetcolorBlack
LCDPanel
Displaysize 15”
ActiveArea 304.1mmx228.1mm
OptimalResolution 1024x768
ColorArrangement RGB‐stripe
Brightness 300cd/m²(typ)
ContrastRatio 800:1
ResponseTime 8ms(typ.)
ViewingAngle V:80/8 0,H:80/8 0
InputVideoFormatVGA
InputVideosignalconnectorVGAD‐sub15pin
19pinHDMI
InputFrequencyH:30‐60kHz;V:55‐76Hz
DCPowerinput12Vdc1.5A
DCJackCenterpindiameter=2.0mm
TemperatureOperating:0°C~40°CStorage:‐10°C~50°C
HumidityOperating:20%~80%Storage:10%~90%
Weight3290g(net)
ApprovalsCE,FCC
WallMountVESA75*75mm
ResistiveTouchPanel
Type
InputMode
TouchControltype
TouchControlDriver
Five‐WireAnalogResistive
StylusorFinger
USB
eGalaxTouch
*Productspecificationtobechangedwithoutpriornotice
*MadeInTaiwan
Table of contents
Other Xenarc Monitor manuals

Xenarc
Xenarc 1500CSH Installation and operating instructions

Xenarc
Xenarc 892 Series User manual

Xenarc
Xenarc 1200TS Installation and operating instructions

Xenarc
Xenarc 705YV User manual

Xenarc
Xenarc 2409YNH User manual

Xenarc
Xenarc 800 User manual

Xenarc
Xenarc 805TSV User manual

Xenarc
Xenarc 709 User manual

Xenarc
Xenarc 700TSV User manual

Xenarc
Xenarc 104OTS Installation and operating instructions