1. Safety precautions and warnings 2. Machine information
0302
Always use the machine under safe environment.
Wear protective goggles that are in line with ANSI standard.
Put down the protective shield when the machine is working.
Do not have clothes, hair, hands and other tools close to the machine when it is working.
DO not leave the machine unattended when it is working.
Do not use a damaged or loose socket.
Unplug the machine when it is not in use for a long time.
Do not put the machine in a place that is damp, greasy and dusty.
Do not put things like tool or containers on the machine.
Put the machine on a flat and firm surface .
Keep the machine dry and clean.
Unplug the machine under unusual circumstance.
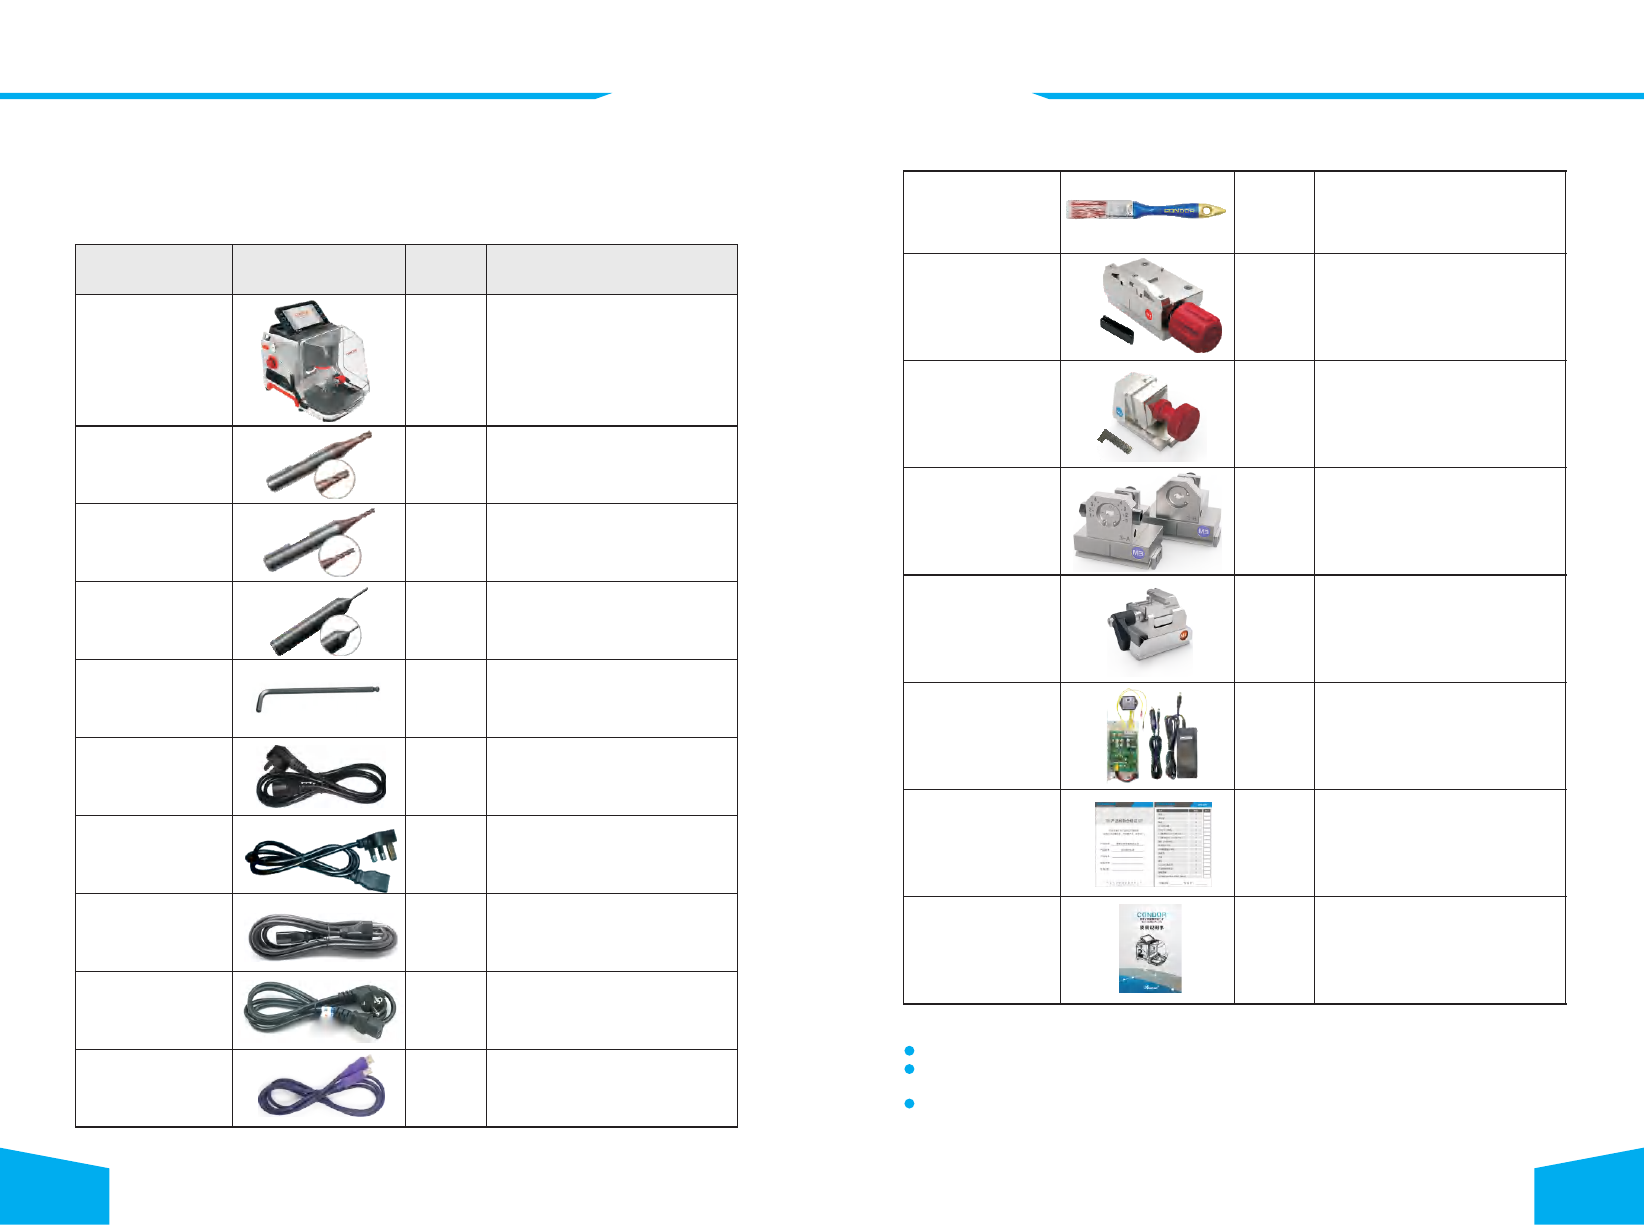
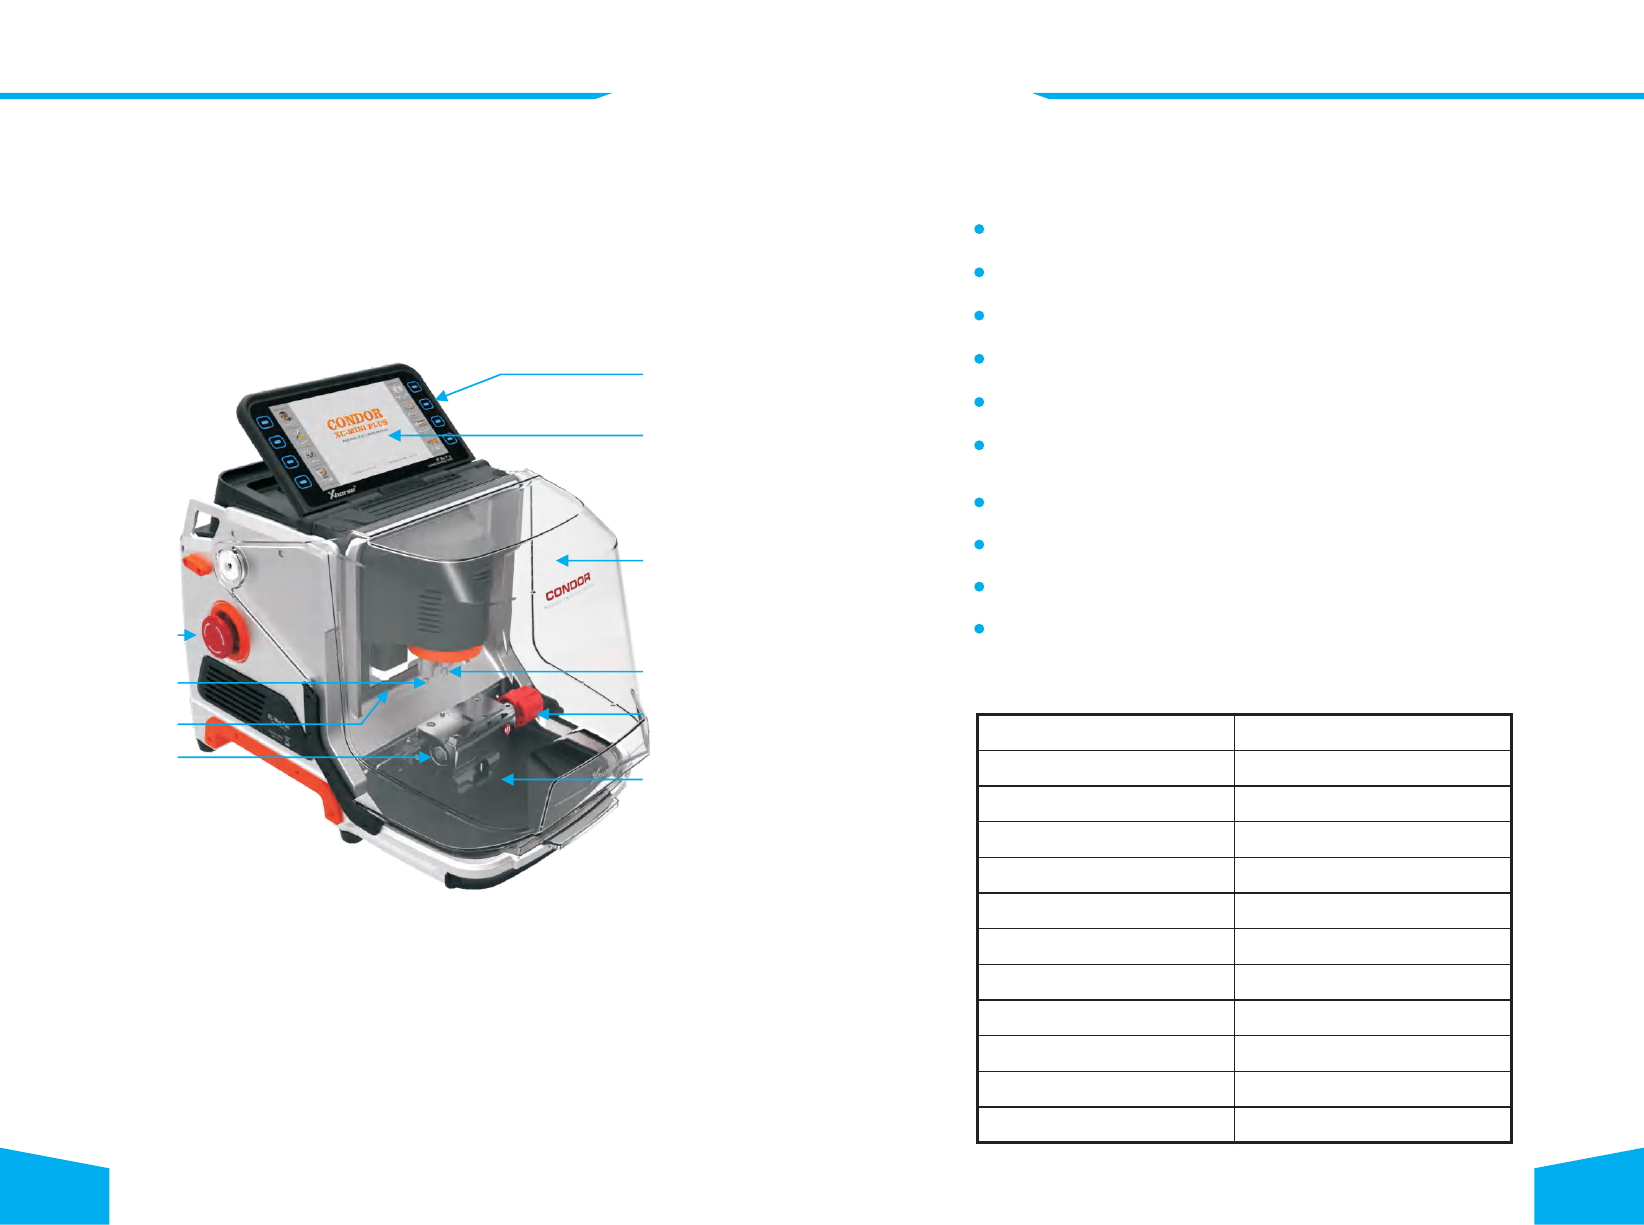
Automatic Key Cutting Machine CONDOR XC-MINI PLUS Automatic Key Cutting Machine CONDOR XC-MINI PLUS
To avoid injuries to operators and damages to the machine, please read this product user
manual carefully before you start, and follow the safety notes shown below:
Dear customers, thank you for choosing XC-MINI PLUS automatic key cutting
machine. We are confident that this product will improve your work efficiency with
great convenience. This product user manual provides operating instructions for
you to use the machine correctly and safely. To avoid injuries and financial loss,
please carefully read this manual through before you start to operate the machine.
And we kindly remind you to keep this manual properly for future reference.
1)
only. If there is inconsistency between the images and actual products, the
actual products prevail.
2) Warranty is 3 years if the use of the machine is under normal condition.
3) Within Warranty, free maintenance and repairing is not provided if the machine
becomes dysfunctional due to the following reasons:
The images and colors of the machine shown in this user manual is indicative
Operation without referring to or violating the user manual.
Modifications or repairs to the machine by individuals.
Falling, knocking or wrong voltage.
Force majeure.
Use of the machine in bad condition for long time or put machine into vehicles
or ships caused damage.
Damaged or worn-out plastic case and protective shield due to frequent use.